A photomosaic is a composite image made from many small photographs, usually assembled as a collage. They are often used to create large and detailed images, or to commemorate special events.
Creating a photomosaic in Photoshop is not difficult, but it does take some time and patience. In this tutorial, we will show you how to make photomosaic using an image of your choice.
Making a Photo Mosaic in Photoshop
To make a photo mosaic, you will need one primary photograph and up to 100 individual photos for the tiles. You will not be placing each tile individually. Much of the process is automated. Making a photo mosaic is actually pretty easy with the right Photoshop techniques!
Step 1: Open your Main Image in Adobe Photoshop
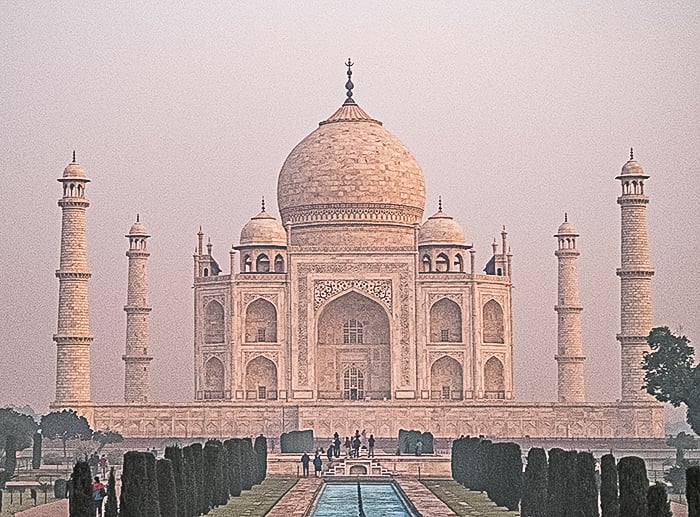
Choose one main image that you want to feature. Choose a photo that is instantly recognizable and is not too busy. If the image is too complicated, the mosaic effect may be lost. For this tutorial, I chose a recognizable symbol of India—the Taj Mahal.
Open the image in Photoshop by going to the File drop-down menu. Select File > Open (Ctrl or Cmd+O) and navigate to your photo.
Step 2: Format the Mosaic Images
Choose the small images you want to use in the background mosaic pattern. You can use up to 100 images. But it is best if the total number is a perfect square. For instance, choose 64 (8×8), 81 (9×9), or 100 (10×10) images. Put them in a folder labeled “Mosaic.” You can use duplicates if you want. Just make sure the duplicate images are not next to each other in the folder.
The mosaic pattern will be easier to create if all the images are the same size. In Photoshop, you have to resize each image one by one. But you can automate the process in Lightroom.
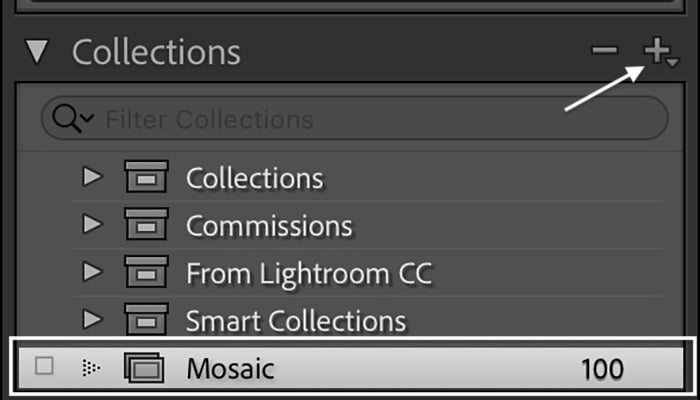
Start by importing your images into Lightroom. Then, put them into a Collection.
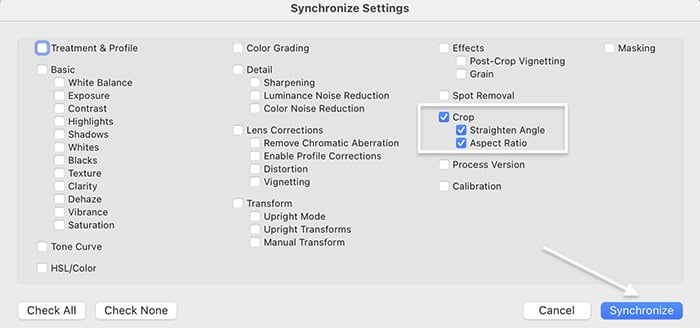
Select the first image. Use the Crop tool in the Develop module to size it to the aspect ratio you want to use for the mosaic pattern. For instance, you can size the tiles as rectangular 2:3 or square 1:1. Highlight the resized image, hold the Shift key, and select the other pictures in the Collection. Click Sync at the bottom of the right-hand column. Check the box next to Crop. Click Synchronize.
The images selected are now the same size. Export the images to a Mosaic folder. The image size can be small—300px at 72 dpi should be fine.
Step 3: Create a Mosaic Pattern in Photoshop
To make the photo mosaic background, create a contact sheet. A contact sheet is a series of photo thumbnails. Originally, contact sheets showed the images on a roll of film. We still use contact sheets to present many photos at one glance. You can create a basic contact sheet in Photoshop, but the process is more flexible in Lightroom. Let’s start by making a contact sheet in Photoshop. Then, I will show you how to use Lightroom to create the contact sheet.
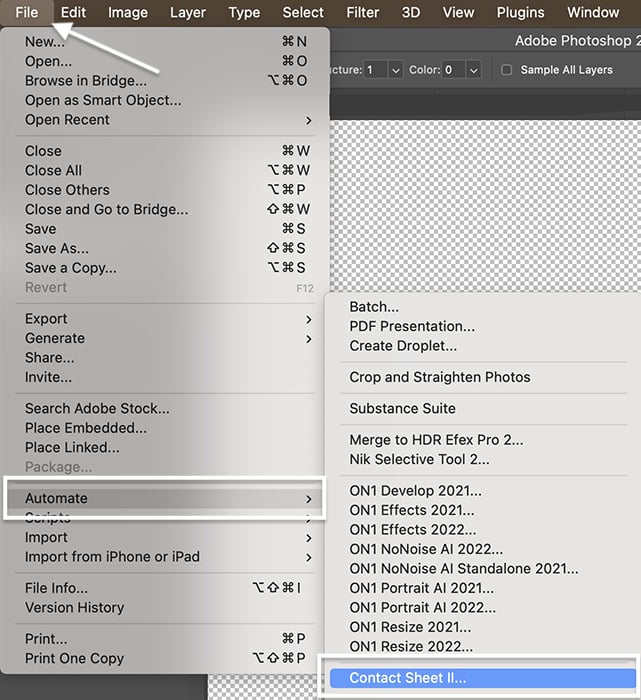
In Photoshop, go to the File drop-down menu. Select File > Automate > Contact Sheet II.
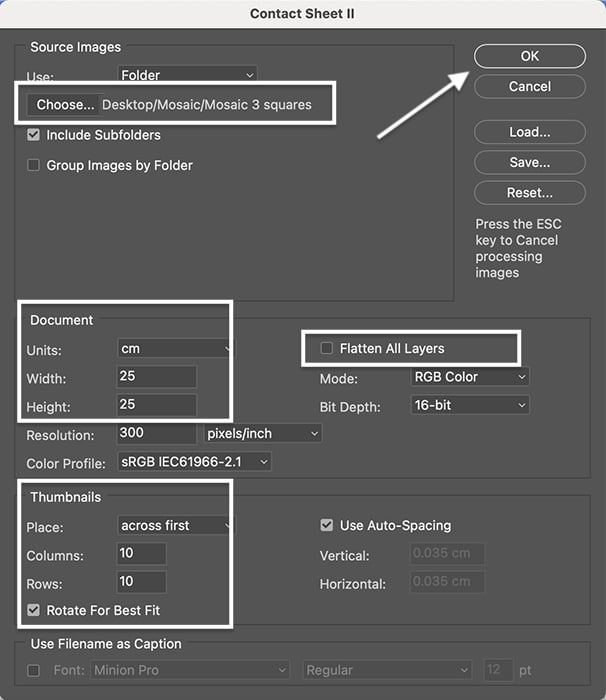
 In the dialog box, click the Choose button, and navigate to the folder containing your mosaic images.
In the Document section, uncheck the Flatten All Layers box. Each image will become a layer that you can change later. Then, enter a canvas size. Create a rectangular canvas if your source images are rectangular (20x30cm or 12×8″). Create a square canvas (25x25cm or 10×10″) if your files are square.
In the Thumbnail section, check the box next to Use Auto-Spacing. Then, enter the number of images in each column and row. If you have 64 images, enter 8 and 8. If you have 100 images, enter 10 and 10. You can choose to place them across first or down.
Click OK and wait for Photoshop to load all the images in the file.
Step 4: Edit and Reorder the Pattern
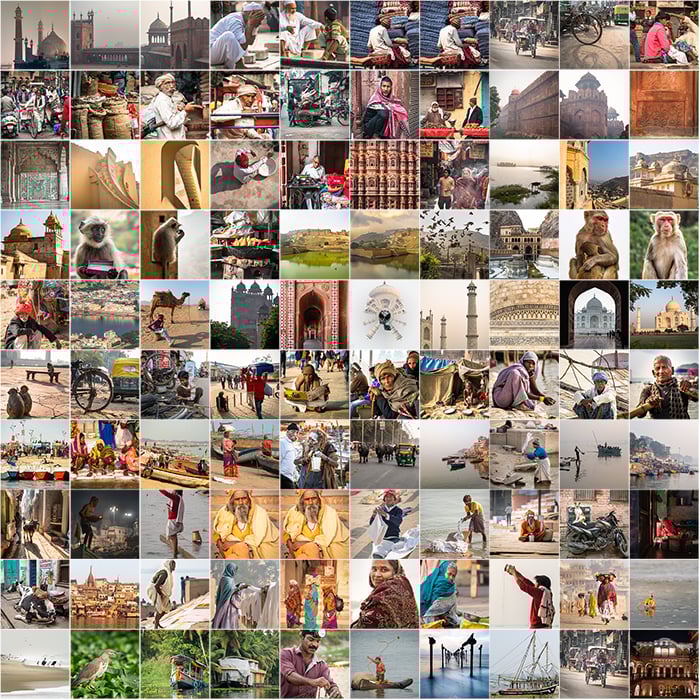
Your contact sheet should look something like this. You can move the images around to get a more pleasing pattern. Notice that some of my duplicate photos are next to each other. These draw the eye. Use the Move tool to drag these files to a new position on the page.
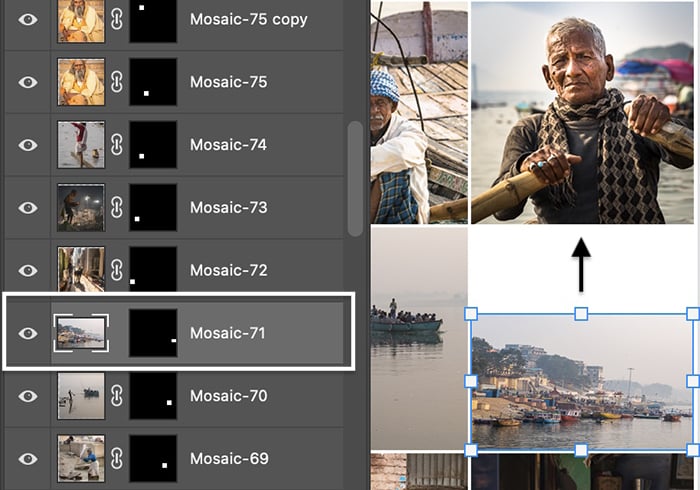
Select the layer containing the image you want to move. Choose the Move tool and move the image to a different position. Repeat the process to move another image into the blank space.
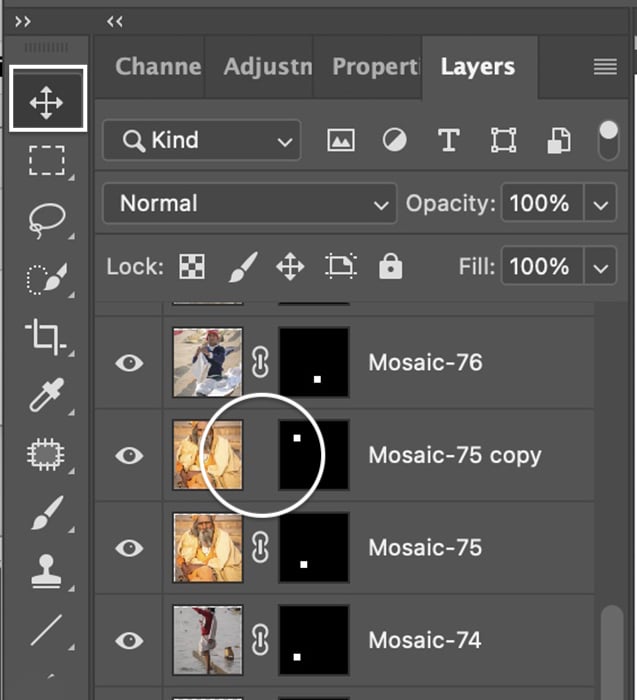 If there is a lot of white space around an image, select the layer containing this image. Unlink the thumbnail from the layer mask by clicking the chain between the layer and the layer mask. Go to the Edit drop-down menu. Select Edit > Free Transform (Ctrl or Cmd+T). Hold the Shift key and drag the edges of the image until it fills up the space.
Go to the bottom of the Layers panel and turn off the eye icon next to the white background layer.
Alternate Step: Create a Contact Sheet in Lightroom
In Lightroom, the process of creating a contact sheet is more flexible than it is in Photoshop. It is easier to change the size of your tiles in Lightroom, and this program lets you create a mosaic pattern without the dividing lines between images.
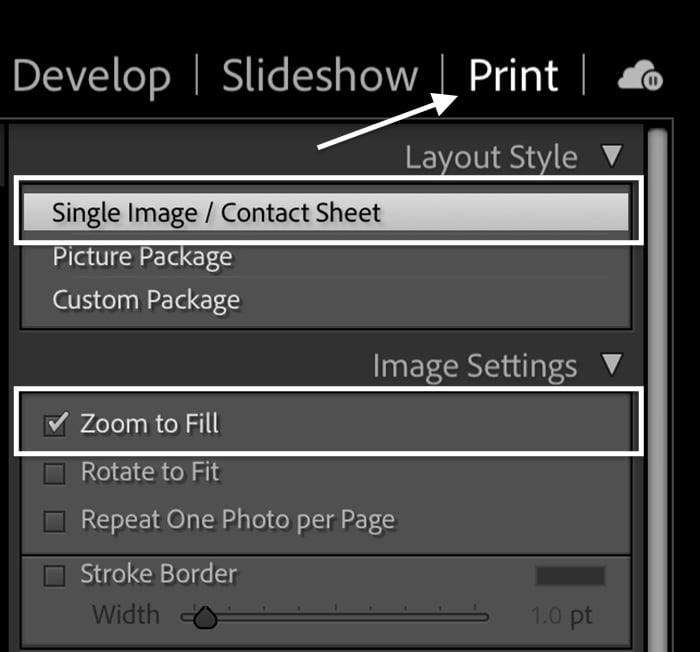
Import the images into Lightroom and select them. Open the Print module. Under Layout Style, select Single Image/Contact Sheet. Under Image Settings, check the box next to Zoom to Fill. This lets you include images of different sizes.
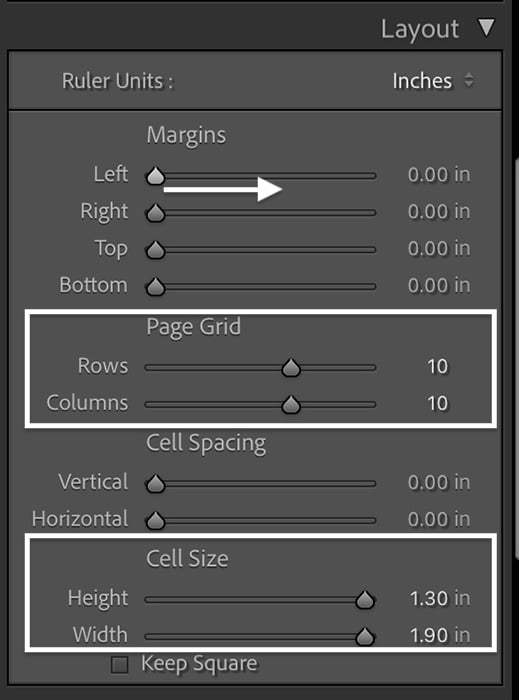
 In the Layout section, set the margins to zero. To make a square document, move the Left Margin slider until the height and width cell size are equal. Enter the number of images in each column and row. If you have 64 pictures, enter 8 and 8. If you have 100 images, enter 10 and 10.
Click Printer. Select the PDF drop-down menu and save it to PDF. Save the file as “Mosaic” and open it in Photoshop.
 Step 5: Create a Photo Mosaic Pattern
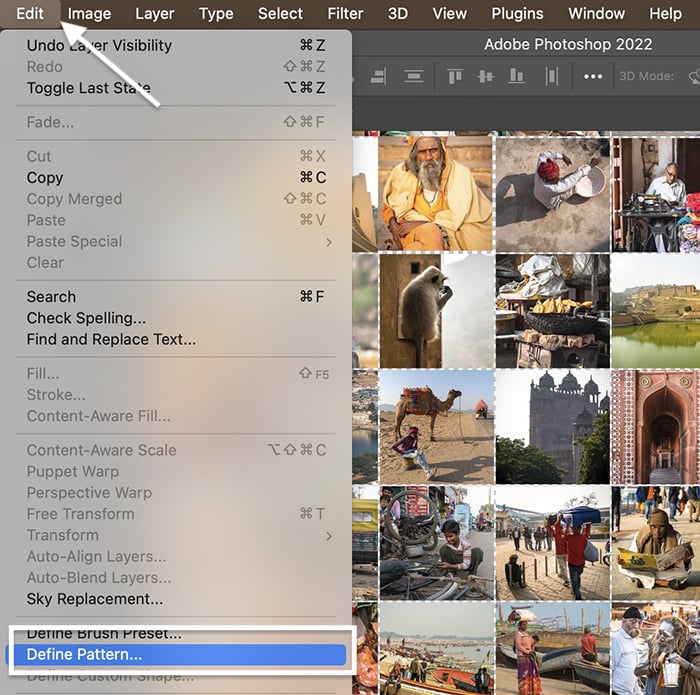
With the mosaic open in Photoshop, go to the Edit drop-down menu. Select Edit > Define Pattern.
Name the pattern “Mosaic,” then click OK.
Step 6: Add Mosaic Pattern to Main Image
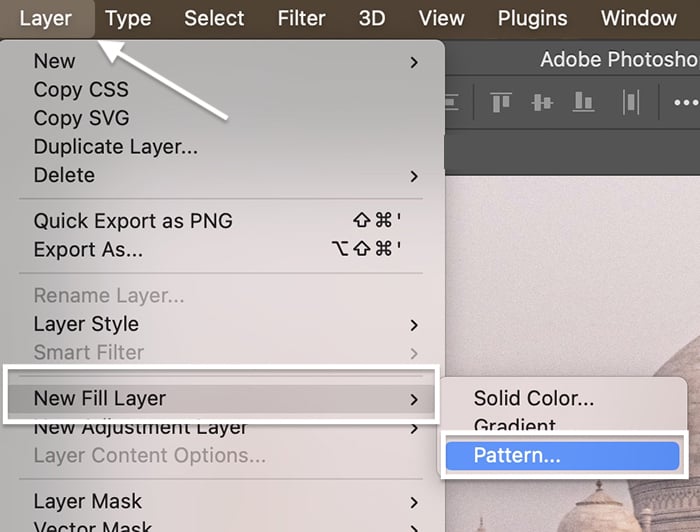
Now it’s time to combine the mosaic pattern with your featured image. Go to the picture that you opened in Step 1. Select the Layer drop-down menu and choose Layer > New Fill Layer > Pattern.
 Name the new layer “Mosaic,” then click OK.
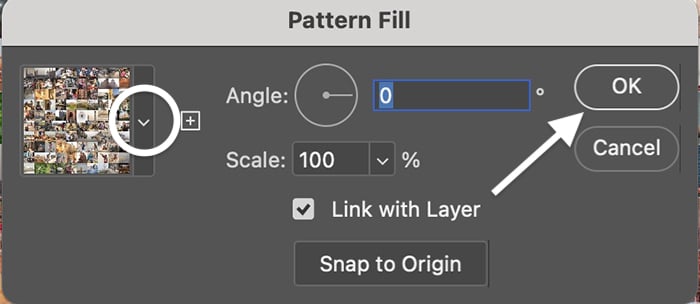
In the Pattern Fill dialog box, toggle the carrot next to the pattern window. Navigate to your mosaic pattern. It should be at the bottom.
Click OK. Your pattern should fill a new layer. Photoshop will take care of repeating the pattern until it fills the entire frame.
Step 7: Change the Blending Mode
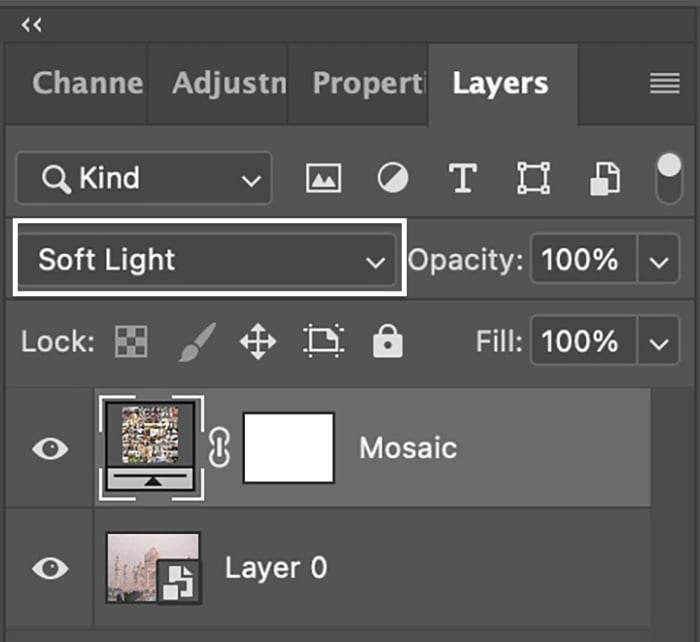
With the Mosaic layer selected, change the blending mode to Soft Light or Overlay. If you have not changed blending modes before, they are in a drop-down menu at the top of the Layers panel. By default, the menu is set to Normal.
Step 8: Bring out Featured Image (Optional)
That’s it! You have created a photo mosaic!
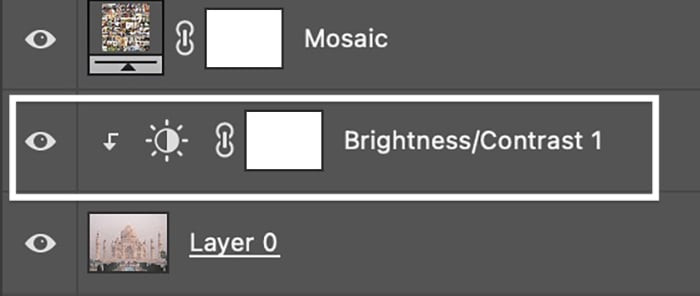
You can make a few tweaks to make your main image more prominent. You can lower the opacity of the Mosaic layer. Or you can add a Brightness/Contrast adjustment layer. Move this layer between the layer containing the main image and the Mosaic layer. Adjust brightness and contrast until you the main image pops.
 Conclusion
Making a photo mosaic in Adobe Photoshop is a creative way to showcase dozens of images at once. Choose up to 100 images to make the photo mosaic. Create a contact sheet of the mosaic images and define it as a pattern. From here, you can apply the mosaic pattern to any image you want.
The final product looks like you spent hours creating it. But in this Photoshop tutorial, the process was surprisingly easy and quick. It only takes a few clicks to make a photo mosaic!
Check out our Effortless Editing with Lightroom course to master all the editing options in Lightroom!


