With digital photography, it's easy to take a good portrait and make it even better with some basic editing in Photoshop. But if you don't know what you're doing, you can easily make mistakes that will ruin your photo. Here are the five most common mistakes people make with portrait editing, and how to avoid them.
1. Portrait Editing: Creating a Focal Point
Ideally, you create interest and focus while shooting by creating shallow depth of field, playing with foreground and background placement, or using lighting to highlight your subject.
Sometimes, though, we end up with photos that have good expression or composition, but don’t have a strong focal point. Rather than doing basic edits and leaving it as is, you can help create a focal point for the eye to land on!
Applying a bit of vignetting can help make the focal point stand out as brighter, which is the same effect you’re going for when you light your subject.
In Lightroom, this can be done with the vignetting effect tool, with a local adjustment brush manually, or with a radial brush. Blurring the background a bit in Photoshop can give a similar effect as a shallow depth of field would give.
Finally, raising the clarity on your subject also helps them to stand out, and this can be done in Lightroom with a local adjustment brush quite easily.
If you feel like you need to brush up on your Lightroom or Photoshop so you can do these edits, check out our articles here and here.
2. Getting Trendy
While things like matte curves and selective colouring appeal to some clients, they're trends that come and go. When editing, think about creating a look that will stand the test of time.
If you enjoy experimenting, consider giving your clients two versions of the photos – one with a classic edit and one that you did for fun!
Basic edits like sharpening, color correction, and saturation/vibrancy should always be tended to, but anything beyond that will become part of your personal style over time.
Allow yourself to experiment, but be weary of delivering images that are too on-trend.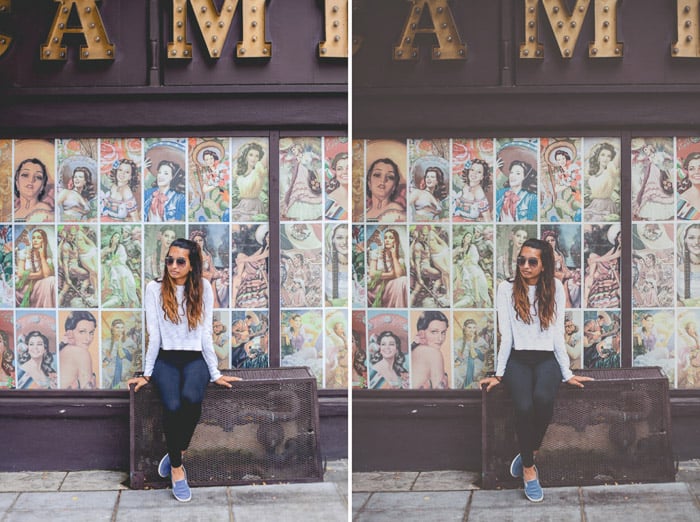
3. Not Cropping
Always try to crop in-camera while shooting. But there will be times when you might shoot too wide. There’s nothing wrong with doing some cropping during editing to create a polished final look.
Leaving photos uncropped when there's a lot of unintentional space around the subject will only make your subject get lost. With portraits, there should always be a very conscious decision about where you’re directing the eye. Having too much space around your subject means that they will not draw the eye to them.
It makes your eye work harder to land on a focal point, often landing in small distracting objects near your subject, and the photo loses impact.
Not sure where to crop? Two beginner options are to either place your subject in the dead center (this requires a really intense connection in the expression between subject and camera) or having the subject far off to one side (centered vertically).
Depending on the expression and overall look, you may even consider having your subject actually go slightly off frame! Don't be afraid to play with different crops so you find just the right one to add interest.
4. Not Seeing the Whole Picture
When editing, it's a good idea to do some fixes, then zoom out to see the whole image, then zoom back in to continue. What this lets you do is see what the entire photo looks like so you can tell if you've gone too far or if you've strayed too far from the final look that you want to achieve.
Imagine that you’re correcting something on your subject’s face, like the eyes. If you don’t zoom out to view the full image, you may not realise if the eyes are over-edited and need to look more natural. Your client will be seeing the photo as a whole, so it’s important to always check back with how the "big picture" looks.
Similarly, you may want to walk away from your photos for a little bit of time after you finish your edits. This way, you come back several hours (or days) later and have a fresh look at the photo. Often, you’ll find small tweaks that you want to do before delivering to your client.
5. Over-Editing
There really can be too much of a good thing. Over-editing will ultimately distract from the subject, and it makes the photo feel dated very quickly. Be careful of over-saturating, creating too much contrast, or over-smoothing skin.
Common requests from clients include to retouch photos with fixes like whitening their teeth or smoothing out some wrinkles. While these are reasonable requests, it's easy to get carried away while editing.
Teeth whitening and eye brightening are very common edits, but if you make them too white then it suddenly looks like one big Photoshop fail. This can easily take someone from looking friendly to frightening! This is another time when zooming all the way out can be helpful so that you keep a clear perspective on when you've over-edited.
The same applies for smoothing the skin. A bit is acceptable so that it helps add that bit of polish to your subject, but if you go too far then the skin begins to look plastic and fake.
Again, zooming all the way out helps you gain perspective on just how much photo retouching is vital.
But be careful not to fall into the other extreme, and not edit your portraits at all.
Making simple adjustments like exposure, sharpness, color balance or saturation can all go a long way in adding polish to a final image.
Conclusion
Portrait photography is very fun to play with, and is perfect for experimentation in editing. As you grow professionally and take on more clients, though, there are common pitfalls you can avoid.
Avoiding the six that we reviewed above will ensure that you find your style with client portrait photography editing a bit quicker.


