Rembrandt lighting is one of the most iconic lighting techniques in portrait photography.
Read on to find out how to use the Rembrandt lighting technique. The effect only requires a few simple steps. You'll end up taking amazing portraits full of drama.
What Is Rembrandt Lighting?
Portrait photographers have a few main classic lighting setups to choose from. You can create many of them in their most basic form with a single light source, such as a speedlight.
The type of lighting isn't important. But it needs to be a light source you can control. Natural light isn't easy to manage as the primary light source.
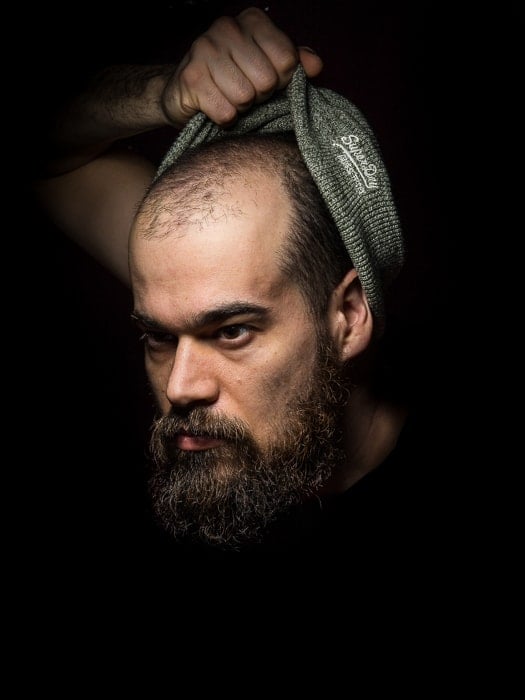
Self-portrait using butterfly lighting.
Some of these setups include butterfly light and loop light. The names are often assigned after the type or shape of the shadows the light(s) casts on the model's face.
Rembrandt lighting takes its name from the famous Dutch painter Rembrandt. He was a master of the chiaroscuro technique. And he often used this kind of light in his paintings, particularly in his self-portraits.

Rembrandt loved to paint himself with this kind of light. Image Credit: Wikipedia.
Looking at his paintings, you'll notice a single-light portrait lighting. How the short lighting hits the subject's face is interesting.
As you can see from the image above, this lighting setup is a split light setup. It creates a triangle of light under the model's eye on the shadowed side.
Why Use Rembrandt Lighting?
Rembrandt lighting is a dramatic light. It is one of those moody setups that plays with chiaroscuro. This technique from paintings uses the sharp contrasts between light and dark.
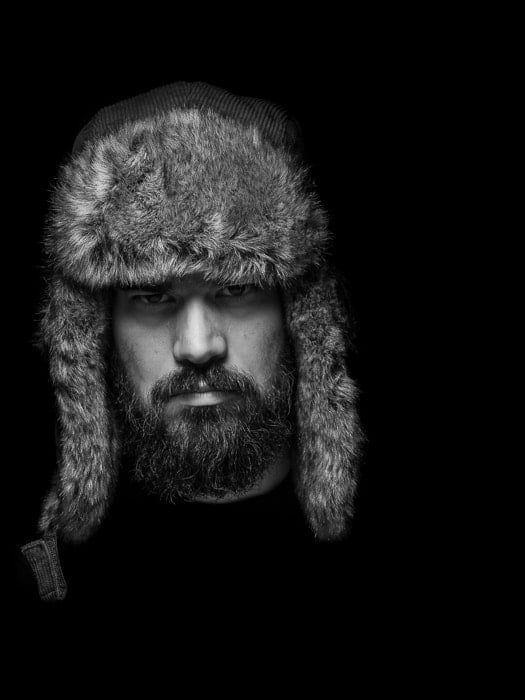
Example of Rembrandt light in a low key image.
These are usually bold contrasts that affect the whole composition. As such, this is a kind of lighting that suits low key photography best.
Rembrandt lighting will draw the viewer's attention where the light triangle is from. This is because of the contrast between the dark and the light.
It also adds a mysterious feel to the image.
On top of this, it's a simple setup to master. And you can create Rembrandt lighting with a single speedlight, for a punchy portrait.
How to Create the Rembrandt Lighting Setup
When it comes to recreating a particular lighting setup, you have to remember one thing. The position of the lights in relation to the model defines the style. The angle you will photograph the model from doesn't affect this.
For example, butterfly light will always be as long as the key light placed in front of and above the model. This is always true, regardless of the camera's position.
Moving the camera to my side did not change the butterfly light pattern on my face.
Don't place the catchlight at eye level. Instead, use the portrait lighting to create the look you're after.
The scheme below shows the position of the lights with respect to the model. These create the most common lighting setups.
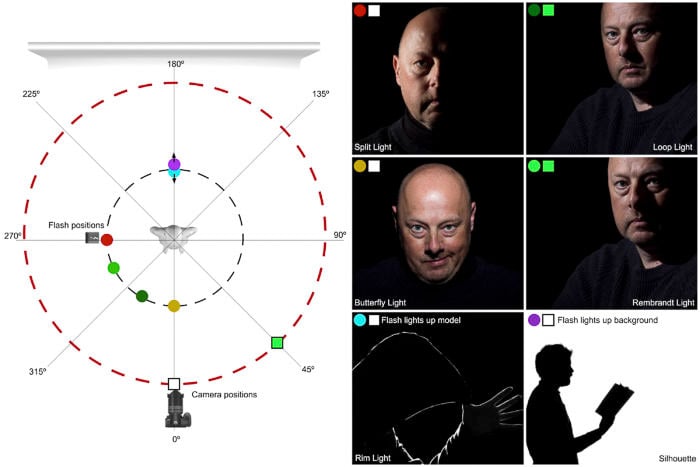
Rembrandt lighting is the right image in the second row. To create it, we need to place key light to the side of the model's face.
When creating a Rembrandt lighting setup, it is easy to work with studio lights that incorporate a so-called modelling light. This allows you to have a preview in real-time of the shadows cast on the model's face.
You can also put your smartphone on your speedlight and use your flashlight as a modelling light.
Where to Position Your Key Light
- Place your key light sideways, at a wider angle than 45 degrees, with respect to your model's nose;
- Lift your light above the model, angled down;
- Refine the light position, height, and orientation. A triangle of light is visible under the model's eye opposite to the side where the key light is;
- Check that the triangle will not be larger than the eye and that it will not "break" the shadow cast from the model's nose. Otherwise, you will create a Loop light (the one above the Rembrandt lighting in the previous scheme). The triangle should not extend below your model’s nose.
Simple Rembrandt Lighting setup.
Where to Position Your Camera
The angle from which you photograph your model does not affect the type of light that will appear. But it will alter the image's mood. That's because it will affect whether you are using a broad light or a short light.
Broad light means that the side of the face illuminated by the key light is close to the camera. Short light means that the side of the face illuminated by the key light is far from the camera.
With software like Set.a.light 3D by Elixxier, it is easy to practice lighting setups. You can see in real-time how the image changes when you move the lights and the camera around on the virtual set.
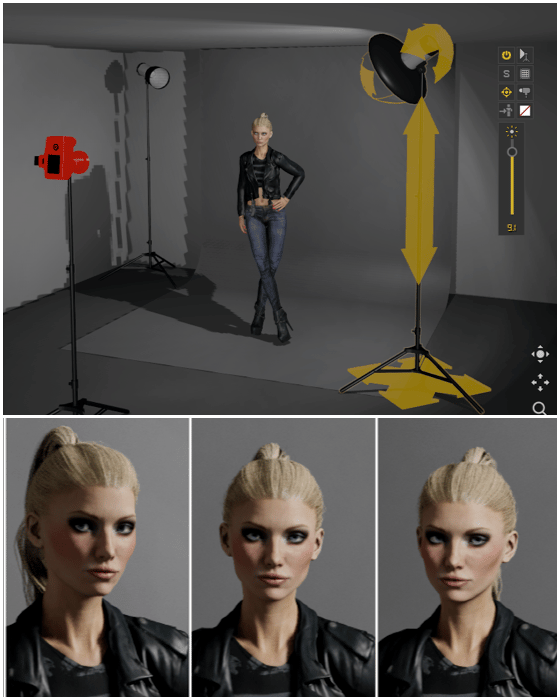 In the simulated setup shown above, you see the effect of moving the camera relative to the model. From left to right we have short, split and broad light.
As usual, you can try less conventional angles. Try shooting from below to give to your model some power.
By photographing your model from slightly below, you will naturally empower him/her. Image Credit: Patrick Bogaert.
Sometimes, it’s easier to ask the model to move a bit than repositioning your light sources.
How and Where to Build the Basic Rembrandt Lighting Setup
You can create Rembrandt lighting even if you don’t have a studio. You only need to find a dark location or wait for the evening. Having access to a studio means that you don’t have to depend on the daylight conditions.
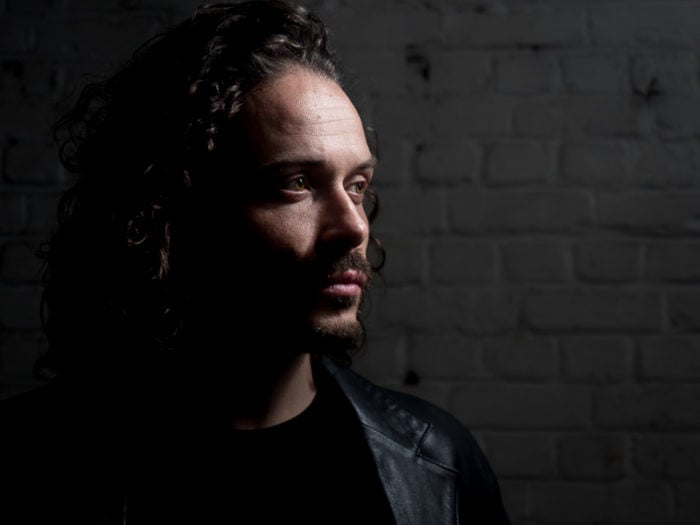
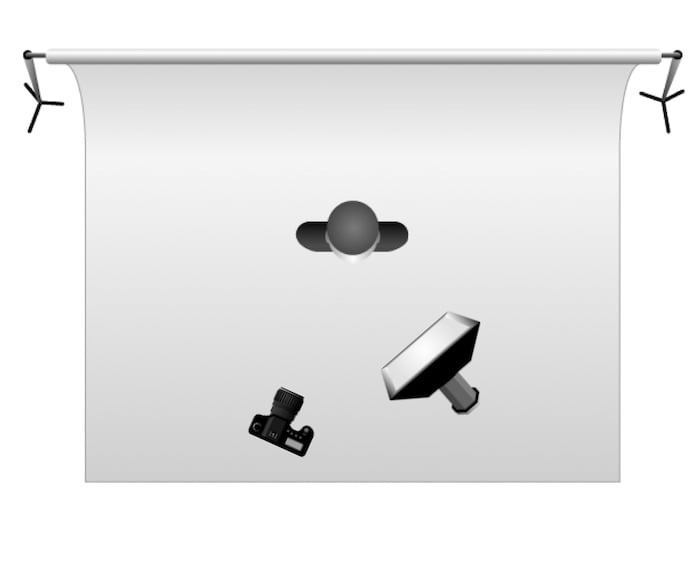
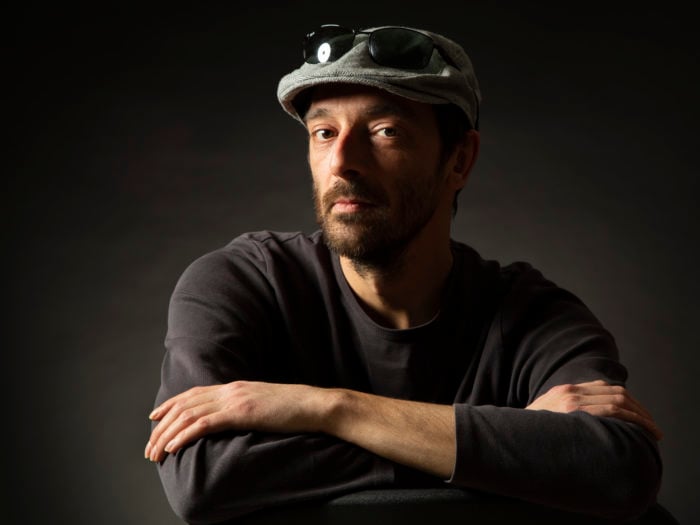
The basic Rembrandt lighting setup consists of a single speedlight with no modifiers. This will create a very hard light. It'll result in very contrasted images that may be ok for some punchy male portraits.
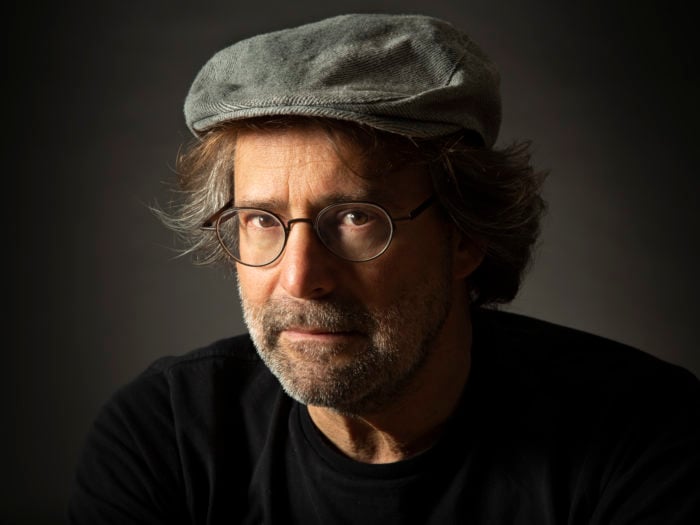
A softer setup is more pleasant while retaining the Rembrandt lighting quality. Image Credit: Patrick Bogaert.
Since the pattern of the shadow is created by the key light, you can use a fill light. This can be a second speed light, a reflector, or a wall to bounce back some light. You can use this to fill the shadows for a gentler and more flattering setup.
A third light hidden behind the model and pointed at the background will act as a separation light. This will allow you to isolate your model from the background better.
Always pay attention to what is in the background. The best solution is a simple, black backdrop. It suits the mood that the Rembrandt lighting creates.
Conclusion
Rembrandt lighting is one of the most iconic lighting setups. It's easy to use to add a unique twist to your low key portraiture.
Rembrandt lighting suits both male and female models. Especially if you soften the contrast in the chiaroscuro with a fill light. You can use it with both color and black and white photography.
To take your skills to the next level, read our Photography Unlocked book!


