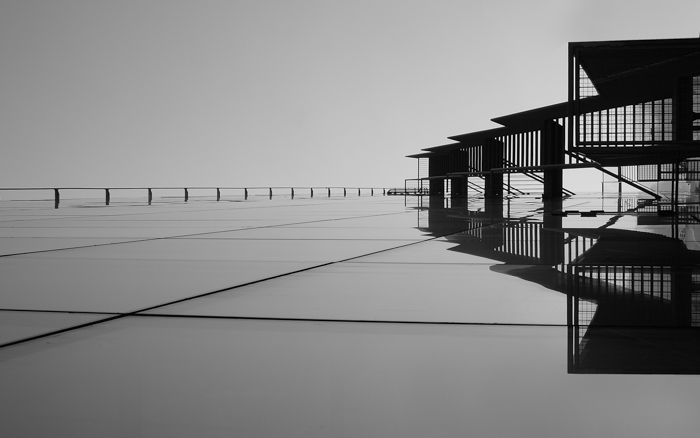
Symmetry in photography is a composition technique in which parts of the image mirror each other across a line or repeat around a central point. A building with matching sides and a mountain reflected in a lake are familiar examples. In real photographs, the match is often approximate.
A symmetrical subject does not automatically make a symmetrical photograph. Your position, camera angle, and crop determine how its parts line up in the frame. This guide explains the main types of symmetry and how to use them without making every picture look the same.
What Is a Symmetrical Composition?
For mirror symmetry, imagine folding the image along a line. Do the main shapes on one side match those on the other? That line is the axis of symmetry. It can be vertical, horizontal, or diagonal. For rotational symmetry, repeated parts match as you turn them around a central point.
Symmetry and balance are related, but they are different. Two matching halves can create balance. A large dark object on one side and several smaller bright objects on the other can also feel balanced, even though they do not mirror each other. That is asymmetrical balance.
Symmetry can give an image a sense of order or emphasize a shape. Whether it helps depends on the subject and what you want to show. Light, background clutter, and a clear focal point still matter.
The fruit display below shows how an everyday subject can become an engaging composition. The diagonal dividers and paired pineapples create an organized structure, while the individual fruits vary in color and position. It is a useful example of approximate symmetry rather than two identical halves.

In the lighthouse photo, the leading lines approach the central subject from both bottom corners. The clouds and light are different on either side, but the main structure still reads as symmetrical.
You do not need to remove every difference. A small interruption can give the viewer something to notice within an otherwise orderly frame.

Reflections offer another way to build a symmetrical composition. In the mountain photo below, the lake repeats the outline of the landscape. Compare the shape above the water with its reflection, rather than expecting every cloud, tone, and detail to match.

© Ivars Krutainis
Types of Symmetry in Photography
Vertical and horizontal describe the direction of an axis. Radial describes an arrangement around a center. A reflection in water or glass can produce symmetry along different axes, so these labels can overlap.
Vertical Symmetry
Vertical symmetry means the left and right sides mirror each other across a vertical line. Start by looking at the center of your composition and comparing the main shapes on either side.
The open book below has a clear central fold and similar page shapes on the left and right. It sits low in the frame, which shows that vertical symmetry does not require matching top and bottom halves.
This approach is useful in architectural photography, where doors, windows, and columns can form matching pairs. Use the building's vertical lines as alignment guides, then check that your camera is centered on the subject.

Horizontal Symmetry
Horizontal symmetry means the top and bottom mirror each other across a horizontal line. A landscape and its reflection in still water are a common example.
For horizontal compositions like the one below, compare the outline of the mountains with the outline in the lake. Placing the reflection boundary near the middle can give both parts similar space. It is an option to try, rather than a rule for every landscape.
Horizontal symmetry does not require a real reflective surface. Two arranged shapes can mirror each other too. Equally, a water reflection can be visible without making the whole frame symmetrical.

Radial Symmetry
Radial symmetry involves repeated elements around a central point, such as evenly spaced wheel spokes or flower petals. It is closely related to radial balance. With rotational symmetry, the pattern matches itself after a turn of less than one full revolution.
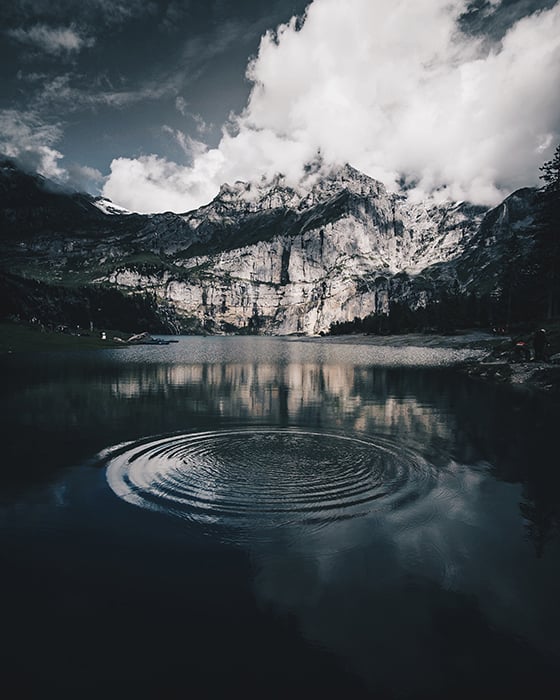
The ripples below form a circular pattern on the water. Seen at an angle, the rings appear elliptical. They provide a radial motif within the scene, while the landscape and its reflection add a different kind of repetition. The whole photograph is not a perfectly rotationally symmetrical image.
When photographing a wheel, flower, or dome, try aiming squarely at its center. Then compare the spacing around it and check how much of the pattern the frame cuts off.
Reflective Symmetry
In photography, reflective symmetry often refers to a subject paired with its reflection in water, a mirror, or glass. In geometry, reflection symmetry is the broader idea of two halves that mirror each other; it does not require an actual mirror.
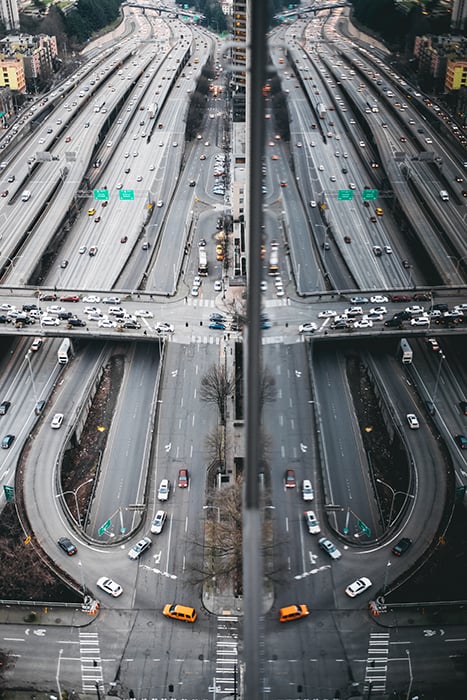
Look for reflections in windows, puddles, and other glass surfaces. In the highway photo below, the roads on the left are repeated in the building's glass on the right.
The reflection's direction depends on the surface and your viewpoint. It may create vertical, horizontal, or diagonal symmetry. Move around until the subject and its reflected shape align in a useful way.
How to Photograph Symmetry
Start with the geometry, then choose settings for the light and movement in front of you.
- Find the axis or center. Identify the matching shapes before raising the camera. Decide whether you want the whole frame or only part of it to be symmetrical.
- Position the camera. For a building facade, move left or right until paired features have similar spacing in the frame. Keep the camera square to the facade if you want matching sides. A centered subject can still look uneven from an off-center viewpoint.
- Check tilt and perspective. Use a grid or level if available, and compare the frame edges with reference lines in the scene. A thirds grid has no central line: use the midpoint between its guides. Tilting up at a building makes vertical lines converge. Keep that effect if it serves the picture; if you want parallel verticals, keep the camera level and adjust your position or framing.
- Leave room on both sides. Check the edges for clipped columns, petals, or reflections. A small crop can refine an image, but framing carefully gives you more choices later.
- Set focus and exposure for the subject. Use a shutter speed fast enough for any movement you want sharp. If you need both near and far detail, choose an aperture that gives enough depth of field and check the result. A tripod can help with a static scene in low light; there is no single setting for symmetrical photos.
- Review the result. Compare matching details and check sharpness. Try a second frame with a different crop or one deliberate interruption, then choose the version that best expresses the subject.
For reflections, adjust camera height as well as angle. A lower viewpoint can reveal more of a subject in a puddle, but check the frame each time. Calm water helps preserve a recognizable reflection. A long exposure can blur moving water; it does not guarantee a clear mirror image.
If you use a polarizing filter, check its effect before shooting. It can reduce reflections on water or glass, including the reflection you want to keep. Rotate it while watching the scene, or remove it if it weakens the image.
Artificial Symmetry in Photography
You can also create symmetry in an editing program. For example, duplicate part of a photo, flip the copy, and align it with the original. This produces a mirrored image even if the scene itself was not symmetrical.
Use that approach when the constructed result suits your idea. Keep it distinct from a photograph presented as an unchanged record of a scene. You can also practise finding symmetry in the camera, where viewpoint and timing affect the result.
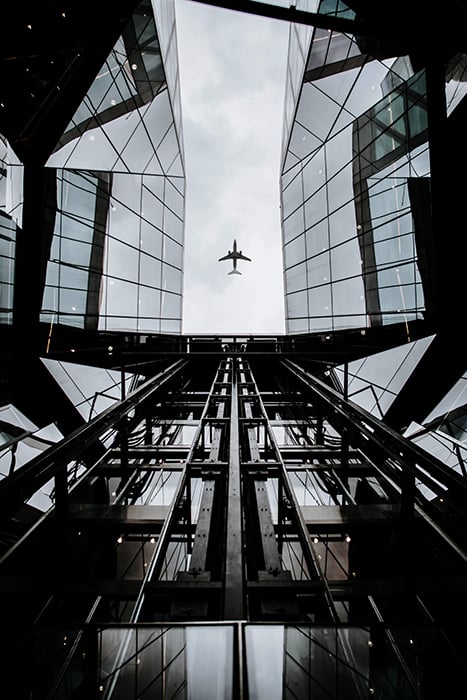
The airplane in the photo below sits within a roughly symmetrical architectural frame and fills the negative space. The visible image shows that relationship, but it does not tell us whether the airplane was added in editing.
Symmetrical Photography Inspiration
Use these examples as starting points. Keep the matching structure clear, then decide which differences belong in the picture.
Look for Symmetry at an Event
Architectural, landscape, and still-life photography give you time to plan. Live events offer a different challenge: the arrangement can change before you take the shot.
In the photo below, the bursts of fireworks spread around their centers, while the water repeats some of the light beneath them. The bursts suggest radial symmetry, and the reflection adds approximate horizontal symmetry. Neither needs to be an exact duplicate to contribute to the composition.

Make Your Own Symmetrical Lines
You can arrange a small still life when you cannot find a suitable scene outdoors. Make a DIY light box or create a flat-lay background, then position an object along a chosen centerline.
The clock below provides a central shape, while the two background colors create a clear division. The colors are different, so this is a balanced arrangement with some symmetrical features rather than a perfect mirror image.
In a DIY studio, try matching the object's outline and spacing first. Then change one side of the background or lighting and compare the results.

Take a Symmetrical Self-Portrait
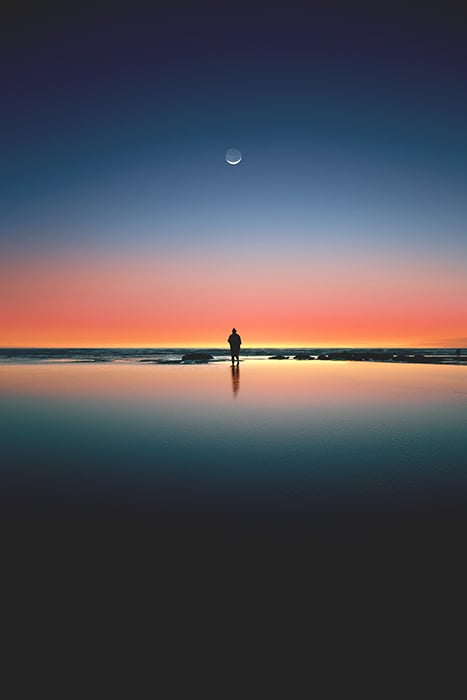
Symmetry can include people as well as buildings. Self-portraiture lets you experiment with your position in the frame. A central silhouette, like the one below, can anchor a scene even when the sky and shoreline differ on either side.
Use a stable support and a remote or timer if you want to work away from the camera. Set focus for the place where you will stand, take a test shot, and check it before you focus on posing. Keep the background simple enough for the outline to remain clear.
Find Symmetrical Lines in Animal Photography
If wild animals are not accessible, take photos of pets. A front-facing animal can show approximate left-right symmetry through its eyes, ears, and facial outline.
The deer below shows how a frontal viewpoint makes those paired features easy to compare. Markings, antlers, pose, and lighting can still differ. Wait for a suitable angle and choose a shutter speed that keeps the animal sharp, rather than expecting it to hold a perfect pose.

Take a Photo of Your Favorite Building
Choose a building with details you want to explore. It could be a familiar house or a unique tourist attraction. Look for paired windows, a central door, and repeated shapes. Take time to find patterns, then decide which of them also form a symmetrical arrangement.
The red building below has a central facade with matching architectural features. Its colors and warm window light also contribute to the image. Compare a centered view with an angled one, and notice what each reveals about the building.

Challenge Yourself With Your Smartphone Camera
Smartphone photography is a convenient way to practise spotting symmetry. Try a pier, doorway, or reflection without waiting for a special trip or a different camera.
Turn on your camera's grid and level if available. On an iPhone, these controls are in Settings > Camera. Check the center between the grid lines as well as the horizon. In the pier photo below, the two rails converge toward a central point, while the clouds add variety to the frame.
If you want to revisit a location with another camera, keep the phone image as a framing reference. Compare several viewpoints rather than assuming the first centered shot is the strongest.

Conclusion: Use Symmetry With Intention
Find a line or central point, align the important shapes, and check the edges of your frame. Then ask what the symmetry contributes: does it emphasize the subject, organize a busy scene, or make a small difference stand out?
Try one orderly composition and one with a deliberate break. Symmetry is a useful choice when it supports the picture you want to make.