Photography can be fun and creative. These DIY photography ideas will bring your creative photography to the next level.
It is art, after all!
Our Top DIY Photography Ideas
There are many ways to be inventive in the field of photography. But we’re going to look at how to get your lens dirty.
How to Get Your Lens Dirty?
This will involve materials such as water, Vaseline, plastic and hosiery. You heard me say creative, right?
You’ll also need a small amount of DIY (Do-It-Yourself) handyman knowledge. Being the owner of a few elastic bands will be a benefit.
Read our thorough guide for all the tips you need on creating these DIY photography filters yourself.
DISCLAIMER: Some of these projects can and will damage your lens. Read up to know exactly what is involved before you start any of the more challenging projects.
Do not use your most expensive gear. Use a cheaper lens rather than your most expensive to practice first. Don't try to work on something you will miss or can't afford to fix or replace.
Better still, use cheap clear filters as these can thread straight onto your lens.
If in doubt, please do not risk damage to your equipment. Especially if it is your livelihood and you really can't live without it.
Read everything you can about what environment you need to conduct your DIY photography project in. Ask for help, and don't risk it for the shot. It's not worth it.
Droplet Filter
Get a protective filter, preferably a clear filter with a thread that will screw on to your lens. Spray water on the lens for an interesting effect.
You will benefit most from pointing your lens towards a light source, as the light will refract and spread around.
What this will also do is introduce strange squiggles, gauzy haze, and a twinkly smattering of bokeh to your image.
Alternatives: You can use a piece of cling film instead of a clear filter. You can also differentiate between a heavy spray and a fine mist for parallel effects.
Photojojo
Lens Flare Filter
Lens flare can be annoying in your images and you may want to drop it before posting images on social media.
But why would you want to purposefully create lens flare? You can improve many settings by using lens flares, as it adds interest.
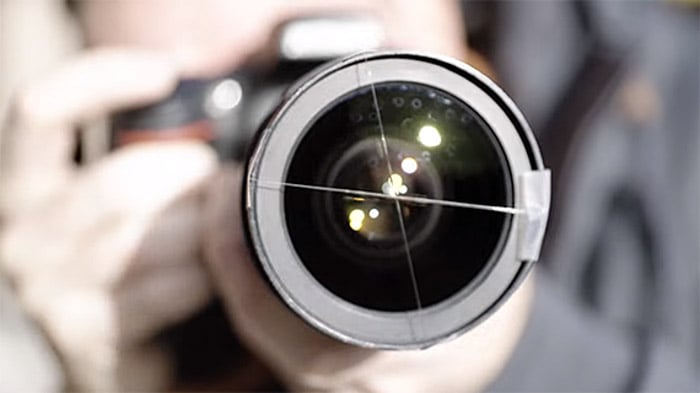
The simple trick here is fishing line. It is a strong and durable material that you can play around with. The most important part is its translucent nature.
You won’t see the actual line in your images, but what you will see is the light hitting the wire and spreading out.
Get out there and try it for your next landscape images. Just put fishing wire along the diameter of your lens held by an elastic band.
Fake Tilt-Shift Filter
Tilt-shift lenses were all the rage in the 20th century. They were used to remove the parallax error found in photographing architecture.
Now, we use them for fun little projects. Some photographers use them for portraits at weddings or events, others use them to make objects look small.
Whatever you use them for, you will need to know how to make one. Luckily, it’s simple. You need a plastic sheet a little bigger than the front element of your lens.
Cut a hole in the middle. The size depends on your cutting skills. The hole should be something akin to an elongated rectangle. This is where the effect comes from.
Attach using an elastic band (they have many uses in this post) and photograph. The center of the image will not change as if you had photographed normally.
What you will see is that the plastic adds a softening effect, placing the focus primarily where the hole is.
Alternative: You can mix this up with some color by coloring in parts of the plastic. You can also place the hole above or below the center.
COOPH
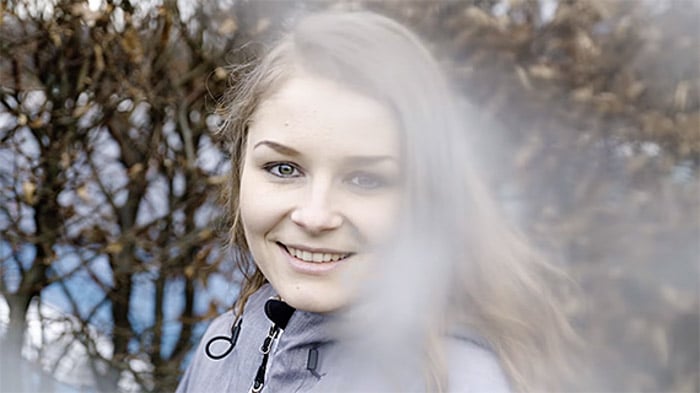
Woolly Filter
Wool has other purposes than that comical reindeer cardigan your grandmother made you for Christmas. It can be useful in your DIY photography.
Take strands of wool to dangle in front of your lens as you shoot the portrait of your model. Make sure not to cover her face.
You just made a DIY photography filter. The wool will create a frame and will stay out of focus. What you will see is the color of the wool feathered out in all its glory.
The great thing about wool is that it comes in many sizes and many different colors. This leaves you free to experiment.

COOPH
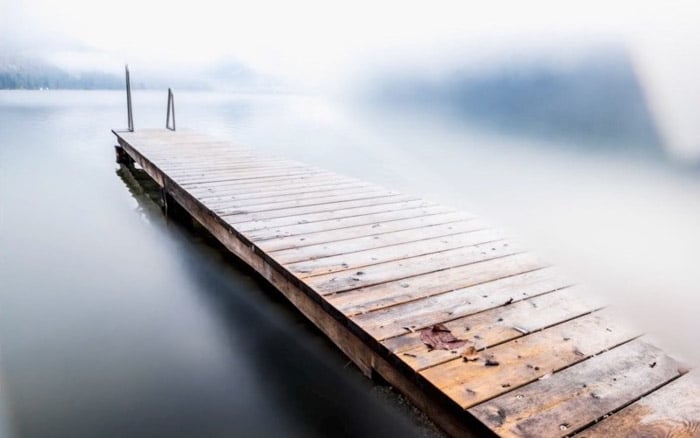
Clear Plastic Filter
Like the fake tilt-shift lens, the clear plastic filter doesn’t try to make anything look small. The purpose is to create a soft focus.
By cutting a piece of plastic a little bigger than the front end of your lens, you can create an interesting DIY photography filter.
Cut a hole in the plastic, then photograph anyone or anything. Keep the main focal point in the center, the rest will be a little softer.
Alternative: You can mix this up with some color by coloring in parts of the plastic. You can also place the hole somewhere other than the center of the lens.
COOPH
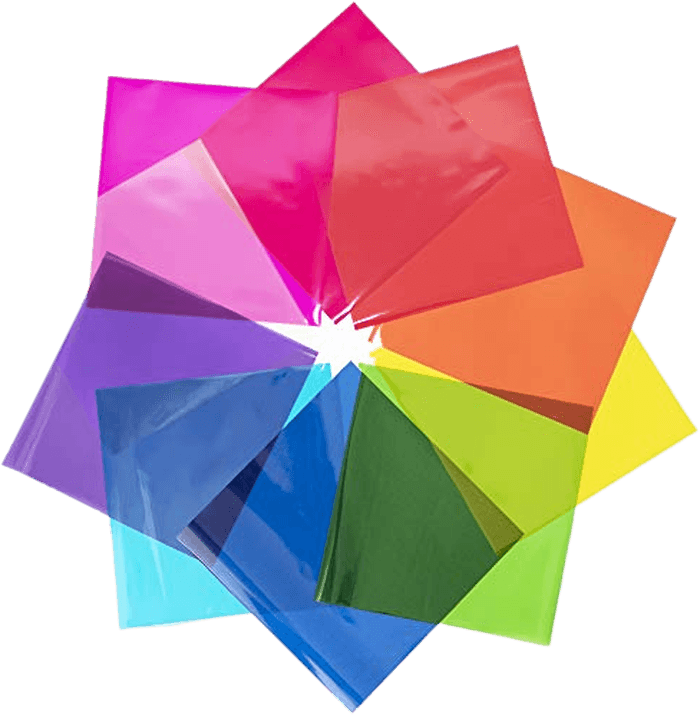
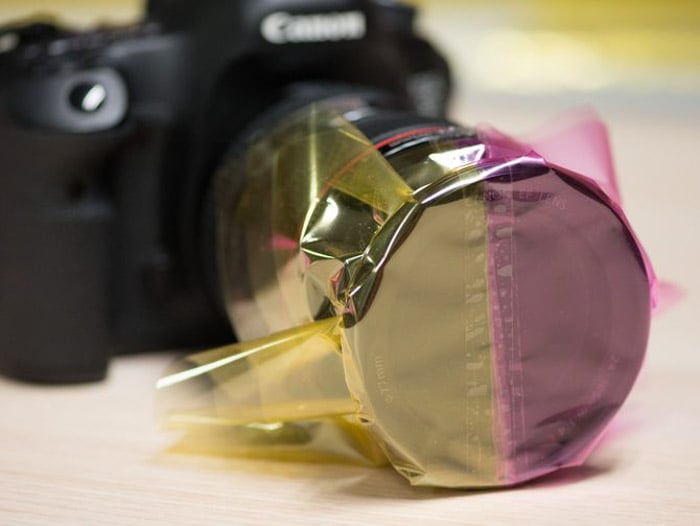
Colored Plastic Filter
Instagram made colored filters famous. The problem is, they only have about 30 to choose from. This makes it hard to be unique.
Grab some plastic and apply a colored pen. It doesn’t have to be perfect, just whack it on. Place the plastic on your lens using an elastic band. Instant filter. You are free to use any colors in any pattern you like. Experiment until you’re bored.
Alternative: Use two different pieces of plastic, allowing them to sit in the center of the frame. Also, don’t be afraid of scrunching them up a little.
CNET
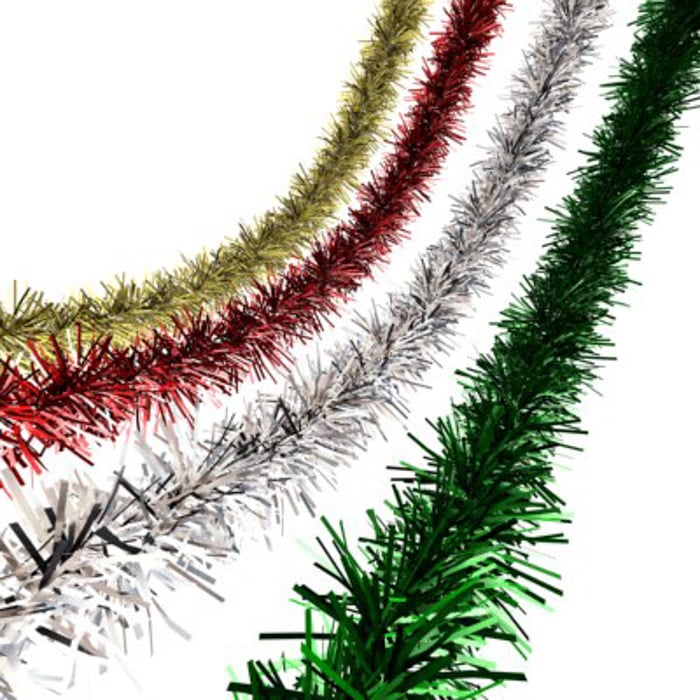
Leftover Tinsel Filter
Christmas is all about leftovers. Forget about the food, grab the tinsel. This works like wool but in a way more flashy ’80s way.
Grab one piece (or a handful) and dangle said tinsel in front of your lens as you shoot. The reflective colored surface will bounce light everywhere.
Vaseline Filter
Vaseline is my favorite kind of filter. It softens and blurs in a way you can’t really replicate anywhere else. Even Photoshop makes it difficult.
For this, you really need a clear lens filter, as it is about to get messy. Place the filter on the lens, and use the Vaseline around the outer edges of the filter.
The results all come down to how you slathered the petroleum on the glass. Practice makes perfect.
Alternative: Color the Vaseline by melting a small amount in a microwave, and adding food coloring. Let it cool before spreading.

COOPH
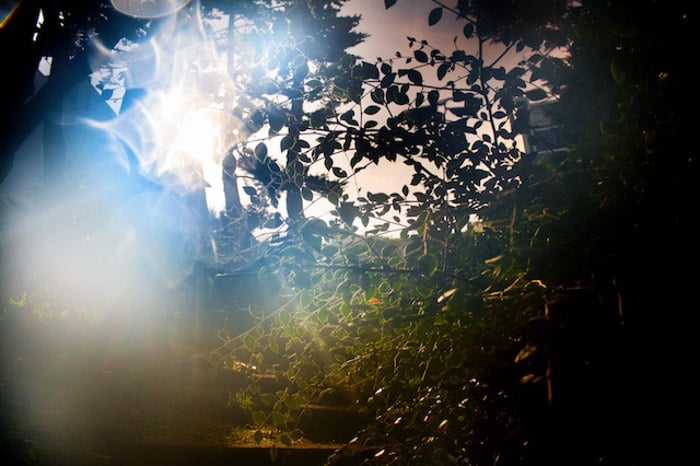
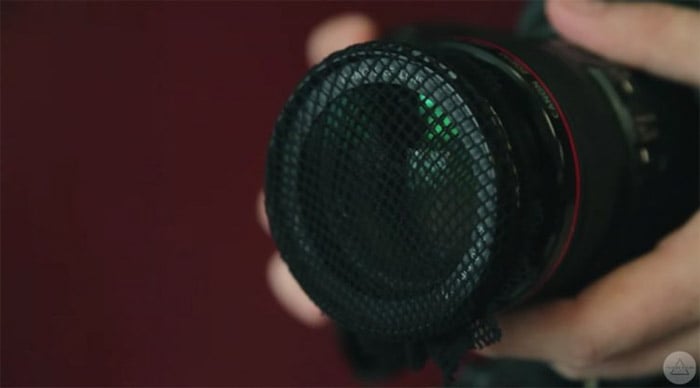
Hosiery Filter
This is a random one, but it provides us with a great effect. You will have to buy stockings if your wife doesn’t have any you can find.
A lens created to give you the same effect will cost around $100. So it make sense to cut up a bit of material to get a similar effect for $95 cheaper.
It adds a beautiful, warm glow around lights that you feel are too harsh. Go, grab some underwear and stick it on your lens. Don’t be embarrassed.
Alternative: Stick the stockings between the camera body and the lens rather than the front of the lens. The contrast will be deeper and still give you a glow.
SLR Lounge
Anamorphic Filter
Anamorphic lenses are the Holy Grail of photography and videography. They are few and far between, and even if you did find one, they cost a small fortune.
They are lenses designed so that wide-format imagery would use the film area of standard 35 mm frames.
These lenses reduce grain and enhance vertical resolution. We aren’t going for all that here.
Like the lens flare DIY photography filter, we will incorporate the fishing wire. We also need to make a small “flag” to insert into the lens.
A piece of cardboard cut to the same size as your lens needs to have an eclipse shape cut into it. It will only work by placing the hole vertically.
Alternative: Use sandpaper to scratch lines into the middle of a clear filter.

Sumihar Christian
*Bonus*
Lens Cleaning
After applying Vaseline, water, and leaving tape residue everywhere, you’ll need to clean your clear filter lenses.
There are three main steps in cleaning your filter.
- Remove as much dirt as possible from the lens with a blower or soft-bristled brush.
- Apply a few drops of lens cleaning solution to a lens tissue or cleaning cloth.
- Using a circular motion, gently remove oil, fingerprints, and grime from the lens surface, working from the center outward.
Interested in finding some more great photography project ideas? Check our article on how to transfer a photo to wood for more photography inspiration!