A lot of photography is about the pursuit of sharpness. In today’s article, you’ll learn to go in the opposite direction with soft focus.
We’ll show you how to use soft focus for artistic effects. And you’ll find out about the different methods of achieving this look.
What Is Soft Focus Photography
This is a branch of photography that harks back to the golden age of film, and 1950s Hollywood productions. The look was often used in glamour photography, with its glow and soft focus.
Hollywood would often use this effect when filming female actresses. The softer focus is flattering for their complexion.
The effect is caused by lens optics that have an imperfection. The look led to photographers wishing to replicate it. It’s still a popular aesthetic today.
The look is not just the result of not focusing the lens. The lens will be focused, yet the image will have a much softer feel than most lenses produce today.
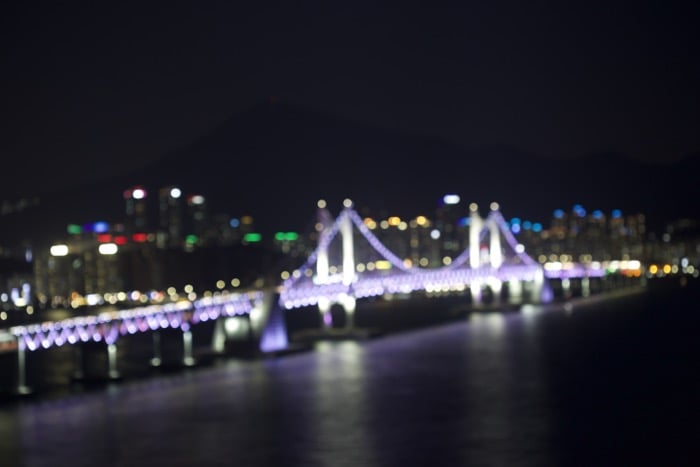
Out of focus blur is an attractive feature in photography. This photo creates bokeh blur by putting the lens out of focus. Soft focus is different, the lens is focused, but there is diffusion of the light.
How to Produce Soft Focus With Modern Cameras
There are a number of methods available for today’s photographers. These range in price and efficiency. The easiest way to achieve this look is by buying a specialist lens, or a specialist filter.
These methods also happen to be the most expensive. Those on a budget can look to other methods involving Vaseline, a black stocking, or a DIY lens.
Let’s look at the different options available to you in turn.
Soft Focus Filters
These filters act by diffusing the light. They’re designed for this purpose and will come in varying strengths so you can adapt as you need.
The advantage is that you can be sure of what you’re going to get every time. The disadvantage is that these filters tend to be quite expensive.
They’re also branded in different ways such as Hollywood, soft or diffusion filters. Which filter is best then?
- Lee soft filters – This brand is known for quality, and comes in 5 levels of strength. It’s also among the priciest.
- Cokin – These filters are advertised as diffuser filters, and will do a good job within a budget.
- Hoya – Unlike the other two companies, Hoya make circular filters. These screw onto the front of your lens, another good option.
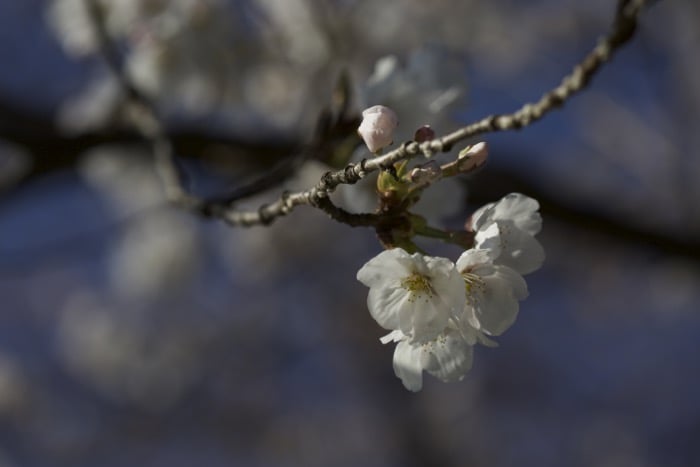
In this image the photo is sharp, no modifiers have been used.
The DIY Soft Focus Effects
There are two great alternatives to purchasing an expensive soft focus filter. These methods work by diffusing the light.
The effect is less precise but has a level of customization that the filters above don’t provide.
The methods below require Vaseline, or a stocking.
Vaseline on a filter or a stocking over the lens can produce soft focus.
Soft Focus With a Stocking
This easily available item of clothing is cheap to buy. There’s no need to ruin any clothes!
In order to make this work you’ll need one stocking, and one rubber band to secure the stocking over the lens.
- You don’t need the whole stocking to make this work. Use a pair of scissors and cut the material.
- Cut one of the legs of the stocking off. You’ll want to make a pipe-like shape. To do this you’ll need to cut it in two places. Now cut along the length of this, and you’ll now have a rectangular shape of the material.
- Yse the rubber band to secure the stocking over the front of your lens. You’ll need to stretch it in order to see through the material. The more you stretch it, the weaker the softening effect will be.
- Using a black stocking will provide a neutral effect on the color in your photo. You can buy stockings of different colors though. Use warmer colors to create more warmth in your photo!

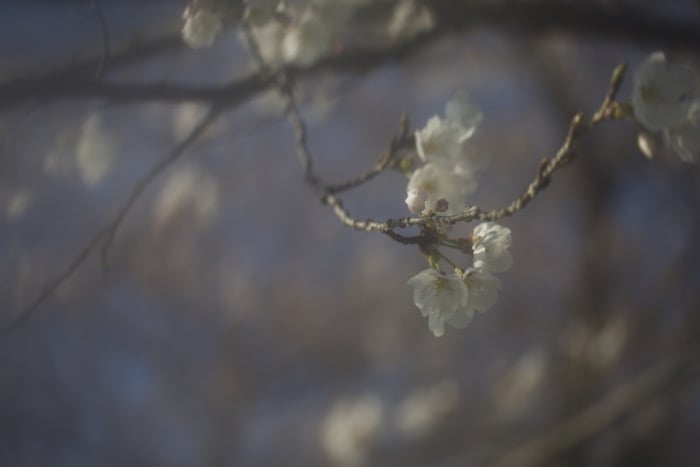
In this photo a black stocking was placed over the front of the lens.
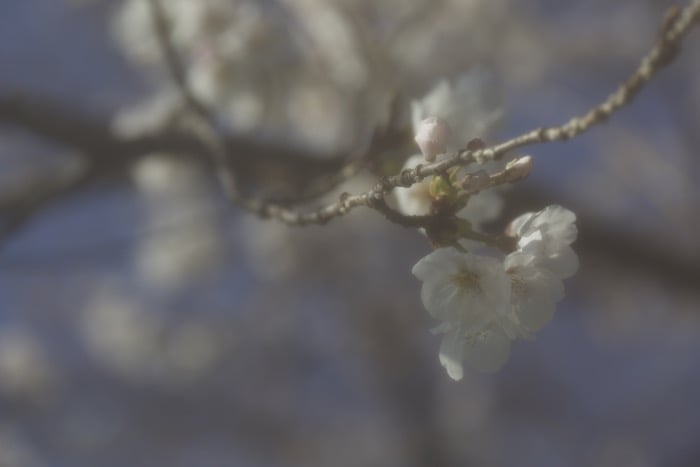
This photo also used a stocking, but this time the color of the stocking was cream.
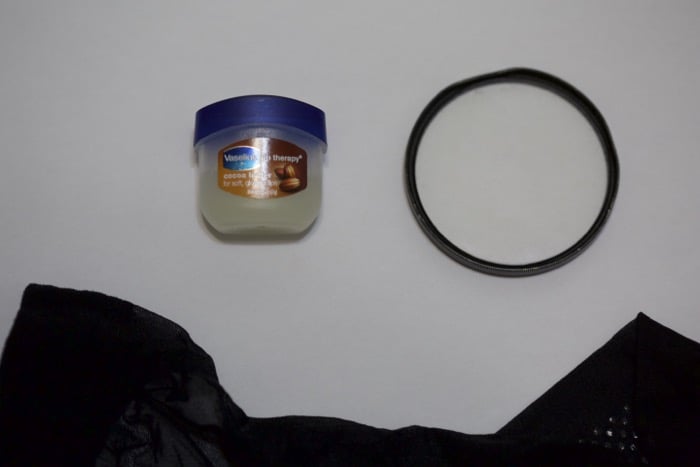
Soft Focus With Vaseline
Take care when handling this substance around your camera. It’s a good idea to have a supply of tissues and possibly wet wipes to clean your fingers after you apply the Vaseline.
The first thing to say is don’t apply Vaseline straight to your lens! Instead, use a cheap UV filter. Screw this onto the front of your lens.
The quality of this UV filter is unimportant. You can buy the cheapest filter you can find.
Take the following steps to produce diffusion by using Vaseline.
- Attach the UV filter to the front of your lens.
- Yut a little Vaseline on your finger. The amount applied needs to be small, so don’t dig out a lot of Vaseline. Instead, brush the surface of the jelly, this amount will be sufficient.
- Smear the Vaseline on the surface of the lens. The layer should be thin and even. Once finished clean the Vaseline off your finger using a wet wipe or a tissue.
- Take a photo, and judge the result. You can change the amount of Vaseline on the filter as needed.
- You can apply the Vaseline to the filter, so that only the edge has soft focus and the center is sharper.
- Use tissues to remove Vaseline from the surface of the filter.
This photo shows the effect of using Vaseline on a UV filter to diffuse the light.
Soft Focus Lenses
In addition to adding filters or DIY filters to your existing lens, there are a number of lenses you can buy that can also give you a soft focus look.
Once again these can be divided into those you buy that are ready to use, and those you can make yourself.
Ready to Use Lenses
These lenses vary in price. The earlier soft focus lenses are highly sought after and therefore very expensive.
- Soft focus lens – These lenses often come with an eye watering price tag, but will produce great images. Lenses such as the Petzval portrait lens, the Aero Ektar and the Dallmeyer Bergheim are examples of this type of lens.
- Projector lens – Providing you can get an adaptor to mount this lens onto your camera, these lenses will produce nice soft images.
- Lensbaby Composer – The lensbaby is on the lo-fi end of lens quality. This makes it good for soft focus. The focus is manual. There is even a plastic lens you can use with this for more diffusion. It creates a tilt-shift-like effect with elongated bokeh.
- High Aperture Prime Lens – While not a soft focus lens, you can use the high aperture to blur out the background to soft focus. This blurred out portion of the photo is known as bokeh.
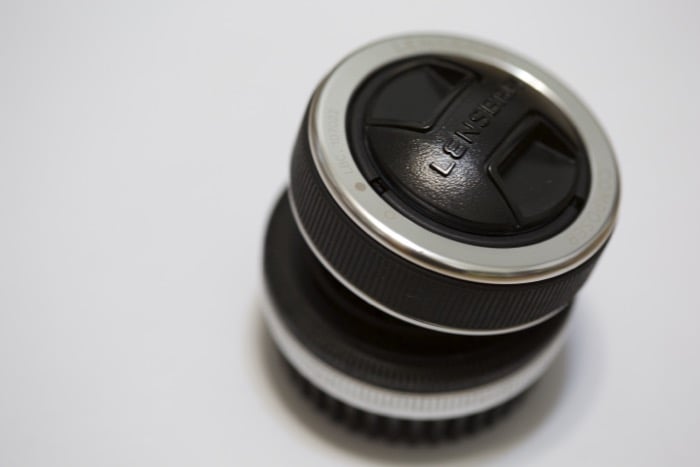
The Lensbaby is a lens that causes some level of diffusion, especially when the plastic lens is used.
DIY Lenses
You could have a go at making your own soft focus lens. This is a fun activity that will teach your more about what happens with the optics of a camera.
- Convert a standard lens – It’s possible to turn a standard lens into a soft focus lens. This won’t work with all lenses. Be careful when doing this. The addition or removal of a lens element can have the desired effect.
- Magnifying Glass – Without adapting the magnifying glass you’ll have an overexposed image. In order to make this work, you’ll need to make your own aperture ring for the magnifying glass. A circular piece of black card with a hole in the center attached to the magnifying glass will work.
- Teleconverter – These extension rings are used to boost the focal length of a telephoto lens. Used for sports photography and the paparazzi, you can also use these for soft focus photography. A cheap three times teleconverter can be combined with a lens of moderate focal length to create the soft focus effect.
- Close up diopter lens – This is also used to increase magnification, but in this case to get closer to an object. In close-up photography, you’d screw this onto the front of your lens. If you attach the dioptor to your camera without the lens, you can use this as a soft focus lens. To make this work you need to place the dioptor a set distance from the camera. The distance in mm will be on the front of the dioptor ring. You’ll now need to attach the dioptor to some extension tubes and bellows, so it’s the correct distance from your camera.
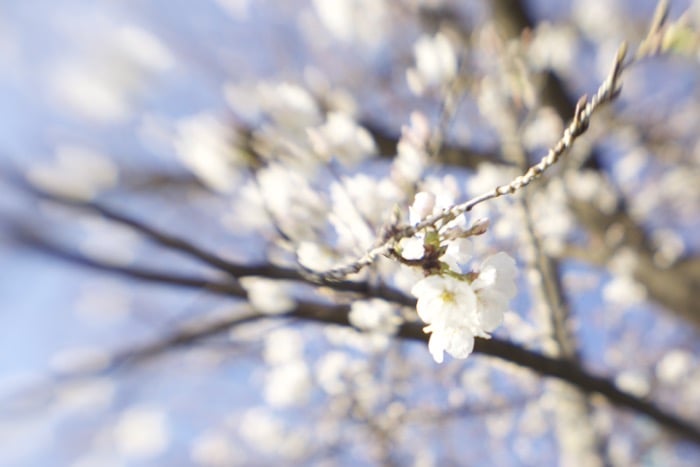
This image shows an image taken with the Lensbaby.
Soft Focus Through Post-Processing
The final option available to you for soft focus photography is post-processing. There are lots of filters available that allow you to achieve this effect.
- Choose the image you wish to work with, this will likely be a portrait photo.
- Open the image in Photoshop, and duplicate the layer. Go to Layer > Duplicate. This is the layer you’ll work with. You can make changes that are non-destructive.
- The filter to use is called surface blur. Apply this to your duplicated layer by going to Filter > Blur > Surface Blur.
- Now adjust the filter to a radius of 20, and a threshold of 200.
- This has applied the filter to the entire image. To make selective adjustments add a black layer mask. Go to Layer > Layer Mask > Hide All.
- You’ll now need a white paint brush to reveal the area’s of the picture which you want to be soft. Choose a soft brush, and set the opacity to 20-30%. Now use the brush to reveal the soft layer.
- As a final adjustment, you can use the opacity bar in the layers menu. You can adjust the strength of the softness filter throughout the whole image.
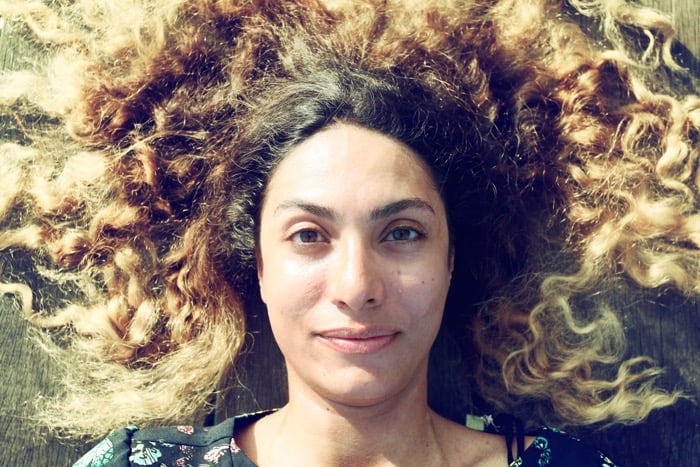
This photo shows an unedited version of the portrait.
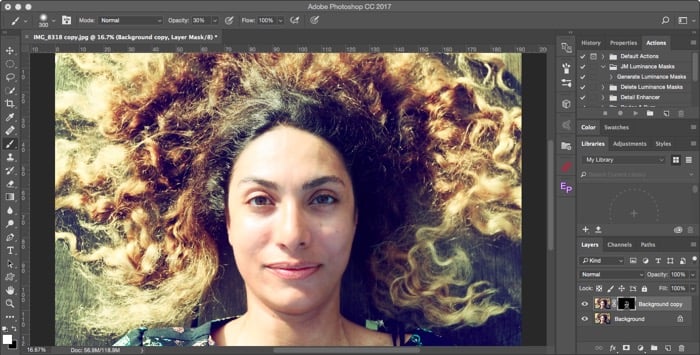
In this image selective softening has been applied.
Conclusion
It’s time to show your softer side, and try a different approach to your photography! Soft focus photos, through diffusion, can add an extra level of interest to subjects like portraits, floral photos or even landscapes!
Have you tried soft focus photography before? What methods did you use to get your results?
As always please share your thoughts and photos in the comments section of this article!
For more great tips, check our posts on using selective focus or triptych photography!