Concert photography is a unique and challenging form of photography. It takes a lot of skill to capture the energy and excitement of a live performance in a photograph. But with the right techniques, you can create stunning images that will immortalize the concert experience forever. In this tutorial, we’ll show you how to edit concert photos like a pro using Adobe Photoshop.
1. How to Choose and Edit Concert Photos to Process
Before processing an image, be sure you are only spending time on your very best photos. Take your time scrutinising and objectively selecting your most compelling shots when importing into your Lightroom catalog’s folders and collections.
Choose images that capture the most interesting moments. Unique moments that only you captured perhaps. Sometimes, I ask others for feedback when I'm undecided. Great post-processing of mediocre moments, still only yields mediocre photos.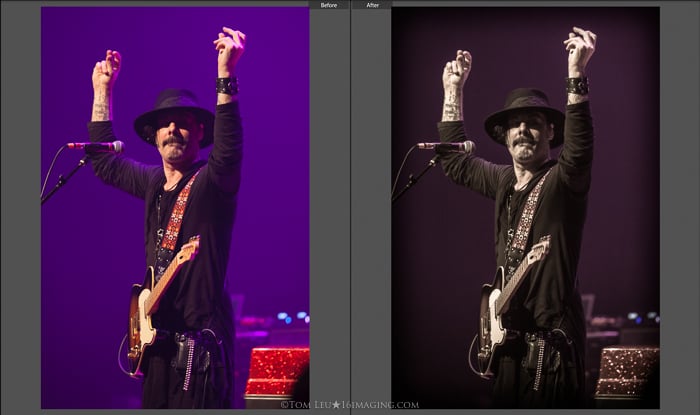
2. Make Lens Correction Adjustments
Lightroom's Lens Correction Panel in the Develop Module contains adjustments used to correct a variety of optical issues seen with most camera lenses.
First, select the Remove Chromatic Aberration box. This corrects any "color fringing" that can make an image look blurred or appear to contain noticeable colored edges.
Next, within this same panel, select the Enable Profile Corrections box. This selection adjusts your image's perspective by enabling automatic corrections based on the type of lens you've used.
I usually use the Default selection, though there are Auto and Custom options also. From there I may further adjust the Distortion and Vignetting sliders to achieve the look I want for an image.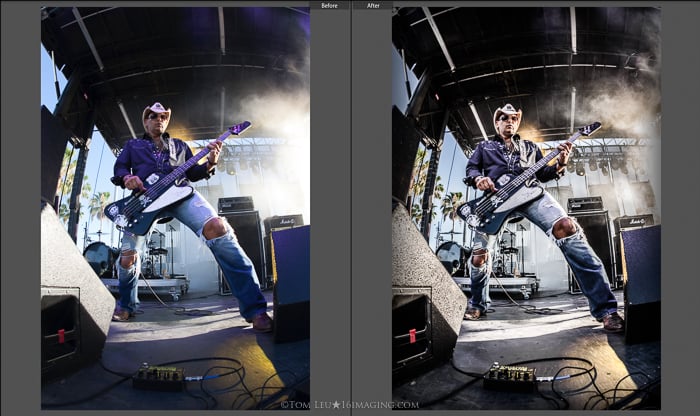
3. Use the Crop Overlay Tool to Balance Your Photos
Your photos should be "balanced” horizontally and/or vertically. While there are always artistic exceptions, doing so makes them most appealing to the eye.
Always attempt to properly compose your images in-camera while shooting. Inevitably, sometimes this doesn't happen. This is where cropping comes in handy.
Find the primary horizontal and vertical planes within your image and align to 90 or 180 degree angles by adjusting the handles of the image frame.
Another consideration is to choose the correct aspect ratio when cropping. This will also depend on whether an image was shot horizontally or vertically. The needs of the image and your personal preferences also dictate how to handle this.
I typically choose "As Shot" or "8×10" aspect ratios when working to align my images. These aspect ratios work best for printing and framing purposes later.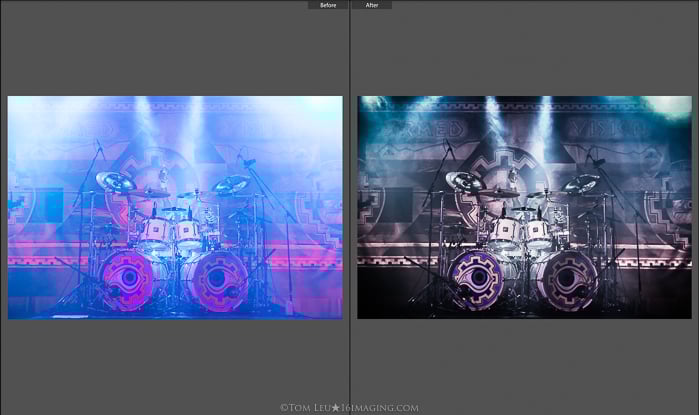
4. Experiment in the Basic and Tone Curve Panels
Lightroom's Basic and Tone Curve panels contain the meat and potatoes of your post-processing power. I spend the majority of my time here getting images to "look” the way I want them to look.
Often, this is a trial and error process. Play with the sliders. Push them up and down to the extremes to see what effects they produce. You need to understand the options and limits you have within each area.
This will help you make decisions as you learn what you like and don't like for your images.
Basic Panel: Highlights/Contrast/Clarity/Vibrance/Saturation
I choose to significantly reduce the Highlights within most of my concert photography images. I then push contrast and Clarity sliders up. How much depends on the image, and your original exposure in-camera.
For concert photos, this combination gives me edgy, darker, yet more defined looking images that I enjoy.
Depending on the artist, I tend to create desaturated looks for concert photography. This pairs well with pulled down highlights and pushed up contrast and clarity. I pull the vibrance and/or saturation sliders down to achieve this.
Tone Curve Panel: Highlights/Lights/Darks/Shadows
I pull up the regional Highlights, and pull down the Lights within the Tone Curve panel. This compensates for and complements the pulled down Highlights in the Basic Panel.
I then adjust Shadows and Darks up or down as necessary to further fine-tune the image to taste.
Finally, I use some amount of Post-Crop Vignetting on my photos 95% of the time. I do this because it pulls the eye to the most important area of the photo. I use low-profile, squared vignette styles with vertical images to produce a better framing effect.
After making these global adjustments, I decide to continue as either a color or black and white image.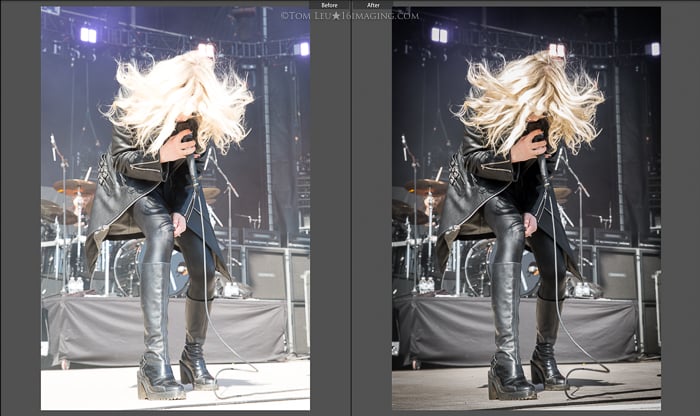
5. Convert to Black and White for More Impact
This is a big question to answer when post-processing concert photography. My basic rule of thumb is to process as black and white for, 1) underexposed images or 2) images with lots of reds or blues.
Pushing Exposure, Highlights, Lights, and Whites to improve exposure will produce image noise. Noise is fine, especially within concert photography. But noisy images typically look best processed in black and white.
Light technicians working concerts love using lots of red and blue lights. But this produces lots of red and blue saturated images that quite frankly, don’t look good.
Red and blue lights produce “soft” images that aren’t as crisply focused. Go black and white in these instances for the best results.
Important: When processing as a black and white image, choose the B&W selection within the HSL/Color/B&W panel. This allows you to fine-tune the desaturated tonality of the entire image by adjusting each color fader separately. Do not select B&W in the Basic panel as this gives you less flexibility.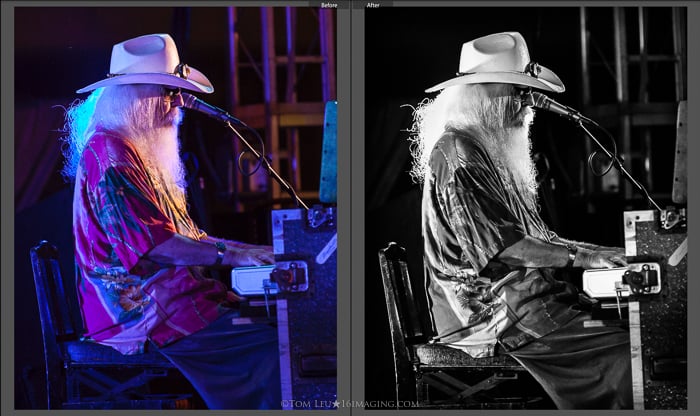
6. Use Selective Color (Sparingly)
At times, I choose to use the Selective Color processing technique with concert photography. Color select processing is when the majority of a photo is converted to black and white, but select parts are deliberately left in color for effect.
Doing this in moderation can give images a unique look, and take a cool moment to another level to stand out.
There are many selective color presets out there that allow you to pull out only red, blue, green, yellow, etc. In the image below, I only wanted the guitar red. But parts of the hands and face still had red tinting showing up.
I fixed this by doing additional fine-tune editing using the adjustment brush tool. Pulling the saturation all the way down, I painted over the areas where color was still appearing. This made the image black and white everywhere except for the guitar.
You want to use this option sparingly though. Too much of any single processing technique gets old quick. Variety within your portfolio is your best bet.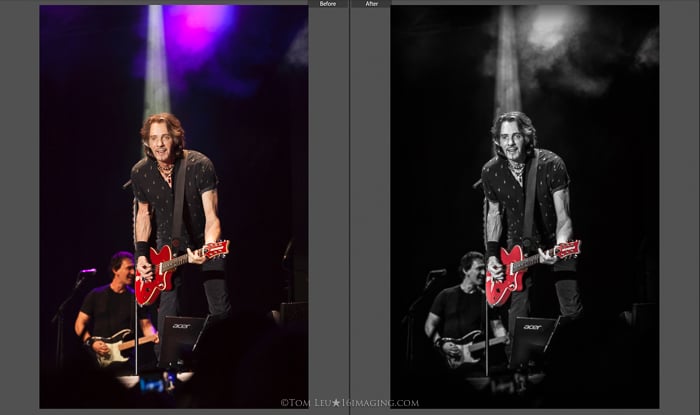
7. Collect Lightroom Presets to Use as a Reference
I recommend having some quantity of presets saved within your Lightroom program. Presets are "pre-selected" positions of faders that you install within Lightroom's Develop Module. They are post-processing treatments that can save music photographers tons of time.
There are countless free and purchasable options out there for all types of photography. I have a large collection of presets I've accumulated through the years that I sometimes use as a starting point when post-processing.
I particularly enjoy many of Matt Kloskowski’s presets and use them fairly often.
Presets can jump start your creative process when attempting to get different looks for a collection of images. You should almost always do further adjustments from there to fine tune your images to your satisfaction.
Eventually, you may want to create and use your own presets.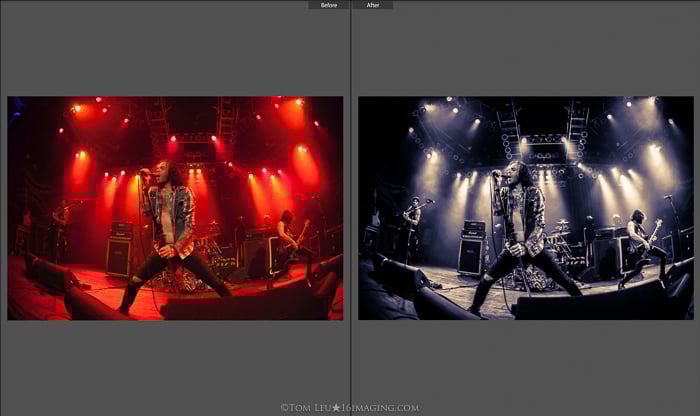
Conclusion
Post-processing images is a subjective undertaking. The outline of steps above will give you a good head start creating powerful live music photography that will stand out.
Be aware that ongoing software updates to Adobe Lightroom will also affect your process somewhat. I recommend always using the latest version of Lightroom. Any changes to your workflow are worth it.
You have expanded editing options available to you as Lightroom's processing power continues to improve. Good luck!
Looking for a photo editing alternative? Check out our post on Capture One vs. Lightroom.
(All Images by Tom Leu)