Learning the basics of photo composition is the best way to improve your photography. Basic composition techniques and ideas serve as a foundation on which you can build your skills. After getting to grips with just a couple, you’ll have more intention when compositing your images, making them more impactful and artistic.
This article covers all the basics of photo composition. We look at all the rules and ratios you need to know, as well as other composition concepts like scale, space, and symmetry. You’ll also find information on framing and using light and shadow.
Keep reading if you want to master the basics of photography composition.
Basic Photo Composition
With so many rules, ratios, and concepts, you might find learning about composition a bit daunting. But that should not be the case. Some of the ideas in this article will be new to you, but you don’t need to worry about learning every single concept.
Learning about one or two composition techniques is the perfect way to start. Read a few of the sections in this article, go away and practice with your camera, then come back and learn another one or two. It’s all about building your skills so your confidence grows and your photography improves.
This articles covers many topics, but we only give you a small introduction on this page. If you are interested in some of these topics in particular, each section has a link to a full article on the subject. You can click the link to learn more.
Rules and Ratios
Composition in photography is about what to include or leave out of your frame and how you decide to place the elements in the scene. Rather than thinking of these as “rules,” think of them as guidelines for making your images more visually appealing and interesting.
Some important composition guidelines include using the rule of thirds to place your main subject off-center, simplifying a scene with the rule of odds, and filling the frame to focus on your subject.
Choosing the right depth of field, orientation, and straightening lines also improve composition.
Leading lines, diagonal lines, light, negative space, symmetry, perspective, and the golden ratio are other tools to emphasize your main subject.
Capturing movement from left to right, incorporating patterns, finding relationships between elements, simplifying images, framing, and layering add depth and meaning to your photos. Avoid mergers and check the edges for distractions to create a clear composition.
If you’d like to learn more about rules of composition, click the link to see the full article.
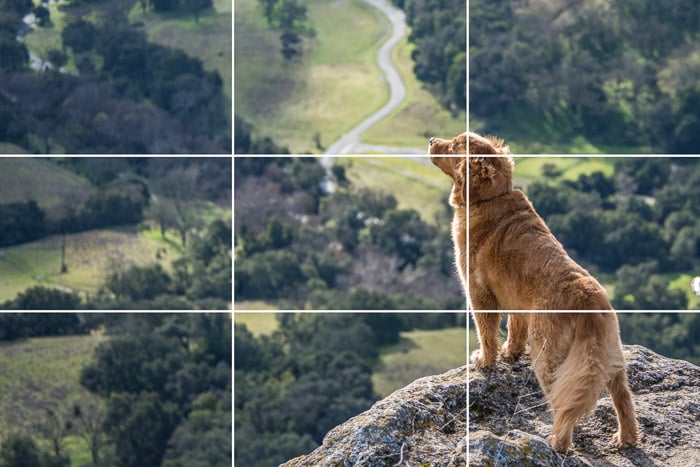
Rules of Thirds
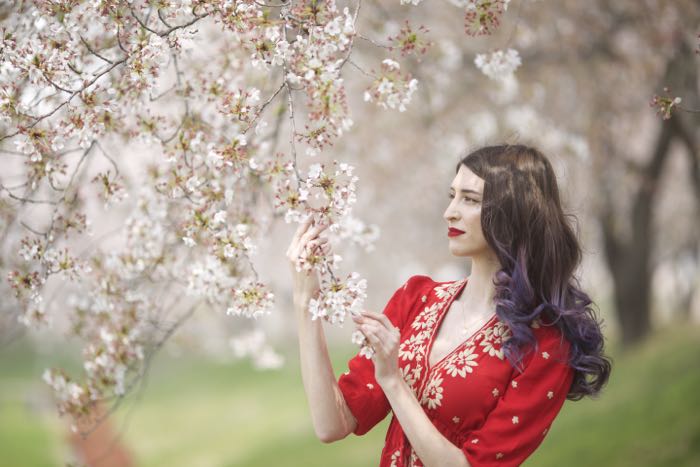
The rule of thirds is a basic composition technique that can improve the balance and harmony of your photos. To use it, imagine dividing your frame into nine equal rectangles using two vertical and two horizontal lines. The four points where the lines intersect are where you should place your subject or other points of interest.
For portraits, position the subject’s eyes or other important elements on one of the intersections. In landscapes, place key elements like mountains or boats near the intersecting points. If your image has two main elements, like a landscape with a sky, use the rule of thirds to give one element two-thirds of the frame for a more dynamic shot.
You can also apply the rule of thirds when editing your photos by cropping them so the subjects fall on the intersections. With practice, the rule of thirds will help you naturally guide your viewer’s eye and create more engaging compositions.
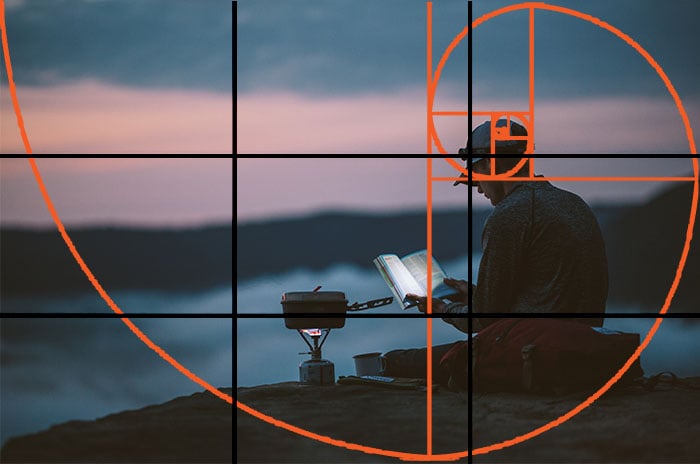
Golden Ratio
The golden ratio is a powerful tool for creating pleasing and balanced compositions in photography. It’s based on a mathematical sequence that appears throughout nature, from nautilus shells to ocean waves. By using the golden ratio in your photos, you can lead the viewer’s eye through the frame in a natural way.
One common way to apply the golden ratio is with the phi grid, which divides the frame into a 1:0.618:1 ratio. This places the subject a bit more centrally compared to the rule of thirds. Another option is the Fibonacci spiral, where you position the main subject in the smallest part of the spiral and arrange other elements along the curve.
To use the golden ratio effectively, consider the scene and choose the method that best fits the subject and any leading lines or curves. Imagine the overlay as you compose the shot, and don’t be afraid to adjust your position to exaggerate lines and angles. With practice, the golden ratio can help you create photographs that are naturally pleasing to the eye.
If you’d like to dive deeper into golden ratio in photography, our full article in a must-read.

Golden Ratio vs Rule of Thirds
The golden ratio and rule of thirds are two popular composition techniques in photography. The golden ratio is a mathematical principle that creates aesthetically pleasing images, while the rule of thirds is a simpler guideline that also produces good results.
The golden spiral, based on the golden ratio, leads the viewer’s eyes around the image in a balanced way. It works well for travel photos with multiple subjects and emphasizes movement in the scene.
In contrast, the rule of thirds is best for minimal scenes with a clear focal point. Place the subject at one of the intersecting points of a nine-grid for a more interesting composition.
To learn more about golden ratio composition, check out this in-depth article.
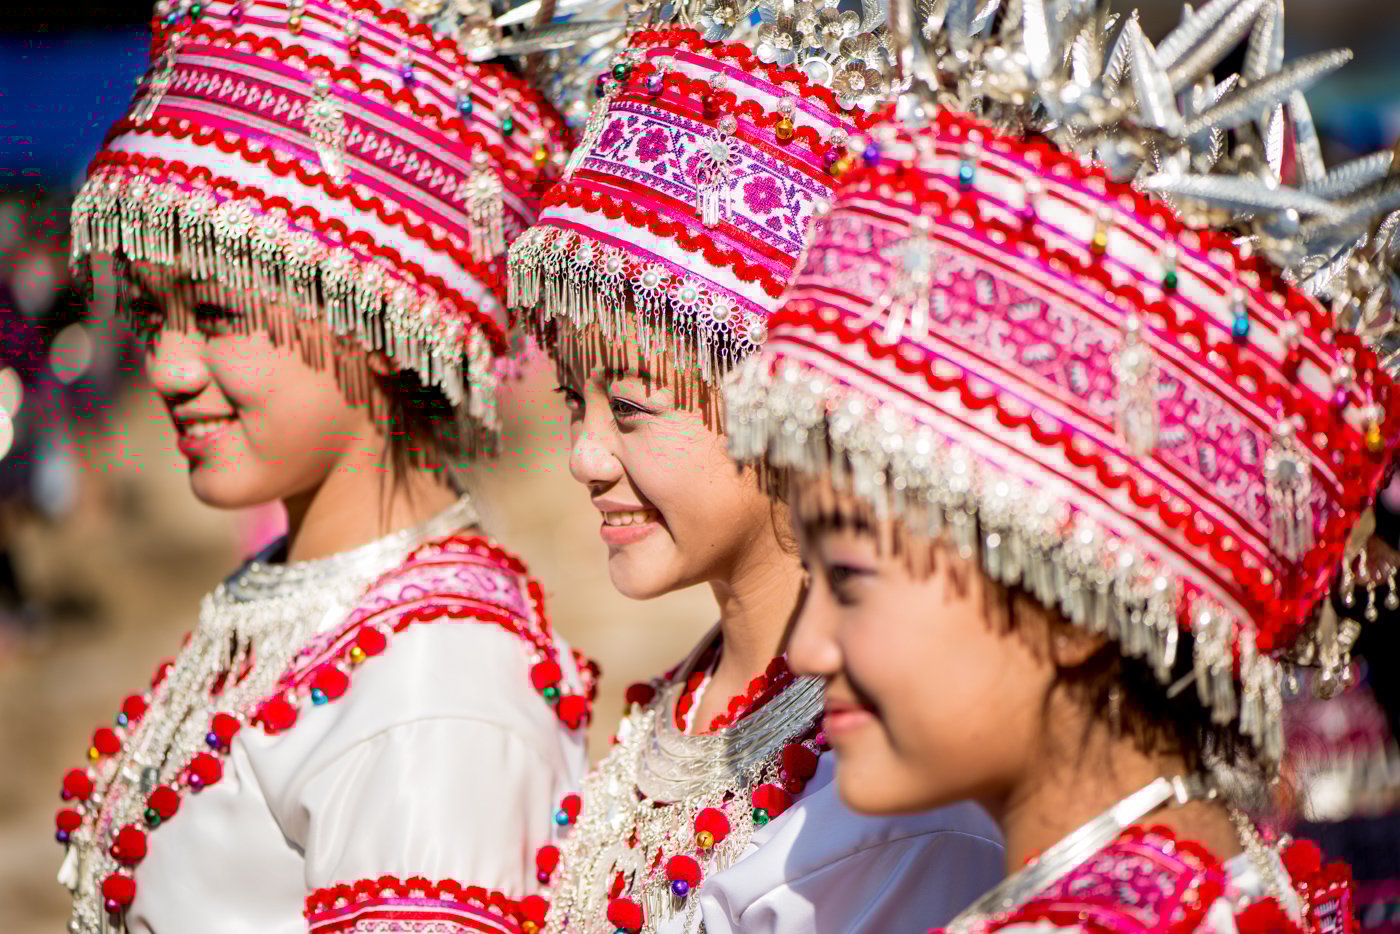
Rule of Odds
The rule of odds is a simple guideline that can improve your photo composition skills. It involves including an odd number of elements in your images, with three being the most appealing option. When our brain can’t pair up all the elements, it catches our attention and makes the composition more interesting.
You can arrange the elements in a line or triangle shape to create a dynamic image. This works well for still life photography, where you have control over the placement of objects.
In nature and street photography, you may need to move around and change your perspective to capture the right number of subjects.
Even with an even number of subjects, you can use the rule of odds by grouping some elements together. For example, having two people interact in a group portrait can create the illusion of a trio.
However, remember that composition rules are meant to be broken when they don’t improve your images. Use the rule of odds as a guideline, but don’t sacrifice a great moment or the essence of your subject just to follow it.
We have a full article on the rule of odds if you want to learn more.

Apsect Ratio
The aspect ratio of a photo is the proportional relationship between its width and height. Common aspect ratios include 4:3, 3:2, and 16:9. Your camera likely offers several aspect ratio options, but which should you choose?
The 3:2 ratio is popular because it’s close to the golden ratio, making photos visually appealing and balanced. It’s also the standard ratio of 35mm film and modern full frame cameras.
The 4:3 ratio is common for digital screens and micro four thirds cameras, while 1:1 is the standard for social media. The 16:9 ratio is used for HDTV and has a cinematic look.
Consider your composition and target platform when selecting an aspect ratio. For example, a horizontal 3:2 ratio works well for landscapes, while 1:1 is best for Instagram posts.
Click this link to learn more about aspect ratio for photos.

Breal the Rules
Breaking the rules of composition can lead to more creative and dynamic photos. While following the rules is a great way to get timeless shots, intentionally breaking them can help you find your style. Experiment with different angles and perspectives to push your compositions further.
Don’t just stand and shoot from eye level. Move around and try tilting your camera for a fresh look. Use a fully articulating viewfinder to get low or high angles that add interest to your images.
Fill your frame with relevant elements that contribute to the story you want to tell. If something doesn’t add to your narrative, adjust your composition, lens, or point of view.
Breaking the rules of composition can open up new creative possibilities and take your photography to the next level.
Basic Composition Concepts
With the rules and ratios out of the way, we can turn our attention to basic composition concepts.
Compositions are more flexible and sell set in stone than the composition rules. These are more like ideas you can bring into your photography to help develop your personal style. They’ll help you think about composition in new ways to create more original and powerful images.
Remember to click the in-text links for more information on each topic.
Subject Placement
Where you place the subject in your photos has a huge effect on your final composition. Use leading lines to draw attention to your subject or apply the rule of thirds to position them at points of interest. When photographing moving subjects, leave space in the frame for them to move into.
Contrasting colors, lighting, and textures can make your subject stand out. Side lighting adds drama while diffused light conveys calmness.
Experiment with different angles and perspectives to change the feeling of your image. Declutter the scene so every element has a purpose and leads the viewer’s eyes to your subject.
If you want to learn more about subject in your photos, we have a great in-depth article that explores the topic further.

Scale
Showing an accurate sense of scale in photography can be challenging. Our cameras capture the world through a single lens, while we view it with two eyes. This difference in perspective can make it difficult to represent the true size of objects in a photograph.
To accurately portray scale, consider your point of view, lens choice, and the relationship between elements in the composition. Your position relative to the subject greatly influences how its size is perceived. A standard lens, around 35-50mm, will provide the most realistic representation of scale.
Including a recognizable reference object, such as a person, is the most reliable way to give a sense of scale in your photos.
Our brains instinctively understand the size of a human, making it easy to compare other elements in the image. By carefully considering these factors, you can create photographs that accurately convey the scale of your subject.
Learn more about scale in photography right here.

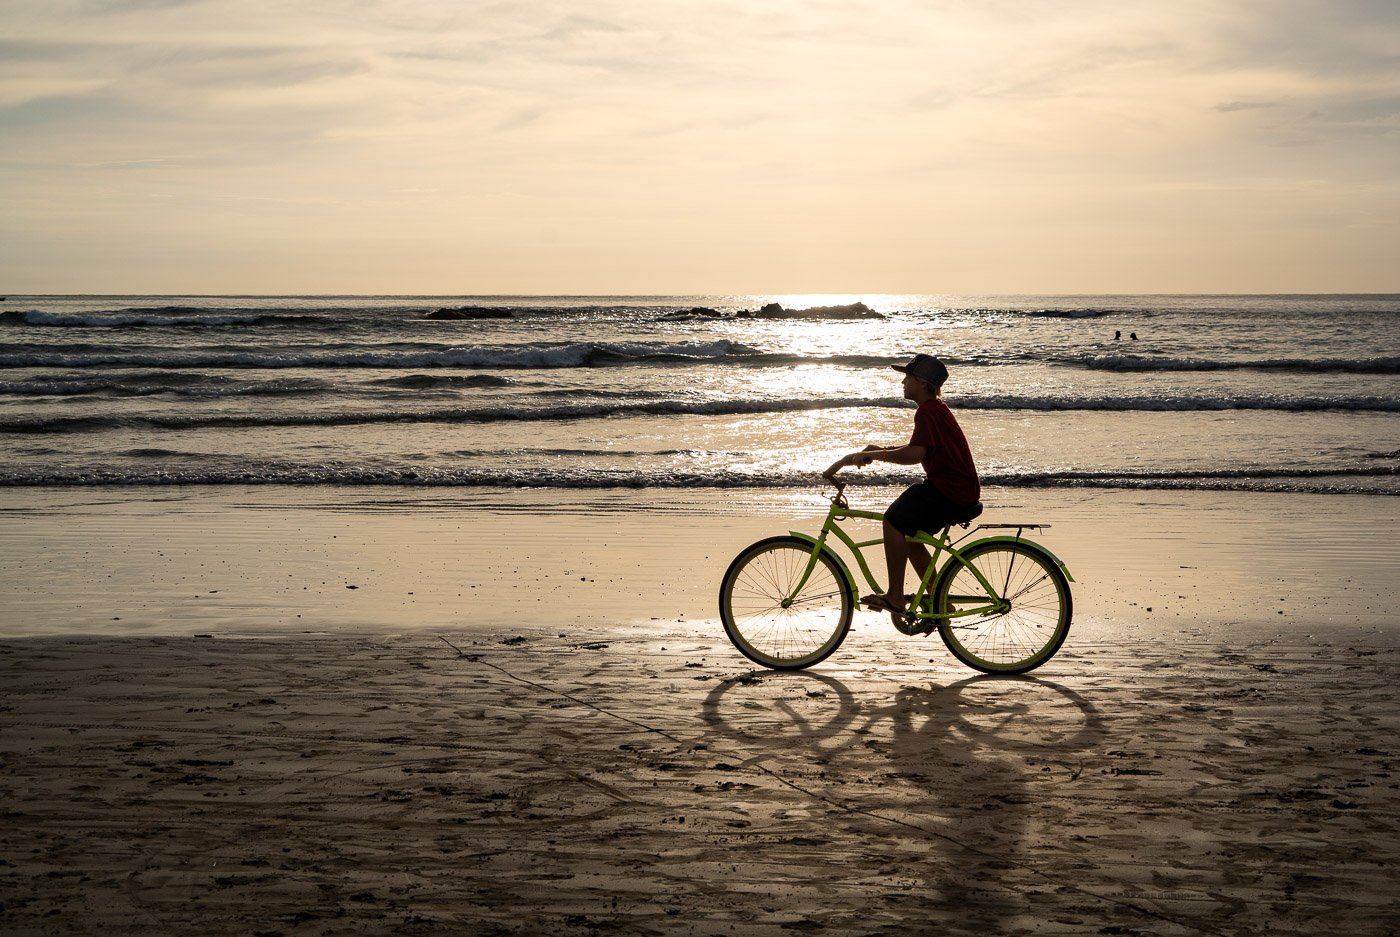
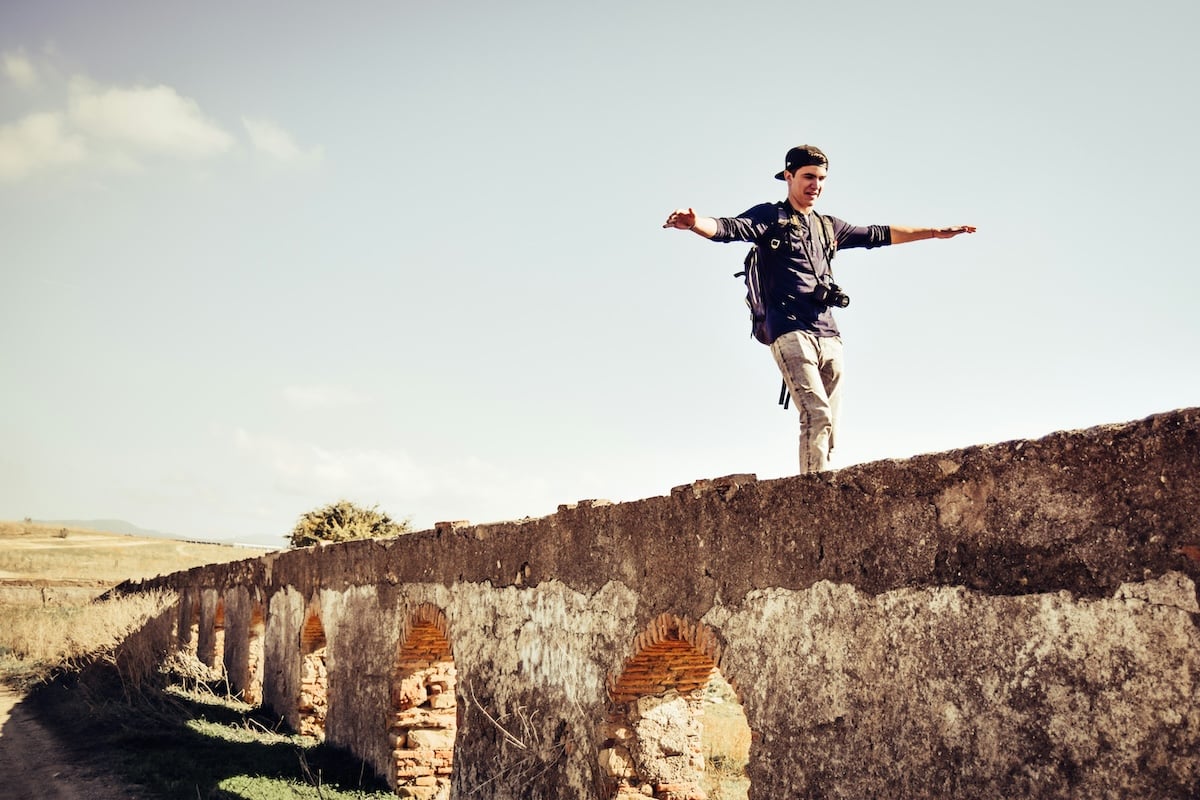
Space
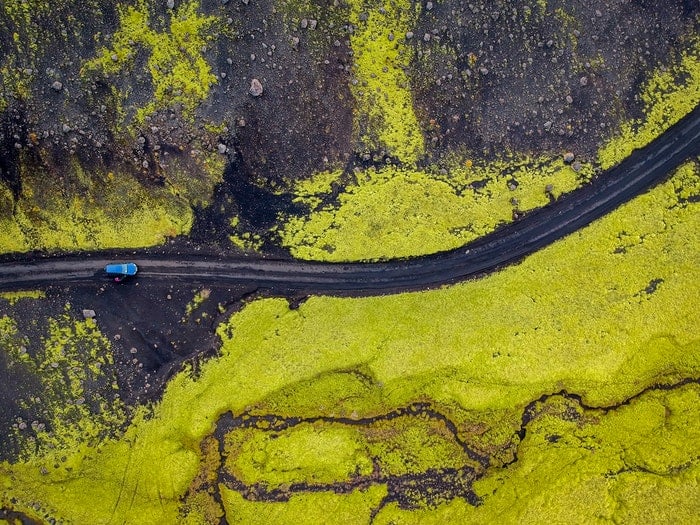
The rule of space in photography adds context and storytelling to your images. By using negative space and directing the viewer’s eye away from the subject, you create a sense of motion and dynamism.
The key is to have the main subject looking or moving into the negative space. This could be a person gazing out to sea or a car driving along a country road. The viewer enters the image from the perspective of the subject, and what they are looking towards forms the narrative.
Locations with minimalism and leading lines work well for the rule of space. Coastal areas, deserts, and even subways can provide the right environment. Use a wide-angle lens for an epic sense of scale, or a long focal length to focus on a distant subject while still capturing the negative space.
Combine the rule of space with others techniques like the rule of thirds or leading lines to create even more interesting and dynamic images.
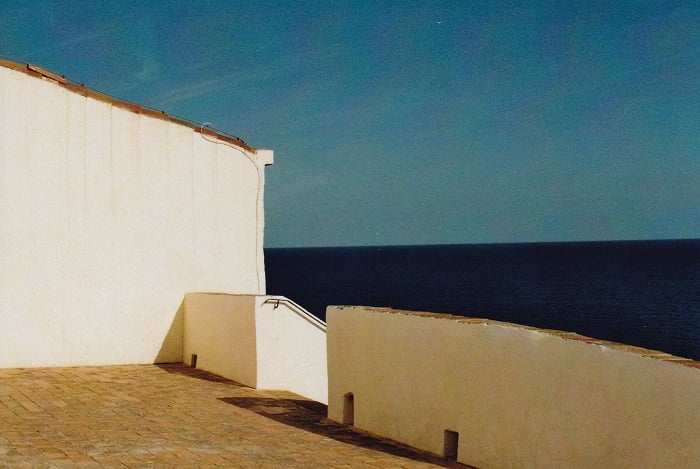
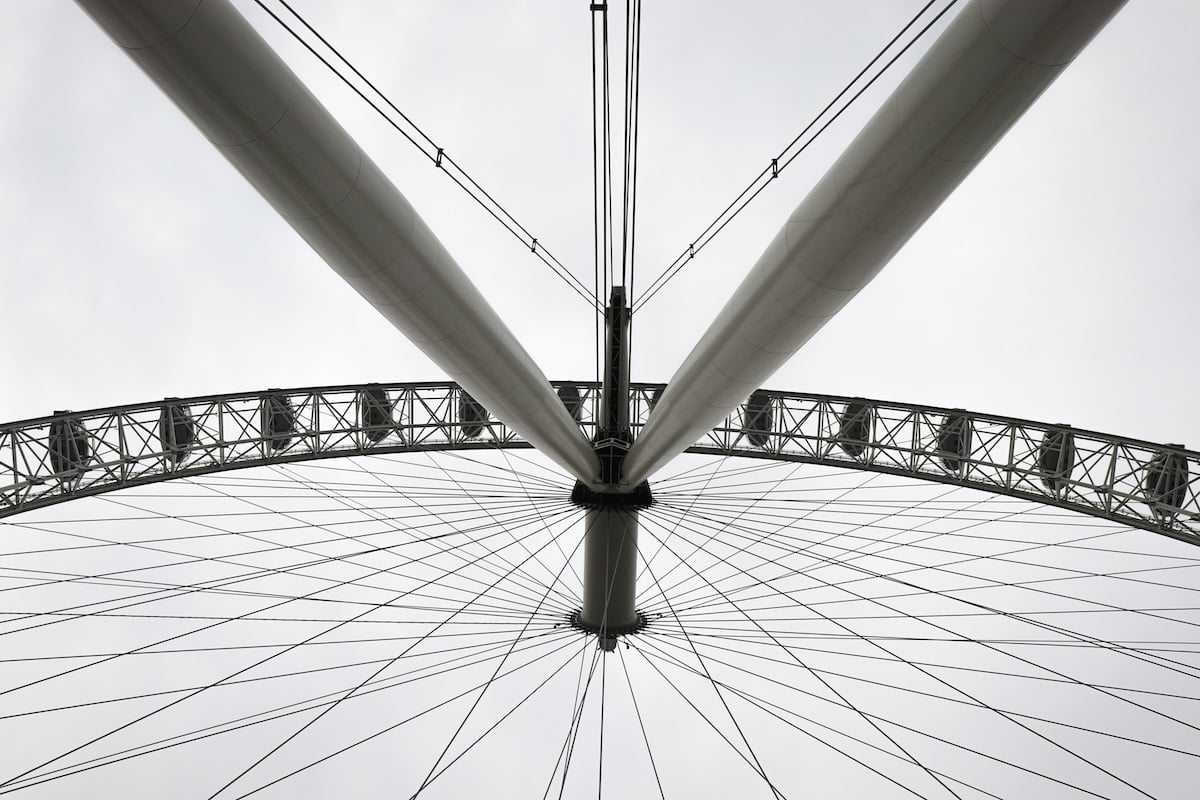
Symmetry
Symmetry is a powerful tool in photography that can turn simple photos into eye-catching compositions. It’s everywhere, from architecture to landscapes to still life. By understanding symmetry, you can find potential in the simplest things and create engaging images.
There are four common types of symmetry: vertical, horizontal, radial, and reflective. Vertical symmetry is the most common, where both sides of a vertical line are the same.
Horizontal symmetry is often used in landscape photography, especially with bodies of water. Radial symmetry involves circular shapes with repeating patterns, while reflective symmetry is all about capturing reflections in water, glass, or buildings.
To capture symmetry, a tripod, bubble level, and shutter remote can be helpful tools. You can also create artificial symmetry using editing software. For inspiration, look for symmetry at events, create your own symmetrical lines, take self-portraits, photograph animals or buildings, or challenge yourself with smartphone photography.
Symmetry in photography is a fun and creative way to improve your skills and find beauty in the world around you.
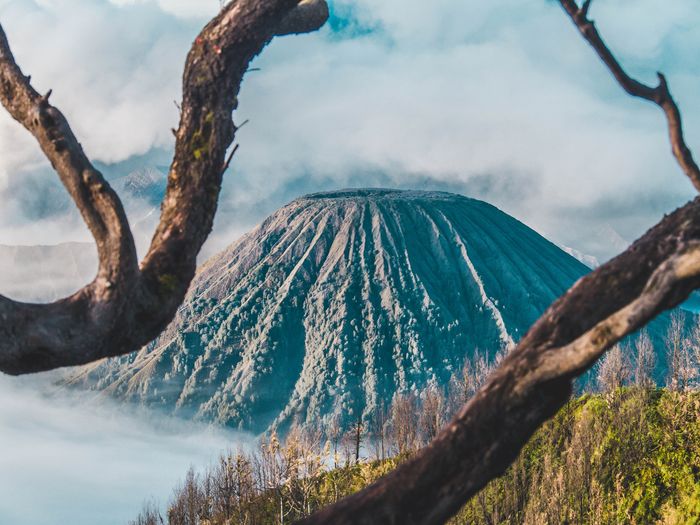
Depth
Adding depth to your photos makes them more interesting and engaging. One effective way is to use the rule of thirds by placing your subject off-center, leaving space in the background. This creates a sense of depth between the foreground and background.
Framing your subject using natural elements like doorways or arches also adds depth. The difference in focus between the frame and the distant background reinforces this effect. Converging lines, like roads or paths, draw the viewer’s eye into the distance, creating a strong feeling of depth.
Vertical lines, such as trees or buildings, can also create depth when placed at different distances from the camera. The farther away they are, the smaller they appear.
If you’d like to learn more ways to add depth to a photo with our full tutorial.

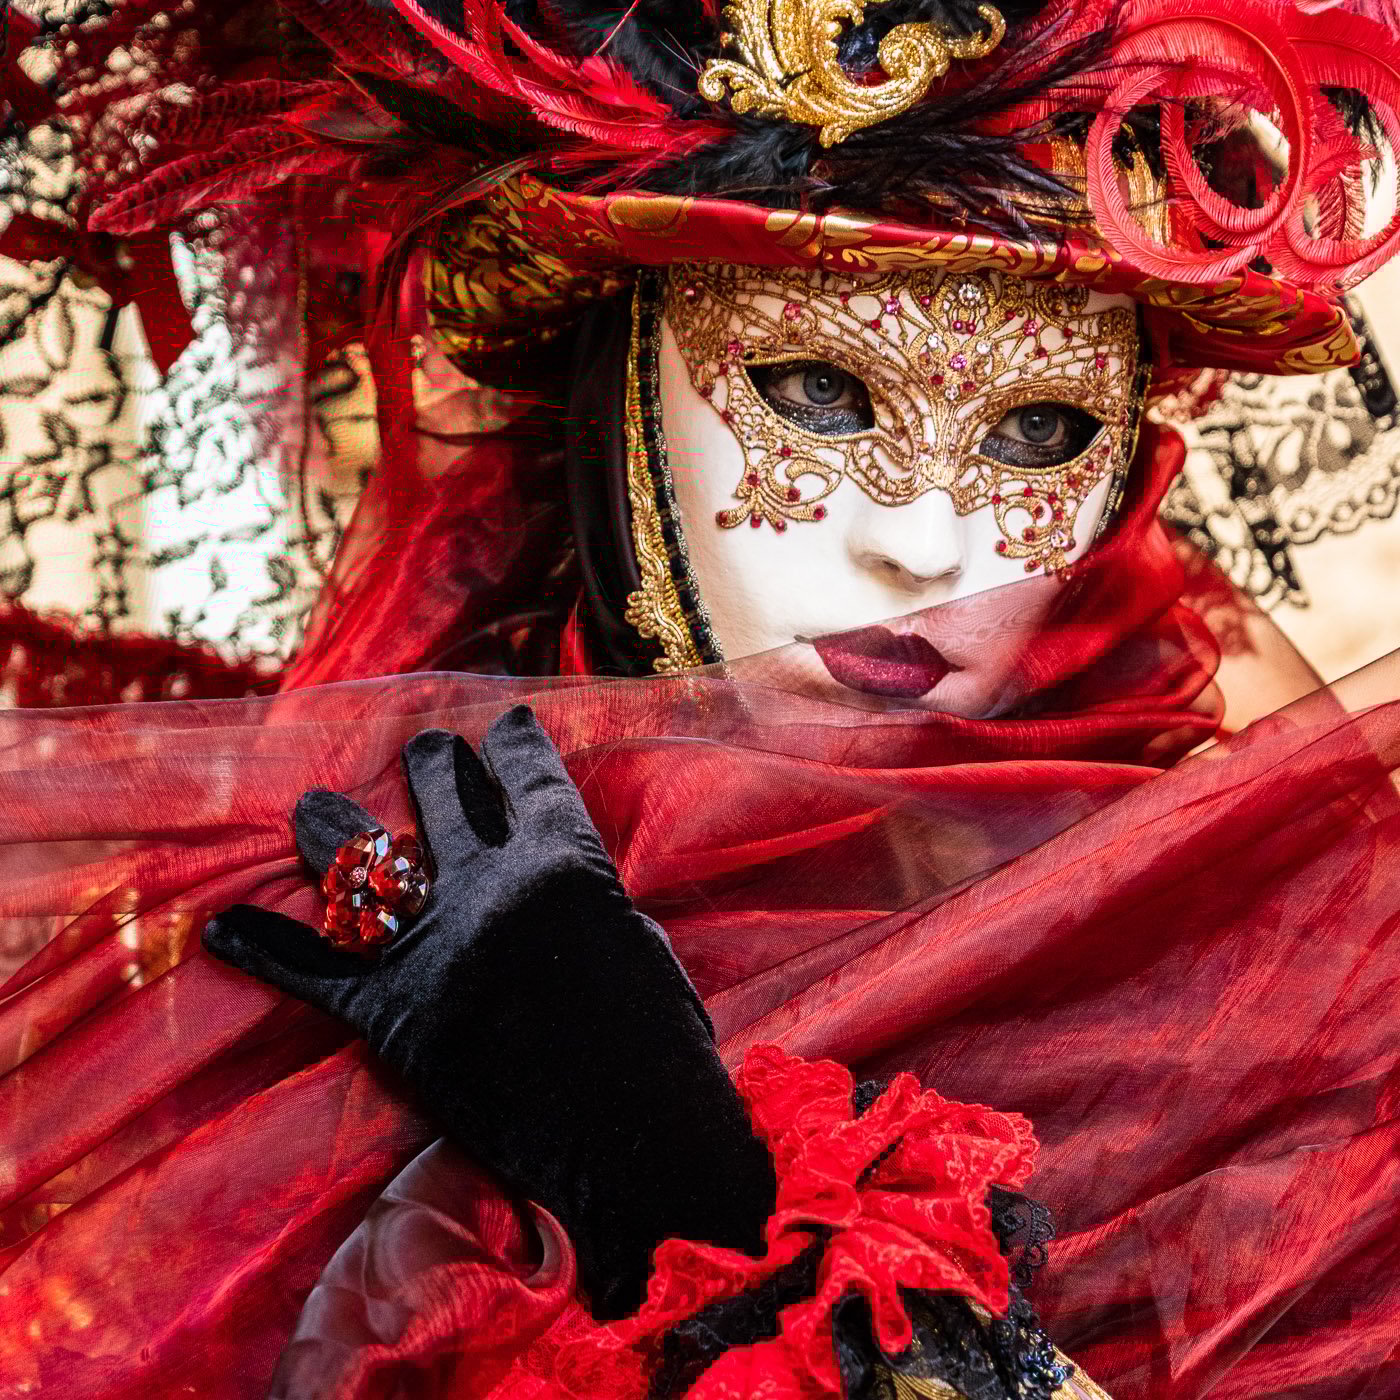
Contrast
Contrast is a key element in photography that can greatly improve your images. It refers to the difference between the elements that form a picture, such as changes in tones or colors.
There are various types of contrast, including color, tonal, and conceptual. Color contrast involves combining colors that are opposite on the color wheel, like red and green.
Tonal contrast is the difference in brightness between the dark and light areas of a photo. Conceptual contrast is more abstract and involves putting together unexpected elements to tell a story.
You can use contrast to convey a particular mood in your images. High contrast photos have an edgy, strong feel, while low contrast images are dreamier.
Learn more about contrast in photography in our full article on the subject.
Visual Weight
Visual weight is an important concept in photography composition. It refers to how much certain elements in a frame draw the viewer’s attention. Bigger objects, bold colors, high contrast, and areas in focus tend to have more visual weight.
You can use visual weight to create balance in your photos. Try placing the main subject off-center and use other elements like textures or people to balance the composition. Leading lines can also guide the viewer’s eye through the frame.
Understanding visual weight will help you make photos that are more engaging and tell a story.
check out this in-depth article to learn more about visual weight.
Background
A good photography background can make your photos more interesting and engaging. One way to create an appealing background is by using bokeh, which is the soft, out-of-focus areas in a photo. You can achieve this effect by using a wide aperture and having a close subject with a distant background.
Another way to make your backgrounds more interesting is by using lights. When light shines directly into the camera’s lens, you can create cool ‘star’ effects on the light source. This not only illuminates the background but also provides an interesting detail to your photo.
If you’re shooting at night, you may need to raise your ISO to reveal more detail in the background. This can help attract the viewer’s attention to the finer details in your photo.
We have a full article on photography background. It’s packed with even more information, so be sure to click the link if you’re interested.
Timing
Capturing the perfect moment in a photo is all about timing. The best photographers know how to be in the right place at the right time to get that one-of-a-kind shot.
From a snowboarder using the moon as a stepping stone to a crocodile catching its dinner, these images showcase the power of perfect timing. A volcano eruption paired with a full moon creates a magical scene, while a well-timed shot of a dog catching a treat brings a smile to your face.
Whether it’s taking advantage of forced perspective or simply being ready to click the shutter at the right instant, timing is key. If you want to see more examples of perfectly timed photos, there are plenty to inspire you.

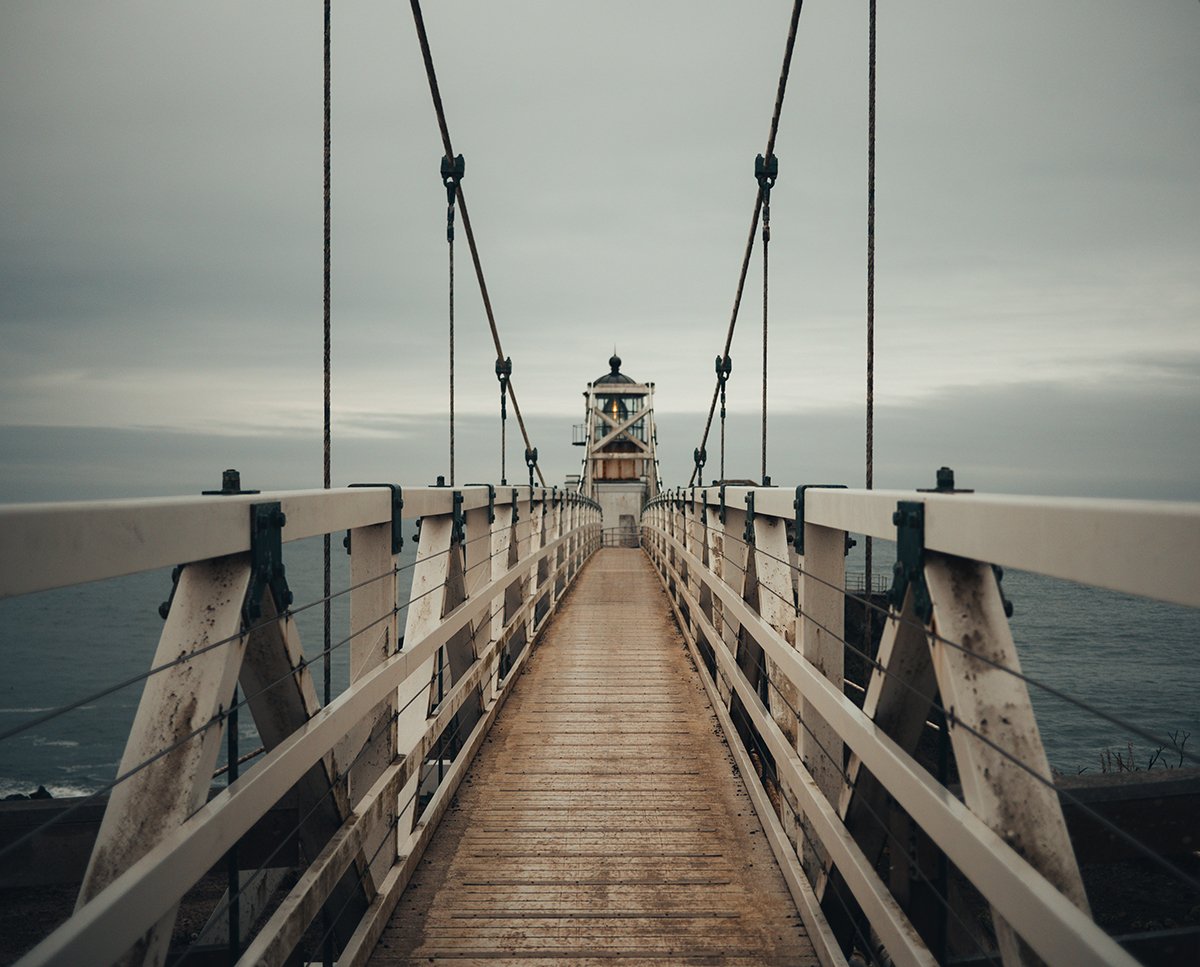
Centre
Here are some tips for using central composition in your photography:
Place your subject in the center of the frame to create symmetry. This works well for architecture and portraits. It can also help simplify your composition.
A central composition draws attention to your subject, especially in busy scenes. Pick one main subject from a group and place it in the middle of the frame to engage the viewer.
You can create a sense of depth with central composition. Balance the space around your main subject and include other elements to enhance perspective.
Combine central composition with other techniques to compose a strong image. Experiment with different rules to see what works best.

Triangles
Triangles are a powerful tool in photography composition. They guide the viewer’s gaze across the frame, directing attention from one point to another. By grouping three points of interest, you encourage the viewer to explore your image longer.
Triangles can be used to portray stability, aggression, or instability. Implied triangles are the most common, where the shape is suggested by the arrangement of elements rather than being explicitly drawn. Converging lines, like those found in architectural photos, often create triangles that extend beyond the frame.
Triangles can also be used to create a sense of instability or to focus attention on a specific subject. When photographing multiple subjects, arranging them in a triangular composition can lead the viewer’s eye through the image.
For more tips on using triangles in photography, check out this in-depth guide.
Framing
Framing is another important aspect of photography composition. The art of framing is where you decide what to include and what not to include in your image. There are elements of placement within framing, and you can incorporate other compositional concepts.
Let’s look at framing as a compositional tool in more detail. Click the links for even more information.
Better Framing
Framing is a powerful technique in photography that can elevate your compositions. It involves using elements within the scene to create a frame around your subject, drawing the viewer’s eye to the focal point.
One effective way to frame your shots is by using natural elements like doors, windows, or even branches and leaves. These elements can create a sense of depth and context, while also highlighting your subject.
Another option is to use light and shadows to create a frame, such as shooting through a dark doorway towards a brightly lit subject.
When framing people, you can ask your subject to frame themselves using their hands or arms. This creates a natural, flattering frame that emphasizes their features.
Reflections are another creative way to frame your shots, whether it’s using a window, puddle, or mirror to create a unique perspective.
To learn more about the art of framing photography, explore the techniques and examples that can help you create stunning, well-composed images.

Fill the Frame
Filling the frame is a simple way to improve your photography composition. It means getting close to your subject so it takes up most of the image. This helps bring focus to the main subject.
You can fill the frame by using a zoom lens or moving closer to your subject. A zoom lens lets you get close even if you can’t move closer. But moving closer can give you more angles and let you interact with your subject.
Cropping your image in editing is another way to fill the frame. Identify the most important parts of your image and crop out the rest. Use the rule of thirds or other composition rules to help you decide where to crop.
If you want to learn more about how to fill the frame, our full article is the perfect starting point.
Frame Within a Frame
Using a frame within a frame is a great way to lead your viewer’s eyes to the subject of your photo. This technique adds depth and context to the image. To use this method, find a shape in the foreground that will “hold” your subject.
You can also use background elements to frame your subject. Look for buildings or other structures that reinforce the subject and guide the viewer’s eyes. Even half frames can be effective when done right.
Framing is an excellent tool for adding depth to your photos. Use a shallow depth of field to accentuate the sense of depth. You can also create depth by using multiple frames within the image. Repeating frames that diminish in size as they get farther away can draw the eye to a single point.
To learn more about the frame within a frame technique, check out this in-depth article.
Light and Shadow
Light and shadow are two powerful tools in photography composition. Lights and shadows great contrast and lines for dynamic shapes. They also add depth and can affect the mood of your image. Learning how to use them and what to look for is a great way to improve your composition skills.
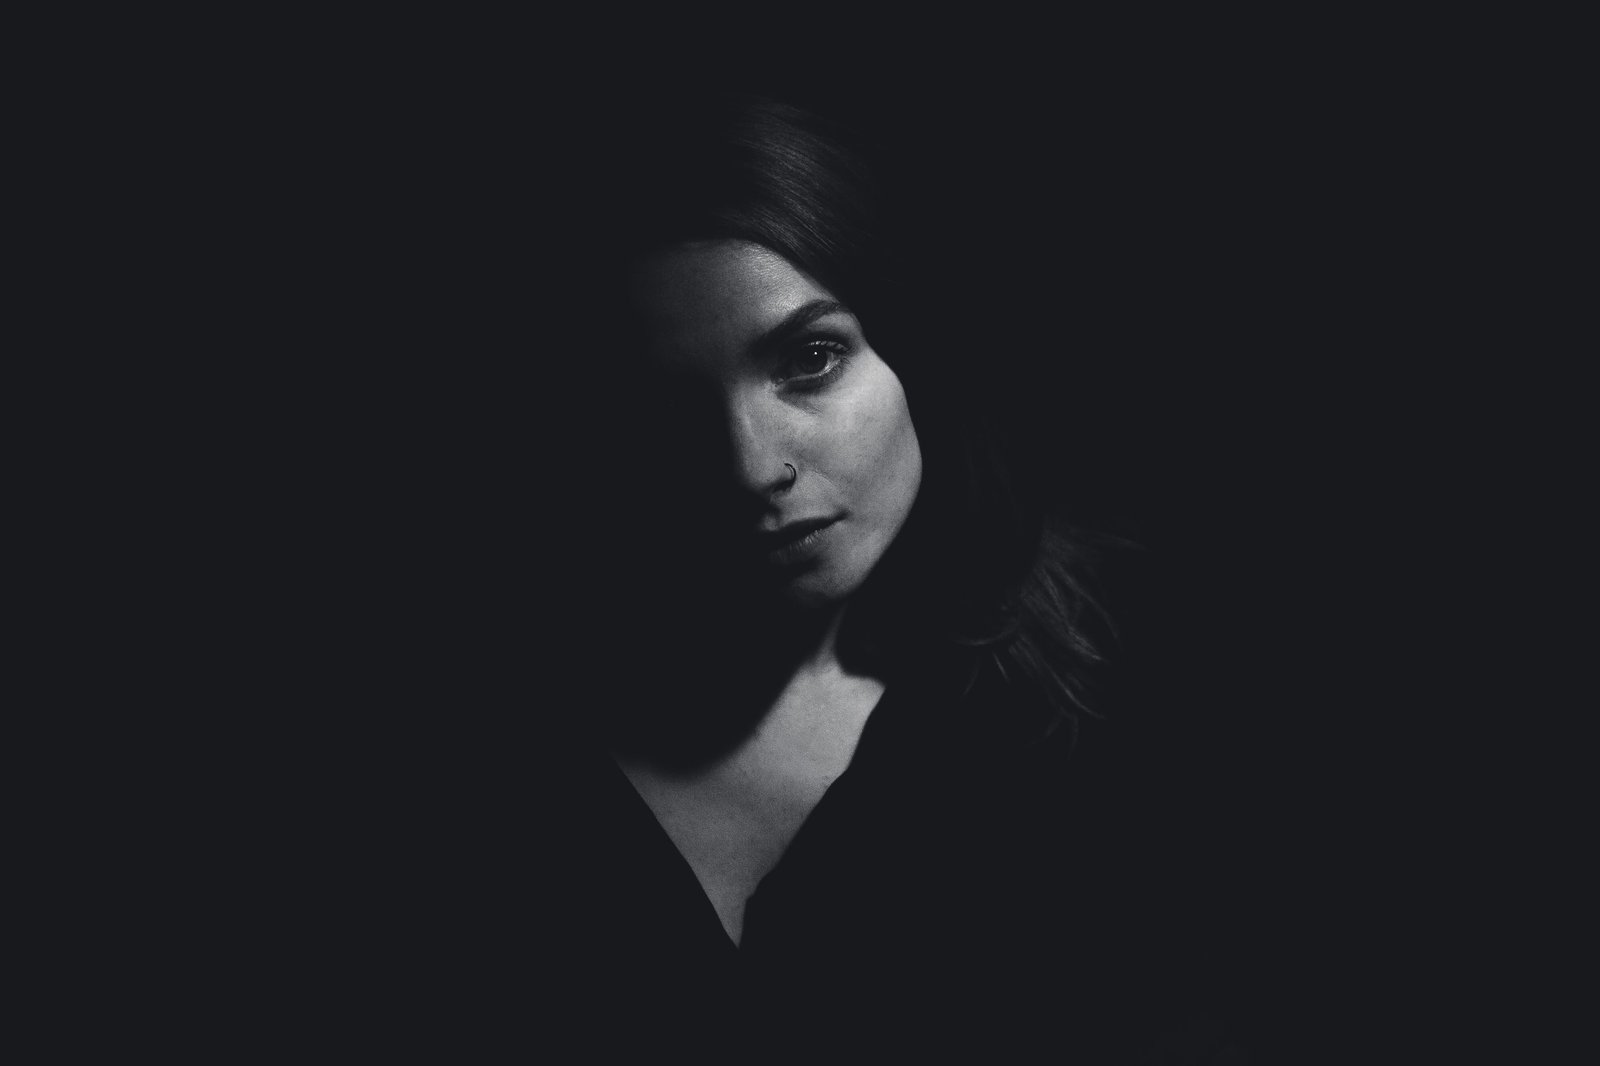
Abstract
Light and shadow are essential elements in abstract photography. By focusing on these qualities, photographers can create stunning compositions that explore form and depth. Shadows shape light and emphasize it organically, adding drama and interest to an image.
Deliberately incorporating shadows into your abstract photos can direct the viewer’s attention, create focal points, and set the mood. Hard shadow edges evoke a sense of immediacy, while softer edges suggest a more subdued atmosphere. Isolating a shadow against a bright background can result in striking abstract images.
Shadows also reveal texture, adding a new layer of realism to your photos. The softness of a feather can be enhanced by the organic quality of its shadows, while rough textures can be juxtaposed with soft shadows for contrast.
By using shadows to reinforce texture, you can create dynamic and expressive abstract photography that captures both light and shadow in their diverse forms.
Check out our full light and shadow post for more information.
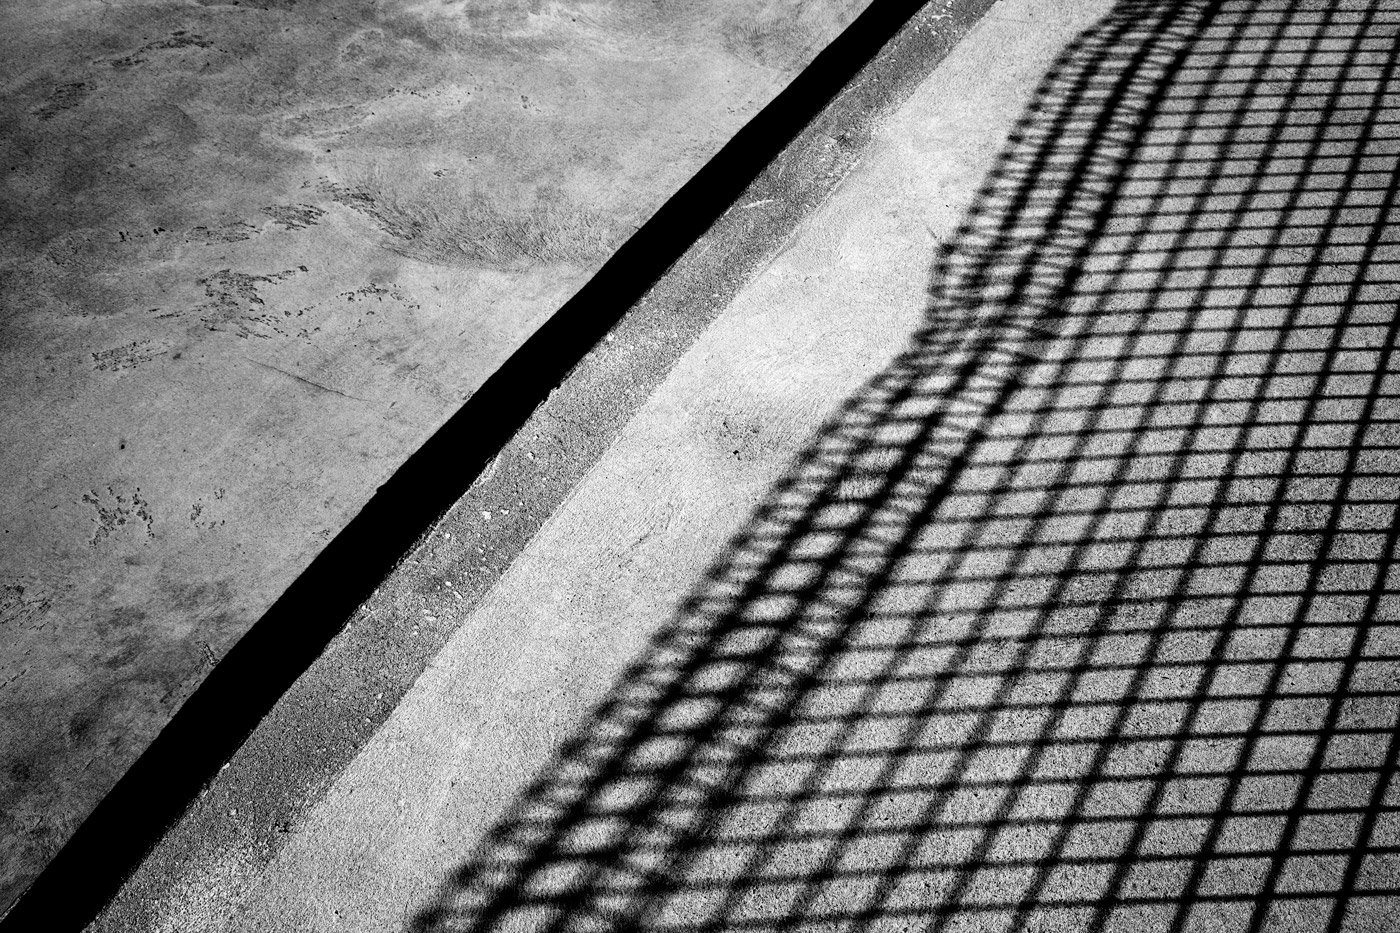
Shadows
Shadow photography can make your photos more dramatic if you know how to use light and shadows. Shoot during the golden hour when the sun is low on the horizon, casting long shadows. You can also experiment with harsh sunlight when the sun is high in the sky, creating sharp contrasts and patterns.
Artificial light sources like street lights and neon signs are great for shadow photography at night. Look for objects with distinctive shapes to create fun, recognizable shadows in your images.
Improve your shadow photography by learning about chiaroscuro, the contrast between light and dark. Use hard, directional lighting to highlight details and create depth.
Try shadow photography lighting techniques like Rembrandt lighting and split lighting to add drama to your portraits. Shoot in black and white to make the contrast between light and shadows more prominent.
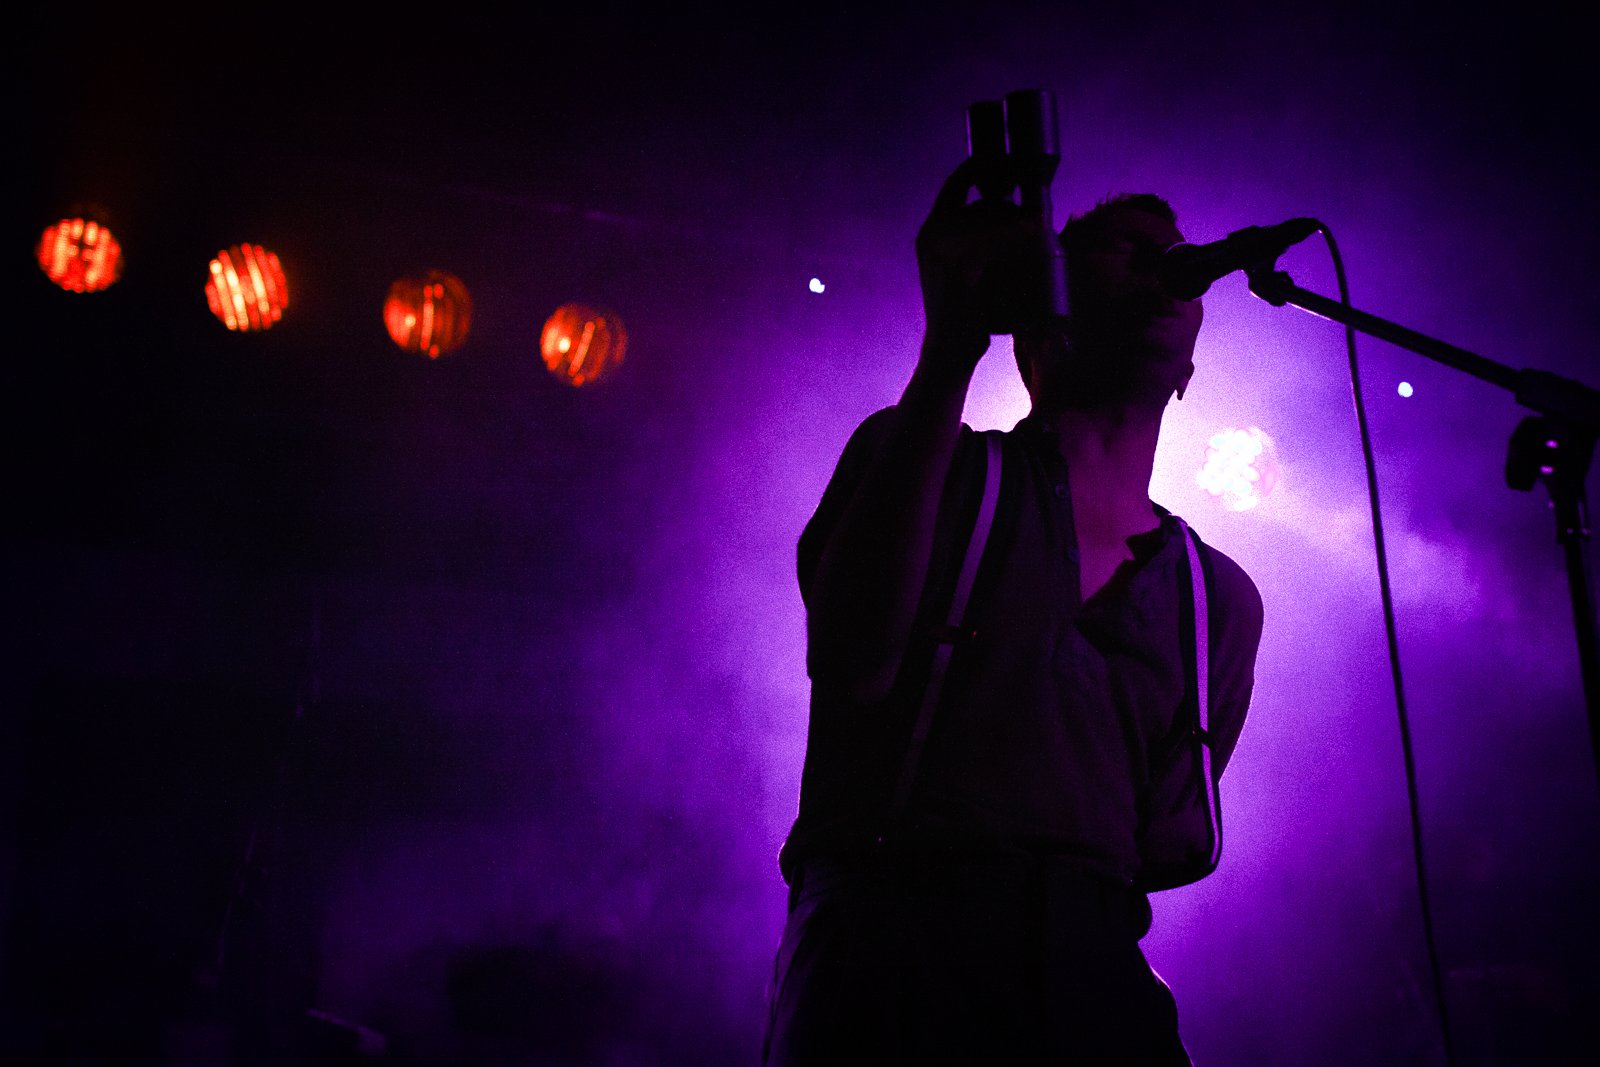
Silhouettes
Silhouette photography is a dramatic and mysterious style that conceals the details of a subject against a bright background. To create a silhouette, position your subject between the camera and a strong light source like the sun. Use spot metering mode to expose for the background, making the subject dark.
Choose a subject with a strong, identifiable shape since the focus will be on its outline rather than details. People make great subjects for silhouette photography, especially when photographed in profile. Buildings and objects can also work well if they have distinct shapes that stand out from the horizon.
For the best results, use a relatively narrow aperture around f/11 and adjust your exposure compensation to darken the image if needed. Don’t use flash, as it will bring out unwanted details in the subject.
With these simple techniques, you can turn challenging lighting conditions into opportunities for stunning silhouette photography.