The high pass filter is one of the most commonly used filters in Photoshop. It’s a tool that can be used to sharpen images, and it’s also great for removing noise from photos. In this tutorial, we’ll show you how to use the high pass filter in Photoshop to improve your photos.
Using the High Pass Filter in Photoshop: Why is It Beneficial?
The high pass filter isn’t in the sharpening menu. But there are a few reasons why should you use it for sharpening.
First of all, it’s easier to use than other sharpening tools. There’s only one slider to worry about.
Also, the high pass filter is an edge-detection filter. Why is that important? Because sharpening a photo is about increasing edge contrast.
To find these edges, Photoshop looks for a sudden change in brightness between neighboring pixels. The high pass filter was developed to do just that.
How to Use the High Pass Filter to Sharpen an Image
Let’s sharpen an image in Photoshop with the high pass filter.
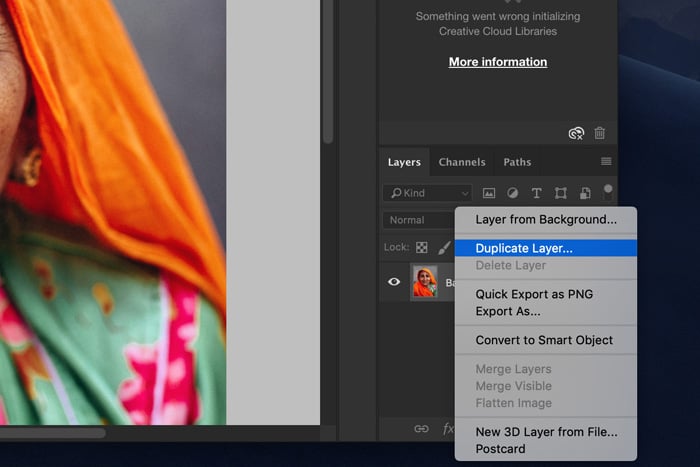
Step 1: Duplicate the Background Layer
First of all, duplicate the layer by using the shortcut Cmd + J (Ctrl + J for windows).
You can also right-click on the layer and select "Duplicate Layer…". Click "OK" when a new window pops up.
Zoom in to 100%. This is important because we don’t want to apply too much sharpening.
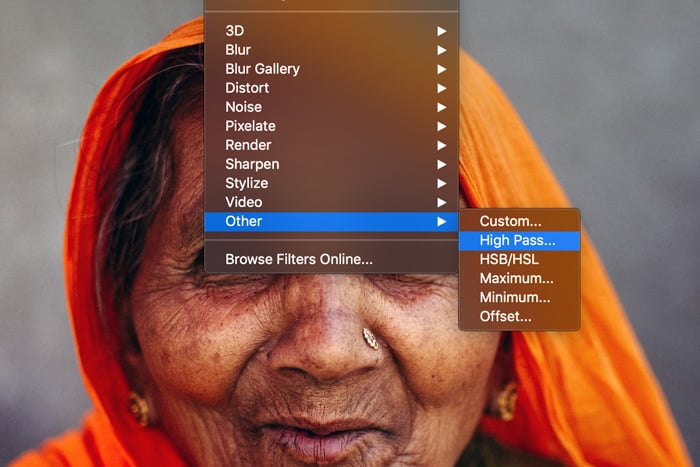
Step 2: Apply the High Pass Filter
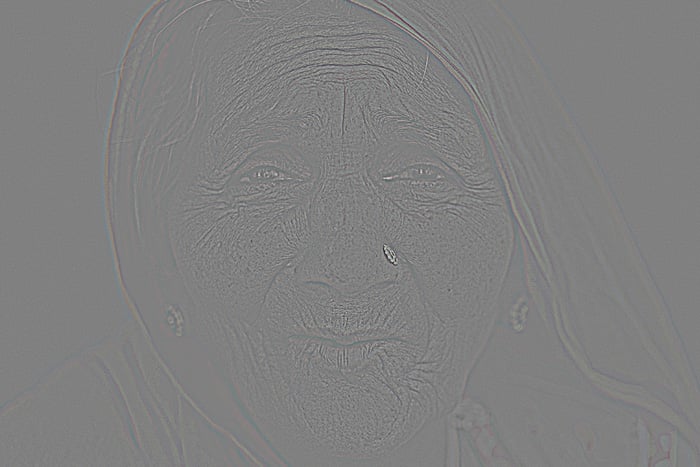
Make sure the new layer is selected. Go to Filter > Other and select "High Pass…".
Your photo will turn grey and you’ll be able to see the edges that the high pass filter detects.
Step 3: Adjust the Amount of Sharpening
The amount of sharpening you can do depends on the photo and size of the photo. It’s best to experiment with different settings to avoid unwanted artifacts in your photo. Too much sharpening will look unnatural.
You can use the preview as a guide. Usually, you’ll get the best results when you see thin black lines and no white. Sometimes the lines are barely visible.
White areas will create unwanted halos in the end result. In my example 0.9 works fine.
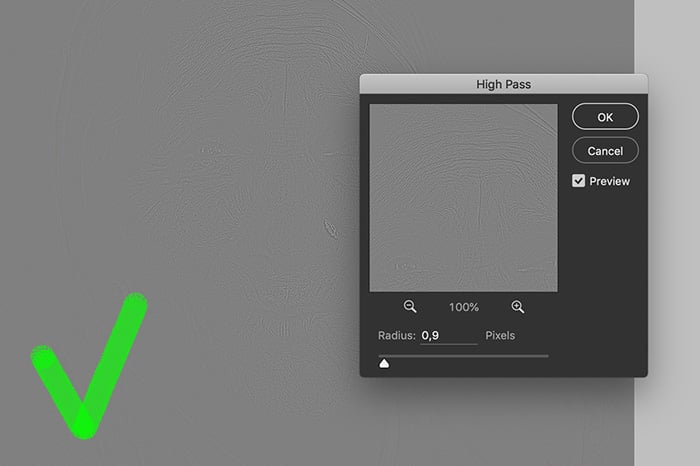

Click OK when you’re ready.
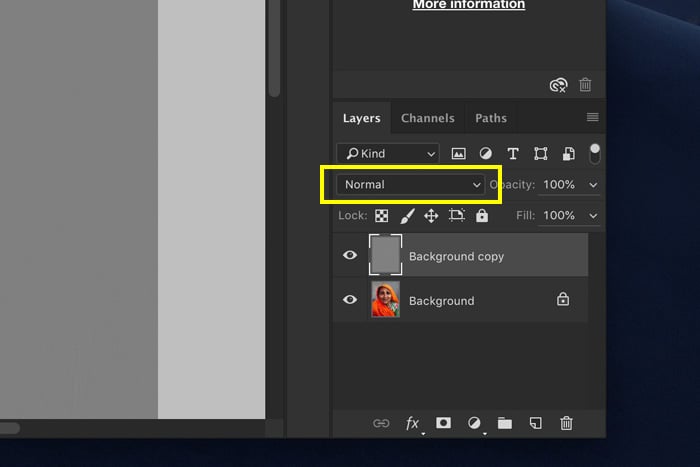
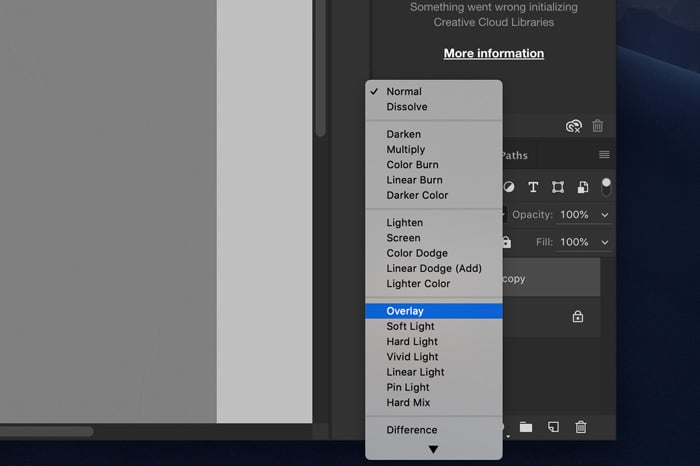
Step 4: Set the Blending Mode
To create the sharpening effect, we need to change the blending mode of the layer.
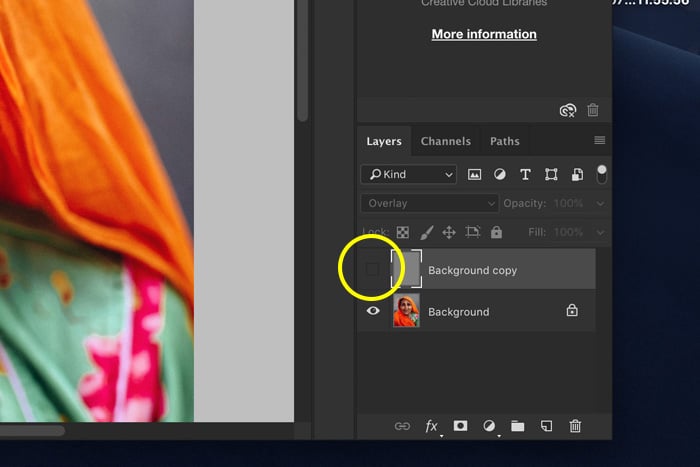
Open the Blending Mode dropdown menu and set the blending mode to Overlay. You’ll see color again and the photo is now sharpened.
You can double-check the result by turning the layer with the high pass filter on and off.
Remember, we’re looking for a subtle and natural sharpening.
Depending on your photo, you can experiment with different blending modes.
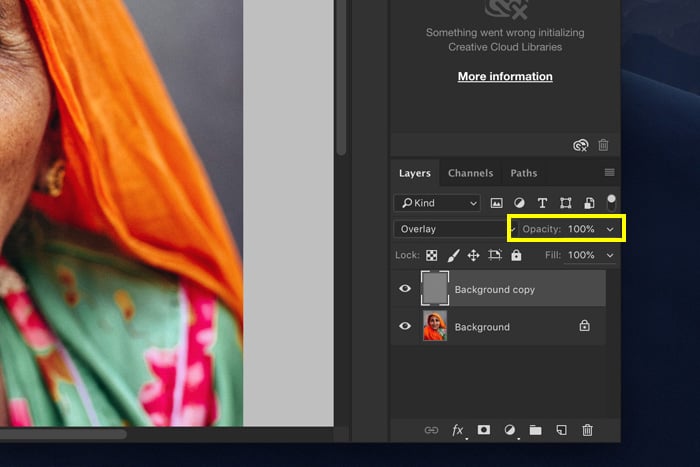
You can even change the opacity of the layer to soften the sharpening.
We’ve created a new layer so this technique is also non-destructive. This means that we always have the original image available if the end result is not as expected.
This technique even allows you to use masking. With masks, you can apply the sharpening effect only to certain areas of the photo.
Conclusion
As always, there are many tools available in Photoshop to do the same task. If you want to sharpen an image, next time, try the high pass filter.
It’s not in the Sharpening menu but it does a great job and it’s easy to use. You’ll find out in no time which settings work best for your photos.
Why not check out how to use grids and guides in Photoshop, use PS brushes, or create surreal levitation photography next!


