The switch from film to digital has created thousands of creative possibilities. And levitation photography is one of those fun and surreal things you must try.
Today, I’ll explain exactly how to create the effect of a floating person in your photo.
Gear for Levitation Photography
There are a few different ways to create the effect of a floating person. Here’s what you need for our tutorial.
First, you’ll need a tripod to mount your camera on. It’s possible to do it without one, but it’s not recommended. It’s easy to lose control over your shot when you place it on a table or something else.
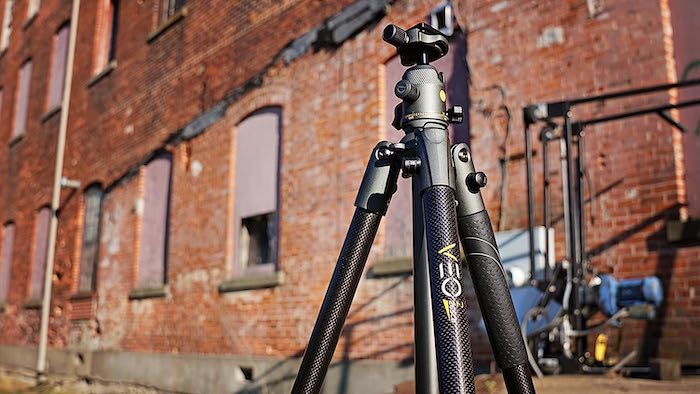
We recommend the Vanguard VEO 2 tripod if you’re looking for one.
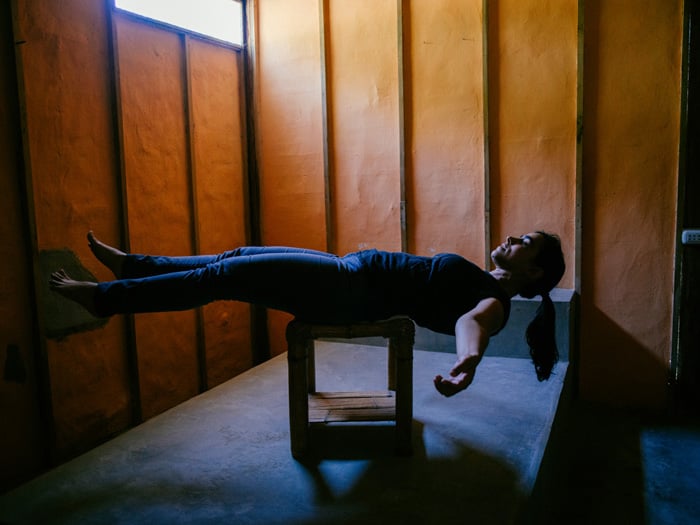
For best results, your model needs to be in a horizontal position. So you also need a stool or chair to support your subject.
If you don’t have one, you can make your subject jump for a vertical shot instead. But the result won’t look nearly as good.
And finally, you’ll need Photoshop or similar editing software to make that support disappear. (There are free editing software options out there, too.)
3 Details to Consider Before You Start
There are three details to make this process easier, especially if it’s your first try at levitation photography.
1. Best Clothes for Subjects to Wear
Tell your model to wear tight-fitting clothes without busy patterns. This will make editing out the chair or stool easier in Photoshop.
2. Best Light to Use
Use soft light. Shooting in harsh sunlight will make it really tough to edit out the support.
Also, creating a realistic shadow in bright sunlight is a lot more difficult. So shoot on a cloudy day or indoors with diffuse light from a window.
Shot with a Fujifilm X-H2S. © Seiya Maeda (Unsplash)
3. Best Camera Angle
A low camera angle works best. But don’t go lower than your model. That would make it impossible to edit out the stool or chair because parts of the body will be blocked.
I find that an angle slightly above your subject works best.
How to Create Surreal Levitation Photography
Okay, time for the shoot itself. It’s actually very simple. You need to create two photos. One with your subject lying on a chair or stool as if they’re floating. And one with just the background or room.
We’ll then combine both photos in Photoshop. This way, we can edit out the chair or stool.
I did this shoot in our guesthouse room in Peru. So any place will work. Use your creativity!
Step 1: Prepare the Shot
Set up your tripod and frame the shot. Make sure your model is in the correct position when doing this. Their body shouldn’t be blocking the chair or stool.
Then pick an angle with the idea that you will edit out the support in the back of your mind. This will prevent mistakes and having to do this process over again.
Set your camera to manual focus and focus on the model. When the focus is how you want it, don’t touch it again.
Step 2: Take a Photo With a Model
The easiest way to start is to have just one pose with a model. Tell your model to lift their feet and hands and take a few different shots. You can pick the best one afterward.
But when you get the hang of levitation photography, you can try different things. Take extra shots for facial expressions or add props.
You can then merge all these shots to create the perfect image. For now, though, we’ll use one simple shot of the model.
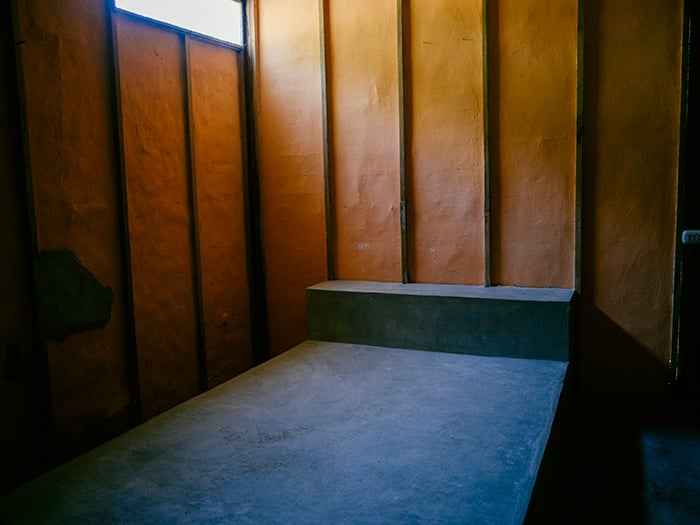
Step 3: Take a Photo Without the Model
After you think you have a photo to create the levitation photo, take a shot without the model and stool (or chair). But make sure the focus point and light stay the same!
And that’s it. Now select the best photo with the model. Look for the most realistic posture.
How to Edit Levitation Photography
Alright, it’s time to create the magical levitation. We’re going to combine both photos and create one. With Photoshop, it’s easier than you think.
Before you start, make sure both images are color corrected for the best results. Sometimes, the light and color of the light change slightly. You need to correct this first in either Lightroom or Photoshop.
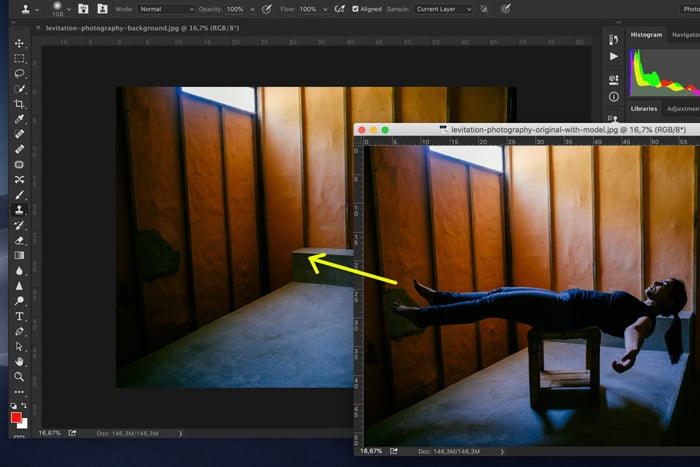
Step 1: Put the Images Together
Open the background image without the model first. Then, open the image with your model and drag it onto the background image.
If you used a tripod, they should line up perfectly.
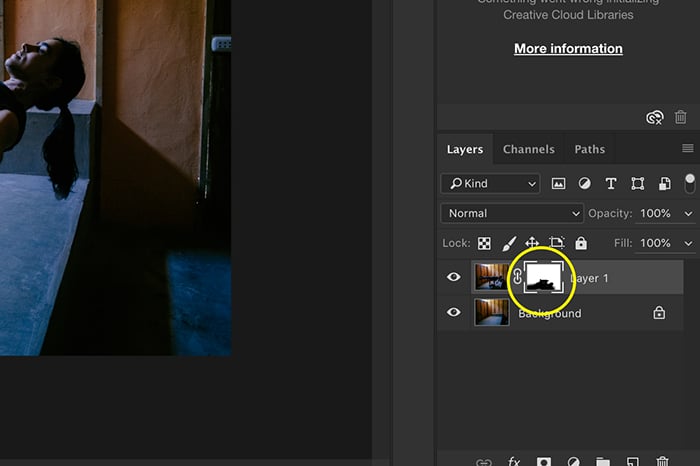
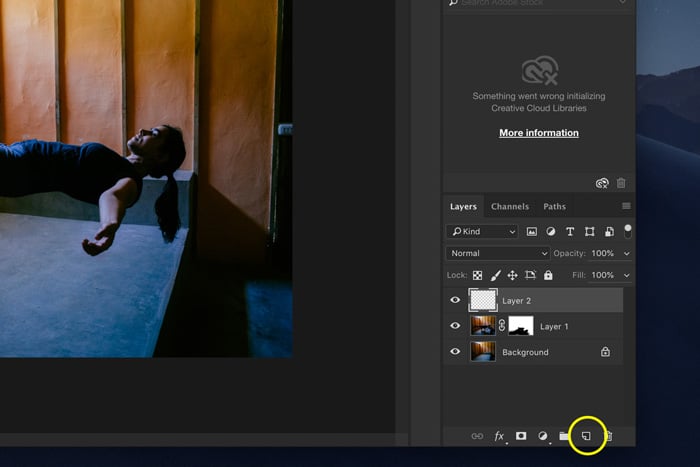
Step 2: Create a Layer Mask
Select the layer of the photo with the model and click the “Add layer mask” icon (a white rectangle with a black circle in the middle).
Photoshop’s “Add a layer mask” icon on the bottom right
You’ll see a layer mask thumbnail appear next to the layer icon.

The added layer mask
Step 3: Remove the Stool or Chair
Now, we’ll remove the support prop by masking. Make sure you’ve selected the layer mask thumbnail.
Then, select the Brush tool (B) and start painting over your photo to remove the stool, chair, and unwanted shadows.
Ensure the brush’s color is set to black to do this. And use different sizes and a mix of hard and soft brushes to get the best result.
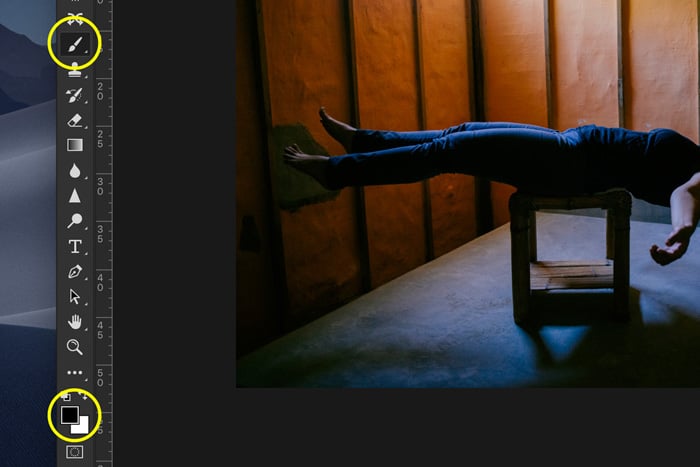
Selecting Photoshop’s Brush tool (top) and setting it to black with the color picker (bottom)
You can click on the Brush Preset Picker icon in the top menu. (It’s on the left and shows the brush size number.) You can experiment with sizes and hardness in the dropdown menu.
Closer to the body, you need to use a harder brush. This leaves clearer and more defined edges.
In the mask thumbnail, you will see black-and-white areas. The black areas represent the parts in the photo you’ve removed.
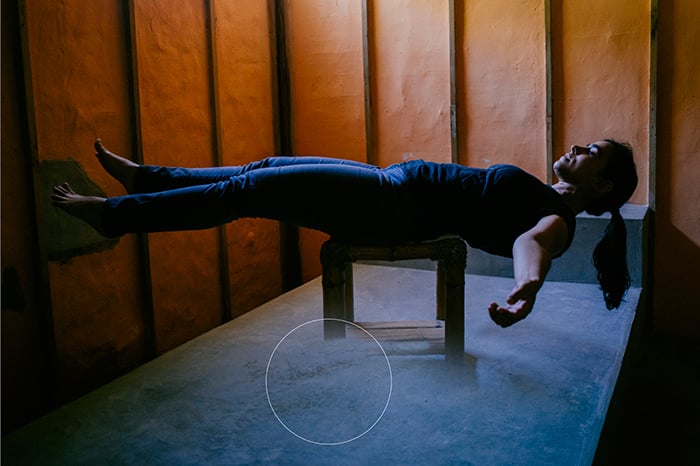
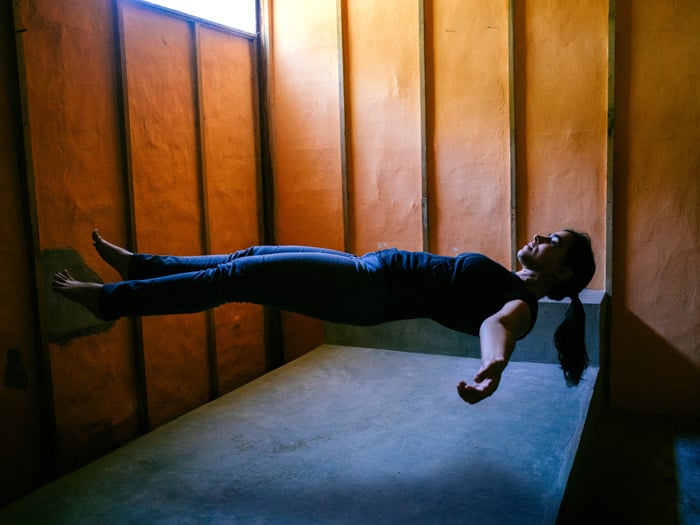
Step 4: Add a Shadow
Add a shadow of your subject to make the floating person look more realistic. Select the “Create new layer” icon to add a new layer.
Make sure the new layer is selected, and use the Brush tool again to paint a shadow.
Remember I told you to use soft light when shooting? You’ll get the best results with a soft brush. And the color of the shadow will depend on the color of the floor.
Usually, black will work best. If the floor in your photo has a particular color, you can add some of that color to the shadow (in the color picker) for a more natural result.
It really is a matter of trying out to see what looks best. You can use the original photo with the model for reference, by the way.
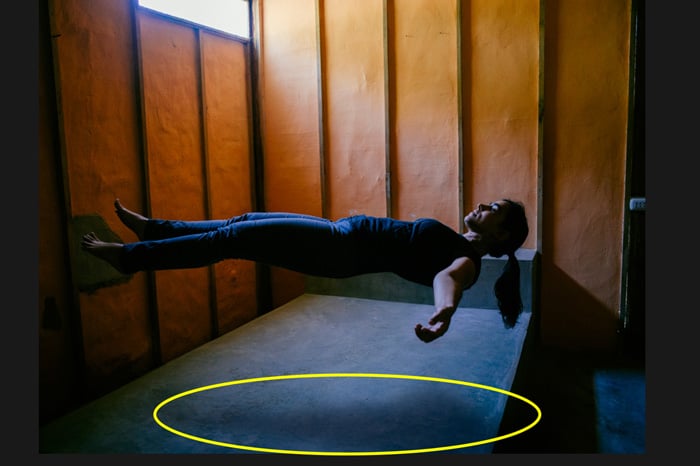
The added shadow
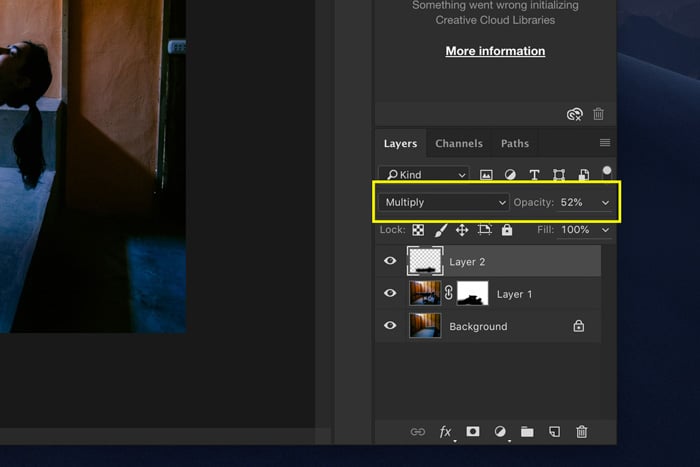
Step 5: Blending Mode
After you’ve painted the shadow’s shape, set the layer’s blending mode to “Multiply.” And change the opacity of the layer until the shadow looks natural.
Step 6: Shape the Shadow
Next, use Photoshop’s Eraser tool (E) to shape the shadow until it’s perfect. Try out soft and hard edges.
You can always undo it with Command+Z in macOS (Ctrl+Z in Windows).
Step 7: Crop, Flatten and Save
When you’re satisfied with the result, crop and flatten the image. (C for the Crop tool and Layer > Flatten Image in the top menu).
Before you save, you can adjust things like contrast and exposure. Then save, and you’re done. You’ve made your model float! Crazy!
Conclusion: How to Easily Create Surreal Levitation Photography
Levitation photography is easy if you have the right gear and prepare well for the shoot. Use a tripod for the best results, and tell your model what to wear.
Start with combining just two shots. And when you get the hang of it, add more details. You can add props floating in the air or use a fan to make the hair move.
The possibilities are endless, really. Now, let me see some of your creations!


