In this article, we give a step-by-step guide on how to scan a photo with your phone. We show you how to use two apps—Google Photos and Genius Scan. They are popular apps for photo scanning on your phone.
A desktop scanner may be the best way to create high-quality scans of your printed photos. But scanning documents using your phone’s camera is fast and easy.
We’ve also gathered useful tips to help you quickly create great digital scans of your favorite snapshots!
How to Scan a Photo With Google Photos
The main selling point of the free Google Photos app is that it allows you to scan photos without any glare. It’s a great feature, especially since glares are almost impossible to avoid when you scan a photo with your phone!
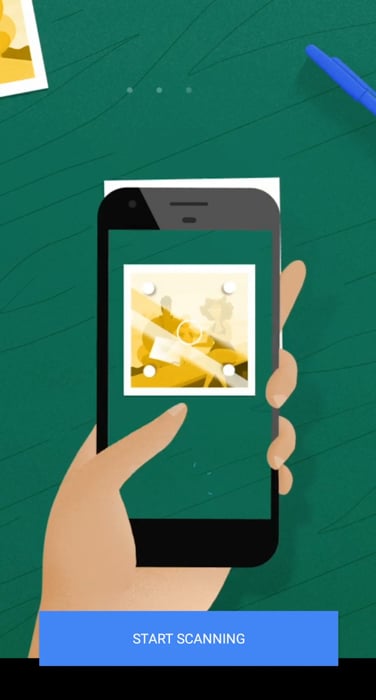
PhotoScan has a simple user interface that lets you scan a photo conveniently.
When you turn on the free Google Photos app, you’ll see a simple camera interface appear. It looks much like any other camera app. So it should feel familiar. There’s the shutter button in the middle, and the Flash and Magic Wand (for anti-glare) icons are beside it. And on the other side, you’ll find a thumbnail of your scanned photo.
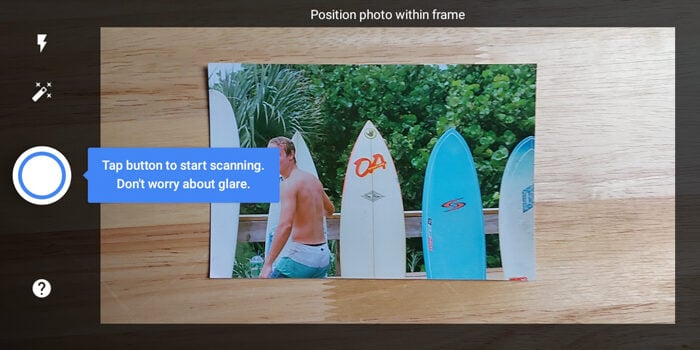
PhotoScan’s user interface is simple and intuitive because it looks like any other camera app.
Step 1: Use Flash and Anti-Glare to Adapt to the Lighting
Feel free to turn on the Flash icon if you’re in a dark room. But if you have enough light to illuminate your photo, keep it turned off.
The magic wand represents the anti-glare feature. Make sure you turn this on to ensure you don’t end up with bright spots in your photo.
Step 2: Follow the White Dots to Scan Your Image
After activating the features you need, it’s time to take a photo. Once you press the Record button, four white dots will appear. In the middle is an icon of a hollow circle with an arrow. To start scanning, follow the direction of the circle until it merges with all four dots.
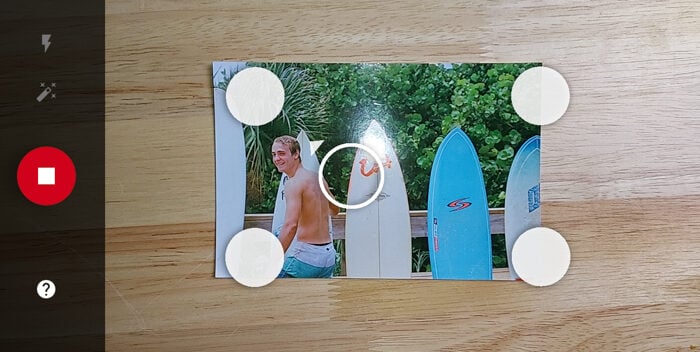
Aligning the four dots can be tricky at first, but you’ll get used to it after a few minutes.
Step 3: Crop and Rotate Your Scanned Image
Once you finish scanning, tap the scanned photo’s thumbnail to edit your file. You have the option to rotate it and adjust the corners (i.e., crop the image).
To crop your image, you’ll need to align the four dots of the Crop Tool to the corners of your photo. The app automatically shows a zoomed-in view of the edges so you can precisely crop your file.
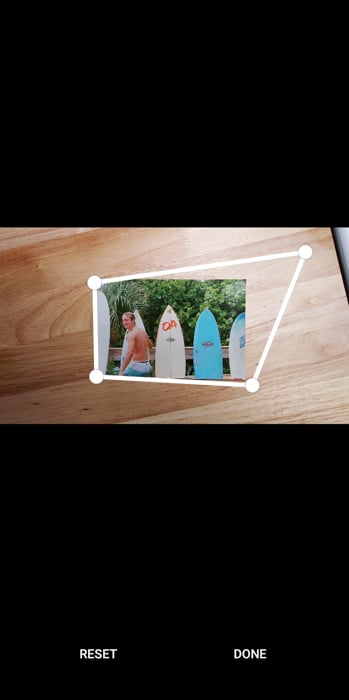
Don’t be surprised if your scan includes the table. You’re supposed to crop the photo after scanning.
Step 4: Save Your Digital Scan
Once you finish cropping your enhanced digital scans, all you have to do is save them, and that’s it!

The final scanned image from PhotoScan
How to Scan a Photo With Genius Scan
In many ways, Genius Scan works much like the Google Photos app. But it also allows you to create enhanced digital scans of other physical files. You can use it to scan documents, receipts, and multi-page paperwork, which it saves as a single PDF.
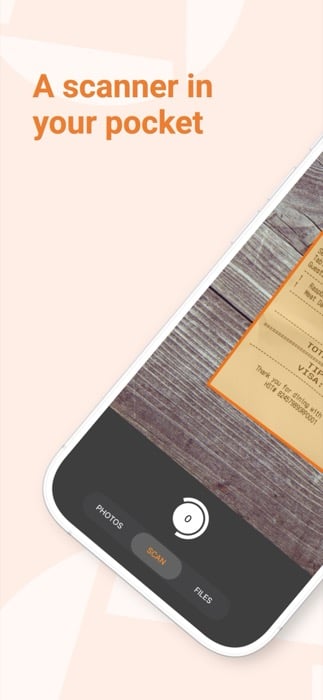
Genius Scan’s capture screen looks like a regular camera app, with its modes along the bottom.
Genius Scan is free to use for as long as you want. The paid Genius Scan Plus plan adds extras like text recognition (OCR), which can even pull contact details off business cards. But you don’t need any of that for photo scanning. The capture, editing, and export tools below are all in the free version.
Once the app opens, you’ll find a familiar camera interface with a shutter button on the screen and a selection of modes below. You can choose from Photos, Scan, and Files. Scan is the camera mode you’ll use to scan a photo. Photos and Files let you import existing pictures and PDFs instead.
Step 1: Select Scan Mode and Frame Your Photo
Tap Scan and hold your phone over the printed photo. Genius Scan automatically detects the edges of your picture against the background and draws an orange frame around it. All you have to do is make sure every corner of your printed photo sits inside the view.
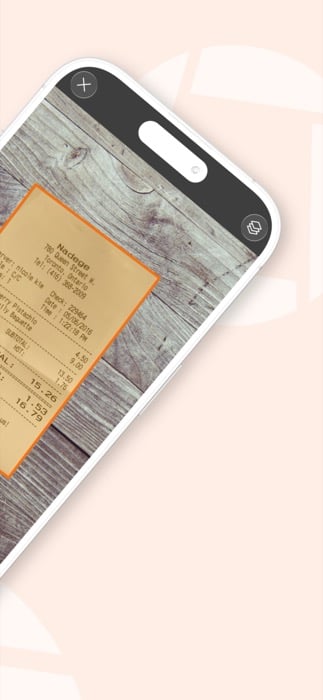
Genius Scan draws an orange frame around your print as soon as it detects the edges.
Genius Scan doesn’t have an anti-glare feature like Google Photos. So make sure your light source isn’t too close to the printed photo you want to scan to avoid glare.
Step 2: Press the Shutter Button to Capture the Scan
Once the orange frame locks onto your photo, pressing the shutter button captures the scan. The app crops the image to the frame and corrects the perspective automatically.
You don’t have to stop at one picture, either. Genius Scan’s batch scanning lets you capture one photo after another, and the counter on the shutter button keeps track of how many scans you’ve taken.
Step 3: Recrop and Pick a Filter to Clean Up Your Scan
After scanning, open your scan and select the Image tab to edit it. You can recrop the image and rotate it left or right. In most cases, all you’ll need is the Recrop tool to make sure the edges of your image look clean.
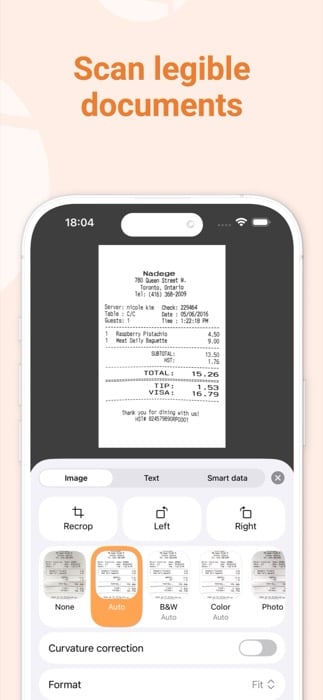
The editing tools let you recrop, rotate, and switch filters without retaking the scan.
You can also choose between the None, Auto, Black & White, Color, and Photo filters. For printed photos, pick the Photo filter. It’s the one designed for pictures rather than text documents.
Step 4: Export Your Photo Scan
When you’re happy with the scan, tap the Export icon. Genius Scan saves documents as PDFs by default. For a photo, tap the gear icon in the export options and switch the format to JPEG instead.
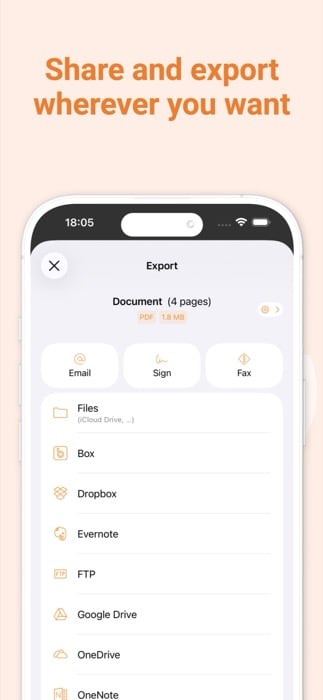
You can email your scan or send it straight to Files, Dropbox, Google Drive, and other services.
You can then send your photo scan by email or save it straight to the Photos app, Files, Dropbox, Google Drive, and other services.
Useful Tips on How to Scan a Photo With Your Phone
The simplest method to scan documents and images is to take photos using your phone’s camera. We’ll show you a few simple tips to help you achieve decent “scans.”
1. Look for Even Lighting for a Clear Scan
Lay your photo on a table near a window or a light source that produces even lighting. Remember that you need to illuminate the entire image and not just a part of it. Otherwise, you’ll end up with one side brighter than the other.

The secret to a good scan is even lighting.
Sometimes, getting an even illumination is impossible, especially when you’re using window lighting. So, to achieve the correct exposure, add a bounce card (i.e., white cardboard) on the other side of the picture opposite of the light source. Doing so allows you to bounce light back onto the picture.
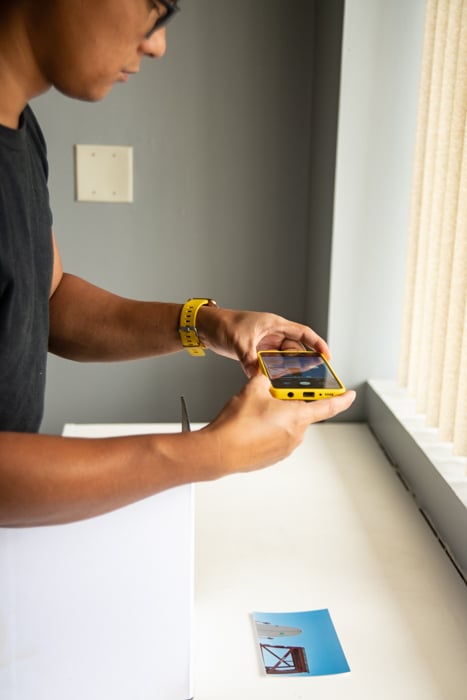
A bounce card helps create an even exposure.
2. Use Zoom to Avoid Casting Shadows
A crucial step when scanning photos with your phone is to use your zoom lens. If you get too close to the printed photo you want to scan, you’ll end up casting a shadow on the image. Zooming in eliminates this issue right away.

3. Use a Tripod if Taking Multiple Scans
If you’re only scanning one or two photos, you can handhold your camera while taking pictures. But if you’re working with multiple images, you may need to use a tripod with a horizontal mount. That way, you don’t have to readjust your angle and height all the time.
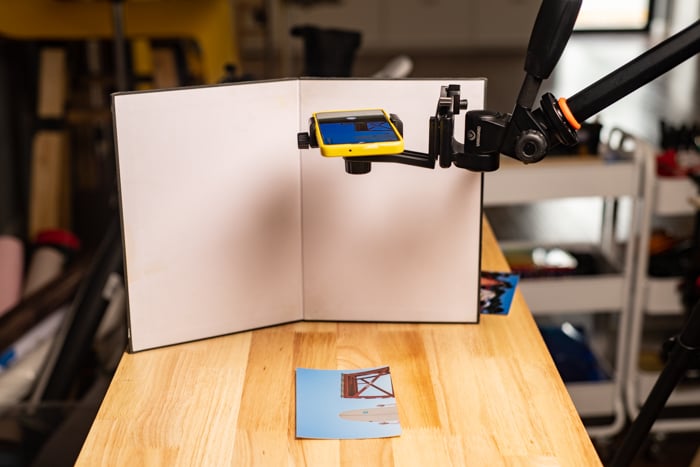
A tripod helps you scan quicker since you don’t have to hold your phone all the time.
Conclusion
Both Google PhotoScan and Genius Scan are free and reliable photo scanning apps.
If you only want to scan photos exclusively, then Google Photos would be the better option. But if you want to scan other documents apart from printed images, we recommend Genius Scan.