Projector photography involves projecting an image onto a person or an object for artistic effect. In this article, we’ll show you everything you’ll need to get started using a projector in different ways.
Projector Photography: What Type of Projector Do You Need?
With so many types of digital projectors out there, how do you know if the one you have or plan to buy is the right option for you? There are a few things that you’ll need to consider including brightness, size, and definition.
First, let's discuss the brightness. You need to look for a projector that has at least 3,500 Lumens. That way, your projected image will still be visible even when you're working with a different light source.
You can also work with options that only have as low as 2,000 Lumens. But with low light output, you'll have to work in a completely dark room and with slower shutter speed.
Another factor to consider is the definition of your projector. For photography, you don't need to get one that has 4K quality. What's important is that it produces images that are sharp enough for your photos. Also, it would help if the pixels it projects on the screen are small enough so they're not distracting.
Finally, you'll need to look at the size of your projector. Although you can always use big options, it would help a lot of you have something that's small enough for you to move around. That way, you can place it at any angle with ease.
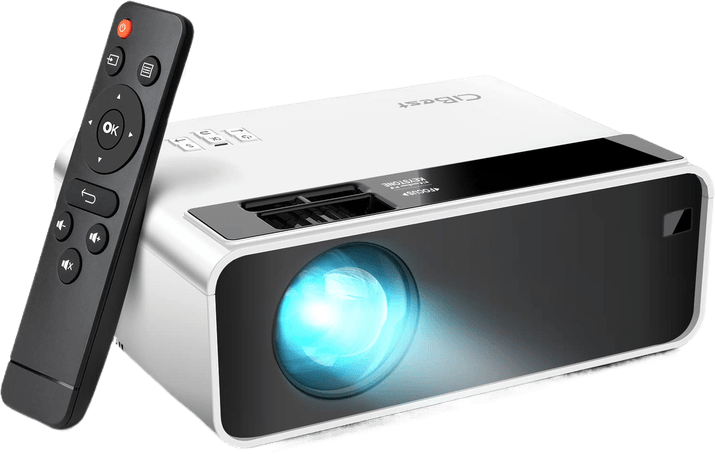
The projector I used for the photos is the Apeman 3800L projector. It's not the most high-tech, but it has everything I needed and it’s also cheap. It's bright enough at 3,800 Lumens. The definition isn't the best, but it's not obvious in the photos. It's also small and has a tripod mount which is convenient.
Best Images for a Photo Projector
Now that you have a projector, the next step is looking for photos you can use for projection.
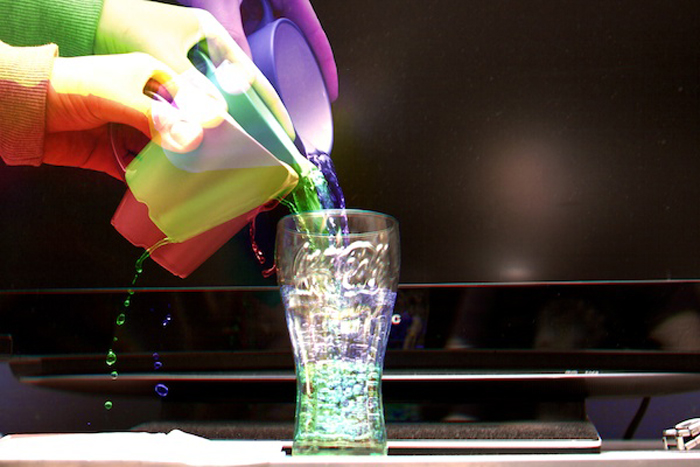
Although you can technically use any graphics you want, it helps a lot to use photos that don't have too many distracting elements. You don’t want your subject to get lost in all that clutter, so choose an image that has some negative space where you can place your model. Some awesome examples for a projected image include the skies, clouds, and open landscapes.
Patterns also work really well for a projected image. Placing a subject in front of the patterns would create distortions that look futuristic. You can try anything from lines to squiggly designs. Don't be afraid to experiment and embrace the results.
For regular images such as cloud photos, you can get away with saving them as regular JPEG files. But for patterns, it would help a lot to save those files as PNG with a transparent background. That way the projector doesn't accidentally project white or black patterns when they should be clear.
Once you have the images, save them in a folder so that you can easily access them once you're ready to take photos.
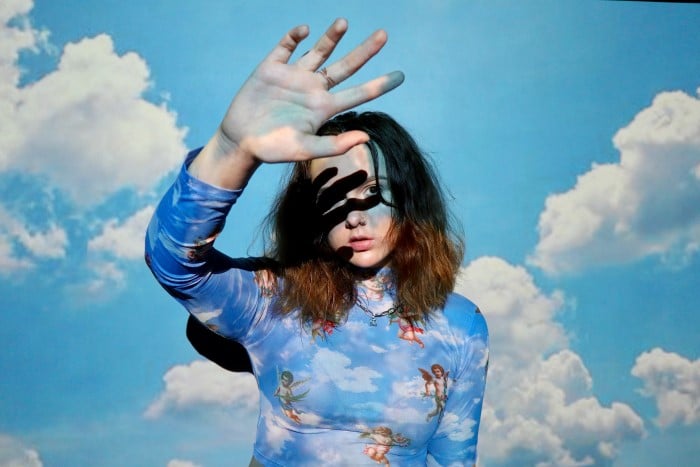
Photo by Isi Parente on Unsplash
How to Use a Projector for Best Results
Choose a dark room that has little or no ambient light, as that can ruin your exposures. You also need to have a blank wall where you can project your images. If you want a small projected image, place the projector at least four feet away from the wall. But if you want a bigger projection, place it at least 8 feet or more. Remember that the farther away you are, the larger the screen.
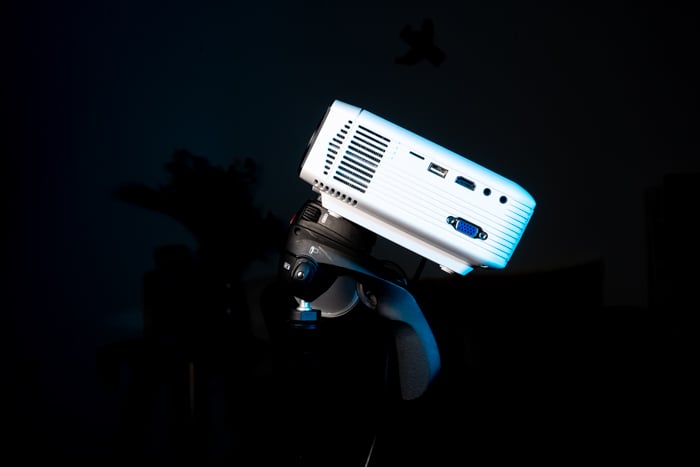
You can set your projector on a table, or you can install it on a tripod if it has a mount. A tripod is always preferable because you can tilt it in any direction and adjust the height as well.
Once you finish setting up your projector, the next step is to adjust the keystone and the focus which are located near the lens. First, turn on the device. Once the menu appears on the screen, adjust the focus dial as you would with a camera lens until everything is sharp. Now go to the Keystone dial and move it back and forth until the perspective of the screen looks straight.
Now that the screen is sharp and straight, all you have to do is plug your computer to an HDMI port. Use the projector's buttons or the remote to access the menu and select HDMI to watch the screen of your computer appear on the wall behind.
How to Set Your Camera for Projector Photography
Even the brightest consumer projectors are often not bright enough to let you shoot with normal settings. That’s why it’s crucial that you know which elements to adjust.
First, you’ll need to bump up your ISO way up. In most cases, you’ll need to go to 1000 ISO or more to get decent results. Of course, doing so would make your photos look grainy. But thankfully, image noise is not as noticeable when using a projector. If anything, it even adds to the aesthetic of your images.
Next, you’ll need to set your shooting mode to either Manual or Aperture Priority. If you’re in Aperture Priority, set your lens to the widest setting. It would be best to pick a prime lens that lets you shoot at f/1.2 or f/1.8 so your camera can let more light in.
If the widest aperture of your lens is f/3.5 or f/4, you will have a difficult time capturing sharp photos. Since these aperture values don’t let as much light in, your camera would automatically select slower shutter speeds. This may cause motion blur. If that’s the only lens you have, set your camera on a tripod to avoid blur and ask your subject to stay still when the shutter goes off.
If you’re using Manual Mode, set the aperture to its widest setting (f/1.2 or f/1.8) and adjust the shutter speed between 1/60th to 1/100th of a second. Why? Because 1/60th is the lowest value you can choose before you run into motion blur. Meanwhile, 1/100th is the fastest you can go before your photos get too dark. Make sure you do some test shots to see if the settings you chose create a good exposure.
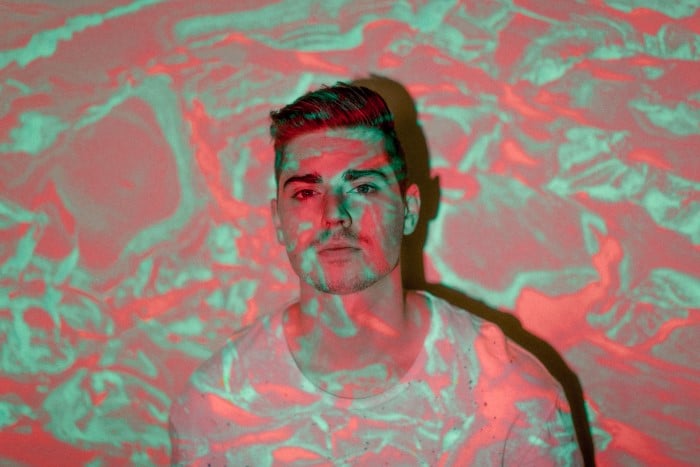
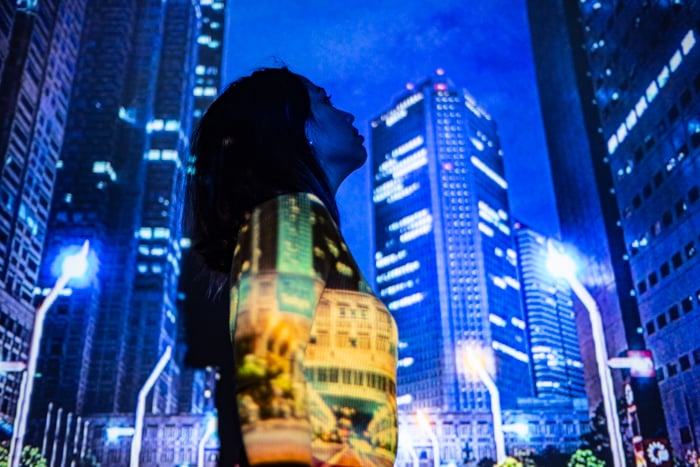
Photo by Keagan Henman on Unsplash
How to Take Photos Using a Projector
Taking photos with a digital projector can be tricky. You can’t stand directly in front of the projector because you’ll cast a shadow on the screen. But we’ll show you a few tricks you can do to avoid any issues during your shoot.
If you want to shoot directly in front of your subject, use a telephoto lens and stand behind the projector. Since you’re not blocking the projector, you don’t have to worry about shadows. All you have to do is zoom into your model and take a photo.
The only downside is that your telephoto lens would need to have a wide aperture to let enough light in. If not, you’ll have to use slow shutter speed and place your camera on a tripod.
For shorter lenses, you can try several angles that will let you take photos without casting a shadow. The most common option you can try is shooting from directly under the tripod or from the side.
Projector Photography Techniques
Now that you know the basics of projection photography, you can try more advanced techniques to create unique images. There are endless possibilities, but we’ll show you a few ones to help you get started.
Try Long Exposures for Creative Effects
As mentioned earlier, slow shutter speeds can cause motion blur which may ruin your images. But you can also use it for creative effects as well. You can set your camera between 1/15h up to 30 seconds and you have your subject move around as soon as the shutter clicks.
The result would turn your model like a ghost because they’d show up as blurry streaks. Just make sure that you’re using a tripod when you’re doing this. You don’t want to hold a camera with your hands when your shutter is open for longer than 1/60th.
Movie Magic
Remember the fake backgrounds in movies when actors are driving inside a car? Filmmakers use digital projectors to create that effect and you can try the same technique as well. Place your projector directly behind your model so it looks as if your subject is in an entirely different environment. Since your subject is not illuminated by the projector, you can use a small lamp or even a flash as your key light source.
Use Unique backdrops
You don’t always have to project images onto white walls. You can try all sorts of surfaces from flowy curtains to doors and furniture. Doing so creates a more immersive space than just having your subject stand on a blank background. Don’t be afraid to experiment!
Editing Your Projector Images for Vivid Colors
To get the most of using a projector, you’ll need to edit your projector photos so the colors show up vividly. Apart from the basic exposure adjustments, feel free to adjust the contrast, shadows, and highlights.
Adjust those settings until there’s enough contrast to help people distinguish all the elements in your final image. This is critical especially since images from the projector tend to come out hazy. And if you have Adobe Lightroom, you can adjust the Clarity and Dehaze sliders as well to bring out the details even more.
Finally, use the noise slider to reduce the grain in your image. This is crucial since your photos are likely going to be grainy from your camera’s high ISO. Just make sure not to overdo it. Otherwise, your final image may lose plenty of detail.
Conclusion
Once you try it, you’ll realize that projector photography is not complicated at all. Just keep in mind your settings while shooting to get the proper exposure.
Once you become familiar with what you need to do, it will become second nature. There are so many potential uses for a projector in photography, so don’t be afraid to experiment with it!
We have a step by step guide on making a DIY smartphone projector to check out next!