How to Easily Understand Your Camera Autofocus Modes
Modern cameras have quite a few autofocus modes for you to choose from. But they’re only useful if you know what they are and what each of them do. When do you choose single focus over continuous focus or vice versa? If you don’t know what that means, this article is for you.
We’ll make your camera’s autofocus modes simple and easy to understand. Continue reading to learn when and how to use them for the best photography results.
Why Use Autofocus Modes Over Manual Focus
In photography, focusing means choosing which part of your photo you want to be sharp. Our brains usually prefer sharp images over blurry ones. A well-defined subject draws attention and is the most important part of the composition.
Mastering your autofocus system allows you to better convey your image’s message. It will also save you from deleting lots of blurry photos!
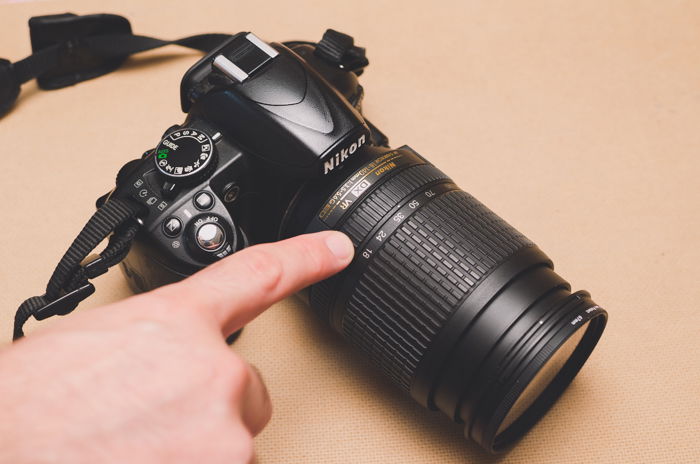
Using manual focus gives you more control, but it is an acquired skill. And there tends to be a steep learning curve. To put it simply, the lenses used on interchangeable-lens cameras have a ring on them that you turn to adjust the focus.
It gives you more freedom for artistic effects. It also helps when taking photos in difficult situations, like low-light conditions. But struggling with manual focus can cause beginners to miss key moments. This is where autofocus comes in.
Autofocus is a practical option that allows you to focus much faster. You can pay more attention to other things like composition and exposure.
You can switch between manual and autofocus either through the lens or the camera itself. Depending on your camera model, you’ll have a dedicated button or can access this through the menu.
How Does Autofocus Work?
When you set the focus, you arrange the glass parts in your lens so that specific light beams meet on the sensor. Beams that reach the lens from different distances require different arrangements.
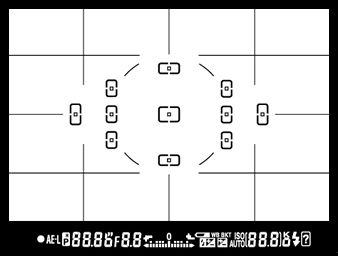
In other words, focus is a matter of the distance of the objects from the lens. In autofocus mode, you select predetermined “focus points.” The number of these points depends on the camera you have. For example, the Canon EOS R5 has an astonishing 5,940 autofocus points.
You can select them through the viewfinder. Your camera will focus on the area that is in front of the focus point you selected.
How to Select the Best Focus Area for Your Subject
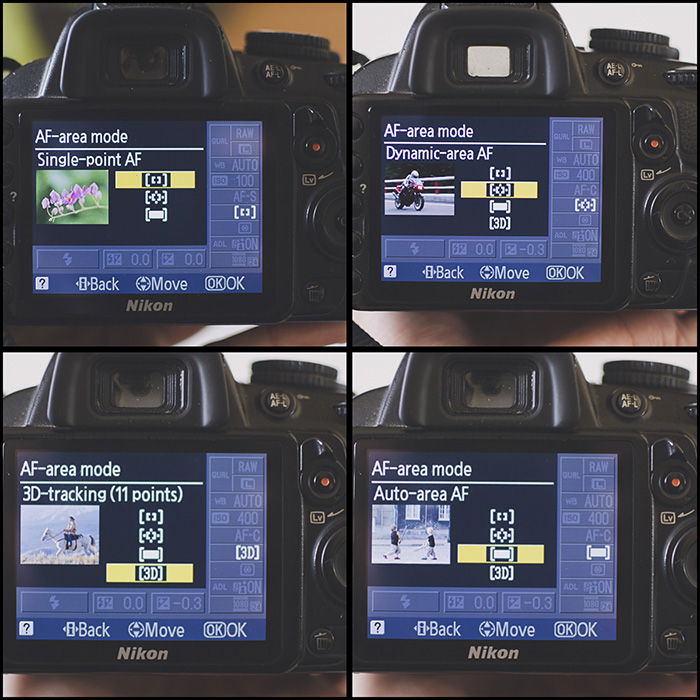
Modern digital cameras have very advanced autofocus modes. They offer more options than just selecting one focus point.
- Single-Point AF-area Mode. The camera will only use the focus point you’ve selected. (This is called Manual AF-Point in Canon models.)
- Dynamic AF-area Mode. In this mode, you also select one focus point, but if your subject moves a little, the camera will use the surrounding focus points to refocus. You need to track the subject with your camera to ensure that it remains close to the first selected focus point. If not, your camera won't be able to refocus. (This is called AF Point Expansion in Canon models.)
- 3D Tracking. You select the first focus point, and your camera uses an algorithm to track your subject while moving. This mode is good, but there’s a risk that your camera will “jump” to another subject and focus on that instead.
- Auto-area AF. This mode is completely automatic. The camera decides what focus points to use. It chooses the subject in the photo according to contrast differences. I don’t use this mode often because I like to keep some control over what to focus on.
Use Single-Servo AF (Nikon) or One-Shot AF (Canon) for Static Subjects
Most cameras have different autofocus modes to help you focus in different situations. You can select one either through the camera settings menu or with a button on the camera body.
The most common autofocus modes are AF-S (single point), AF-C (continuous), or AF-A (automatic). The basic option is the AF-S. In this mode, you focus using one focus point. The camera allows you to choose the focus point.
This mode has the advantage of blocking the focus when you half-press the shutter release. This is handy when you want to reframe the image without losing the focus point.
AF-S mode is useful when the subject of your photo isn’t moving at all, like in or still-life photography.

Use Continuous Servo AF (Nikon) or AI Servo (Canon) for Moving Subjects
Continuous AF mode (AF-C) is another great autofocus mode. This is especially useful when the subject of your photo is moving. This mode is great for sporting events, vehicles, wildlife, or kids.
The camera does not lock the focus point when you half-press the shutter release. Instead, it tracks your subject and refocuses accordingly. Remember that when you select this autofocus option, you can't lock the focus.
What About Automatic Autofocus Mode?
There is a third option, which is automatic autofocus. Your camera will select single AF for stationary objects or continuous AF for moving subjects.
This might seem like a great option, but it can lead to confusion. The camera switches between the two AF modes. This makes it hard to know if half-pressing the shutter release will lock the focus or track the subject.
How to Combine Autofocus Modes With Focus Areas for Better Photos
Let’s talk about how to combine the autofocus mode and autofocus area for perfectly sharp photos every time.
Single Point Area + AF-S Mode
This is perfect for stationary subjects such as landscapes and still photography. I also use it in posed portraits where the model is barely moving.
You choose one focus point, and the camera won't refocus.

Single Point Area+ AF-C Mode
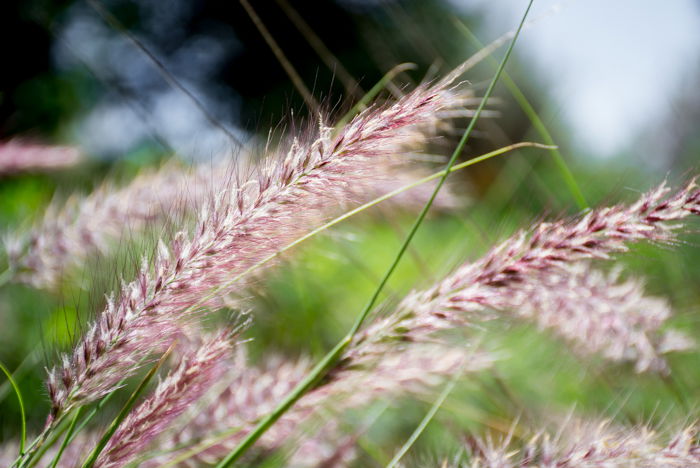
This is ideal for when your subject is moving, like animals, kids, or sports. It’s also particularly handy in nature photography on windy days.
You select one focus point, and your camera will refocus if needed if the subject moves. It will refocus only on the selected focus point, so you need to track the subject.
Dynamic Area + AF-C Mode
This combination is useful when the subject is moving in an unpredictable way. You select one focus point, but the camera will also use the surrounding ones if the subject moves.
You might be wondering why you shouldn’t always use this mode since the camera can track the movement and refocus accordingly. Why bother switching to one single focus point?
If your subject isn’t isolated in the frame, your camera can get confused. It might end up tracking another subject you don’t want it to.
For that reason, the one single focus is still more precise than the dynamic area/3D tracking. If your subject is not moving, you have better chances for a sharper image.
AF Combinations to Avoid
Dynamic Area + AF-S Mode
Although your camera might let you select this combination, these two options are incompatible. On one hand, you’re telling the camera to use an area of several focus points to refocus if needed (dynamic area). But you are not allowing it to refocus (AF-S mode doesn’t have this option).
The dynamic area will be disabled and it will work as a single-point focus instead. If you select this option because your subject is moving, you might miss the shot. Your camera is working as if it were in the single-point area + AF-S mode.
3D Area + AF-S Mode
Just like with the previous combination, the camera won't refocus if you use 3D area and AF-S mode. The 3D area will get disabled, and you’ll be taking photos like in single-point area + AF-S mode.
How to Autofocus in Live View
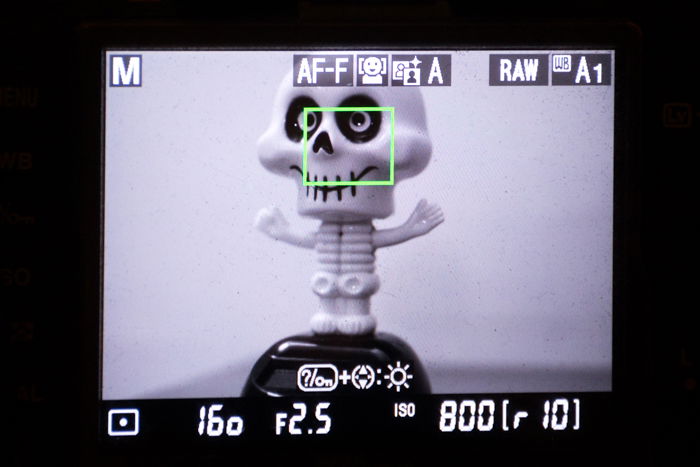
Autofocus mode works slightly differently when you’re using Live View. In this case, you can select any point on the screen to focus on and not just the predefined focus points.
Live View autofocus mode works by detecting contrast in the scene, while the viewfinder autofocus technology is based on phase shift sensors. Live View focusing is slower, but it’s more accurate for static subjects.
I recommend using it with AF-S mode. When selected, you will see a red square you can move around the screen using the arrow bottoms. When your subject is in focus, the red square will turn to a green square, meaning it’s ready to shoot.
How to Use Autofocus Modes in Low-Light Situations
In low-light situations, your autofocus might not be as accurate. Your lens will go into a loop, looking to focus without success.
In this case, the AF-assist built-in light can be really useful. You turn it on via your menu. When activated, your camera will emit an orange-red light toward your subject.
This will help your camera focus, but it’s not a perfect solution. It selects the AF-S mode and focuses using the central focus point. It has a limited range, so you need to be relatively close to your subject (1 to 10 feet).
You could also use a flashlight or other light source to briefly illuminate the point you want to focus on.

Conclusion: Autofocus Modes
Getting familiar with your camera’s autofocus modes will allow you to take sharper images. There are quite a few things to consider when choosing your AF modes. But it’s worth learning them so you can always choose the right AF mode for your scene.
Check out our Photography for Beginners course to learn everything you need to know about your camera and how to use it to take perfect shots every time!

