Why Are My Photos Dark? (Best Photography Exposure Tips)
“Why are my photos dark?” That’s a question every photographer has asked themselves when they were just starting out. Shooting photos that are too dark is a common problem for beginners. But there are some easy and accessible remedies to this problem, so there’s no need to worry.
This article looks at why your photos are dark and how you can fix the problem. Prevention is better than the cure, so we look at how to shoot bright, well-exposed images. We also give some tips on how to fix dark photos in post-production.
© Max Bender
Why Are My Photos Dark?
If you keep producing dark photos, there’s always one root cause. And that is, the camera is not getting enough light.
Light is the essential element in photography. When ever you take a picture with a camera, you are exposing the camera’s sensor to light. The key is to get the right amount of light onto the sensor.
But getting it right isn’t easy. If you use too much light, your photo will be too bright. If your photos are dark, that means the camera didn’t receive enough light to expose the image correctly and your photos are underexposed.
That’s why mastering your camera’s exposure settings is the best way to prevent dark photos. We introduce you to the key exposure settings in the following section.
We also look at other ways to remedy your dark photo problem. These include using a flash, understanding your histogram, and using the correct camera metering.
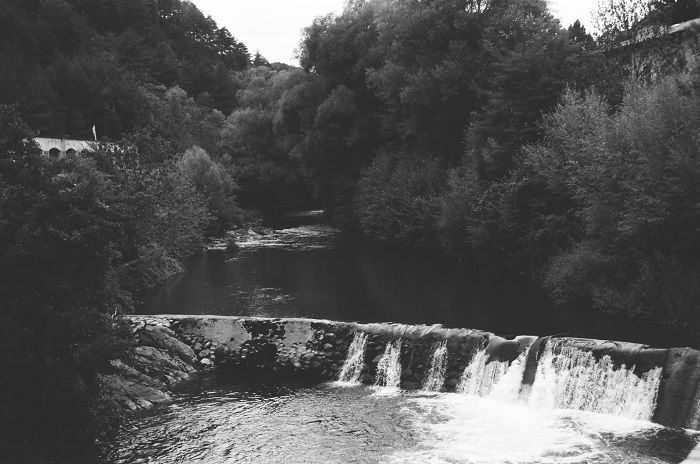
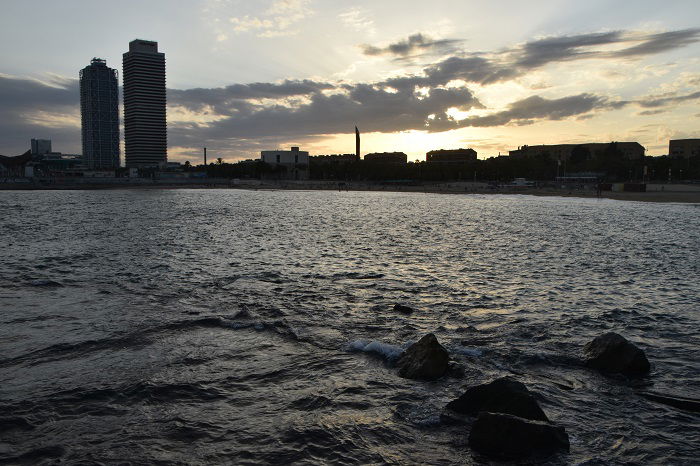
Under-exposed photo on Rollei Retro 400S © Kit Bryan-Smith
Master Your Exposure Settings
Developing a full understanding of the main exposure settings is the best way to avoid dark photos. Knowing how to use the settings to get the best shots in any situation will make you a better photography. Dark photos will be a thing of the past.
Every camera has three main exposure settings. These are aperture, shutter speed, and ISO. They are all of equal importance when creating an image. It’s these three settings that makes up the exposure triangle.
First, it’s best to look at each setting individually. We will then look at how they relate to one another with the exposure triangle.
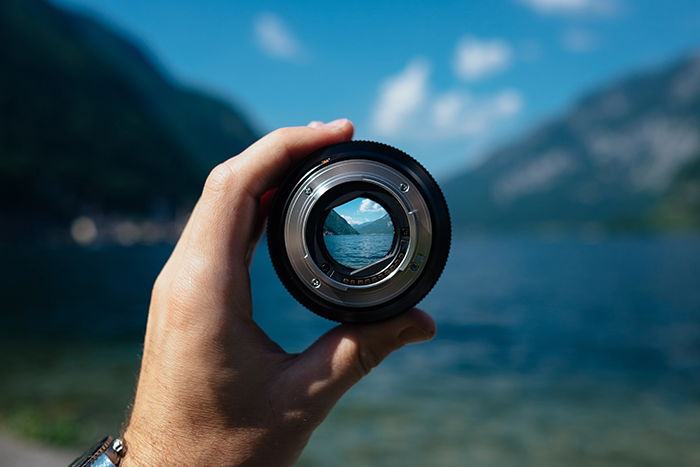
Aperture
The aperture is the hole in the back of the lens that lets light pass through to the camera. All modern lenses have a variable aperture, which means you can adjust the size. A wider aperture lets in more light, while a narrow aperture lets in less light.
We measure aperture in f-stops or f-numbers. Every lens has a set aperture range. The range varies from lens to lens, but the f-stop scale is universal to all camera brands. f/4.6 means the same on a Canon lens as it does on a Sony lens.
A small f-stop number denotes a wide aperture. A large f-stop number denotes a narrow aperture. For example, f/1.8 is a wide aperture while f/11 is a narrow aperture.
![]()
A sufferer of dark photos might think it best to use a wide aperture at all times. But there are two reasons why that isn’t always the best option.
The first reason is that using a wide aperture reduces your depth of field. This gives you a narrow focal plane where the foreground and background are out of focus. Portrait photographers like this technique, but it’s not great for landscapes.
You also lose sharpness at the wider aperture settings. Sharpness is key to pro-looking images, so many will tell you to avoid your maximum aperture settings.
Shutter Speed
Cameras have a shutter in front of the sensor. When you take a picture, the shutter opens to let light through before closing again. You can control the length of time the shutter is open. This setting is called the shutter speed.
The longer the shutter is open, the more light gets in. When you use a fast shutter speed like 1/1000, the shutter is only open for a 1000th of a second. With a shutter speed this fast, not much light gets in.
Using a slower shutter speed, like 1/250, lets more light into the camera. That means you will usually use a slow shutter speed in low-light situations.
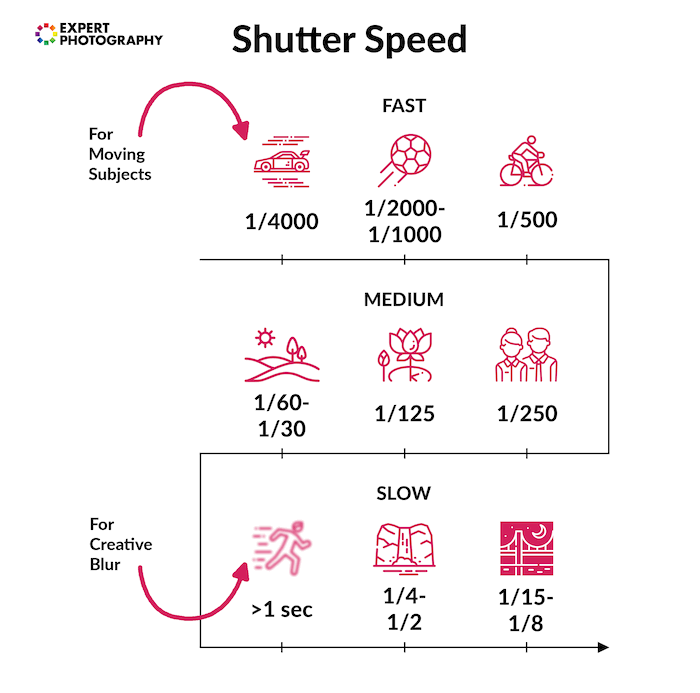
However, the slower your shutter speed, the more sensitive your camera is to movement. That means fast-moving subjects might appear blurred. But also, if the shutter speed is too slow, the camera becomes sensitive to camera shake.
If you set the camera to 1/60 or slower, the camera will detect even minor movements. This means any picture you take without additional support (like a tripod) will be blurry.
ISO
The third exposure setting is ISO. This setting determines how sensitive the camera sensor is to light.
Unlike film photography, where the ISO is fixed depending on the film you use, you can adjust the ISO at any time on a digital camera.
Using a low ISO setting makes the sensor less sensitive to light. This means the camera needs more light to properly expose the image. If you don’t have enough light, the images will be too dark.
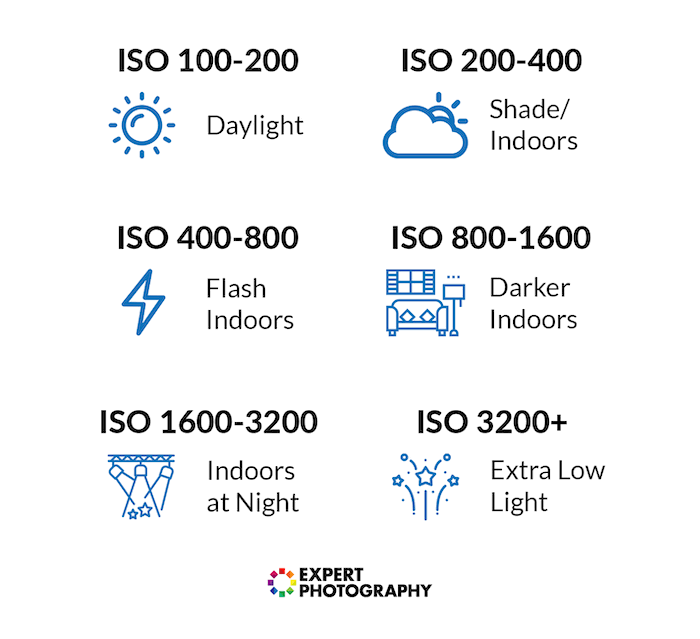
Increasing the ISO number makes the sensor more sensitive to light. If your image is too dark at ISO 100, you can increase it to ISO 800 for a better exposure.
However, increasing the ISO can have a negative effect on image quality. If you push the ISO too high, you will experience digital noise. This grain-like texture that becomes visible at high ISO settings, deteriorating image quality.

High ISO image with visible digital noise © Josh Dunlop
Exposure Triangle
It is important to understand each exposure setting individually. But we can’t look at them in isolation, as each one affects the other two. In order to capture the perfect exposure, you need the right balance of ISO, shutter speed, and aperture.
If you change the aperture setting, you will to change shutter speed or ISO accordingly. That’s the same for all of them.
If you’re shooting a landscape, you will need a narrow aperture because you want a deep depth of field. That means you need to find more light elsewhere.
You can slow the shutter speed down, but you might need a tripod. You can also increase the ISO, but you’ll lose image quality. That’s the balancing act of photography.
When we move an exposure setting by one increment, we call this a “stop.” If we change the aperture from f/2 to f/2.8, we increased the aperture by one stop. If we drop the ISO from 400 to 200, we’ve decreased it by one stop. It’s the same for shutter speed.
We do it this way because it makes it easier to balance the three settings. If you move one setting by one stop, you know you need to adjust one of the others by one stop in response. Move aperture two stops, and you need to make up the difference by moving another by two stops or both by one stop.
We hope the infographic below makes these easier to understand. You can also read our full article on the exposure triangle.
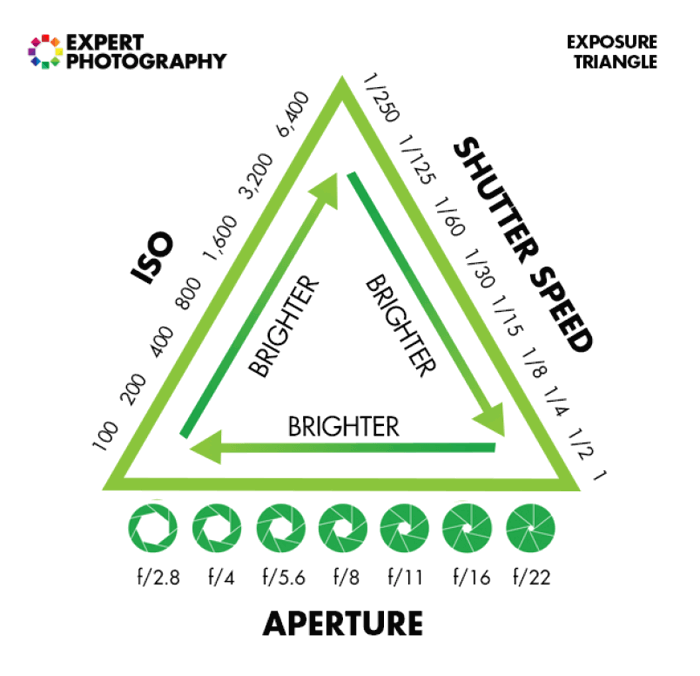
Understanding the exposure triangles is the best way to remedy your dark photos. When you take a photo that’s too dark, you now know you can increase one, two, or even three of your exposure settings for a brighter shot.
But remember, every action has a reaction. Whether you’re adjusting aperture, shutter speed, or ISO, you know you have to balance all three to get bright, well-exposed photos.
Why Are My Photos Still Dark?
But what if you’ve nailed your exposure, the ISO, shutter speed, and aperture are all perfect, but your photos are still too dark?
Fear not, as we still have more solutions to help you produce bright, clear images without fail.
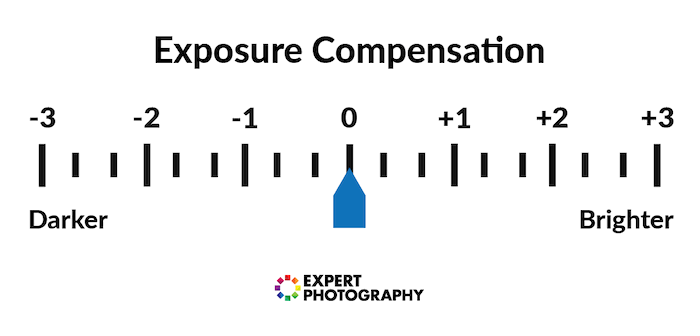
Set Zero on Your Exposure Meter
Every camera has an exposure meter. Some old 35mm cameras have the exposure meter on the body, but most digital cameras have it in the internal menu.
The exposure meter controls exposure compensation. Changing the exposure meter can be useful if you’re dealing with strong backlighting or high-contrast scenes.
But if you’re struggling to get the proper exposure in bright, even lighting, make sure the meter is set to 0, which is in the middle.
The camera will set the meter to zero if you’re shooting in automatic mode. But if you’re in manual mode or a semi-manual mode, make sure it’s set to 0 before you start shooting.
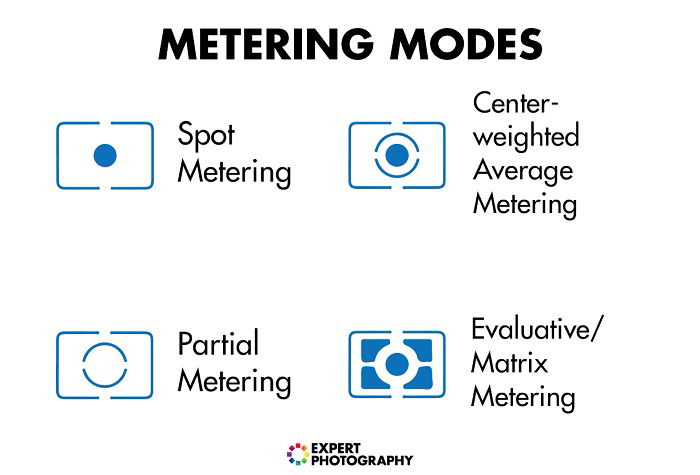
Use Correct Camera Metering
All modern cameras have a built-in light meter. The light meter evaluates the light in your scene and helps you capture well-exposed images when using auto and semi-auto shooting modes.
However, cameras have several different metering modes, with each being better suited to a specific type of lighting. Selecting the right mode to suit your scene will help you avoid producing dark photos.
The default metering mode is Evaluative (Canon) or Matrix (Nikon) metering. This mode divides the entire frame into zones. It then takes a reading from each zone and comes to a conclusion about the overall exposure.
Evaluative metering modes often favor the zone with the focus point. If your focus point is in the top left corner, it will favor that zone and select exposure settings appropriate to it. This only really works well if you have a scene with even lighting.
Center-weighted metering takes a light reading from the very center of your frame. The metering point only moves if you move the camera. It’s a limited metering mode and only useful if your subject is dead-center in your frame.
Spot metering might be the most useful if you’re photos are too dark. This light meter mode takes a reading from the area of your focus point. It ignores the rest of the frame, only metering for that specific point.
Some cameras also have a highlight priority mode where the camera meters for the brightest areas. However, you won’t need this mode if your photos are too dark.
If you don’t trust your camera’s built-in light meter, you can buy an external one. They are a great tool for photographers, especially if you’re struggling with exposure.
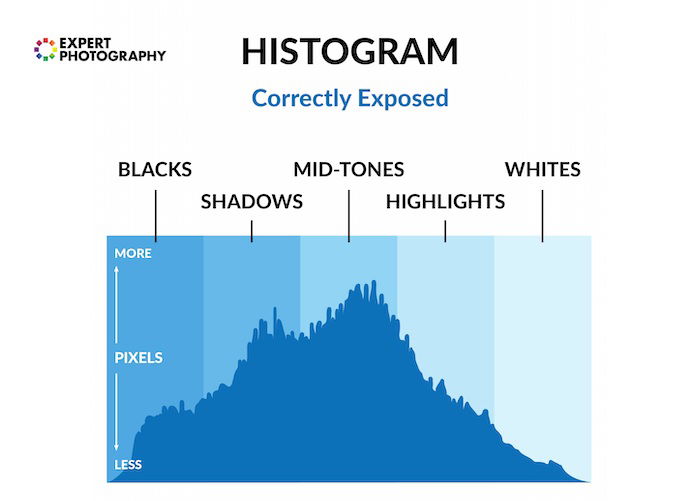
Understand Your Histogram
A histogram is a graph that shows you the tonal values of your image. In the simple graph format, you can see whether your image is over-exposed, under-exposed, or correctly exposed.
The vertical axis denotes the number of pixels, while the horizontal axis tells us the tonal value of these pixels. Blacks and dark tones are on the left-hand side, and highlights and whites are on the right.
Therefore, if the histogram is heavily weighted on the left side of the graph, the image has lots of black or dark pixels. The histogram is telling you the image is under-exposed.
If the pixels are concentrated on the right side, the histogram is telling you the image is over-exposed.
A correctly exposed image will have more pixels in the center of the graph, with very few pixels on either extreme.
Understanding your camera’s histogram helps you correctly expose your photos. If the pixels are concentrated on the left, you can make decision on the fly in order to capture a better exposure.
The image might look fine on the camera’s display screen, but the histogram gives you a more accurate evaluation.
Use a Flash
Sometimes there just is not enough light. You can open your aperture, push the ISO, and slow the shutter speed, but you won’t be able to get a decent shot. It happens, especially when shooting at night.
The best solution is to use a flash. Some cameras have a built-in flash, which is ideal for dark situations. But more high-end cameras do not have flashguns built in.
In this case, you need to buy a flashgun separately and connect it to your camera using the hotshoe connector. This will allow your camera and flash to sync up, so the flash goes off when you press the shutter release button.
You can also use off-camera flash techniques. This is where the flash is not mounted directly on your camera. You can position the flash elsewhere but still have it sync to the shutter release using a wireless connection.
However, flash light can be intense and overbearing when used incorrectly. Sometimes it’s best to point the flash above or below your subject to get more flattering results.
You can also use reflectors, diffusers, and softboxes to soften the harsh light from flashes.
© Luciano Zanollo
Calibrate Your Camera LCD
LCD calibration might not cross your mind when you buy a new camera. But an inaccurate camera screen can cause problems when trying to capture perfectly exposed photos.
A poorly calibrated camera screen can be a mischievous being. If it’s too light, your images will look brighter than they actually are. This could lead you to under-expose your images, which you won’t realize until you see the image on another screen.
You will have the opposite problem if the camera screen is too dark. That’s why you need to calibrate the camera brightness as soon as you get it. Being able to see an accurate depiction of your photo when you’re shooting will help improve results and avoid dark photos.
To calibrate the screen, go into the camera’s brightness settings. It should have a brightness scale to help you find the correct level. But also do some tests to make sure the screen accurately displays your photos.
© Jamie Street
Increase Brightness in the Edit
While you should always aim to correctly expose your images at the time of taking, you can also use photo editing software to brighten dark images later.
Top editing programs like Adobe Lightroom and Luminar Neo have adjustment tools for brightness and exposure. Tools like this allow you to increase the brightness of a dark image, saving them from the photography scrapheap.
As you can see in the comparison below, just a quick edit can brighten a dark photo. Here, we’ve used the Exposure tool in Develop module of Luminar Neo.

Conclusion
You’re not alone in asking, “Why are my photos dark?” Shooting dark photos is a common problem with beginners. Even experienced users sometimes have trouble getting the perfect exposure.
As we’ve seen, there are plenty of solutions. Firstly and most importantly, you have to understand your exposure settings. You can’t take good photos without some knowledge of aperture, shutter speed, and ISO.
Sometimes the problem goes beyond your exposure settings. But learning to use the histogram, using a flash, and correctly metering your camera are all ways you can improve your images. You can even adjust the exposure and brightness when editing your photos.
With this information, your problem with dark photos will be behind you. Never again will you ask, “Why are my photos dark?”