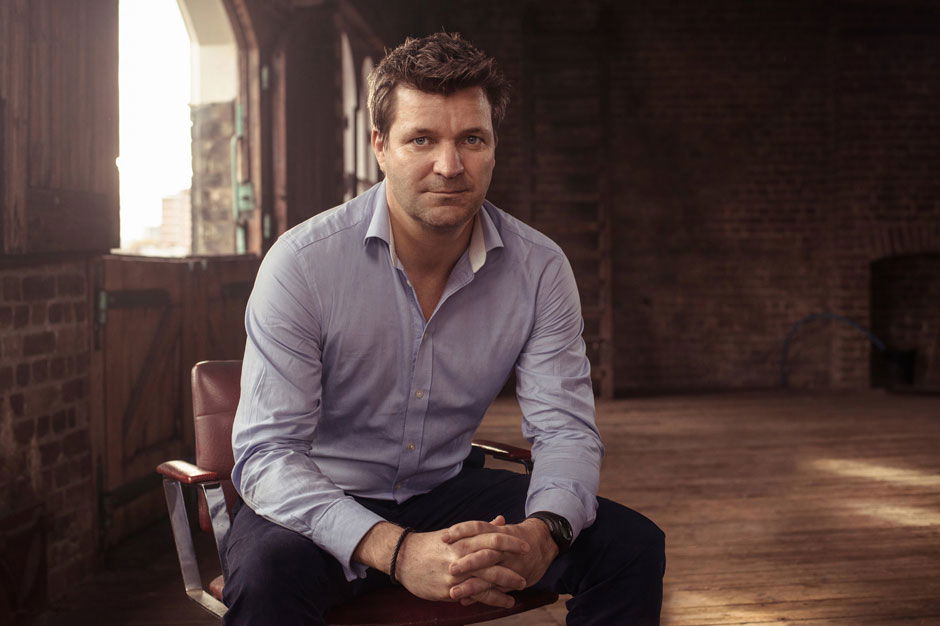
There are many things to concentrate on in portrait photography. And getting the lighting right is one of them. There are many options, and it’s one area where carefully learning your craft pays off in the quality of the results!
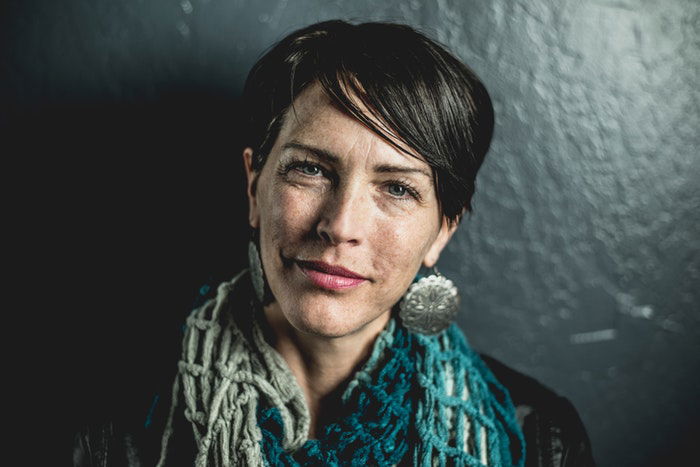
One of the most challenging and rewarding photography niches is portraiture. It’s a great example of how lighting can make or break an image.
A portrait tries to capture the character of the subject as well as their physical appearance. So, using light to create a mood or impression is valuable.
We’ve broken our guide down into four sections. Use these jump links to get to the ones you need, and click the links for more in-depth guides:


Learning some portrait lighting terms can help you improve your lighting. A “key light” is the primary light source illuminating a scene, while a “fill light” reduces shadows. “Backlight,” or “rim light,” comes from behind the person to make them stand out.
Light patterns like butterfly, loop, Rembrandt, and split lighting create distinct shadows on the face. Modifiers such as softboxes, umbrellas, and reflectors shape the light to achieve the desired effect.
Understanding these portrait lighting terms helps you master the art of portrait photography. You’ll create beautiful, professional-looking images.
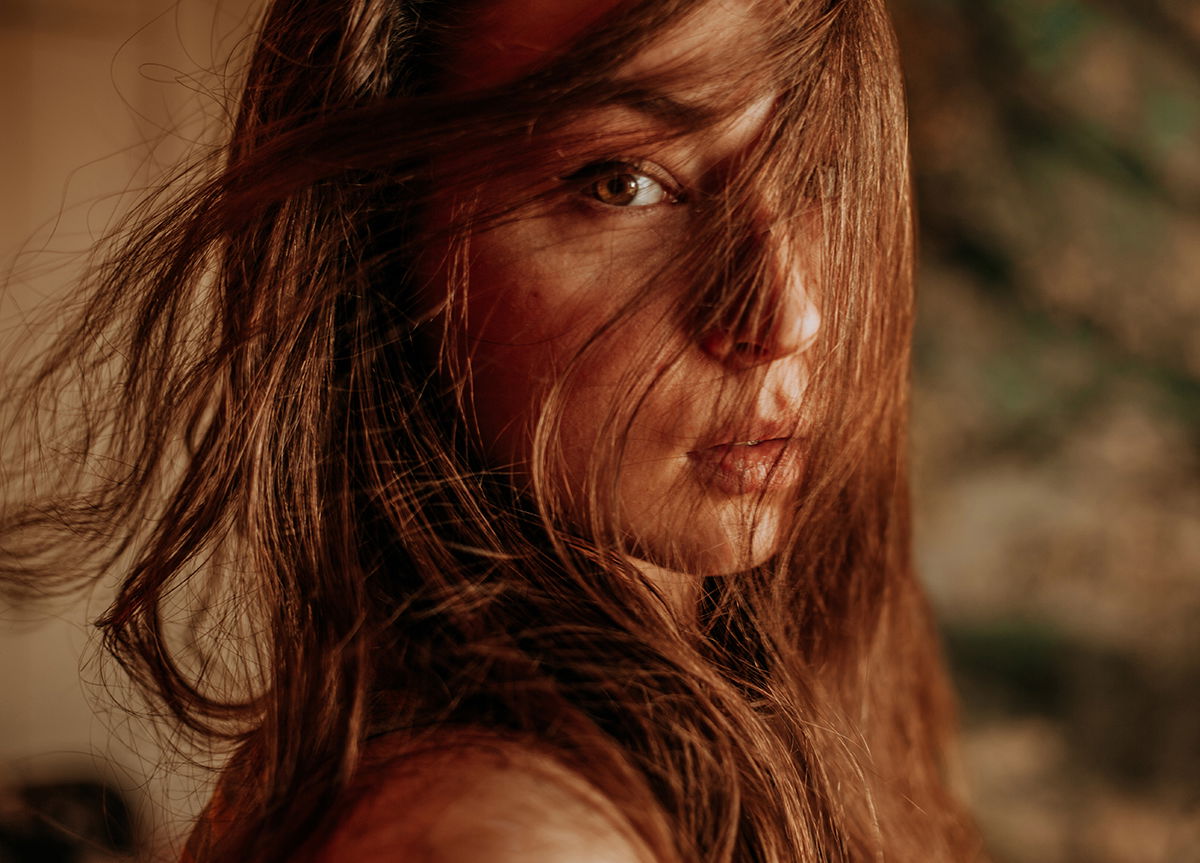
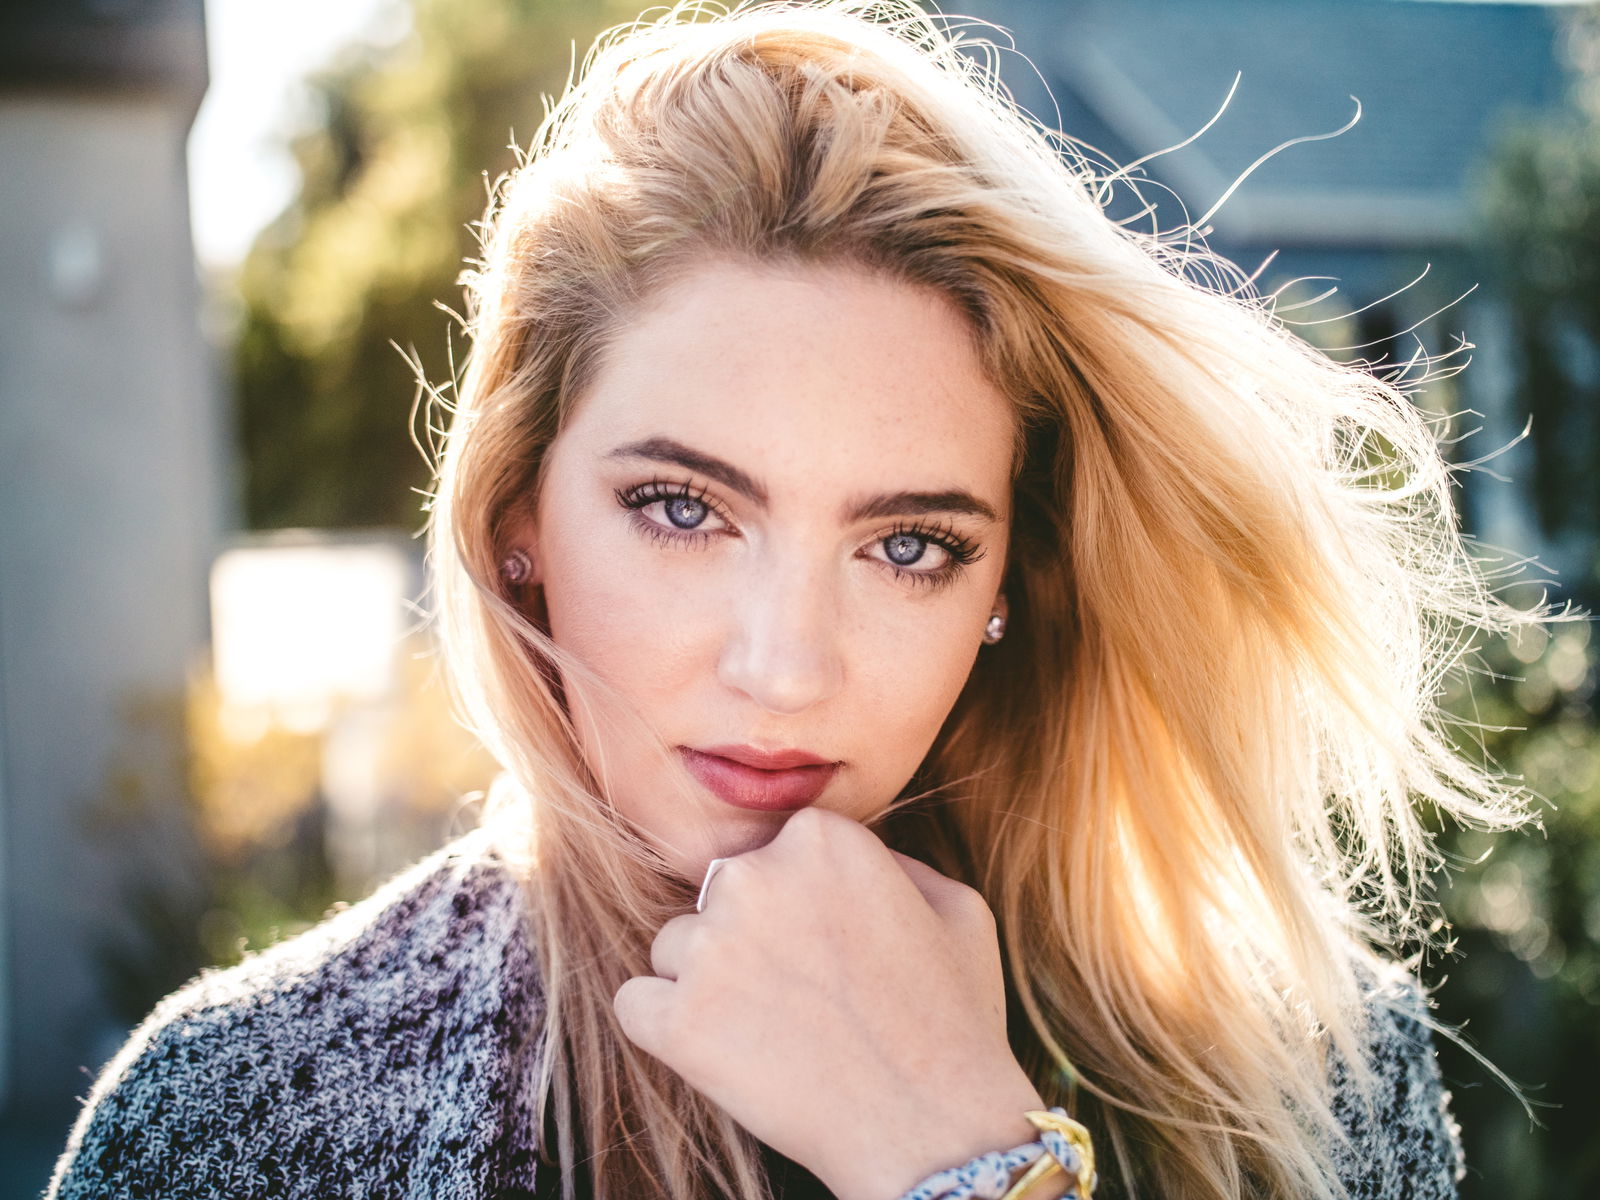
Natural light is the most varied, beautiful, and sometimes inconsistent light. It can be harsh, warm, soft, golden, cold, and changeable. But for many situations, it is unbeatable.
Learning to exploit natural light to the fullest extent can raise your portrait photography game to a new level. Natural light is a powerful tool for creating dreamy, ethereal portrait photos.
Shadows can transform simple elements into stunning works of art. Look for interesting patterns created by branches, plants, or everyday objects. Objects like hats and curtains can add depth and dimension to your portraits.
Window light is another reliable source of natural light for portrait photography. Position people near a large window to ensure even lighting on their faces. Experiment with curtains to create a makeshift studio and control the shadows.
When shooting outdoors, look for eye-catching backgrounds that complement your model and theme. If you can’t find the perfect backdrop, don’t be afraid to add elements, such as flowers, confetti, or bubbles, to enhance your compositions.
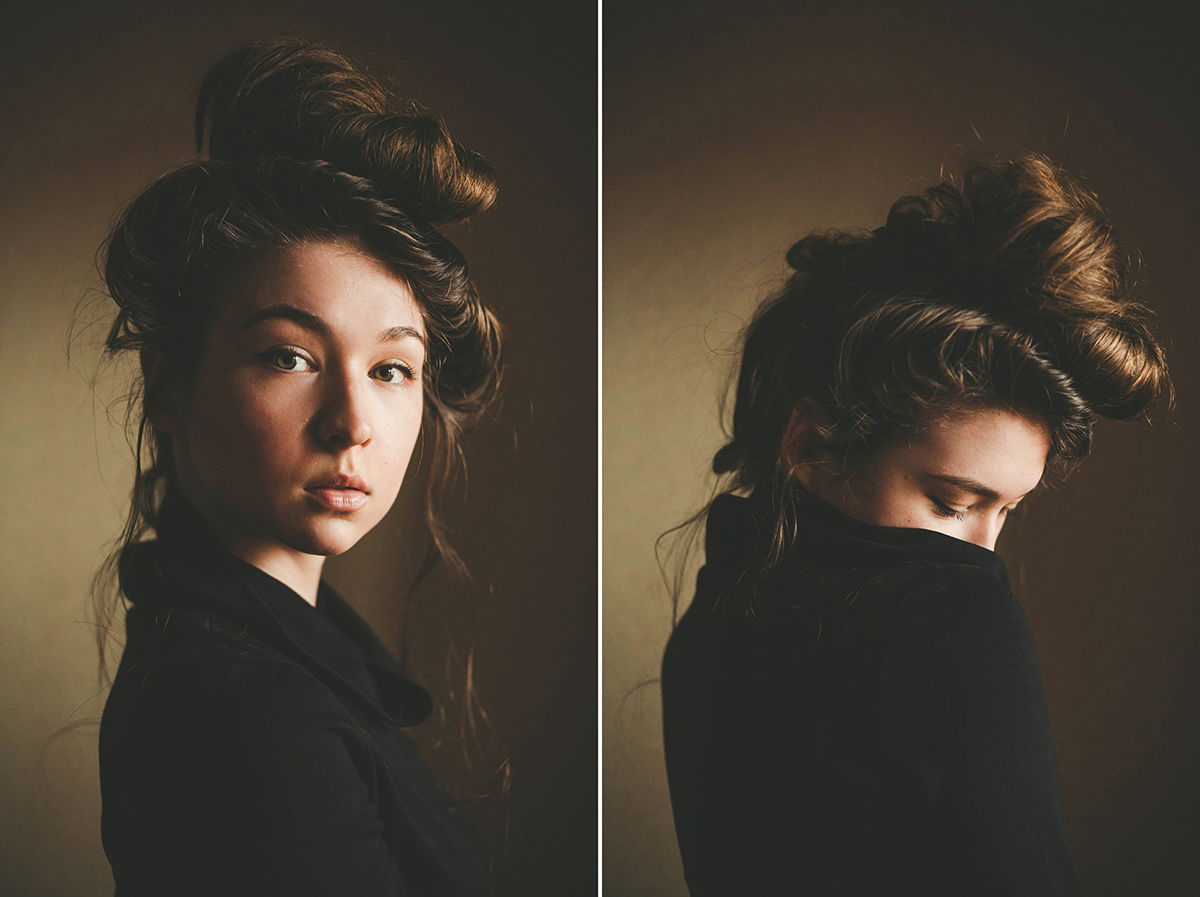
You can create diptychs that tell deeper stories. Capture people and objects to combine your love for different photography genres. To learn more about natural-light portrait photography, check out our in-depth guide.
Ambient light photography is a great way to capture atmospheric portraits. It uses “available light” sources like windows, doors, and the sun to create moods.
You can use different types of ambient light to achieve various effects. Backlight and golden-hour lighting are perfect for dreamy atmospheres.
Cloudy daylight and toplight can create mysterious moods. Direct light results in harsh shadows and striking contrasts.
Ambient light is available almost everywhere. It gives you endless opportunities to explore atmospheric portraiture. Experiment with lamps, parks on cloudy days, or stores with haunting toplight. Try to find inspiration and potential in every location.
Ambient light improves your observation skills. It helps you take stunning atmospheric portraits.
Window light photography is a simple and beautiful way to take portraits. Using natural light from a window, you can create stunning images with a soft, dreamy quality. All other things being equal, the larger the window, the softer the light is.
The softer light is because a large window provides a wider angle for the light to fall on your subject’s face, producing fewer shadows. You can experiment with the distance between your subject and the window to adjust the hardness of the light.
Window lighting is very directional. It acts as a side light unless the window is directly above the subject.
Place your subject in the middle of a window, and the light from the left illuminates the left side of their face more than the right. This setup creates an interesting effect with more shadows on the right side.
Look at our handy guide to learn more about window light portrait photography.
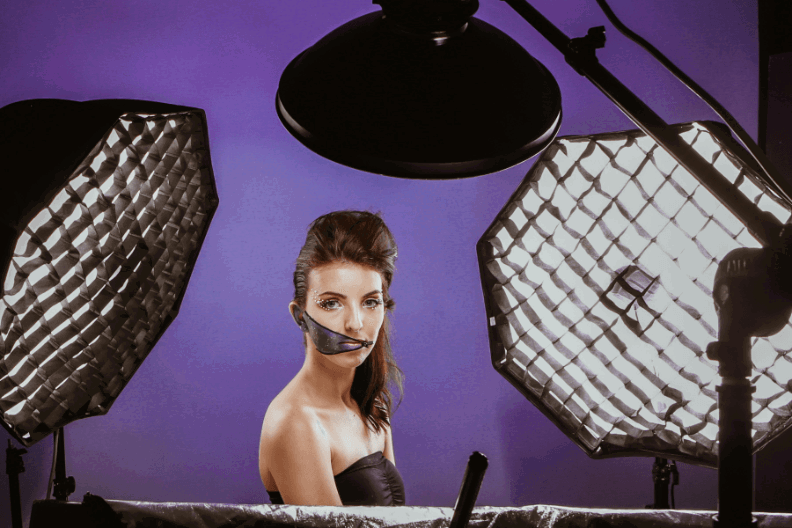
Try these photography lighting techniques using artificial light in a studio.
Portrait lighting is a crucial skill for any photographer. The right lighting can make all the difference in creating a stunning portrait. Here are seven portrait lighting setups to try with studio lights.
Split lighting is the simplest setup, using a single flash lined up with the model’s shoulder. Loop and Rembrandt lighting are classic setups that suit both male and female models. Butterfly lighting casts a small, butterfly-shaped shadow under the nose.
Rim lighting highlights the contours of the model, creating a mysterious feel. Clamshell lighting uses a key light and a fill light to disperse shadows. And don’t forget about mixing flash with ambient light for environmental portraits.
Mastering these portrait lighting diagrams takes your photography to the next level. Experiment with different setups to find what works best for your style and subject.
You can create amazing portrait lighting with just one light. The key is knowing where to place that light relative to your subject.
Butterfly lighting places the light above and slightly behind the camera, creating a small shadow under the nose. Loop lighting moves the light 45 degrees to the side, creating a shadow on one side of the nose.
Rembrandt lighting creates a triangle of light under one eye. Rim lighting places the light behind a person, outlining their shape.
Split lighting puts the light directly to the side, lighting only half the face. A reflector on the opposite side can fill in some of those shadows. A backlight creates a halo effect behind the subject.
Adding a reflector in front bounces light back to softly illuminate the face. For more one-light portrait tips, check out our full guide.
An external flash is a great way to improve indoor portrait photography. Bouncing the flash off the ceiling or walls can create a more natural, pleasing effect than using a direct flash.
Experiment with different angles, such as 90, 120, or 150 degrees from the subject, to find the best results for your environment.
Pay attention to your camera settings as well. A maximum aperture of f/4.0 for single subjects and f/7.1 for groups ensures the entire face is focused.
A shutter speed of around 1/50 s lets some ambient light in without risking any camera shake. An ISO of 400 provides a good balance between detail and noise.
With these techniques, you can capture well-lit, professional-looking portraits indoors. You don’t need a studio! To learn more about indoor flash photography, check out our in-depth article.
A three-light setup is a versatile lighting technique for photography. It uses a key light, fill, and backlight to illuminate the subject.
The key light is the main light source. To reduce shadows, place it 45 degrees to the subject’s right and the fill light 45 degrees to the left. The backlight is positioned behind the subject to separate them from the background.
Adjust the brightness of each light to get the desired exposure. The key light should be brighter than the fill light. The backlight can be as bright as the fill light or slightly dimmer. Use a radio trigger to set off the lights remotely for the best results.
Learning to use a three-light portrait photography setup is an important skill. You can use it for portraits, headshots, and more.

Butterfly lighting is a simple yet effective setup for creating beautiful portraits. It involves placing a single light directly in front of the subject, about a foot above their face.
This setup creates a butterfly-shaped shadow under the nose. It’s flattering and slimming.
When setting up butterfly lighting, using an off-camera flash, triggers, and a reflector is best. Position the person before your camera and align the light with them. The reflector should be placed below the subject’s face to soften shadows.
To control the intensity and direction of the light, experiment with the angle of the subject’s face and the power of the flash. You can also add creative elements like fairy lights or dramatic shadows to make your portraits more interesting.
Butterfly lighting is a great technique. It’s for any photographer looking to improve their portrait photography skills.
Paramount lighting, also known as butterfly lighting. It’s a timeless portrait illumination style that can create stunning results.
It involves placing a single light source above and directly centered with the subject’s face, angled down towards them. This setup creates a butterfly-shaped shadow under the nose and emphasizes the cheekbones.
To achieve paramount lighting in a studio, use a softbox or strobe placed above and behind the camera. An octagon-shaped softbox creates beautiful catchlights in the model’s eyes.
If the shadows are too harsh, place a reflector under the chin to help soften them. This lighting style is flattering for most people, filling wrinkles and facial lines while creating a soft look to the skin.
Our full article is helpful if you want to learn more about paramount lighting.

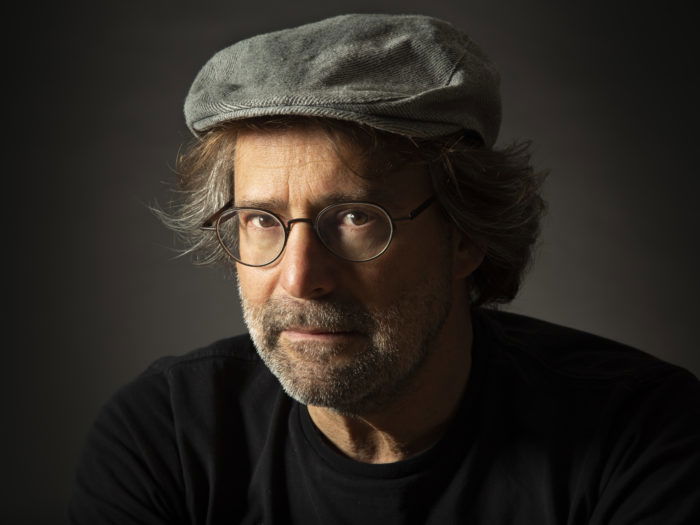
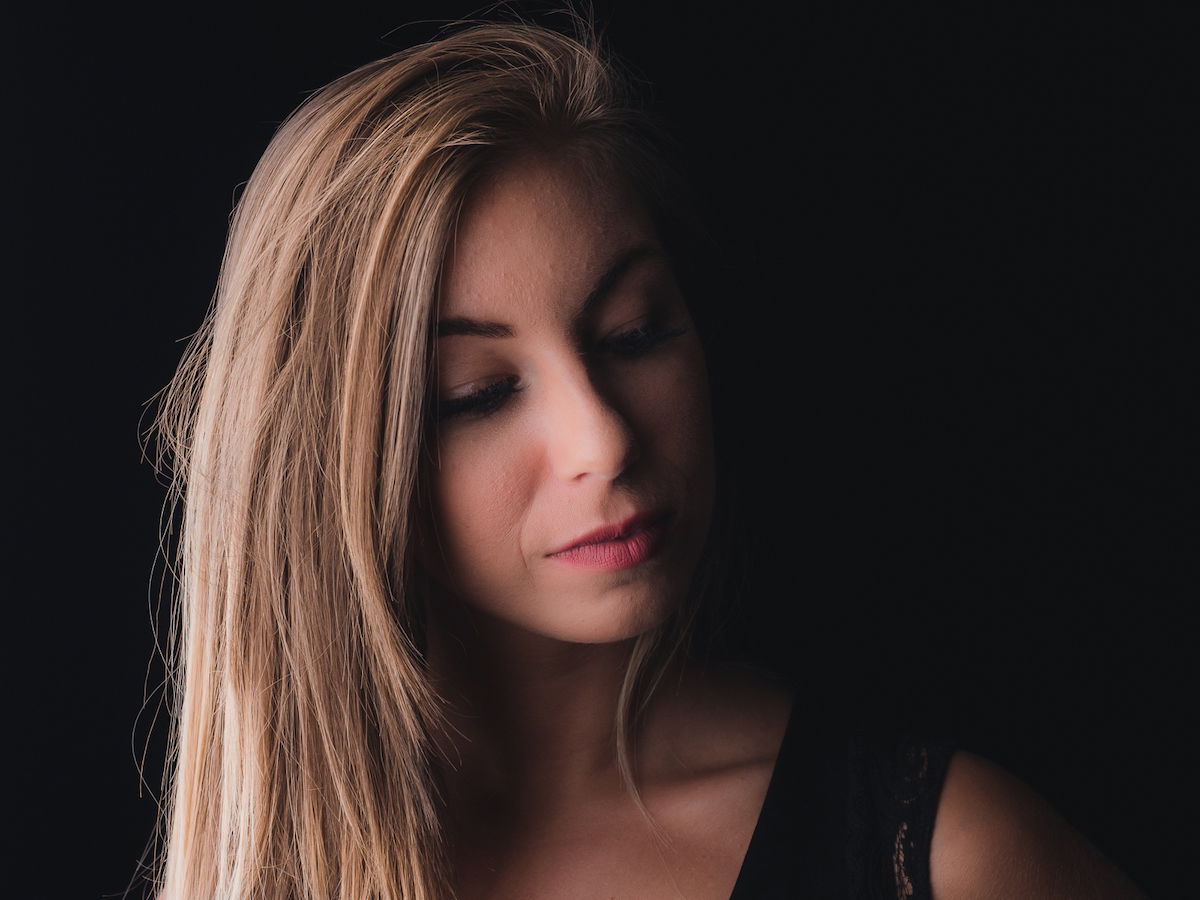
Rembrandt lighting is a classic portrait technique that creates a dramatic, moody look. It was named after the Dutch painter Rembrandt, who often used this type of lighting in his paintings.
For Rembrandt lighting, place your key light off to the side of the subject’s face at a 45-degree angle and slightly above their eye level. This setup creates a triangle of light under the subject’s eye on the shadowed side of their face.
Rembrandt lighting is a great choice for low-key portraits, and you can achieve it with a single light source. Add a fill light or reflector to lighten the shadows for a softer look. Our full article is a good resource to learn more about Rembrandt lighting.
Clamshell lighting is a popular beauty, portrait, and headshot photography setup. It sculpts the face, defines the cheekbones and chin, and creates a sparkle in the eye while keeping shadows soft.
Place the key light above the subject’s head at a 45-degree angle to create clamshell lighting. Use a modifier like a softbox to soften the light. Take a test shot and adjust the light until you see catchlights in the eyes.
Next, add a reflector or second light below the subject at a 45-degree angle. This setup fills in the shadows under the chin. If using a second light, set it about two stops lower than the key light. Clamshell lighting is a simple yet rewarding setup to master.
A hair light is a studio light that separates the hair from the background. It’s placed behind the model and directed towards the hair, creating a halo effect. This setup is especially helpful when the subject’s hair color is like the background color.
The hair light can be subtle or more pronounced depending on the desired look. Use a low power setting for a subtle separation, or turn up the power for a stronger halo effect.
Modifiers like beauty dishes, barn doors, grids, and snoots help prevent light from spilling onto other parts of the image. Be careful not to exaggerate flyaways with the hair light.
Have the subject use hair spray to smooth their hair and save time in Photoshop later. A hair light can add the perfect pop to your portraits when used correctly. Check out our in-depth article to learn more about using a hair light in your photography.

You can achieve these portrait photography lighting techniques using natural and studio lights.
Fill light is an extra light source that helps eliminate shadows and balance the exposure in your photos. It’s especially useful when shooting in bright conditions, and your subject looks dark. You can use a flash, strobe, continuous light, or reflector as your fill light.
The fill light is typically less bright than the key light, the main light source. To use a fill light, place it opposite the main light source. If the key light is behind your subject, position the fill light in front of them.
The key to effective fill lighting is setting the correct fill ratio. Use your camera’s spot meter to make an exposure reading from the lightest part of your composition. Then, add fill light to eliminate shadows without overexposing the subject.
To learn more about fill light, check out our in-depth article.
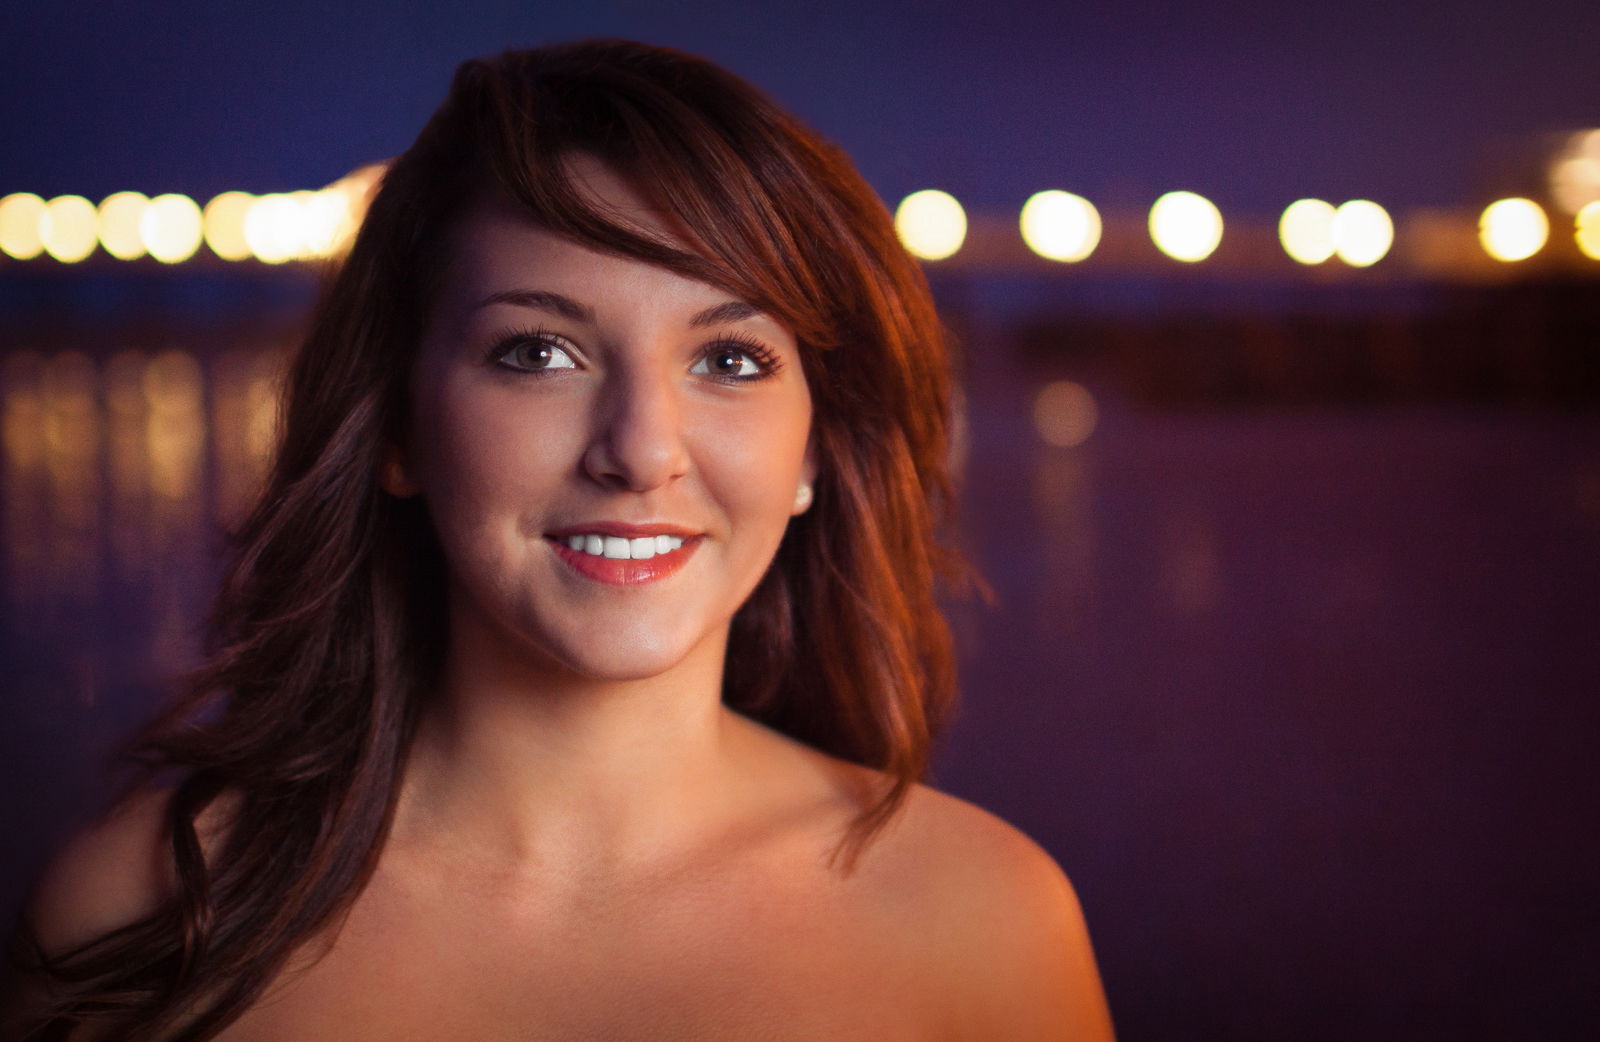
Catchlight is the sparkle in a subject’s eyes, making them look alive and vibrant in a portrait. It’s a reflection of the light source, whether natural or artificial. Without a catchlight, portraits can appear dull and lifeless.
Position your subject facing the sun or a reflective surface like windows or mirrors to capture catchlights outdoors. Shooting during the golden hour when the sun is low can create stunning silhouettes in the eyes.
Indoors, use windows to diffuse natural light and position your subject about 45 degrees from the window. This lighting setup creates the most appealing catchlights.
Artificial light, household lamps, continuous lighting, or off-camera flash can create catchlights. Focus on the eyes. Use a wide aperture like f/1.8 or f/1.4 to emphasize them. And choose circular light sources for natural-looking specular highlights.
Editing can help bring out the catchlights by removing unwanted reflections. Check out our in-depth guide to learn more about catchlight in portrait photography.
Short and broad lighting are two styles of portrait lighting. They can dramatically affect the mood and appearance of your subject.
Short lighting is when the shadowed side of the face is closest to the camera, creating a more dramatic and moody look. It can also make the face appear slimmer and longer.
Broad lighting is the opposite, where the brighter side of the face is closest to the camera. This lighting creates a more open and inviting look and can make the face appear wider. It’s often used for female subjects to help smooth out skin imperfections.
Use these lighting styles with both studio and natural light. By adjusting the position of your subject and the light source, you can create various looks.
Check out our in-depth guide to learn more about using short and broad lighting in your portrait photography.
Loop lighting is a popular portrait lighting technique. It creates a small shadow of the subject’s nose on their cheek. To achieve this effect, position the light source slightly above eye level and angle it down to create the desired shadow size.
The ideal angle is around 45 degrees. Move the light until the nose shadow is right—not too large or fused with the cheek shadow. Avoid placing the light too high, which results in lifeless images without eye catchlights.
Loop lighting flatters most faces, making it a go-to choice for many portrait photographers. By mastering this technique, you can create stunning portraits that showcase your subject in the best possible light.
Loop lighting is a fundamental skill for any portrait photographer looking to take their work to the next level.
Rim lights create a dramatic effect in portrait photography. Position your subject before a dark background with a strong light behind them.
The light source can be slightly to the side or above. But the subject should block the light source from the camera’s view.
You can use any light for rim lighting, including studio strobes, off-camera flash, continuous LED panels, or natural light. Contrast is key – the rim light should be stronger than the key light on the front of your subject for the most impact.
When using natural light, look for locations with a dark background and place your subject so the sun is behind them. Morning and late afternoon work best when the sun is lower in the sky.
You can also combine available light with flash to balance the exposure. Translucent edges like frizzy hair or clothing can enhance the rim light effect. Improving the contrast during post-processing can further refine the look of your rim light portrait.

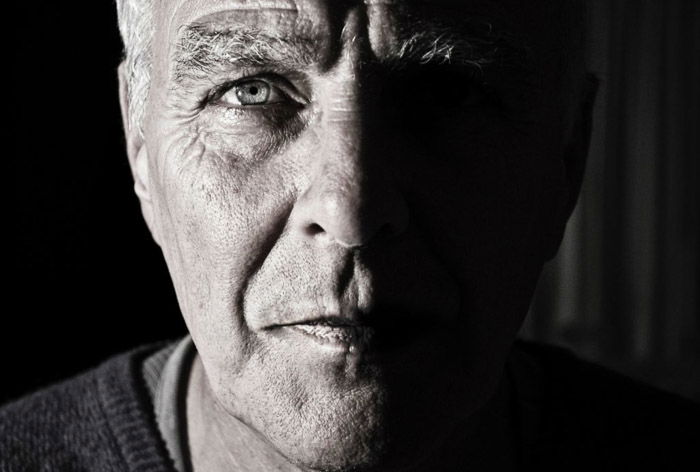
Split lighting is a photography technique in which the light source illuminates half of the subject’s face. It leaves the other half in shadow. This lighting setup creates a dramatic effect that emphasizes texture and adds contrast to portraits.
Place the light source to the subject’s side at a 90-degree angle from the camera to achieve split lighting. The light should be slightly behind the subject’s head.
Adjust the position of the light or the subject until you light exactly half the face and the other half is in shadow.
You can use natural light from a window or artificial light sources like LED lights with stands. To add vitality to the portrait, ensure there are catchlights in the subject’s eyes.
Experiment with light intensity and color to create different moods. Split-lighting portraits often look striking when converted to black and white. It further enhances the dramatic effect.

Dramatic lighting makes photos stand out by creating contrast, interest, and mood. It has three main features:
To create dramatic lighting, use small or distant light sources for hard light. Change the light with grids, snoots, or barn doors to focus it on a specific area or create patterns. Increase contrast by avoiding fill light and using a black reflector to deepen shadows.
Experiment with light positioning to achieve dramatic effects like split or Rembrandt lighting. With these dramatic lighting techniques, you can create powerful, attention-grabbing photos that stand out.
Twilight portrait photography can be challenging. But with the right techniques, you can capture stunning images in low-light conditions.
Start by taking a test shot to gauge the ambient light exposure. Then, add a flash with a diffuser to illuminate your subject while maintaining natural shadows.
Experiment with your camera settings to find the right balance between flash and ambient light. A wide-aperture lens, like an f/1.4 prime, lets more light in. Focusing on the model’s eyes creates a soft, dreamy effect.
Pay attention to your background lighting. And position your model to capture interesting elements. With the right settings, you can create stunning twilight portraits. To dive deeper into twilight photography, explore our comprehensive guide.
![P39 [Lead gen] sidebar banner Related ebook](https://expertphotography.b-cdn.net/wp-content/uploads/2022/09/P39-Lead-gen-sidebar-banner-Related-ebook-300x295.jpg)
![P39 [Lead gen] Sidebar Banner offer 2](https://expertphotography.b-cdn.net/wp-content/uploads/2022/09/P39-Lead-gen-Sidebar-Banner-offer-2-300x245.png)
![P39 [Lead gen] Sidebar Banner offer 1](https://expertphotography.b-cdn.net/wp-content/uploads/2022/09/P39-Lead-gen-Sidebar-Banner-offer-1-300x245.png)