Few things in photography are as important as understanding how to use light. And when it comes to using light, there's nothing more versatile than a three-light setup.
A 3 light setup for photography can be used for portraiture, still lifes, product shots, and just about anything else you can imagine. In this article, we're going to show you how to set up a three-light studio lighting kit and how to use it to create beautiful photos.
Necessary Equipment for a 3 Light Setup for Photography
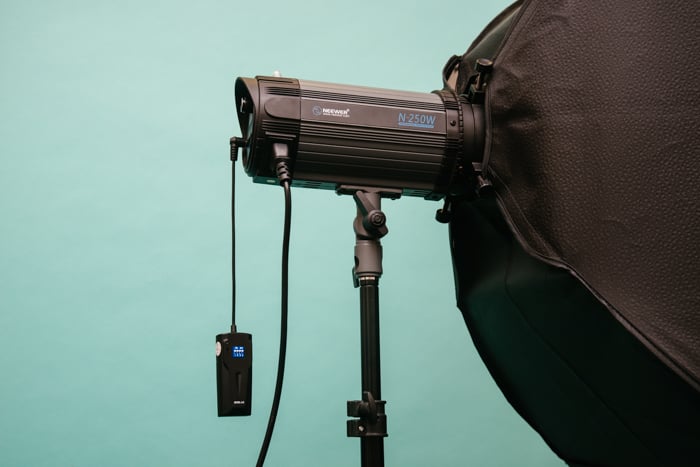
You'll need 3 light sources for the 3 point lighting setup. It could be anything from continuous lights (LEDs or light bulbs) to flash (monolights or speedlights).
To make sure everything looks consistent, try to use the same type of light source. That way your color temperature stays consistent.
Having the same type of light source also allows you to control the lighting better. Since they produce the same output, you won't worry about one unit overpowering the others.
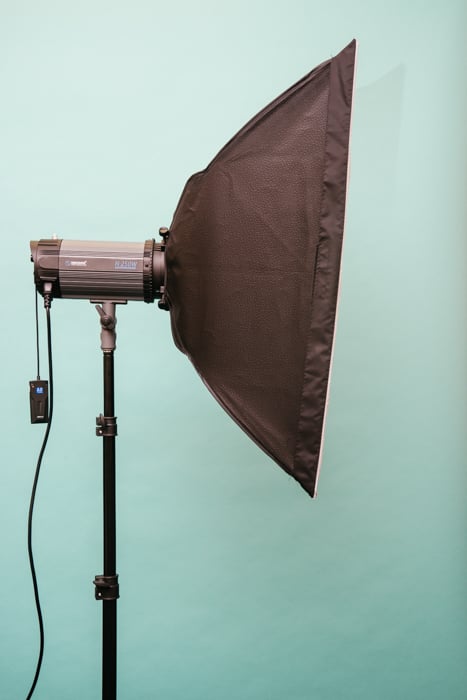
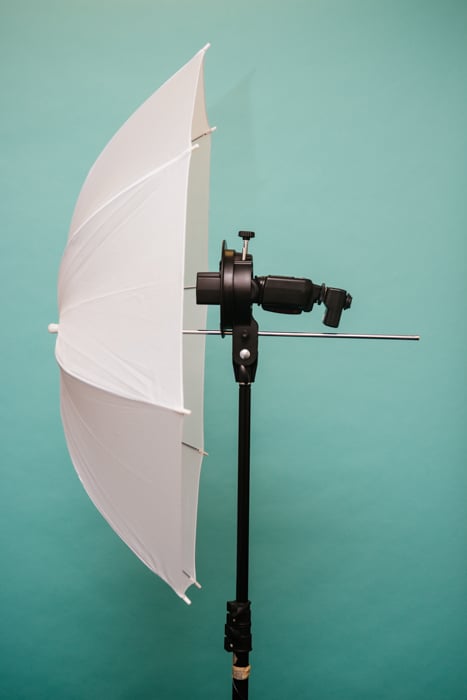
To soften the light coming from your light source, you'll need diffusion as well. There are many types available, but the most common you can buy are softboxes and/or umbrellas.
You'll also need light stands. C-stands would be ideal as you can adjust the legs in any direction, but they tend to be expensive. If you're on a budget, regular light stands will work as well.
The good news is that you can now buy lighting kits for cheap online. The cheapest ones are continuous lighting kits which start at $50.
The output often isn't very bright. I suggest getting strobe kits, instead. These tend to be more expensive (starting at $200), but they produce better photos in general.
You'll need a radio trigger and receivers to set off the flashes remotely. If you're using continuous lighting (light bulbs), then these pieces of equipment won't be necessary.
Monolights vs. Speedlights
In the previous item, we talked about the different types of lights you can use for your studio lighting set up.
The common ones that most photographers use are monolights and speedlights. They’re better than continuous lights because you can control their output more precisely.
The monolight and speedlight are both considered flash, but they are not quite the same. We'll show you the differences between the two and help you decide which one is appropriate for you.
The cheapest flash you can purchase is a speedlight. It's the one you see photographers attach to the hot shoe of their cameras.
The speedlight is compact and produces bright bursts of light. But the downside is that it often has a longer recycle time.
If you like doing sequence shots with it, you'll have to wait a few seconds until it goes back up to full power again. Otherwise, the photos you take after the first one will look darker.
Speedlights also don't have a modeling light to help you see how the flash is going to hit the subject. You'll have to guess where the light will bounce and readjust until you find the perfect lighting.
On the other hand, a monolight has much more powerful output than a speedlight. It also has a faster recycle time to help you take sequence shots with consistent exposure.
A monolight also often has a modeling light. It's a constant light source that lets you see how the light interacts with the subject.
The downside of using a monolight is that it's bigger than a speedlight. That means you can't take it anywhere and attach it to your camera.
The good news is both the monolight and the speedlight are perfect as photo studio lights. This is due to their bright and consistent output. It's up to you to decide which one suits you and your budget.
Setting Up the Lights
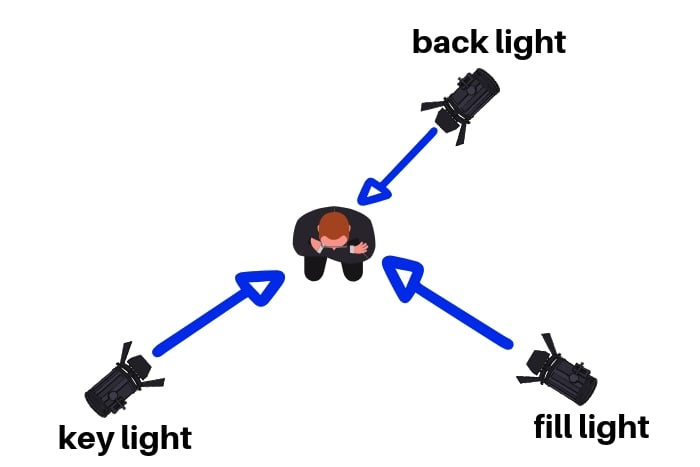
All your three lights perform a specific function. The first one is the key light which supplies the most amount of light on your subject or your subject’s face.
The second is the fill light which gets rid of the shadows that the main light produces.
And finally, there's the backlight. This either illuminates the background or the back of a person's head. See them in action by checking out this lighting simulator by Media College.
The first step in setting up your portrait photography lighting is to install your preferred three light sources to your light stands.
Most photography lights (either monolights or continuous lights) have slots. You can slide these onto the tip of the stand.
If you have speedlights, you'll need special mounts so you can attach them.
The mount I use for speedlights is called an S-Type Bracket Bowens type holder. It clamps down the head of the flash. And it includes the slot that you can find on monolights and other light sources.
It also has a mount that lets you attach Bowens-type softboxes, reflectors, and filters.

An S-type speedlight mount
After you install your lights, its time to move them to their correct positions. First, place your key light 45 degrees to the right of your subject.
Next, move the fill light 45 degrees to the left of your subject. Finally, place the rim light about 45 degrees behind your subject.
Feel free to look at this 3 point lighting diagram for reference.
You'll need to make adjustments depending on how tall your subject is and how far they are from the lights. So do some test shots before proceeding.
Adjusting the Light Intensity
The amounts of light produced by the key, fill, and the backlight are different. It's essential to know how bright you need to adjust each one.
In general, adjusting the intensity of your light source is the same. Almost all of them has a "dimmer" that you can crank up to increase brightness, or down to decrease it.
If you’re using flash, it’s worth noting that the values used for speedlights and for monolights often vary.
For monolights, full power is typically the highest number. For instance, if your light goes up to 60, that would be the brightest setting.
Meanwhile, speedlights often start with 1/132 as the dimmest setting and end with 1/1 as its brightest.
The values used to indicate the flash power of the speedlight also varies from one manufacturer to the next.
In other words, a 1/1 setting from a Canon flash may be either dimmer or brighter than a Nikon set to the same value.
That's why there's no definitive setting you can use for your three-point lighting setup. You just have to eyeball the output of each light source and figure out how bright you want it.
Always make sure that your key light is brighter than the fill light. A one to three stop difference is often enough. But feel free to go beyond those parameters if you feel the exposure still isn’t correct.
Finally, make sure your backlight is either as bright as the fill light or slightly dimmer. The value you use often depends on the hair color of your subject.
If your model has dark hair, then you may need to crank up the power higher than you would for blonde hair.
Setting Off Light Remotely
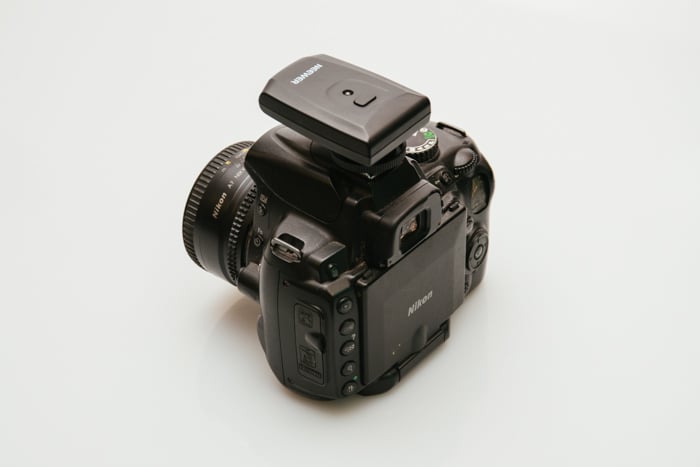
A camera with a radio trigger installed.
Once your 3 point lighting set up is in position and set to the proper settings, it's time to connect them to your camera.
The most straightforward approach is connecting your camera and flash with a sync cord. When you press the shutter, the cable sends a signal to the flash and sets it off.
This process is highly effective, but the downside is that the cable limits your movement and they can be messy.
Another method is using optical slaves. Instead of using cables, they respond to the flash from your camera.
Most monolights have built-in optical triggers. That means you can trigger them wirelessly by simply activating your pop up flash.
If you’re using speedlights, you can also buy optical slaves that attach to the bottom of the flash units.
The issue with optical triggers is that they fail to fire if the optical sensor is blocked. So you need to make sure the light from the flash hits the sensor or it won’t work at all.
The most effective method is using radio triggers. Since the system uses radio waves, you can be sure that the flash fires every time you press the shutter no matter where you are in the studio.
Radio triggers have plenty of settings and customizable options. But for the most part, all you have to do is to attach the trigger to your camera hot shoe and the receiver to your flash unit.
Once you activate the transmitter and the receiver, all you have to do is press the camera shutter to set off the flash units.
Adjusting the Exposure Settings

The good thing about using studio lights is that they produce consistent results. That means you don't have to fumble around with your camera settings every time you shoot.
To keep your exposure settings consistent, you'll need to set your camera to Manual. That way all the exposure values don't change while you're shooting.
First, set your ISO to 100. Doing so ensures your photos don't end up overexposed from the bright studio lights. Furthermore, this setting also produces minimal image noise.
In Manual Mode, use your command dial to set your preferred aperture. If you want a shallow depth of field, then choose anything between f/1.2 to f/4.5.
If you want the background to be sharp as well, then pick between f/8 to f/22. Keep in mind that using extremely narrow apertures may produce blurry results due to lens diffraction.
Once you set your aperture, use your subcommand dial to change your shutter speed. If you choose a wide aperture, choose a high value up to 1/200th or 1/250th depending on your camera's maximum shutter speed sync.
If you go higher than those values, you'll risk getting dark photos due to the shutter curtain obstructing the frame.
Meanwhile, feel free to use lower values down to 1/60th if you're using a narrow aperture. Why 1/60th? Because that's the lowest value you can go until you start seeing motion blur in your images.
Remember to do test shots while you're adjusting your settings. Keep moving your subcommand dial up or down until you achieve the proper exposure.
Once you are satisfied with the values, you can keep them that way while you're shooting in the studio.
Conclusion
3 point lighting is such a versatile system that I even recommend it to be your go-to setup in your studio.
Once you know how it works, you can use it for just about anything. From beautiful portraits to corporate headshots. Learn and master it because it's an essential skill in the trade.
Why not check out our essential tips for your portable photo studio or using fractal filters for prism photography next!


