You’ve might have heard of Capture One as a growing software for photo editing. It’s most known for its abilities to control and correct color. And it can offer a tempting alternative to Lightroom.
If you’re used to other software, making the switch might come with a steep learning curve.
In this guide, we’ll go over the basics of editing techniques within the Capture One workflow.
Capture One Workflow vs Lightroom Workflow
If you’re used to working in Lightroom, making the switch to Capture One may seem confusing at first. Lightroom houses a lot of different tools and features within the Develop module. With Capture one, these are all under separate tabs.
In Capture One , you see the different tabs at the top left of the workspace. From left to right, their default order is Library, Capture, Lens, Color, Exposure Details, Adjustments, Metadata, Output, Batch.
It’s important to know that you can move these tabs to be in a different order. If you’re used to working in a certain order during edits, it’s easy to make these tabs match that order!
The Library tab is where you filter images. You can also view the parent folders for the photos you’ve imported into your library. Much of the information here will be the same as Lightroom!
The Capture tab is used when tethering to Capture One. It’s where you can control some settings in the camera and preview photos as they’re taken.
Now let’s move on to the tabs that involve how to edit a photo in Capture One, tool by tool.
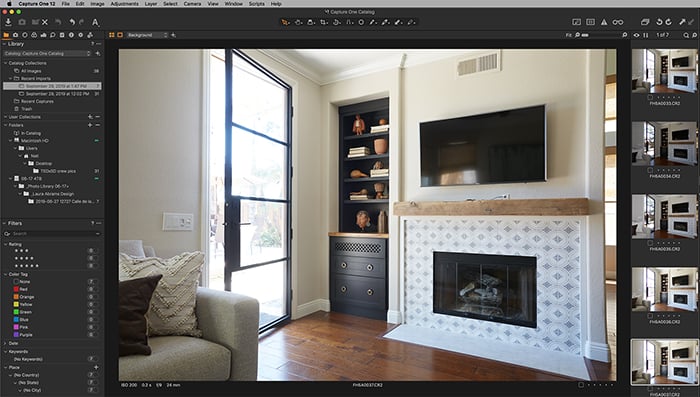
The Library tab shows the file organization and lets you filter photos.
Editing Features
Lens
This is where you correct any sort of distortion, aberration, or fringing caused by the lens of your camera. For major brand name camera lenses, these corrections may be made automatically. If no camera lens profile automatically loads, though, then there is a pull-down list of lenses to select from.
Still, there’s a chance that your lens, especially if it’s a third party lens, may not be listed as an option. In this case, you can still manually make adjustments!
Make sure the boxes underneath the profile list are checked. Then adjust the distortion slider and the Defringe slider.
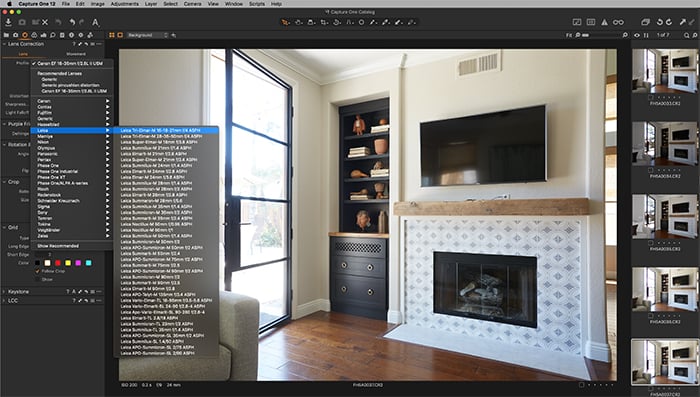
Capture One has a robust list of lens profiles for automatic corrections.
Color
Capture One is known for its amazing handling of color. There’s a key difference you’ll notice between the color controls of Capture One and of Lightroom. Capture One uses color wheels for their adjustment controls.
The most basic adjustment you’ll need to make on a photo’s color is correcting the white balance. Within the White Balance section in the Color tab, select a Mode.
If none of the default modes is a good fit, you can also use the dropper to select a spot that is meant to be white. Capture One will then customize the white balance of the image for you.
To further customize the white balance, you can manually adjust it on the color wheels within the Color Balance section.
The wheels take a little getting used to, but are well worth learning!
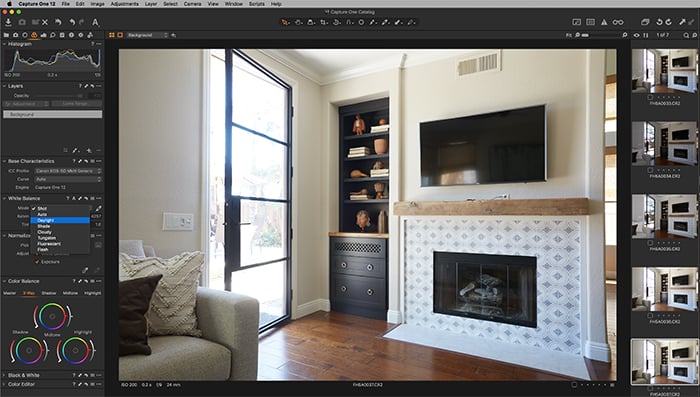
The Color tab is one of the most noteworthy benefits of Capture One.
Exposure
The exposure tab is where you adjust some of the basics. These include exposure, contrast, and saturation. There are two sections within this tab worth noting that work differently than Lightroom.
First, you’ll see that the Highlight and Shadow sliders only slide in one direction. This is because you slide to recover. For highlights, this means that as you slide to the right the highlights are pulled back. For shadows, this means that as you slide to the right the shadows are brightened.
The second section under the Exposure tab to take note of is Curve. You’ll see what looks like a histogram with a diagonal line through it. At the top, you have the options of RGB, Luma, Red, Green, and Blue.
This section allows you to create split toning effects. You just grab and drag the diagonal line up or down. This is another tool that takes a bit of getting used to but is well worth the effort.
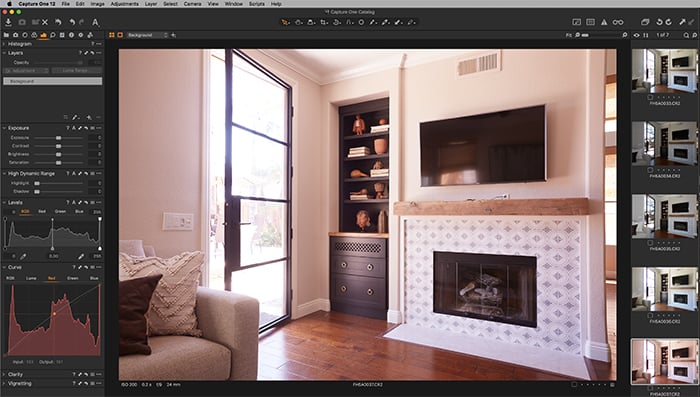
The curves section in the Exposure tab creates split toning effects.
Details
The Details tab is where you correct things like grain, sharpening, spot removal, and noise reduction. Sharpening and noise reduction work the same way as in Lightroom. You use sliders to adjust the level of correction.
The spot removal tool does have two different brush options – Spot and Dust. The spot brush is for very noticeable areas that need to be corrected. The dust brush is for more subtle spots caused by specks of dust on a lens.
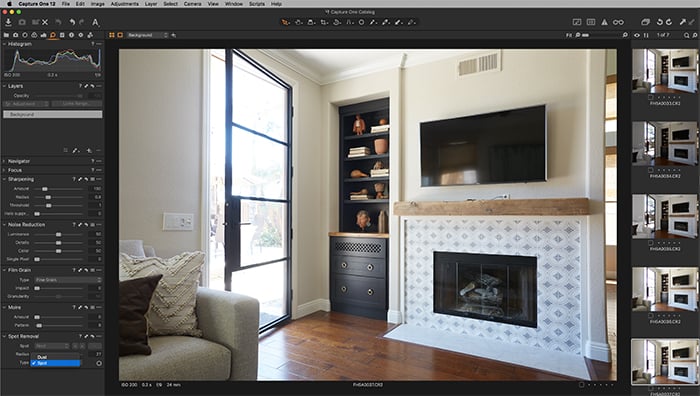
Capture One differentiates between spot removal and dust removal.
Adjustments
The adjustment tab is where any styles or presets are housed. It’s important to note the difference between a style and a preset. It can be confusing if coming from a Lightroom workflow.
A style in Capture One is the equivalent of a Lightroom preset. It’s a saved collection of settings applied at once. A preset in Capture One, however, is when a single setting is saved.
For example, a preset would be for a specific type of grain. A style would be for a vintage-looking image that includes heavy grain.
Capture One does have some built-in styles that come with the software. It’s always a good idea to save your own as well!
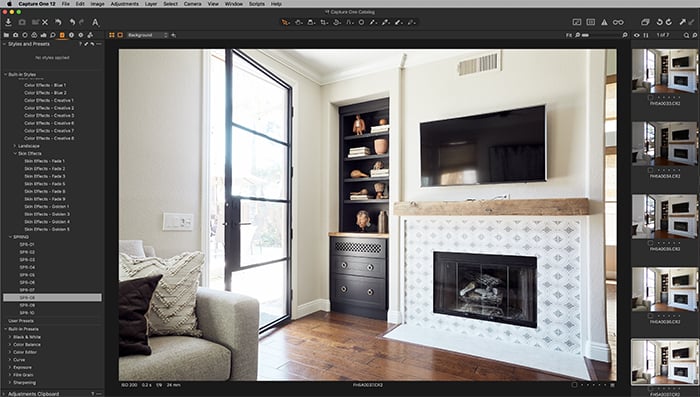
The built-in styles that Capture One includes offer a wide variety of options to get you started.
Additional Noteworthy Features in Capture One
Other than the tabs on the left side of the workspace, you also have a selection of tools to go to at the top of the screen.
Here you’ll find icons for selection mode, pan mode, viewing modes, cropping options, rotation options, straightening options, spot removal tool, mask options, eyedropper selection options, copy adjustments, and annotations.
Having these tools at the top offers a quick way to click to some of the most needed tools for image editing.
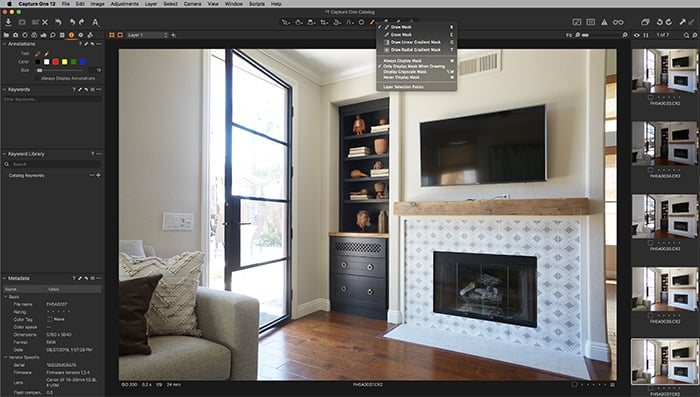
The tool shortcuts at the top are quite handy.
As I just mentioned, there are masking options in Capture One! The ability to create layers and masks is one of the big differentiators between Capture One and Lightroom.
Creating masks and layers is beyond the scope of basic editing that we’re discussing in this article. But it’s a noteworthy ability to be aware of when starting out with Capture One.
Conclusion
Learning new software can be frustrating, but it doesn’t have to be. Capture One and Lightroom appear to be very different at first. But they share many of the same tools and editing methods.
Now that you’re armed with the basics of Capture One , it’s time to give it a go!