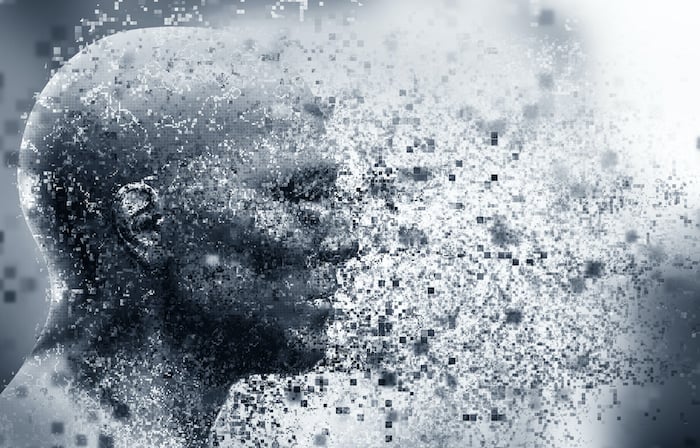
If you want a fun Photoshop technique that imagines your friends disappearing into the abyss, then look no further! Whether you want to prank your friends or you wish to copy inter-dimensional travel, the dispersion effect is here for you.
Today we will take you through the most straightforward route of creating a dispersion effect in portraits. We will go through a simple step-by-step guide so you can make your own particle dispersion effect in photoshop by the end.
What is A Dispersion Effect?
Dispersion is a statistical term that describes the act of dispersing, which is to separate. A simple way to think about this is light being dispersed into a spectrum through a prism.
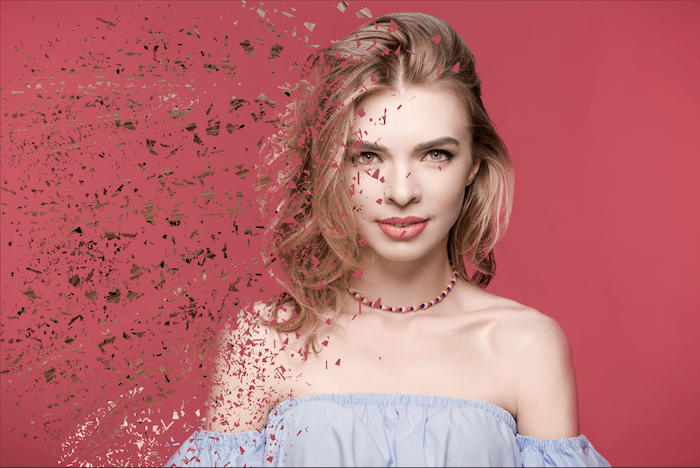
The Dispersion effect in Photoshop will mimic an object slipping away into nothingness. This effect has recently become widely seen in the final Avengers movie. It creates this effect that looks like a solid is decomposing into particles. Ashes lighter than air are the products of this decomposition, and the solid object slowly breaks off into nothingness.
Using this effect is a great way to create narratives in your images. Or it can be used as fun for family and friends.
What You Will Need
- Adobe Photoshop
- Dispersion brush download (I got mine from brusheezy.com)
- Image to work on (My image was taken from depositphotos.com)
Dispersion Effect in Photoshop
Now I will guide you through a simple step-by-step tutorial on how to create the dispersion effect in Photoshop.
Step 1 – Preparing your Image
First, you need to open your image on Photoshop and duplicate your layer.
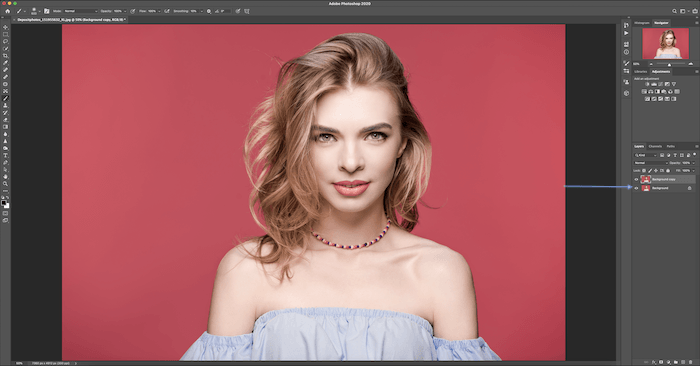
Use the Lasso tool on your background layer to cover your subject.

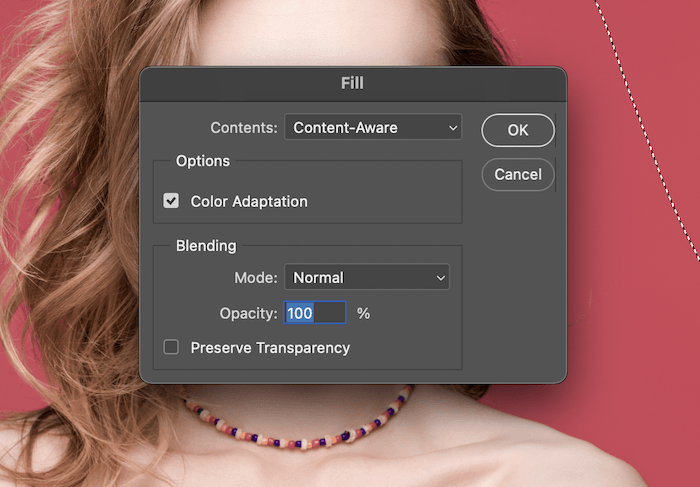
Right-click within the lasso outline and click on Fill.
Choose ‘content-aware’ and click OK.
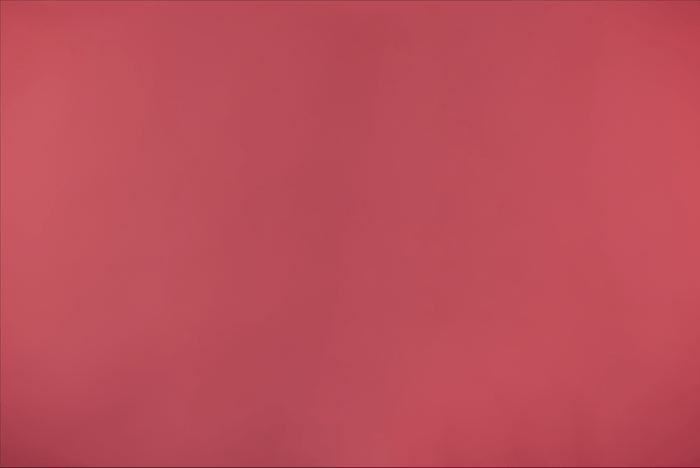
Now you should be left with just the image background.
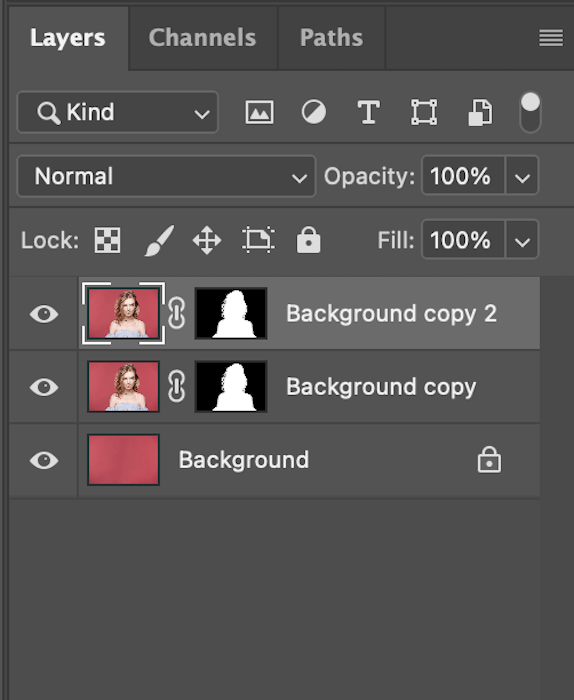
Step 2 – Selecting your Subject
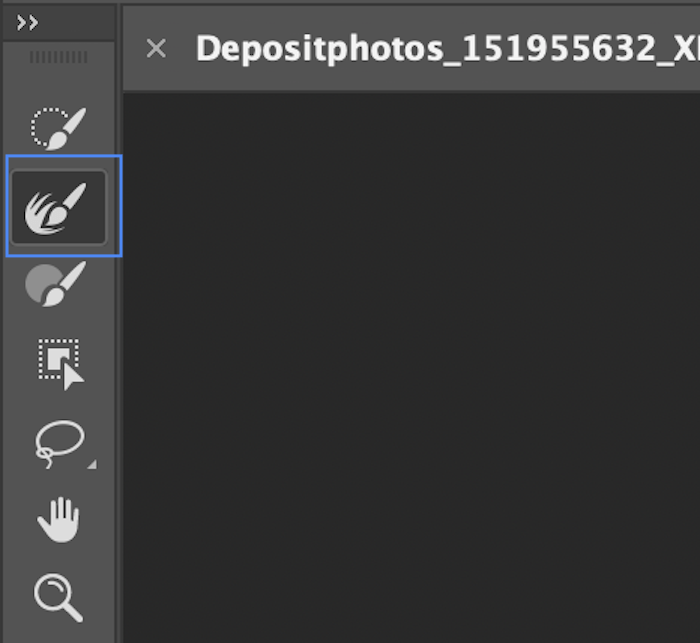
Now you can use the Quick Selection tool to mark out a rough outline of your subject. This can be done in many ways, but the Quick Selection tool works well for this technique.

With your subject is selected, click 'select + mask' at the top.
Now, you want the Refine Edge brush toward the left of your screen.
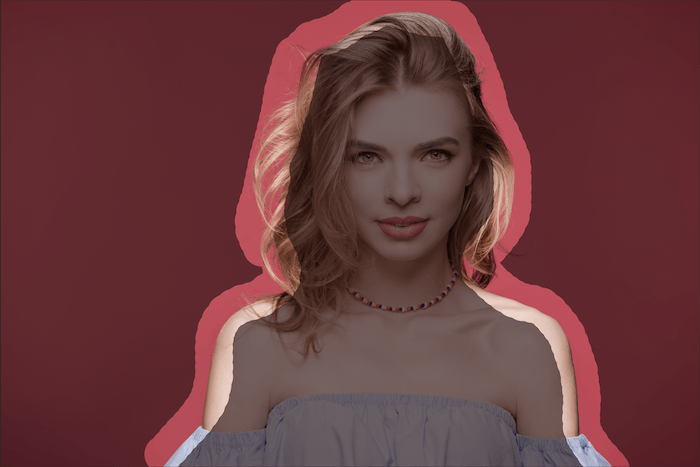
Select 'show edge' to the right of your screen and draw a simple line around the outskirts of your subject. This will help with loose hairs and other more challenging-to-define edges in your image.
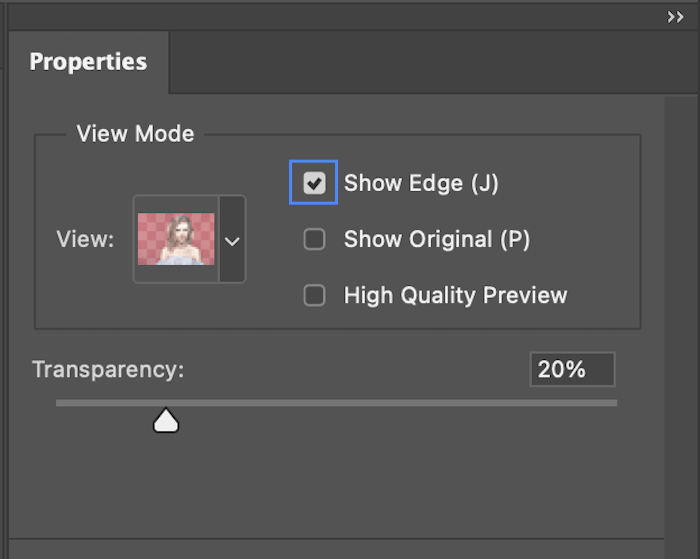
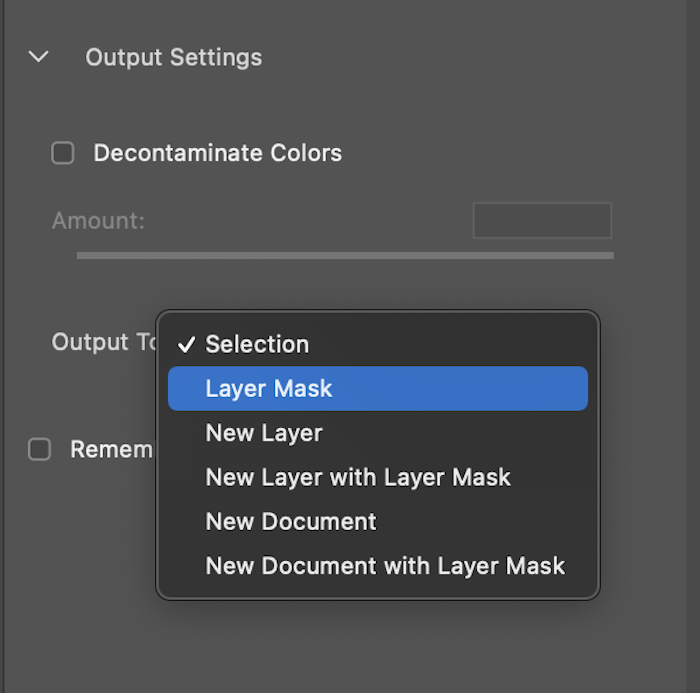
Then select 'layer mask' from the Output drop-down menu and press OK.
Now duplicate the layer. Drag your layer to the bottom of the Layers panel and drop it onto the 'new layer' icon.
Step 3 – Preparing the Dispersion Effect
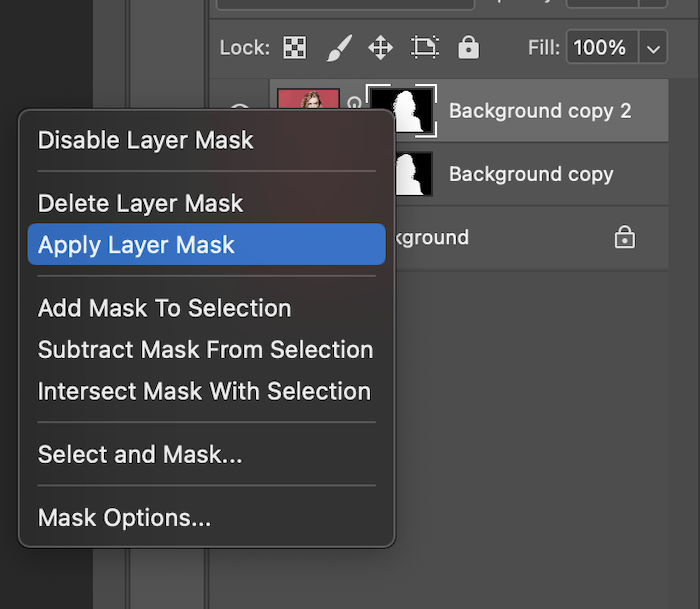
Select the top image. Then, right-click on the new layer mask and select 'apply layer mask'.
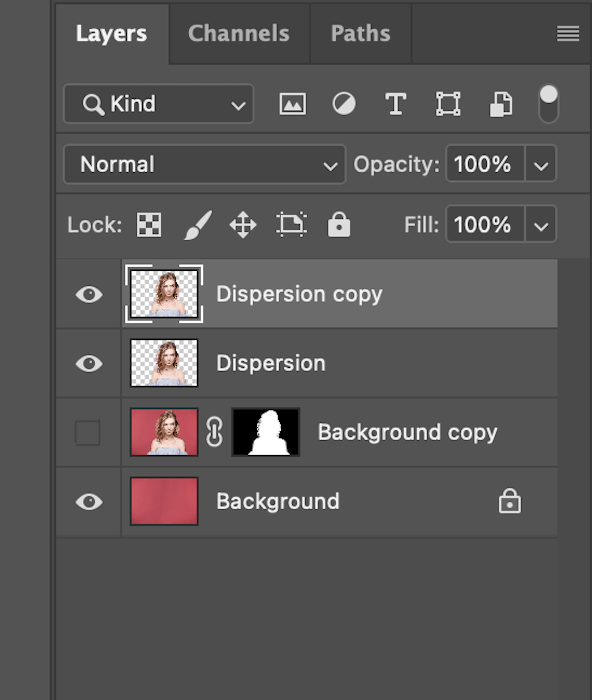
The top layer should now be the isolated subject. Rename this layer 'Dispersion'. This will make identifying your layers a lot easier.
Make a copy of your 'Dispersion' layer. You can now rename this to 'Foreground'.
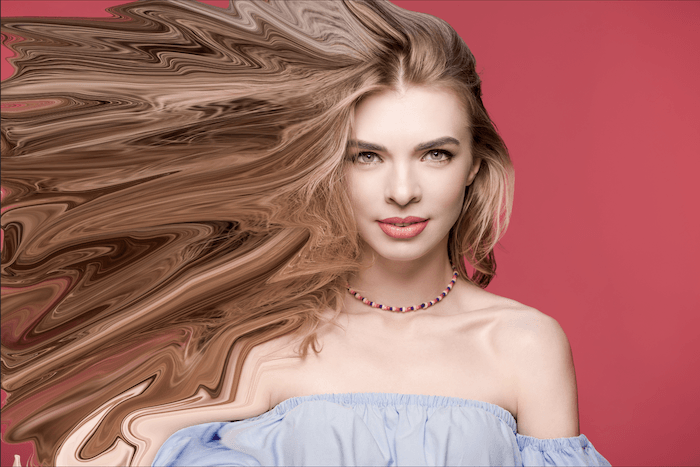
With the 'Dispersion' layer selected, go to Filter in the top bar, then select ‘liquify‘.
This will bring up a new window. Toward the top left of this window, there’s a Forward Warp tool. Select this tool, and now you will be able to drag out the area you want to disperse.
In this section, you can increase or decrease the size and strength of the Liquify brush. You want to warp the image to mimic the way ashes would fly away from your subject. Be sure to use swooping motions to reflect this.

Once you are happy, click OK. You will then see an image similar to this.
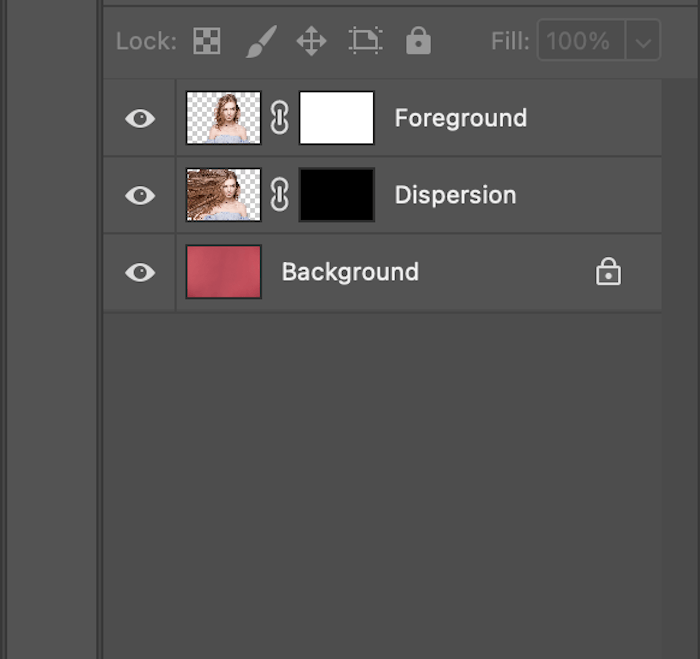
Step 4 – Create the Dispersion Effect
Now you need to get your layers ready for the dispersion effect.
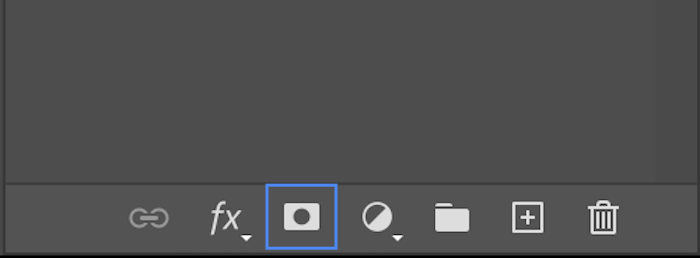
Click on your 'Dispersion' layer, and add a layer mask. For the 'Dispersion' layer, you want to Alt click (or Option click for Mac) when selecting the 'Add Layer Mask' icon in the lower layers panel. This automatically hides everything on your 'Dispersion' layer.
Now create a layer mask for your 'Foreground' layer without the alt-click. This should leave your workspace looking like this.
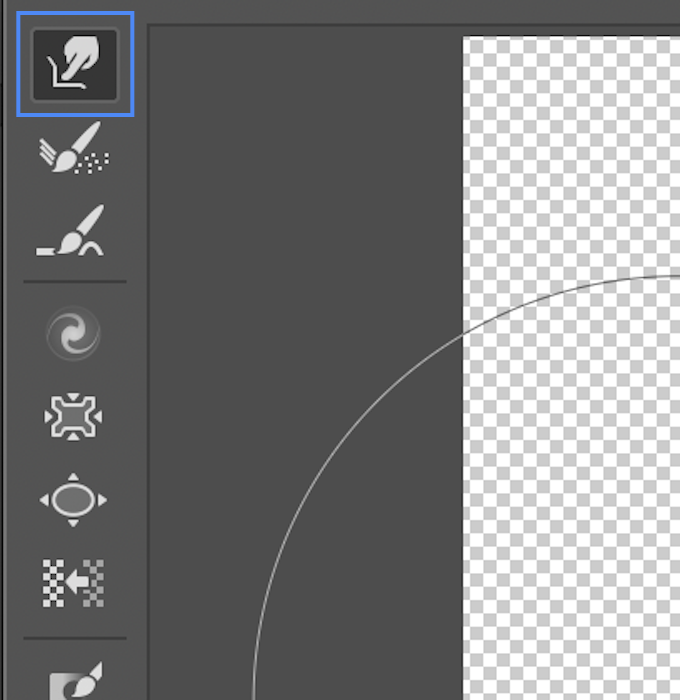
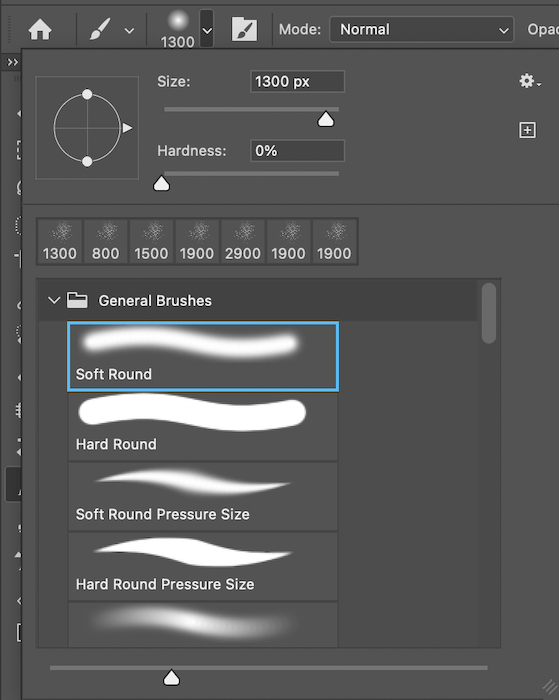
Make sure your new Dispersion Effect Brush tool is in Photoshop.
With these new brushes, start working away at the edges that go in the direction of the effect. Remember you are working on the new layer mask. You want to be painting with black selected.
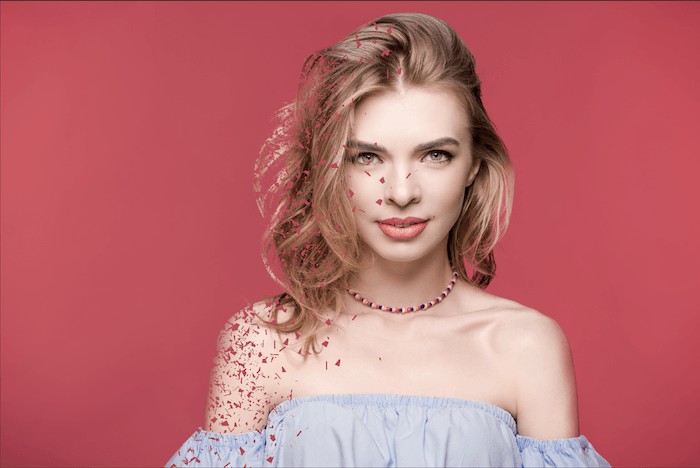
With these brushes, you can change the size and direction they face. Be sure to have your opacity and flow at 100%.
When you have finished this, click on the mask for your 'Dispersion' layer. We will now start adding the 'ashes'.
Invert your Brush tool color from black to white by clicking 'x'. Now you can start revealing the bits you dragged out. Play around with this bit by changing brush sizes. You might also want to add a brush with the opacity reduced to fine-tune your effect.
Make sure you constantly switch between the 'Dispersion' and 'Foreground' layers to make the transition look refined. Remember that each time you swap masks, you need to be cautious of your brush color.
Once you are happy with the dispersion effect you’ve created, you can further refine the image.
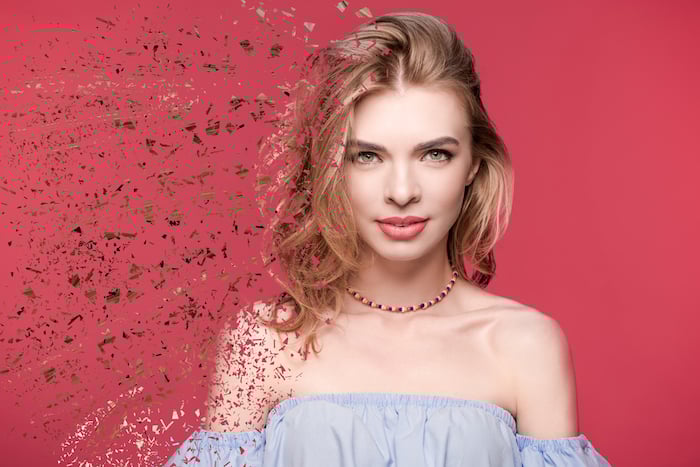
Select the ‘Foreground’ image and use a brush to remove the bits that don't fit. You want to use a white brush tool for this part. Here, I have left her face and shoulder intact. This makes it look like the model is just starting to disappear.
You are now able to make any further edits, like sharpening or anything else you want! This is the most basic way to make a dispersion effect in Photoshop.
Conclusion
Now that you have the basic steps, you will want to try this technique as much as possible to create a dispersion effect in portraits. You might get confused, and even a bit lost the first time around. Don’t get discouraged! The only way to work through this is to keep trying it over and over again.
The dispersion effect may seem like a confusing effect to make, but it’s actually pretty simple once you get used to it. Even people with a beginner/intermediate relationship with Photoshop can get great results with this effect. Start with an image that has a clear background to make it easier for yourself. Soon, you will be able to take your friends and family into other dimensions.
As you can see, there are so many possibilities that you can create with this dispersion effect! Maybe you want to work with objects instead of models? Try it! This is one of those Photoshop techniques that rewards you as you put more and more creativity into it.
Looking for other creative Photoshop techniques? Try adding a soft glow to portraits!


