The liquify tool in Photoshop is a powerful tool for correcting and modifying images. With it, you can easily fix problems like wrinkles or distortion, or go beyond simple corrections to create completely new effects.
The liquify tool is easy to use; just select it from the toolbar and start editing. There are a variety of options available, so you can customize the effect to get the results you want. You can also save your settings as a preset for future use.
The liquify tool is a great way to experiment with your photos and create unique and interesting effects. Give it a try and see what you can come up with!
How to Edit a Portrait With the Liquify Tool in Photoshop’s Face-Aware Liquify
The Liquify workspace has both sliders and tools that are useful for body shaping. Let's start by exploring the changes you can make using the property sliders. Specifically, we will use the Face-Aware Liquify filter.
These filters are the most useful parts of the Liquify tool for portrait photographers. Use these when a client is self-conscious about a particular facial feature like a large nose. You can easily alter it using the Face-Aware Liquify tool.
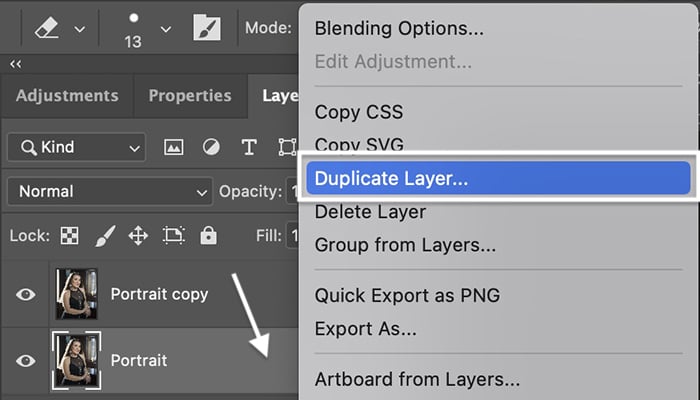
Step 1: Open the Image and Make a Duplicate Layer
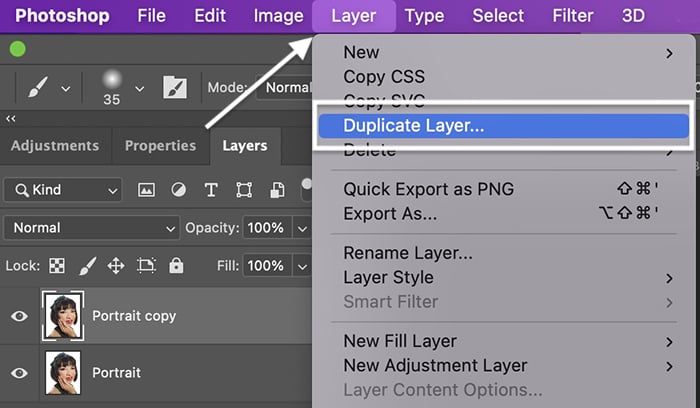
Open your image in Photoshop and duplicate the layer. Go to the Layer drop-down menu and select Layer > Duplicate Layer (Ctrl or Command+J).
Duplicating the original layer ensures that you can return to the original image if you do not like the changes. This also lets you toggle back and forth to see a before and after version of the photo.
Step 2: Open the Liquify Workspace
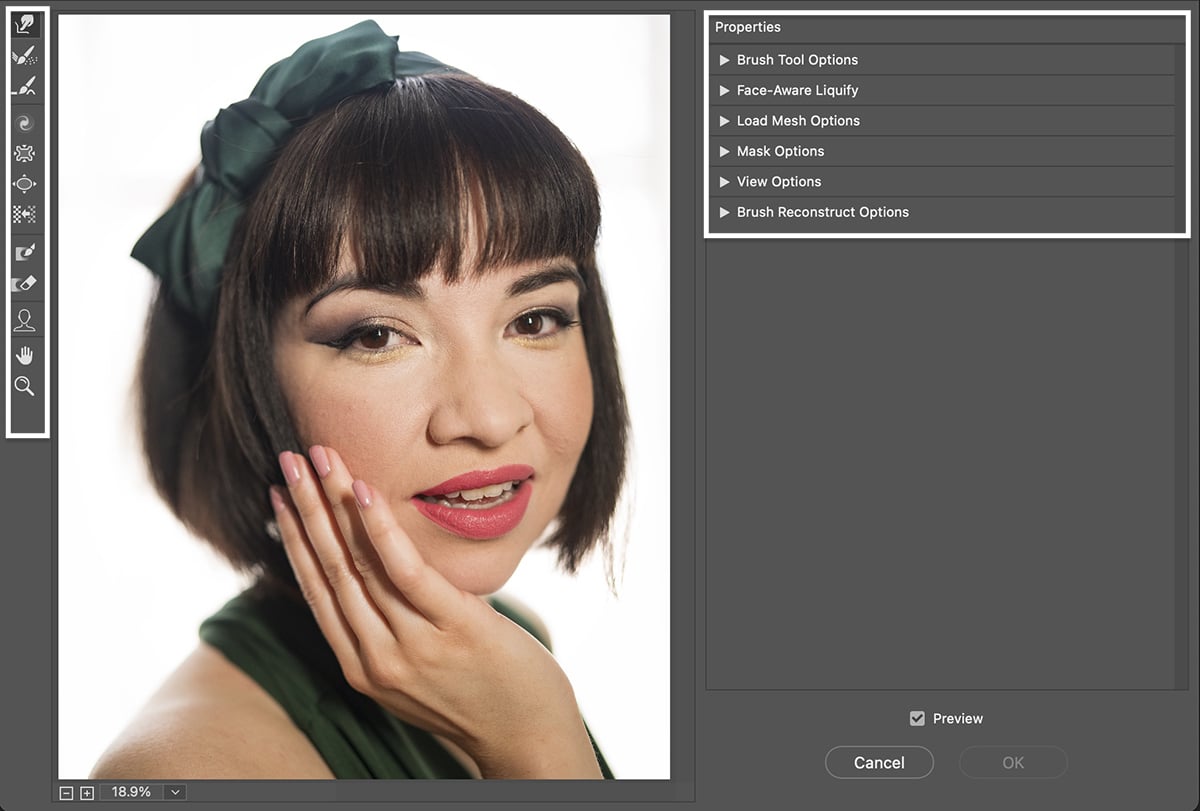
Open the Liquify workspace by going to the Filter drop-down menu. Select Filter > Liquify (Shift+Ctrl or Command+X). This opens a new workspace with your image in the center.
Tools are in both the right- and left-hand columns. In this section, we will talk about the tools in the Properties panel to the right of the image. We will cover the body shaping tools in the left column in the next section.
Step 3: Open the Face-Aware Liquify Panel
To change facial features, click the triangle next to 'Face-Aware Liquify' in the right-hand column of the workspace to open its panel. Photoshop automatically detects facial features in an image and allows you to change them. If Photoshop detects more than one face, you can select which one you want to edit using the drop-down menu at the top of the panel.
In the Face-Aware Liquify panel, you have adjustments to change the person's eyes, nose, mouth, and face shape. You can adjust each eye individually. By default, the sliders are at zero. Increase the feature by moving the slider to the right. Decrease the feature by moving it to the left.
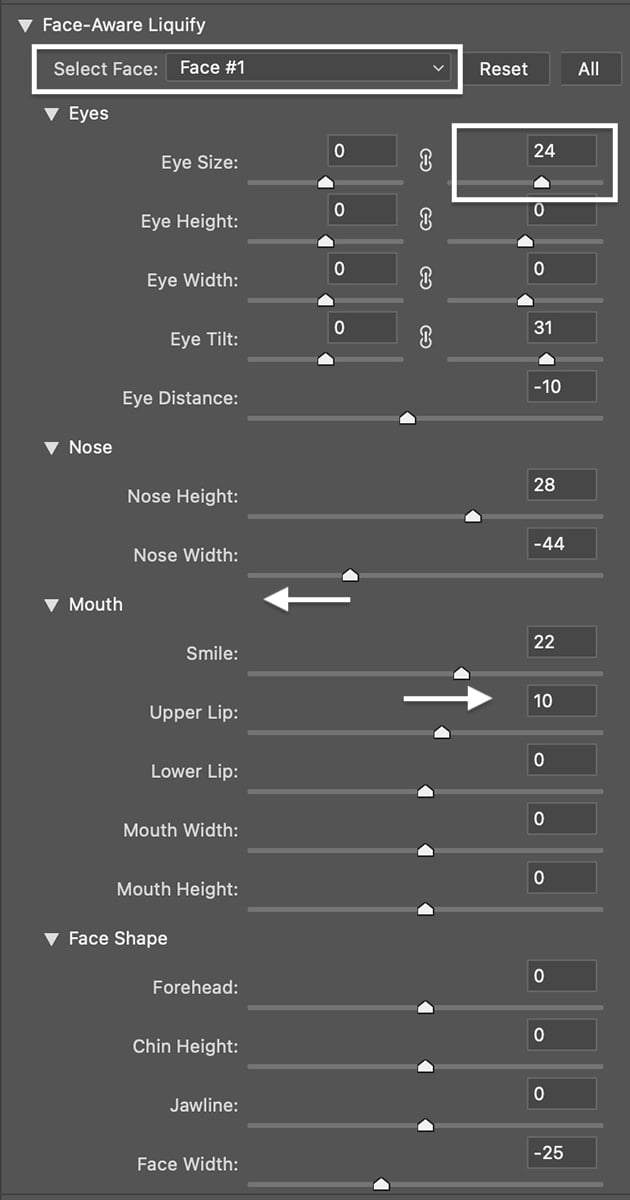
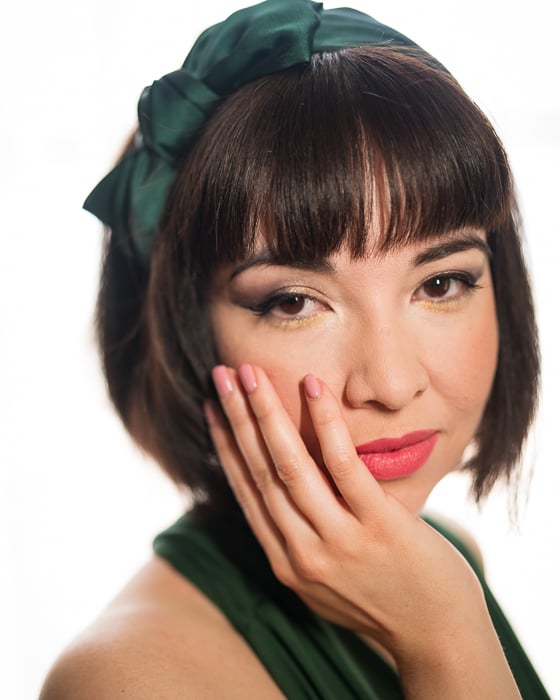
For instance, in this example, I changed the size and tilt of the left eye and reduced the distance between the eyes. I moved the nose higher on the face and reduced the width of her nose. I added some volume to her upper lip and added a little more smile. Finally, I reduced the overall face width.
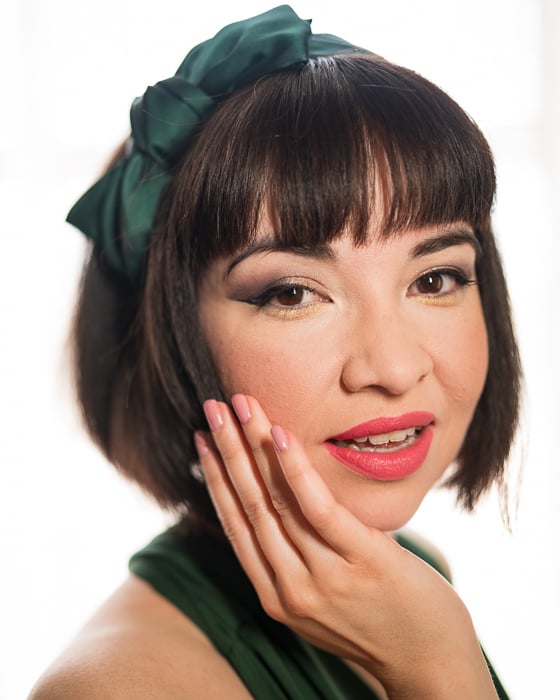
Click the OK button to apply the settings. Let's compare the portraits side-by-side.

If you do not like the settings, click the Reset button.
Ideally, you want to make only subtle changes, especially at first. You do not want the photo to look digitally altered or change the model's features so much that she looks like someone else.
Step 4: Save Mesh to Use Settings on Other Portraits
If you are a portrait photographer, you are likely editing many images of the same person. To apply the Face-Aware Liquify settings to other photos, save your edits as a 'mesh'. A mesh is a map of the changes you have made.
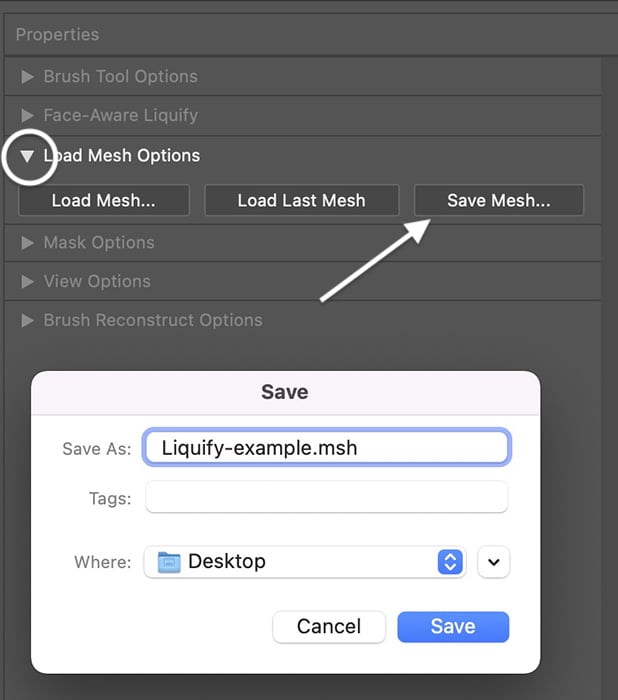
Click the triangle next to 'Load Mesh Options' to open the Mesh panel. Click the Save Mesh button. Name your mesh and click Save. The file is saved with a .msh extension.
Step 5: Load the Mesh on a New Image
Open a new image in the Liquify workspace. Go to the Load Mesh Options panel and click the Load Mesh button. Navigate to the saved .msh file. Click Open.
Let's look at a before and after comparison of the previously saved mesh applied to a new image from the same photoshoot.

How to Edit a Portrait with Liquify Tools
The Face-Aware Liquify tool works well for changing facial features. Other tools in the Liquify workspace let you modify body shape and make your client look thinner or add some curves.
These tools are in the left-hand toolbar and work with the brush and mask panels in the right-hand column. Use these tools sparingly and carefully. You can easily go 'Dali' on someone with a liquify tool. Avoid making your portrait look surreal unless that is what you're going for.
Liquify Tool Definitions and Hotkeys
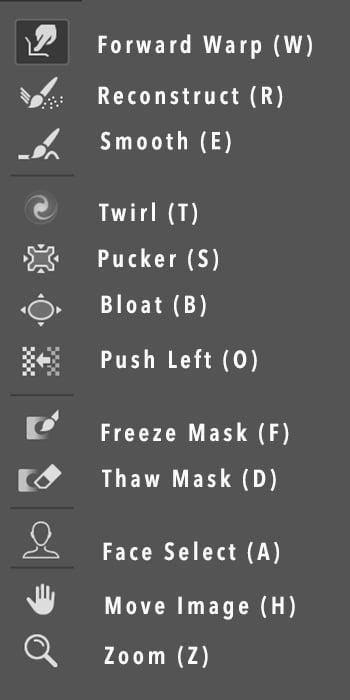
Liquify tools with labels and hotkeys.
Let's start by defining each Photoshop Liquify tool, and then we will use some of them to edit a portrait. The hotkeys associated with each tool are in parenthesis. Here are the Liquify tools in order from top to bottom:
- Forward Warp (W) allows you to push pixels around by clicking and dragging on them.
- Reconstruct (R) selectively erases changes by clicking and dragging on the area.
- Smooth (E) smooths edges and wrinkles.
- Twirl (T) twists pixels in a clockwise direction. To swirl counterclockwise, hold the Option or ALT key.
- Pucker (S) pulls pixels to the center of the brush. It makes the center area smaller.
- Bloat (B) moves pixels away from the center of the brush. It makes the center area larger.
- Push Left (O) warps pixels to the left as you drag it. To drag right, hold the Option or ALT key.
- Freeze Mask (F) lets you select an area that will not be affected by the liquify tools. A red overlay mask will appear over the selected area.
- Thaw Mask (D) selectively removes a mask from a selected area.
- Face Select (A) chooses faces in your image. This allows only the face shape to be changed.
- Move Image (H) or the Hand tool, moves the image around your workspace.
- Zoom (Z) magnifies the image for more detailed work.
Brush Settings for Liquify Tools
Clicking a Liquify tool in Photoshop activates a brush. Use the brush to move pixels in your image. The tools work with brush size and pressure. The larger the brush size, the more pixels are changed.
If you click on a section and hold, the effect becomes stronger. You can change how the brush works in the Brush Tool Options panel on the right-hand side of the workspace.
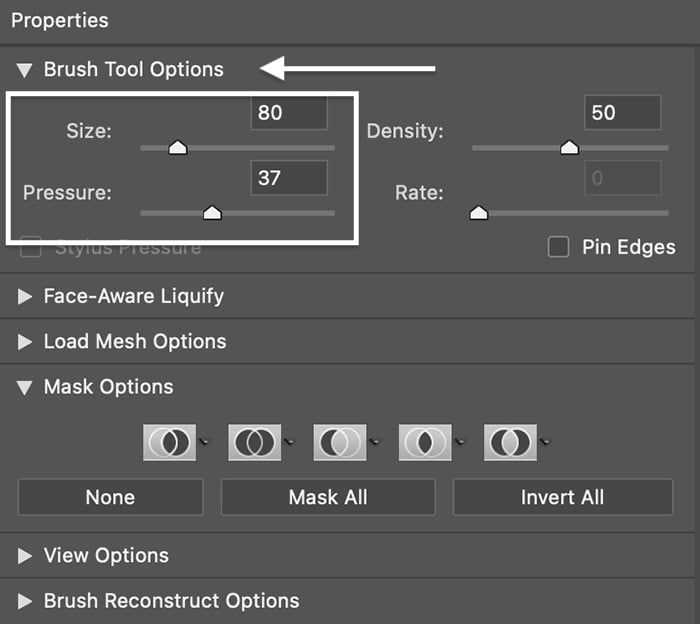
- Brush pressure affects the speed of the change. The higher the brush pressure, the quicker the change is made on your image. Lower the brush pressure to apply the effect more slowly.
- Brush density affects the hardness of the brush. The higher the brush density, the harder the edges of the effect. Lower the density value to feather edges.
- Brush rate affects the quality of the change. The higher the brush rate, the starker the changes. A lower brush rate will give you more subtle changes.
Let's go through the step-by-step process of editing body shape using liquify tools.
Step 1: Open the Image and Make a Duplicate Layer
Open your image in Photoshop. Right-click on the original image and select Duplicate Layer.
Step 2: Open the Liquify Workspace
Open the Liquify workspace by going to the Filter drop-down menu. Select Filter > Liquify (Shift+Ctrl or Command+X).
Step 3: Use the Freeze Mask Tool on Unchanged Areas
Using the Freeze Mask tool, paint over areas that you do not want to change. By default, the mask is red. You probably do not want to change the background. Also, you probably do not want to change features like hair. You can adjust this mask as you start making changes by using the Thaw Mask tool.
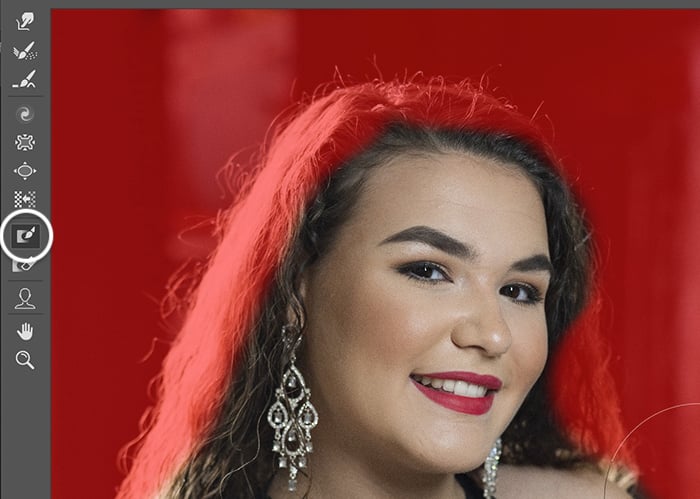
Step 4: Use the Forward Warp Tool to Change Shapes
The Forward Warp tool at the top of the left-hand toolbar is one of the most valuable tools when editing portraits. We are going to use the tool to make this model look a little slimmer.
This model is okay with her body shape, but your clients may want to look a few pounds lighter. If you are slimming a client, change areas where they naturally hold fat like arms, face, hips, and belly. You do not want to completely change the body's shape. Just tuck it in a little.
Select the Forward Warp tool with a relatively large brush. You can change the brush size by opening the Brush Tool Options panel in the Properties column. Or you can use the square bracket keys. The left bracket ( [ ) makes the brush larger. The right bracket ( ] ) makes the brush smaller.
Place the brush on the edge of the area you are working on. Then carefully push the outline of the body towards the center. Use many little pushes and follow the form of the body. You want the changes to be as subtle and natural as possible.
If you do not like the result, switch to the Reconstruct tool. Then hold the brush over the area to return it to its original form.
This short video shows you the process of slimming the model's arm.
Step 5: Use the Pucker Tool to Make an Area Smaller
While Bloat plumps an area, the Pucker tool pulls in edges. But both can be useful in changing body shape. (The Forward Warp tool gives you more control.)
Place the Pucker tool with a large brush over the area you wish to change. Click and hold. The longer you have it there, the more the area changes. But be careful. It is easy to overdo the effect.
This short video shows how to use the Pucker tool to slim the model's arm.
Step 6: Use the Smooth Tool to Remove Blemishes
Finally, you can use the Smooth tool to remove any rough areas like blemishes on the skin. This tool is a little temperamental and may not give you good results. Instead, you may want to use the Skin Smoothing neural filter.
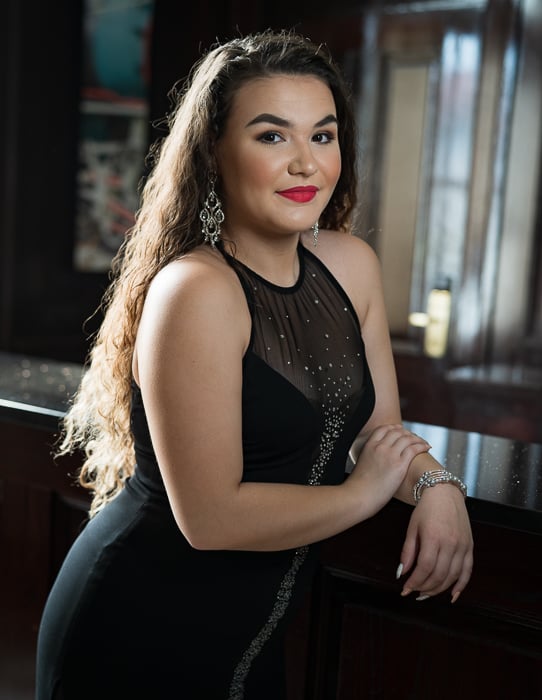
When you are happy with the results, click OK. Look at the portraits side by side.

Using Other Tools to Liquify in Photoshop
For editing portraiture, you may only use the Forward Warp, Pucker, and maybe Bloat tools. But there are a couple of other tools available. You can use these tools to distort or add a surreal effect to images other than portraits.
With portraiture, you may want to keep modifications subtle. But with other photos like abstracts, you can pull out all the stops! Let's take a look at some of the other tools available in the Liquify workspace.
How to Use the Twirl Clockwise Tool with Landscapes
The Twirl Clockwise tool twists the area under the brush. Click on the area you want to twist and hold. The longer you apply pressure, the more the area swirls. If you want less of the effect, lower the brush rate in the Brush Tool Options panel in the right-hand column.
By default, the pixels turn in a clockwise direction. To twist counterclockwise, hold the Option (or ALT) key.
You may not be able to use the Twirl tool in portraiture. But it can create a "Starry Night" effect in landscape photography.
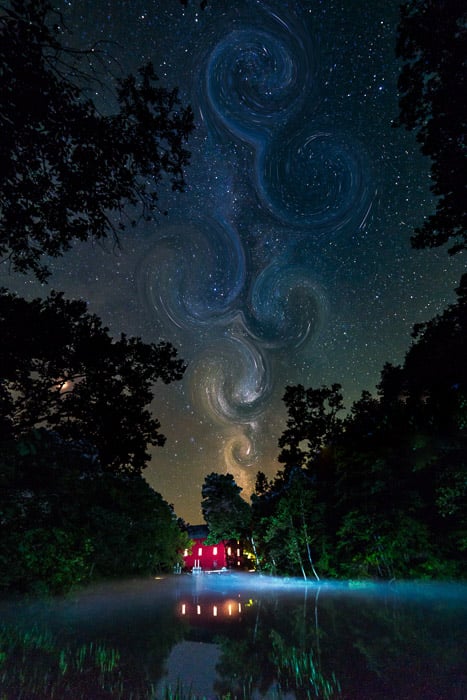
Stars swirled using the Twirl tool.
How to Use the Bloat Tool with Landscapes
The Bloat tool expands the area under the brush. This may be useful in editing portraits if your client wants to add a bit more roundness to certain areas.
You can also use the Bloat tool to make things swell. I rarely want to do this in portraiture. But I might use this tool to poof clouds. And I can also create a reflecting ball or water drop effect with this tool.
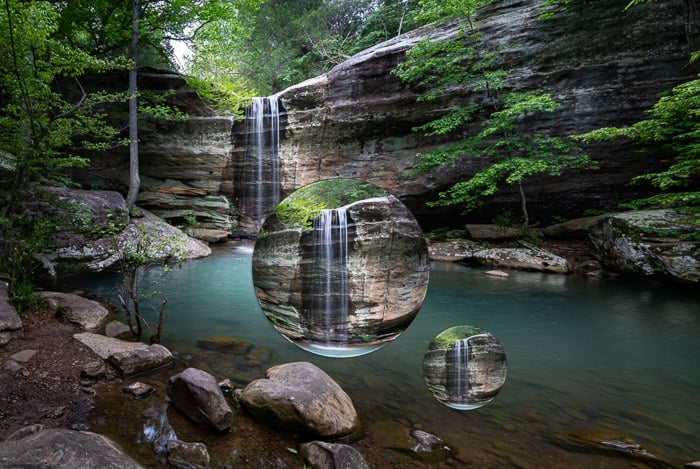
Reflective balls added using the Bloat tool.
How to Use the Push Left Tool for Abstract Distortions
The Push Left tool distorts the pixels as they move. It is a great way to add interesting distortions as if viewing your subject behind wavy glass. This may not be as attractive when editing portraiture. But if you want funhouse distortions, this is your tool!
Click on the tool and drag your cursor over the image. The more you drag it, the more significant the effect. By default, the pixels warp to the left as you drag. To distort the pixels to the right, hold the Option or ALT key. The tool will pick up on the shapes you make with your cursor. So, you can swirl down or around to create complex distortions.
Be careful as you near the edge of your frame. The Push Left tool may pull in blank pixels from outside of the frame. If you do not like the result, switch to the Reconstruct tool to return elements to their original form. Remember to mask areas that you do not want to be affected by the distortions.
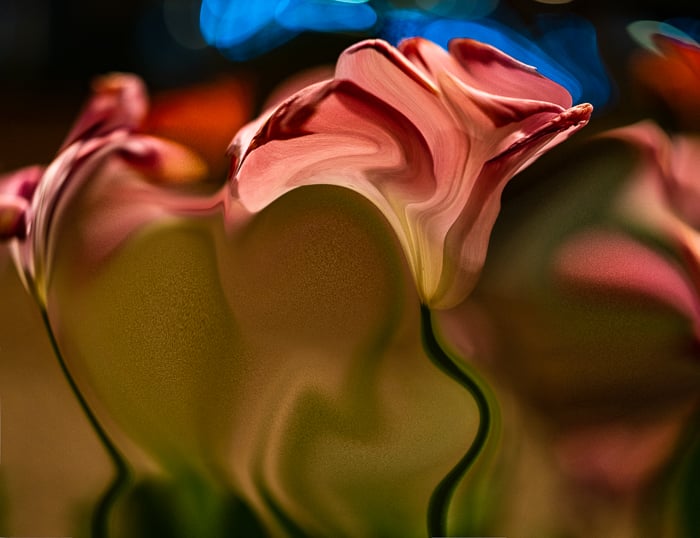
Flowers distorted using the Push Left tool.
Ethics of Photo Manipulation
Now that you know how to use the Liquify filter and tools in Photoshop, let's consider the ethics of changing a person's body or face. Portrait photographers should use the liquify tool with care and in consultation with their clients. It is possible to change someone's appearance too much. They may look unnatural, or the person may become unrecognisable.
The fashion industry and fashion photography have a history of digitally manipulating photos. The changes perpetuate an unrealistic body image. There is a push to label digitally altered photos and be clear about what is real and what is not.
You will have to decide on how much you will alter your client's features. This is especially the case with clients who want you to make significant changes in their appearance. Just because we can digitally transform how a person looks, it does not mean we should. There is beauty in imperfection!
Conclusion
The Liquify tool in Photoshop selectively distorts an image. This tool is handy for portrait photography. You can use the tool to change features on a person's face using the Face-Aware filter. Or you can alter body shape using the Liquify tools like Forward Warp and the Pucker tool to create a more flattering appearance. And you can easily save the changes as a mesh and apply this to a series of photos.
Liquify Photoshop tools lets you add distortion in creative and wonderful ways. You can push the limits of your imagination and create beautiful abstract or surreal images. So have fun with this tool!
Try out The Magical Photography Spellbook to create vibrant seasonal images!


