You can use Photoshop to straighten lines or change perspective. But you can distort photos in Photoshop, too! It’s even possible to use this technique to reposition an arm or a leg, for example.
In this article, I will show you some basic and advanced techniques to distort images.
Tools to Distort Photos in Photoshop
The Skew, Distort, Perspective, and Warp tools in the Edit > Transform menu are the base tools used to distort images.
They’re useful when you need to straighten a rectangular object. Or when you want to make a composite of different photos. These tools only work with content in a rectangular plane.
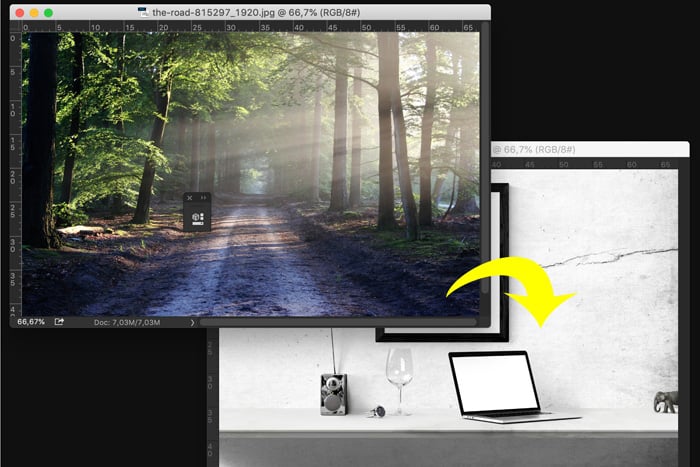
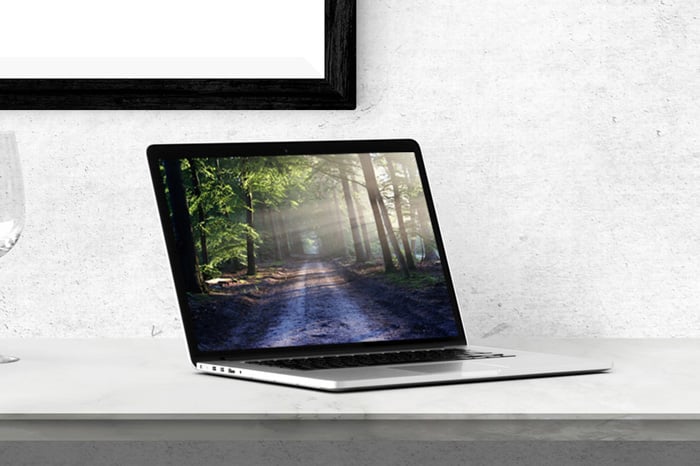
As an example, I will distort this image and place it on the laptop screen shown in the second photo.

© Pixabay

© Pixabay
Step 1. Open Both Photos
Open both photos in Photoshop and position them next to each other. Drag the photo you want to distort onto the other picture.
This action will create a new layer.
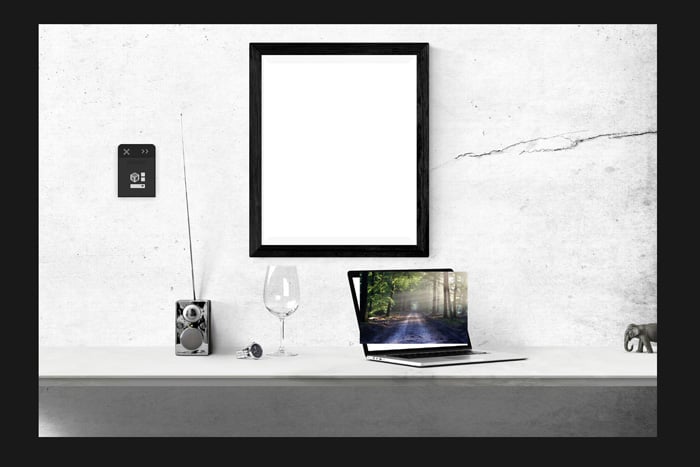
Step 2. Scale and Position
Scale the new layer to the size of the photo frame. Use the Move tool (Shortcut “V”) to drag the scaled image over the photo frame.
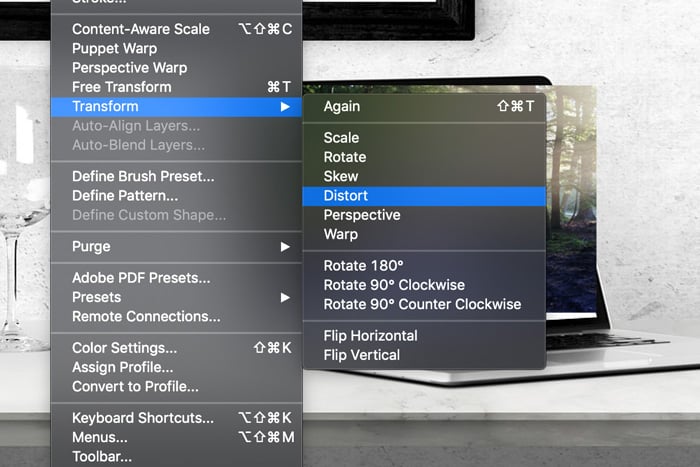
Step 3. Distort the Image
Select the layer with the photo that you want to place on the laptop screen. Go to Edit > Transform and select “Distort.”
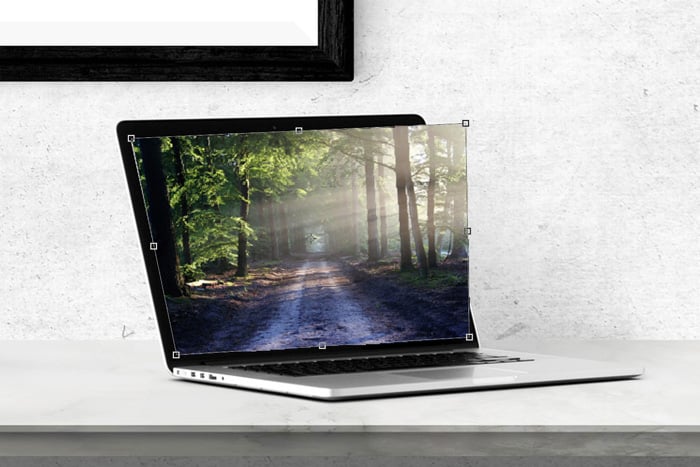
To distort the image, click and drag the corner handles until it fits in the laptop screen.
Advanced Photoshop Distortion Tools to Get Creative With
If you want to get creative, you can use one of the more advanced Photoshop distortion tools. Here are a few examples.
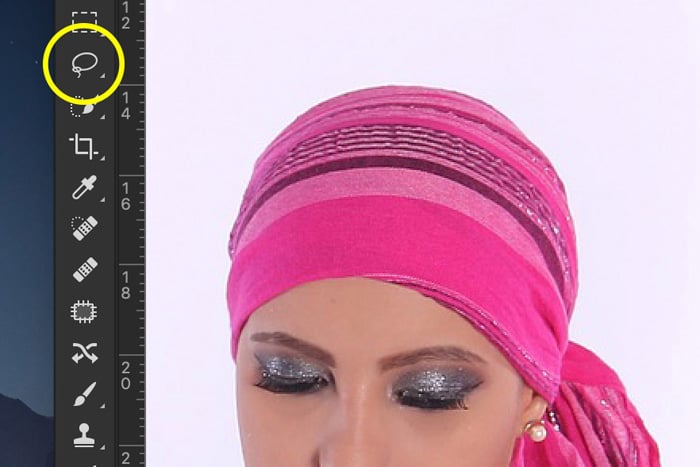
Using the Warp Tool to Curve Objects
The Warp tool is an excellent option to curve objects or clothing. It allows you to drag the handles to distort parts of an image. It creates a rectangular mesh with a few control points, and it’s easy to use.
Select the area you want to distort with the Lasso tool. Make the range a bit wider and longer than the actual object.
Use shortcut Cmd + J (Ctrl + J for Windows) to create a new layer of the selection.
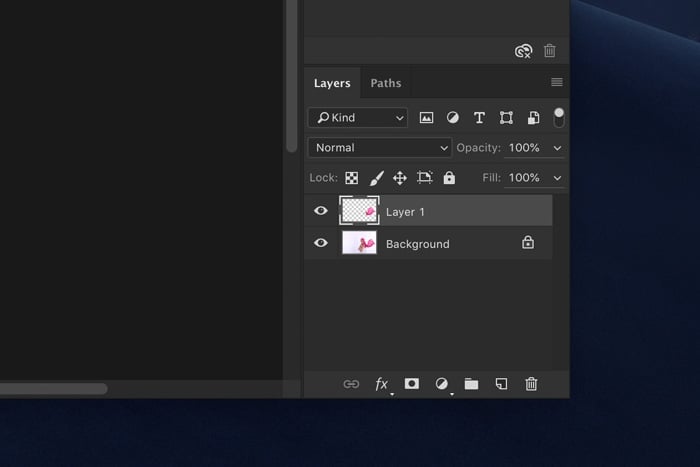
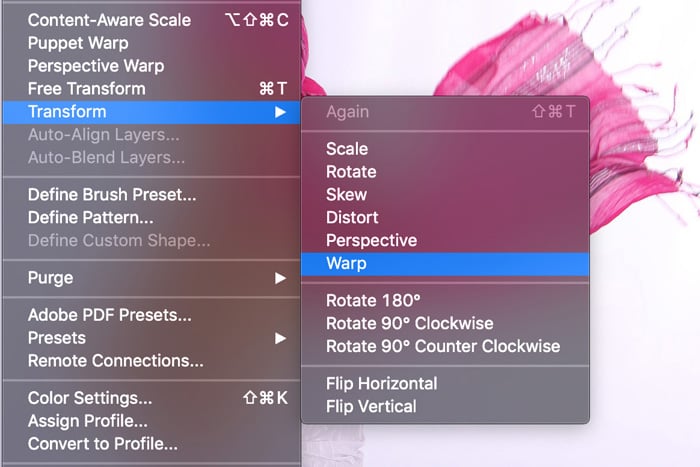
Right-click and choose Warp. This action will create the mesh to work on.
Now click and drag anywhere in the mesh to manipulate the selection. You can easily make curves by pushing and pulling the image.
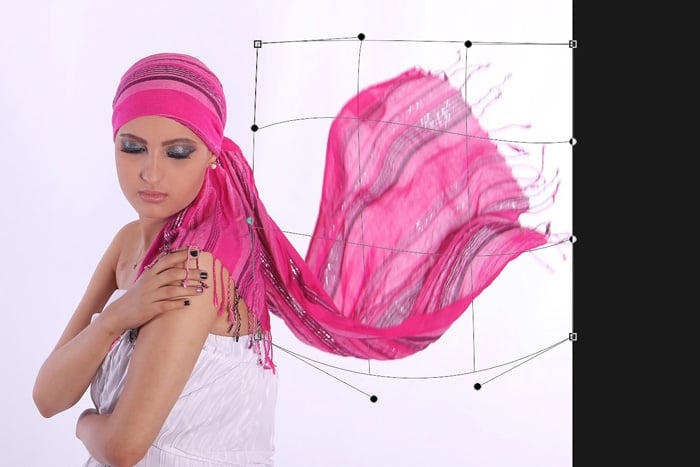
Depending on how much you manipulate the image, you might need to finish up with the Clone Stamp tool.
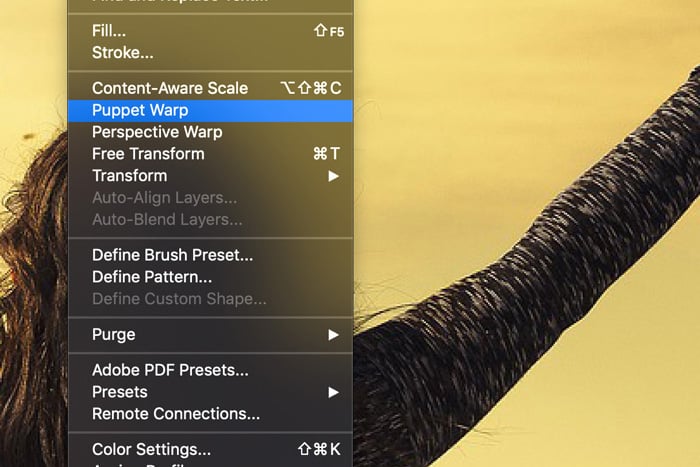
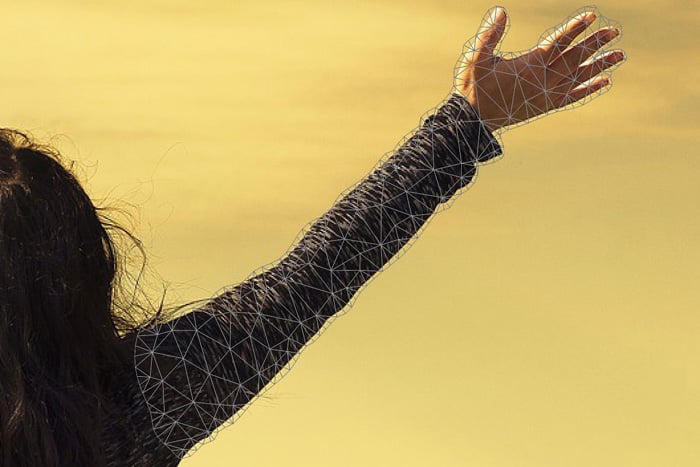
Advanced Manipulation With Puppet Warp
If the Warp tool is too simple for your needs, try the Puppet Warp. It allows you to move arms, legs, or anything that needs more defined control. Here’s an example. I’ll reposition an arm using Puppet Warp.
Use the Quick Selection tool to choose the object you want to move.

Once you’re ready, hit Cmd + J (Ctrl + J for Windows) to create a new layer.
Make sure the new layer is active and go to Edit > Puppet Warp. A mesh will appear over your selected area.
In the top menu, you can adjust the mesh. You can add more control points or expand the mesh.
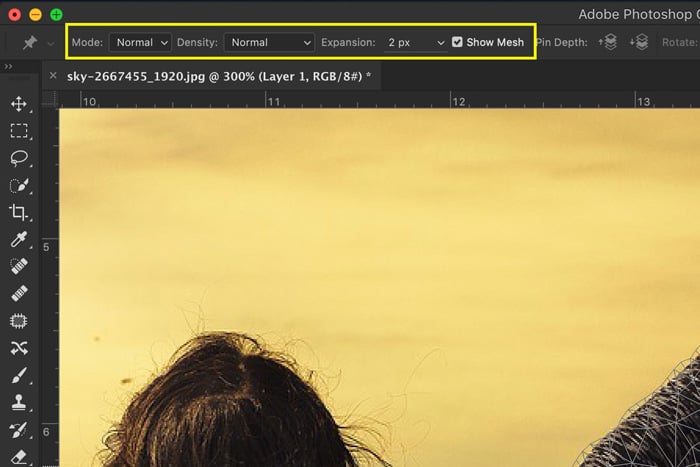
Make sure to check "Show Mesh" so you can see all your adjustments. Usually, it’s OK to start with the default settings.
Now, it’s time to anchor points. Place a pin on the spot you wish to anchor. When moving body parts, you should add pins on the joints.
For example, if you want to move the lower arm, place a pin on the shoulder, elbow, and hand. Then, select the pin on the hand and drag to move.
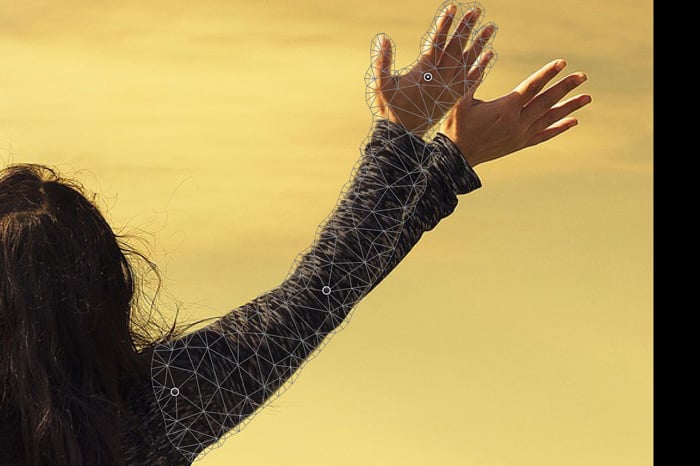
If you place too many pins, it will make the manipulation too distorted. It will alert you if you set a pin too close to another.
Again, you’ll need to clean up using the Clone Stamp tool.

The Puppet Warp isn’t perfect, and sometimes the result will look unnatural. You have to look out for mistakes in perspective and weird stretching. It is also important to know how the body moves naturally.
You can always go back and create less distortion, but you can also use Liquify to make the final result look better.
Using Liquify to Perfect the End Result
Liquify is like an advanced Smudge tool. You can use it to fix hair, slim dress lines, and even open eyes. Don’t go overboard here, though.
We’ve all seen the "Worst Liquify Photoshop Mistakes" that made it into magazines and on Instagram.
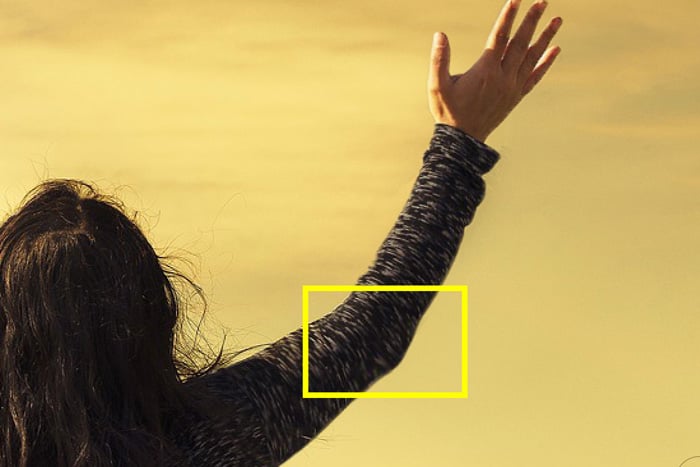
In my example, I want the shape of the elbow more pronounced.
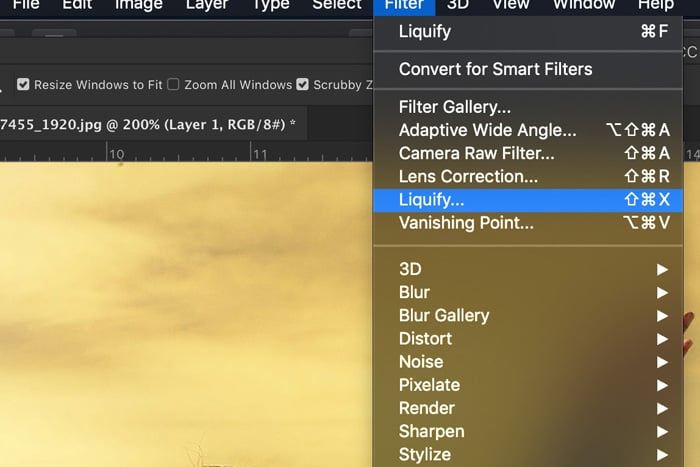
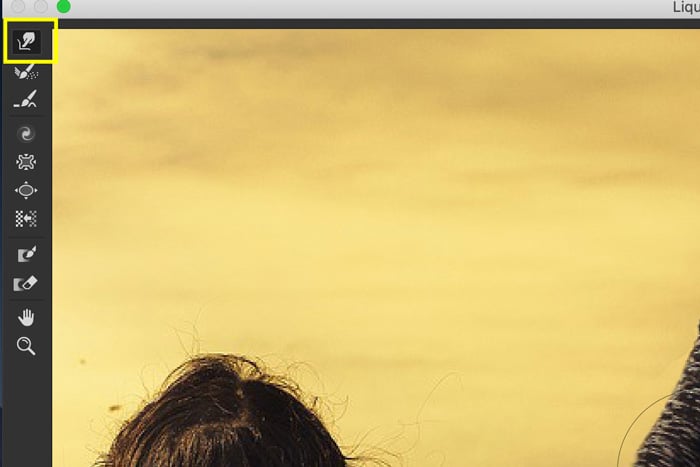
Go to Filter > Liquify.
The Liquify window will open. Select the Forward Warp tool and set the brush size.
Now, start pulling and pushing the areas you want to distort. Use Cmd + Z (Ctrl + Z for Windows) to undo.
It takes some practice to know what brush size you need for a natural result.
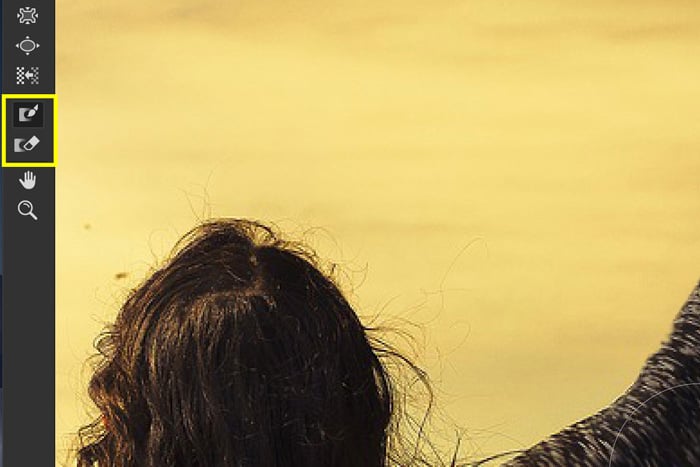
If you don’t want to distort certain parts, you can use the Freeze Mask tool. Paint over the parts you want to keep unaffected by the Forward Warp tool.
Use the Thaw Mask tool to erase the mask again. When finished, hit "OK" and check out the result.
Common Photoshop Distortion Questions
What Is the Distort Tool?
The Distort tool in Photoshop allows you to straighten a rectangular object in a photo taken at an angle. You can also use it to skew a graphic or artwork to fit the side of a packaging or box.
What Is Distort in Photoshop?
Photoshop offers you more than a dozen tools to distort images and artworks. You can use them to change the perspective, reshape bodies and faces, correct lens distortion, and much more.
What Is the Difference Between Skew and Distort in Photoshop?
The skew tool is designed to slant an item vertically and horizontally. The distort tool can do the same, but it can also stretch an object in all directions.
Conclusion
With all Photoshop tools, there is a fine line between creativity and overdoing it. Don’t spend hours and hours editing without a break. You’ll make mistakes. Take a break and return to your project with a fresh mind.
Look out for repeating patterns or unnatural positioning of body parts. Using the distortion tools without making things look weird is something you’ll have to learn by practicing.
Check out our Effortless Editing with Lightroom course to master post-processing!


