Hiring a professional newborn photographer doesn't always fit into the budget. This is why many parents turn to DIY newborn photography.
Newborns grow quickly, making photos a must even if you snap them with a smartphone. But newborn photography that you see coming from a professional studio isn't always safe to try at home.
With a few newborn photo shoot tips, you can snap your own baby pictures. And get results that don't look like a fail.
DIY Newborn Photography With a Smartphone: 9 Essential Tips
9. Keep the Newborn Safe During the Photoshoot
Those cute photos that you see of newborns holding their own head up in their hands in the "froggy" pose? They aren't real.
Photos like the froggy pose and other complex shots are composite images. To keep the baby safe, the photographer's assistant held the baby in place. Then the assistant was later Photoshopped out of the image.
The same concept applies to images where the baby appears to be dangling from a hammock or another prop.
DIY newborn photography is only safe when using poses that the baby can also DIY. Never place the baby in a position that they can't hold themselves.
The two safest poses for a baby for DIY newborn photography is placing the baby on his or her back or side. Go ahead and search Pinterest for those newborn photo ideas as inspiration. Use safe, simple poses that the baby can hold without assistance.
The same concept applies to using props. Never place the baby in a prop that could tip. Props also should be made of safe materials. That old box with peeling paint you found at a flea market looks cute, lead paint is not cute.
The safest DIY newborn photography pros are simple blankets, hats, and swaddles.
8. Use an Advanced Camera App for More Control
The camera app that comes pre-installed on your smartphone isn't letting that built-in camera live up to its full potential. Consider using a more advanced camera app for newborn photography.
The app should let you adjust the focus, lighten or darken the image, adjust the white balance and more.
Several advanced apps will also let you shoot a DNG file instead of a JPG. This file is easier to edit later on, making it great for taking newborn photos.
Try using the Lightroom mobile app or Camera+ 2 to get more options than the built-in app on your smartphone.
7. Start With Window Light
Great photos need great light. And for baby photography, all you need for great light is a large window during daylight hours.
Large windows work best, but be sure to also choose a window that doesn't have direct sunlight streaming in. If there's a window-shaped spot of sunlight on the floor, then try a different window or a different time of the day.
Choose a window on the side of the building that's not facing the sun.
Working with window light as simple as placing the baby and props near the window – but where near the window?
Position the baby so that the light falls in a natural position. The top of the baby's head or the baby's face should be towards the window.
Placing the baby's feet towards the window creates unnatural, odd lighting. Sunlight is never coming from your feet.
6. Use Warmth and White Noise to Keep Baby Comfy
Newborns get cold easily. And, since most new babies appear to be swimming in their clothes, newborn photography is often done with the baby undressed. Before taking the photos, turn up the thermostat or use a small space heater. Be careful when using a space heater not to put the heater too close to the baby.
While the baby will need warmer temperatures than you do, it's possible to make the baby too warm too. Aim to have the space around 80 degrees if the baby will be nude or lightly clothed. Aim for less warmth if you're planning on using warm clothing or blankets.
Along with keeping the space warm, white noise will also help the baby stay sleeping for the shoot. Try using a white noise app, running a fan or space heater, or playing some soft music.
If the space is completely silent, the baby is more likely to wake up at sudden noises. If the space is already noisy, the noise is less likely to wake them.
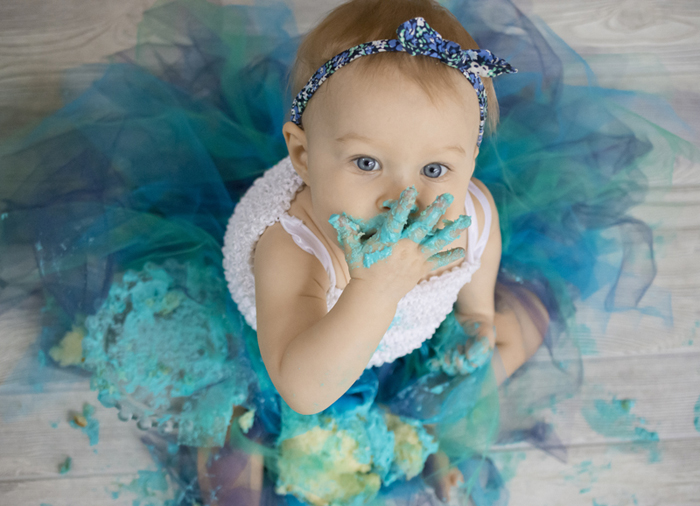
5. Use Wraps and Props for More Variety
Clothes often look too big on newborns – not to mention hiding any cute fat rolls and other details. Instead of clothing, try a snug, fitting stretchy wrap.
Swaddling a newborn for photos is art itself, but try doing a basic wrap like this one. Wraps can also help if the baby is having trouble sleeping for the photos.
If you want to dress the baby, consider clothing made specifically for newborn photography.
Simple props can help draw more attention to the baby. A simple solid-colored blanket can make a great background. You can tape the blanket to a wall so that the blanket serves as both a 'floordrop’ and a backdrop.
Hats and headbands are also fun and add a pop of color. You can tuck that hat away in the baby box to remember how small he or she was years down the road.
4. Gently Adjust the Baby's Arms and Legs
The froggy pose with the baby resting his or her head on the hands isn't a DIY pose. But the placement of the infant's arms and legs can make a big difference in the image.
While you pose the baby on the back or side, gently move the arms and legs into a snuggly position. This can mean placing the hands near the cheeks or crossing the legs to show off baby toes.
Never force a baby into a position and always move them slowly and gently. If they are sleeping soundly and not resisting attempts to reposition them, adjusting the arms and legs can make all the difference in the pose.
3. Adjust Your Composition Before You Adjust the Baby
Getting a baby sleeping and nicely posed takes much more time than actually taking the photo itself. To get the most variety, take photos from different angles and with different crops before trying to move the baby.
Try and angle straight on to the baby's face. Then try shooting directly above the baby, or shooting from an angle slightly above their face.
Take a photo that shows just the baby's face, then one that shows the baby from waist up, then a full body shot.
Along with adjusting the angle and crop, you can also change the subject and try some macro newborn photography. Get in close to the baby's tiny hands, for example, or feet.
If you get too close, your smartphone won't focus properly, so if the image looks soft, back a little farther away. Smartphone add-on macro lenses can help you get closer and still lock focus.
2. How to Choose a Focal Point
On most smartphones, tapping the screen changes what the camera is focusing on. In most photos, that means you should tap on the baby's eyes (or eyelids, if they are sleeping) to focus on them.
It's okay to get creative with the focal point, especially when mixed with a creative composition. Try focusing on the baby's toes, for example, the pouty lips, or that wisp of fine baby hair.
1. Use a Phone App for Editing
One of the biggest perks to smartphone photography is that the camera and the editing computer are one and the same. A little bit of editing can go a long way into creating great newborn pictures.
Sometimes, the same advanced apps that offer more camera controls offer editing tools too, like Lightroom. Other smartphone photo editing apps to consider are Snapseed and VSCO.
When editing newborn photos, keep it simple. Removing temporary flaws like infant acne or a rash is okay.
Avoid blurring the skin using an app – it looks fake, and babies don't need that kind of retouching anyways. Try the healing brush tool to remove infant acne.
Use color tools to reduce skin redness. In VSCO, for example, use the HSL editing tab, tap on the red and increase the lightness to lighten any rashes or skin redness. VSCO also has a skin tone slider that can be helpful.
Filters are also easy, simple ways to adjust newborn photos on a smartphone. The exposure, highlights and shadows tools may also come in handy when working with smartphone newborn photography.
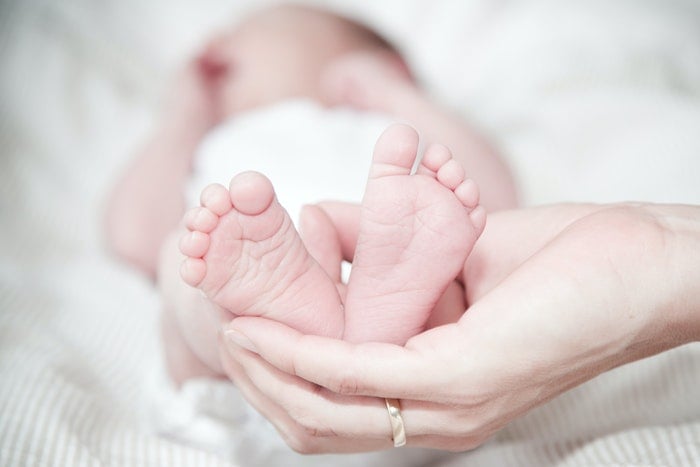
Photo by Rene Asmussen from Pexels
Common DIY Newborn photography questions
Is it OK to Take Pictures of a Newborn?
DIY newborn photography won't look as great as hiring a professional. But, all babies should be photographed, and it's okay to take your own if you can't afford a pro.
The key is to use safe, simple poses and leave the complex shots to the pros.
Can a Camera Flash Hurt a Baby’s Eyes?
Research has shown no relationship between a camera flash and a baby's eyesight – so it's safe to use. But natural light, such as window light is often better for taking great newborn photos.
What Equipment Do I Need for Newborn Photography?
DSLRs and mirrorless cameras are the most versatile, with the best quality. That doesn't mean you can't take pictures with the camera that's already in your pocket.
While those cameras are best, if you have to choose between buying diapers and buying a better camera, buy the diapers. And use the camera that's already in your pocket, a smartphone.
When to Take Newborn Photos
Newborn photos are typically taken between seven and 14 days old. There's nothing wrong with taking them earlier or later. In the first week, newborns are still getting the hang of things and typically still have that umbilical cord stump.
After 14 days, it's harder to get those sleepy newborn photos, as newborns start to become more alert.
How Do You Take Good Newborn Pictures?
Good newborn photos are a result of good lighting, posing, composition, and exposure, among others. To learn how to take good newborn pictures, check the tips n this article!

Photo by Rene Asmussen from Pexels
Conclusion
DIY newborn photography is possible with a smartphone. The key is to follow safe posing and props, and to keep the photos simple.
Use simple tricks like shooting by a window and keeping the newborn baby calm with white noise. This way, you can capture sweet memories of your little one.
Note: the images used in this article are not all taken with a smartphone. They are used to illustrate concepts in posing, lighting, etc.