Once you understand basic forms of composition, you will want to become familiar with advanced composition techniques. These techniques may not be used every day, but learning how to use them effectively will make you a better photographer. You may take up a job one day where these photoshoot ideas like a triptych or decisive moment is needed.
Today, we will cover a wide range of advanced composition techniques to show you the multiple approaches you can take in photography. Each technique has different characteristics. We break down each approach in detail to give you a better understanding. If you want more detail, click the link in each section.
Composition Techniques
Let’s start by looking at simple methods to produce advanced composition techniques. Even though these methods may seem basic, they are tricky to master. We will outline the best ways to get the most out of each of these photoshoot ideas.
You can try many of these techniques from the comfort of your own home! If that doesn’t inspire you, go for a walk around your town or city. Try to get one image of each composition technique; the more you practice, the better you will get!
Form
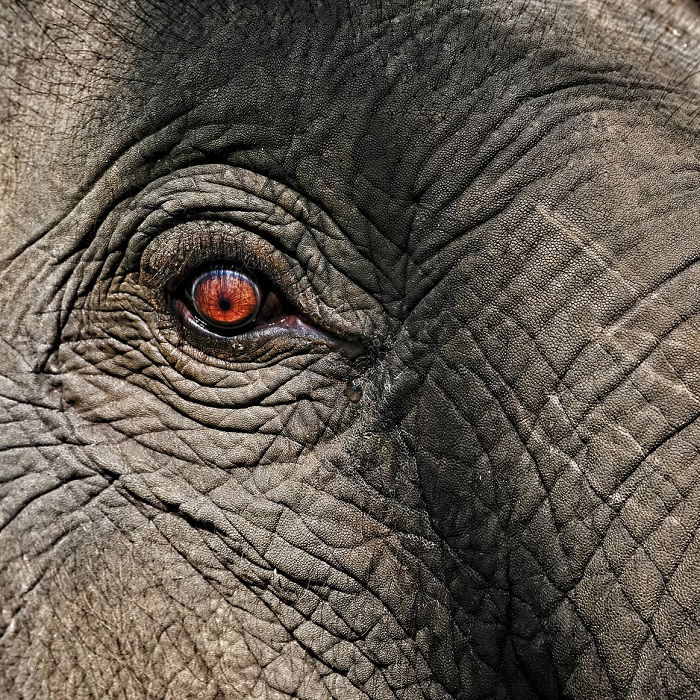
Form photography is all about making subjects stand out as if they’re 3D objects. It creates a line between 2D and 3D by using the right kind of light, angles, colors, and depth.
To take stunning form photos, experiment with side light to emphasize your subject’s shape and textures. Use a large aperture to separate your subject from the background and create depth. If your results don’t look eye-catching enough, try converting them to black and white to add emotion and put the spotlight on specific tones.
Shooting from different angles is key to making your photos look unique. It gives you more creative freedom to capture movements, colors, and textures. With a little imagination and practice, you can use form photography to take outstanding photos of anything. You can read our in-depth article to learn more about form in photography.
Shape
Shape is an important element of photography composition. It can create balance and symmetry or lead the viewer’s eye to the main subject. Photographers can use shape in many ways to make their images more interesting.
Light plays a big role in how shapes look in photos. Front or back lighting will create a flat shape. But side lighting adds shadows, giving the shape a 3D form.
Perspective also changes how shapes appear. A coffee mug from the side is a cylinder, but from above it’s a circle. Shooting straight on shows a flat shape, while angling the camera reveals depth. Using these techniques, photographers can find new ways to capture everyday objects. Learning to see the shapes that make up the world is key to creating powerful compositions. Shape in photography is an essential part of image composition.
Emphasis
Emphasis in photography is all about making your subject stand out. You can use composition techniques to bring focus and attention to your subject, even in a cluttered or busy scene.
One way to emphasize your subject is by using strong contrast. Place your subject in a brightly lit area surrounded by darker tones to make it pop. You can also use a shallow depth of field to blur the background and keep your subject sharp. This is especially useful in portrait photography.
Negative space is another tool for emphasis. By leaving empty space around your subject, you remove distractions and draw the viewer’s eye. Leading lines can also guide attention to your subject, while framing it within the scene adds even more emphasis. Click here to learn more about emphasis in photography.
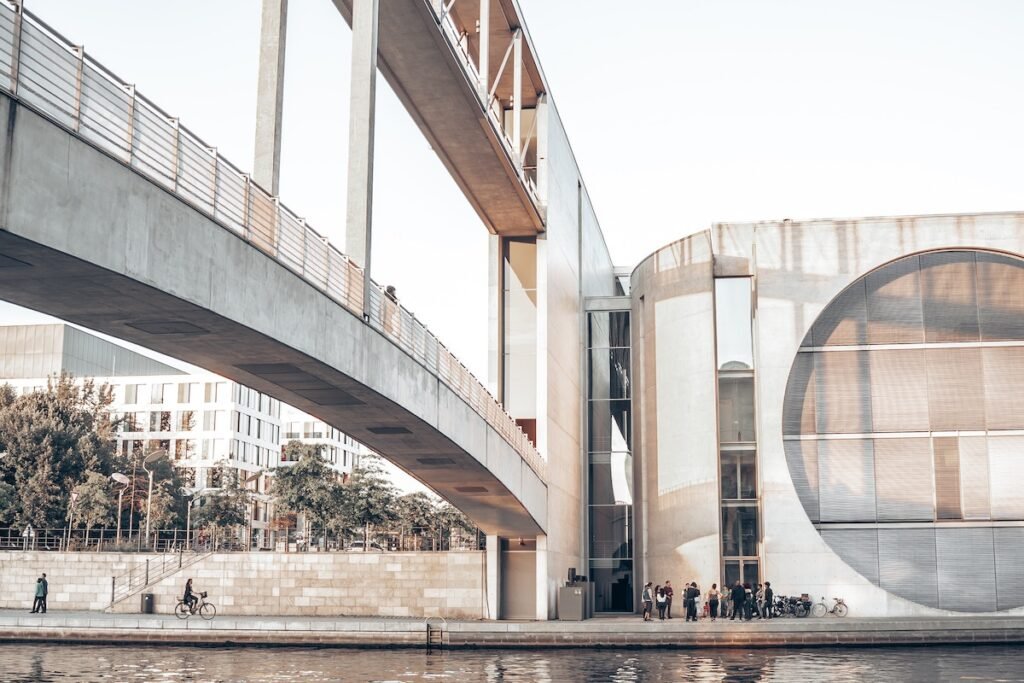
Geometric
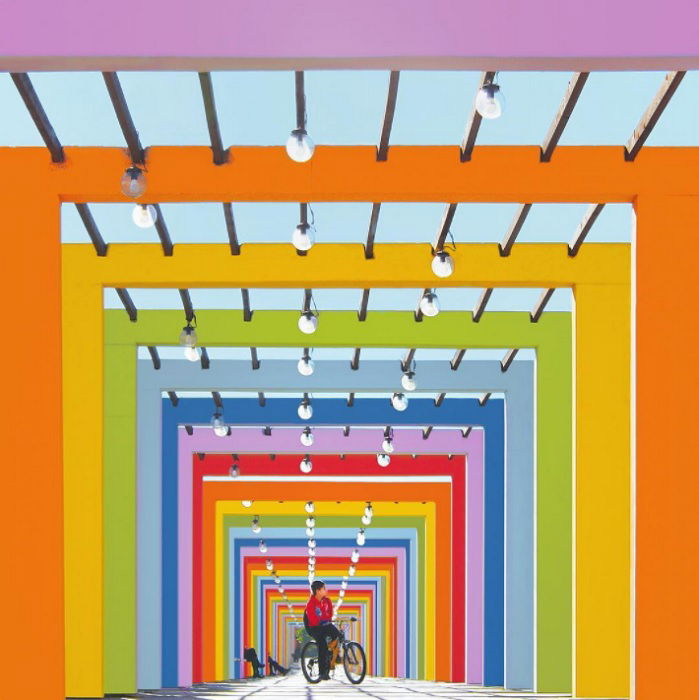
Geometric photography is all about finding and capturing the shapes and lines that make up our world. From the bold lines of a cityscape to the organic curves of nature, geometry is everywhere. Here are some cool ideas to get you started with geometric photography.
Look for repetition in your subjects, like brick walls or tiled floors. The repeating shapes will create a bold, eye-catching pattern in your photos. You can also use color to make your geometric images pop. Bright, contrasting colors will emphasize the shapes and lines in your compositions.
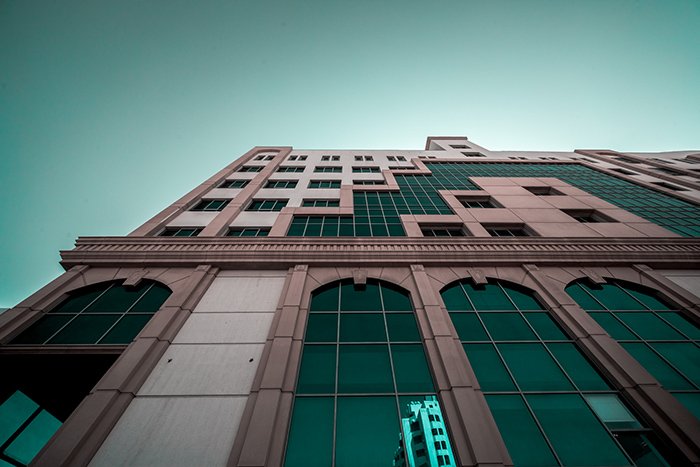
Perspective is another powerful tool for geometric photography. Try shooting from unusual angles, like low to the ground or high above your subject. This will create a unique and engaging point of view. And don’t forget about architecture – buildings are full of geometric shapes and lines that make great subjects for photos.
Ready to dive deeper into the world of geometric photography? There are endless possibilities to explore, from minimalist compositions to abstract designs.
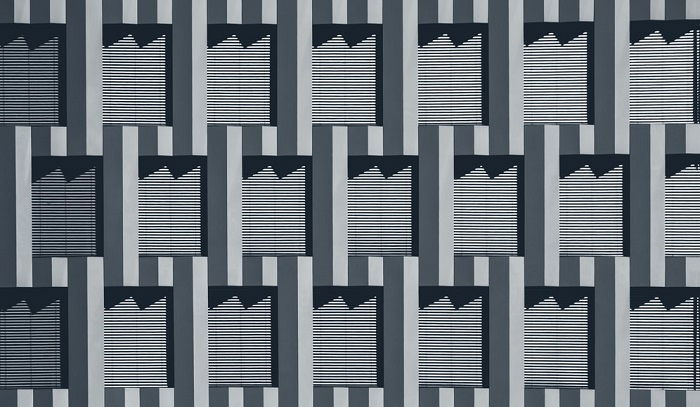
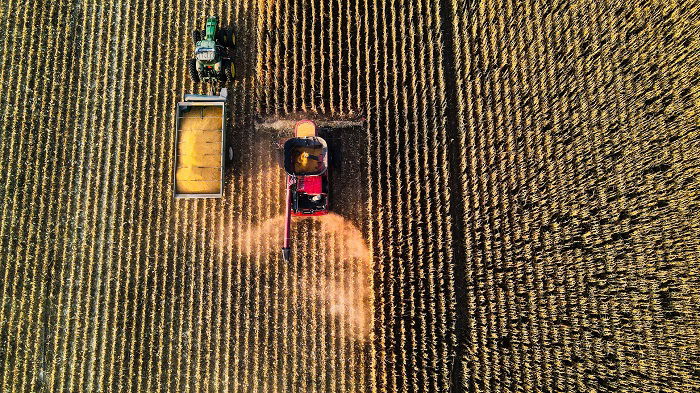
Rhythm
Rhythm in photography brings structure and stability to your images. It’s about visual storytelling and composition building. Rhythm can hold the viewer’s gaze to a steady beat or quicken the pace as their eyes move around the image.
Rhythm is created by elements that repeat or echo throughout the photo. This could be a series of shapes that make a pattern or multiple subjects that appear at different points in the frame.
You’ll find rhythm in many types of photography, from street and architecture to portraits and landscapes. Bringing rhythm into your photos can help you make conscious decisions about composition and how you want the image to flow. Read on to learn more about how to use rhythm in photography, including the different types of rhythm and how to break rhythm for emphasis.
Negative Space
Negative space is the area around your main subject in a photo. It creates a relationship between the subject and background, allowing the subject to stand out. When used well, negative space attracts the viewer and leads their eyes to the main subject.
The space doesn’t have to be empty. Things can be in the negative space, but they should blend into the background and not draw attention. This directs the viewer’s focus to the main subject.
To use negative space, look at the area around your subject. Move around to frame the subject with negative space. Get closer to fill the frame with an interesting pattern, or step back to make the subject smaller. Negative space can improve your compositions in any type of photography. Here are some more tips on negative space in photography.
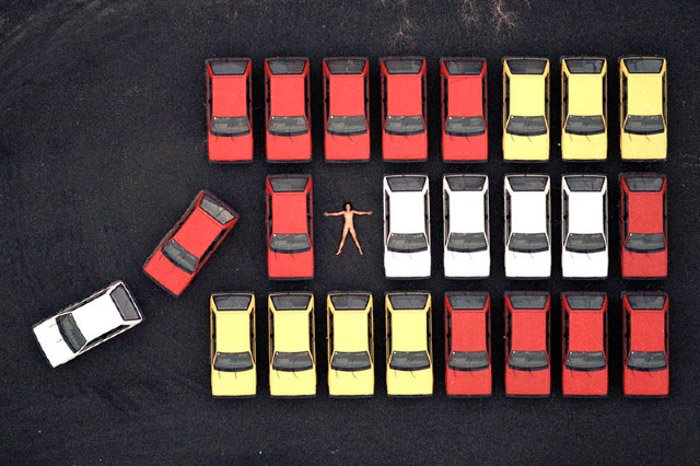
Juxtaposition
Juxtaposition in photography is all about showing contrast between two or more elements in a scene. This can be done through composition, forced perspectives, or props. Some examples of juxtaposition include animate vs inanimate objects, big vs small subjects, dark vs light colors, and natural vs man-made elements.
Photographers can also create juxtaposition in post-processing by merging different images together. This allows for creative concepts like mixing life and death or showing the contrast between poverty and idealism. Juxtaposition can evoke powerful emotions and make viewers think deeply about the story behind the image.
Finding juxtaposition examples is easy if you look for them in your environment or while juxtaposition examples in street photography. Capturing these contrasts can lead to striking and thought-provoking images that keep viewers engaged.
Advanced Composition Techniques
Now, we will look at more advanced composition techniques. Some of these techniques do not have set framing advice; instead, the content of the photograph holds the composition.
If you familiarize yourself with these ideas, you will be well on your way to becoming an advanced photographer. The advanced composition techniques below are directed more by storytelling, one of photography’s key benefits. Learning to use storytelling to your advantage will set you apart from other photographers.
Conceptual
Conceptual photography is all about expressing ideas and themes through symbols and creative editing. To create a great conceptual photo, start with an original idea. Then use editing to bring your vision to life.
You can find inspiration for conceptual photography all around you. Everyday objects can symbolize nature, and water can add emotion and drama to a portrait. Even your childhood dreams can spark ideas for nostalgic photos.
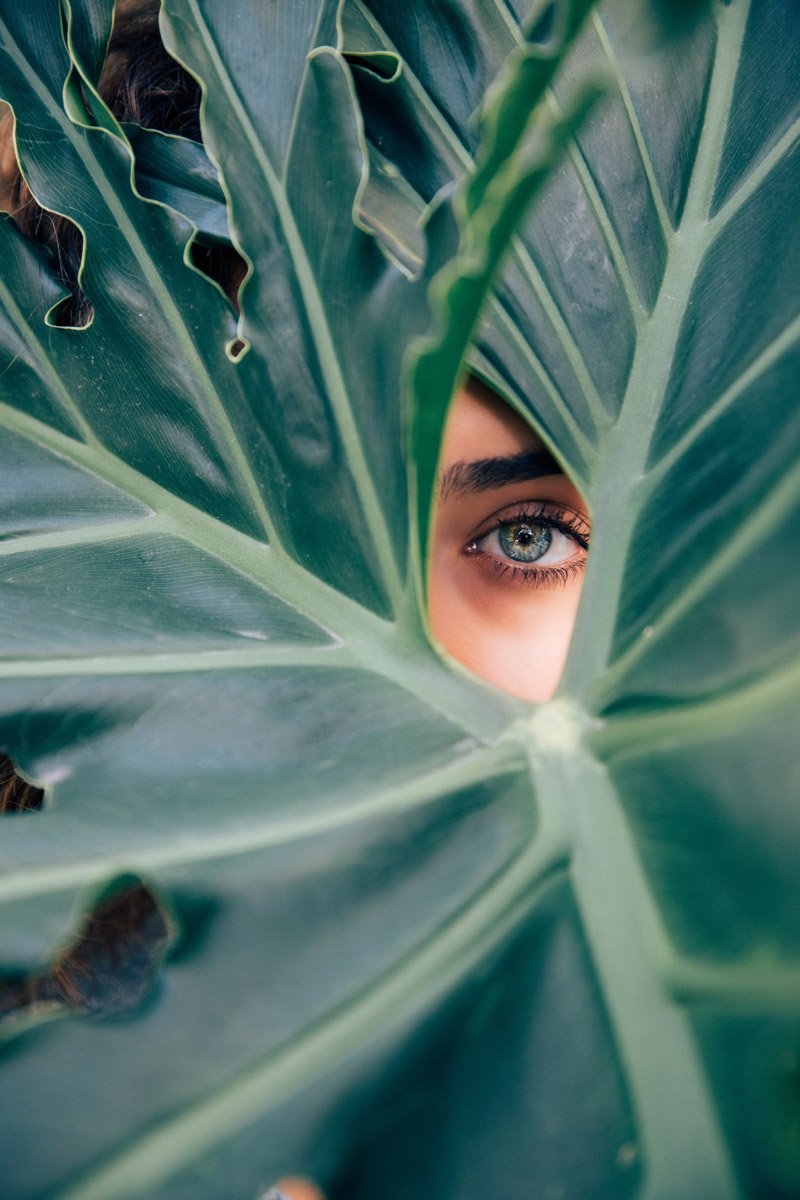
Anonymity is another powerful tool in conceptual photography. Partly hiding a subject’s face can make a concept more relatable. And simple tricks like conceptual photography can turn an ordinary portrait into a mysterious and thought-provoking image.

Symbolism
Symbolism is a powerful tool for photographers to express concepts and ideas beyond what is visible in an image. By using visual cues like color, objects, animals, and placement, photographers can convey deeper meanings and evoke emotions in the viewer.
Throughout history, symbolism has been used in various forms of art, from ancient carvings to Renaissance paintings. In photography, early practitioners adopted symbols to signify intelligence, while iconic images like Dorothea Lange’s Migrant Mother became symbols of the Great Depression.
Contemporary photographers continue to use symbolism in their work, drawing from both historical and modern symbols. By understanding and incorporating symbolism in their images, photographers can create rich, meaningful experiences for their audience. Symbolism in photography is a fascinating subject that can elevate your work to new levels.

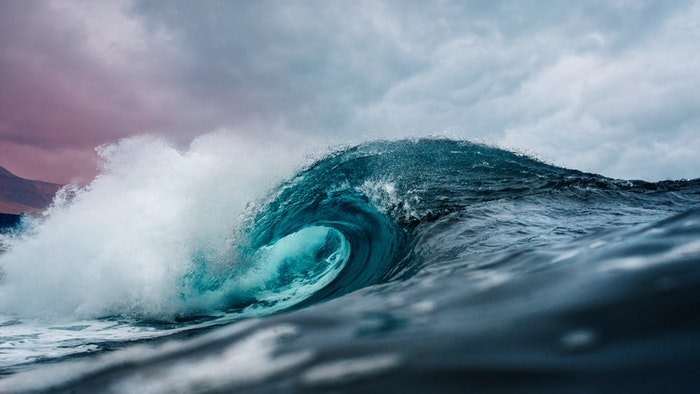
Golden Ratio
The golden ratio is a powerful tool for creating pleasing and balanced compositions in photography. It’s based on a mathematical sequence that appears throughout nature, from nautilus shells to ocean waves. By using the golden ratio in your photos, you can lead the viewer’s eye through the frame in a natural way.
One common way to apply the golden ratio is with the phi grid, which divides the frame into a 1:0.618:1 ratio. This places the subject a bit more centrally compared to the rule of thirds. Another option is the Fibonacci spiral, where you position the main subject in the smallest part of the spiral and arrange other elements along the curve.
To use the golden ratio effectively, consider the scene and choose the method that best fits the subject and any leading lines or curves. Imagine the overlay as you compose the shot, and don’t be afraid to adjust your position to exaggerate lines and angles. With practice, the golden ratio can elevate your compositions from good to excellent. Learning more about the golden ratio in photography can help you master this powerful technique.
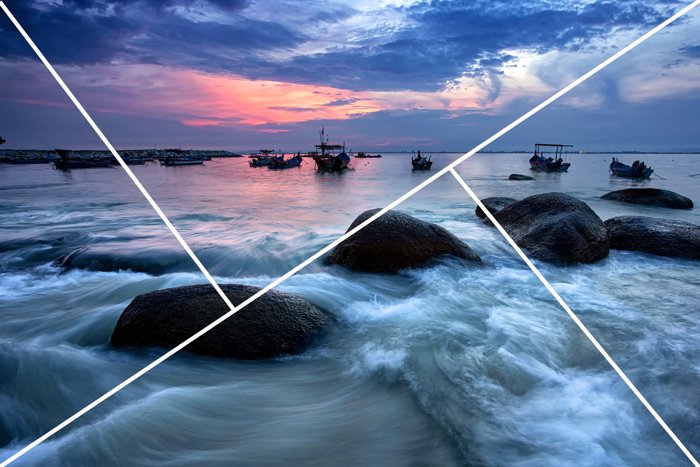
Golden Triangle
The golden triangle is a composition technique that uses diagonal lines to form right-angle triangles. These triangles act as a guide for placing the main subject of the photo at the intersection points.
Using the golden triangle can give your photos a more dynamic feel compared to other common composition techniques. To create the golden triangle, draw a diagonal line from one corner to the opposite corner, then draw perpendicular lines from the other corners to the diagonal line.
Place your point of interest at one of the intersection points and use leading lines that follow the diagonal. Subjects that work well with the golden triangle include portraits with the model sitting or lying down, mountains with a diagonal horizon line, and roads that cut through the frame diagonally. Golden triangle in photography is a great way to experiment with composition and create visually interesting images.
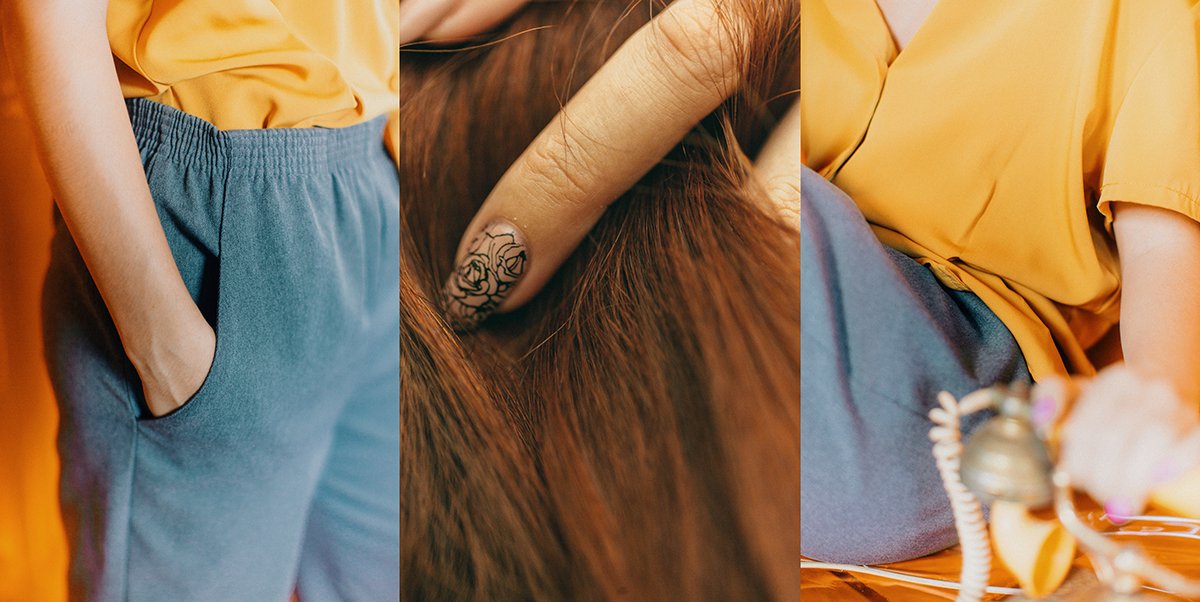
Triptych
Triptych photography is a creative technique that tells a story using three photos. Experiment with different formats like square or circle to make your triptychs stand out. Capture a series of movements using burst mode to create exciting action shots.
Themes can make your triptychs more meaningful. Love, nature, and symmetry are common choices. You can also split one image into three parts or put a spotlight on details that usually go unnoticed.
Triptychs are a great way to improve your photography skills. Work on a long-term photo series to document a subject’s progress over time. Or photograph different parts of an event to tell a more complete story. As you explore triptych photography, you’ll find a style that works for you and triptych photography will help you think outside the box.
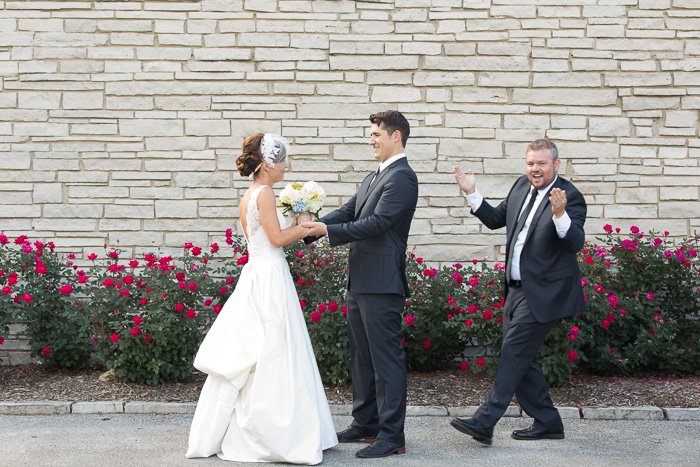
Decisive Movement
Capturing the decisive moment in photography is about being in the right place at the right time and knowing how to take the shot. It’s not just luck, but also understanding your subjects and predicting their behavior. The more you observe and understand the subject, the better you’ll become at anticipating the perfect moment.
Developing your photographing intuition is key. Trust your gut feeling when you sense something special is about to happen. The more you practice, the easier it becomes to recognize and capture those fleeting moments.
Look for emotional moments, everyday life details, and motion in your scenes. Train your eye to see patterns and the things that disrupt them. If you’d like to learn more about decisive moment in photography, there are great resources available here to dive deeper into this fascinating topic.
Dynamic Tension
Dynamic tension is a powerful tool for creating dramatic photos. It involves using diagonal lines, paths, and body language that move in opposing directions. This creates a sense of tension and pulls the viewer’s eye through the image.
To use dynamic tension, look for multiple diagonal lines moving away from each other, paths that move in opposite directions, or contrasting body language between subjects. The strongest tension comes from the widest angles between intersecting lines, ideally 90 degrees.
Framing and rotation also play a role in emphasizing dynamic tension. Experiment with different angles and compositions to find the most dramatic effect. However, use dynamic tension sparingly in your portfolio to avoid overuse. You can learn more about dynamic tension in photography here.
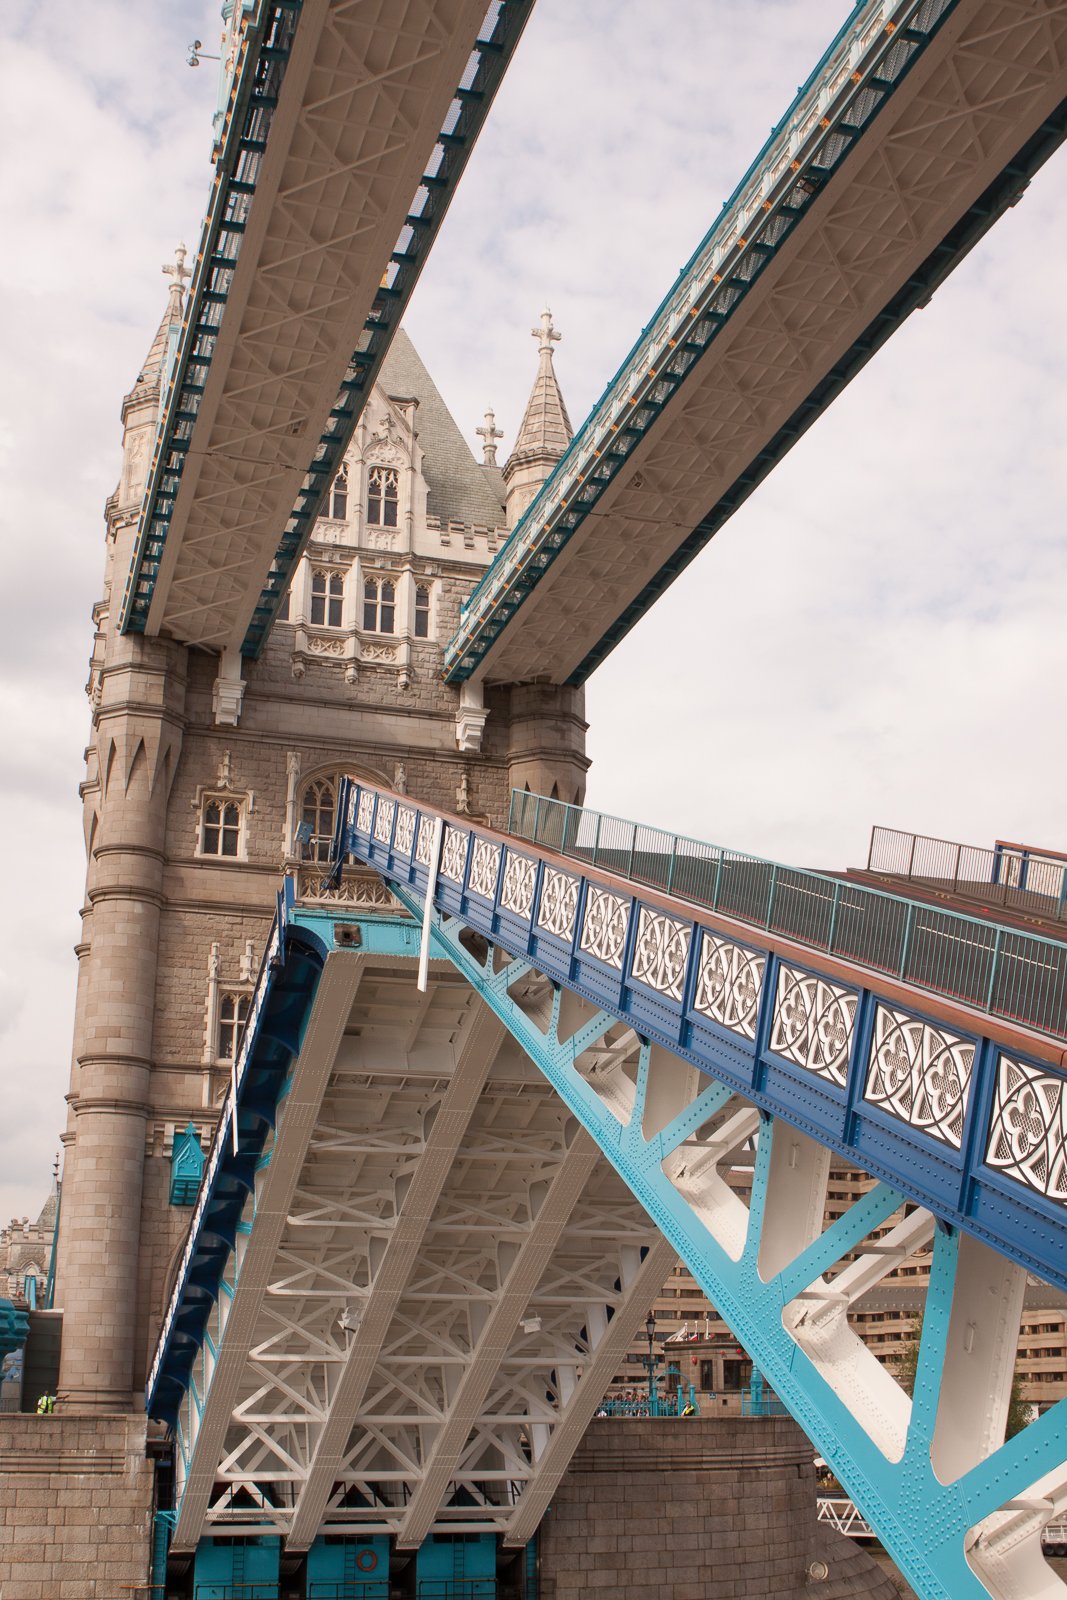
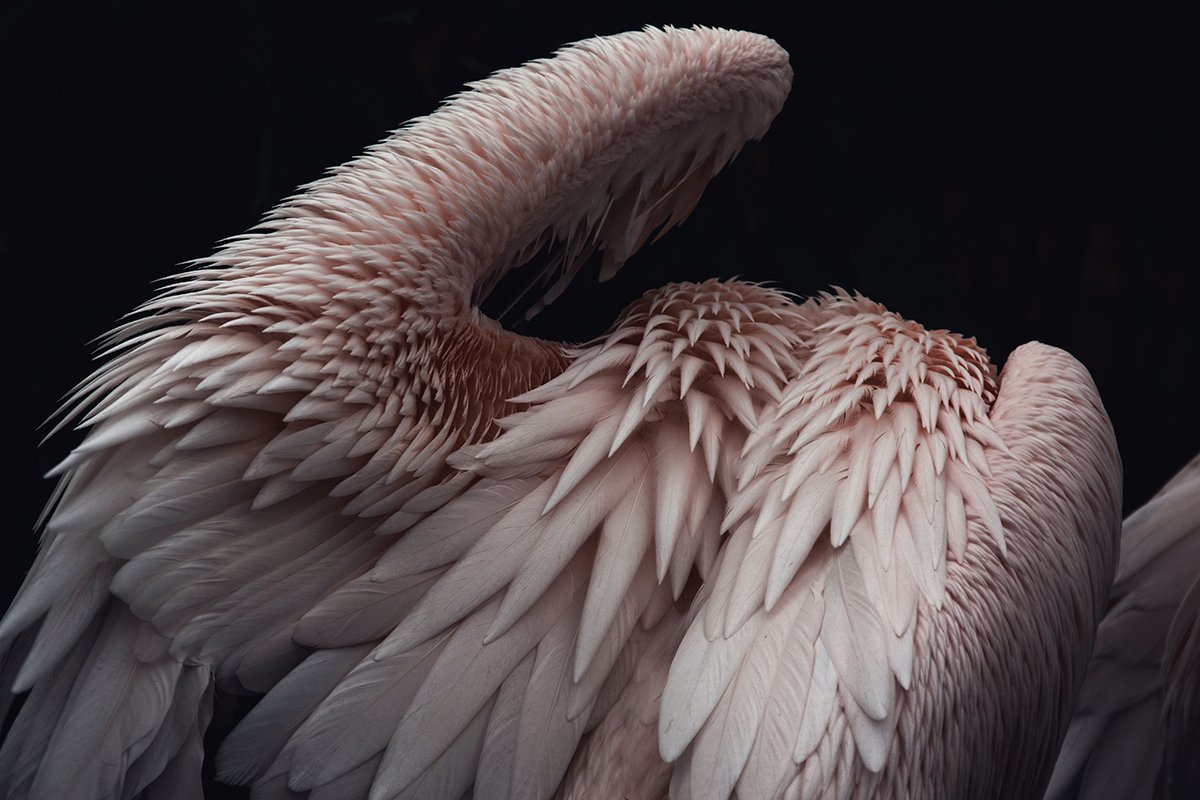
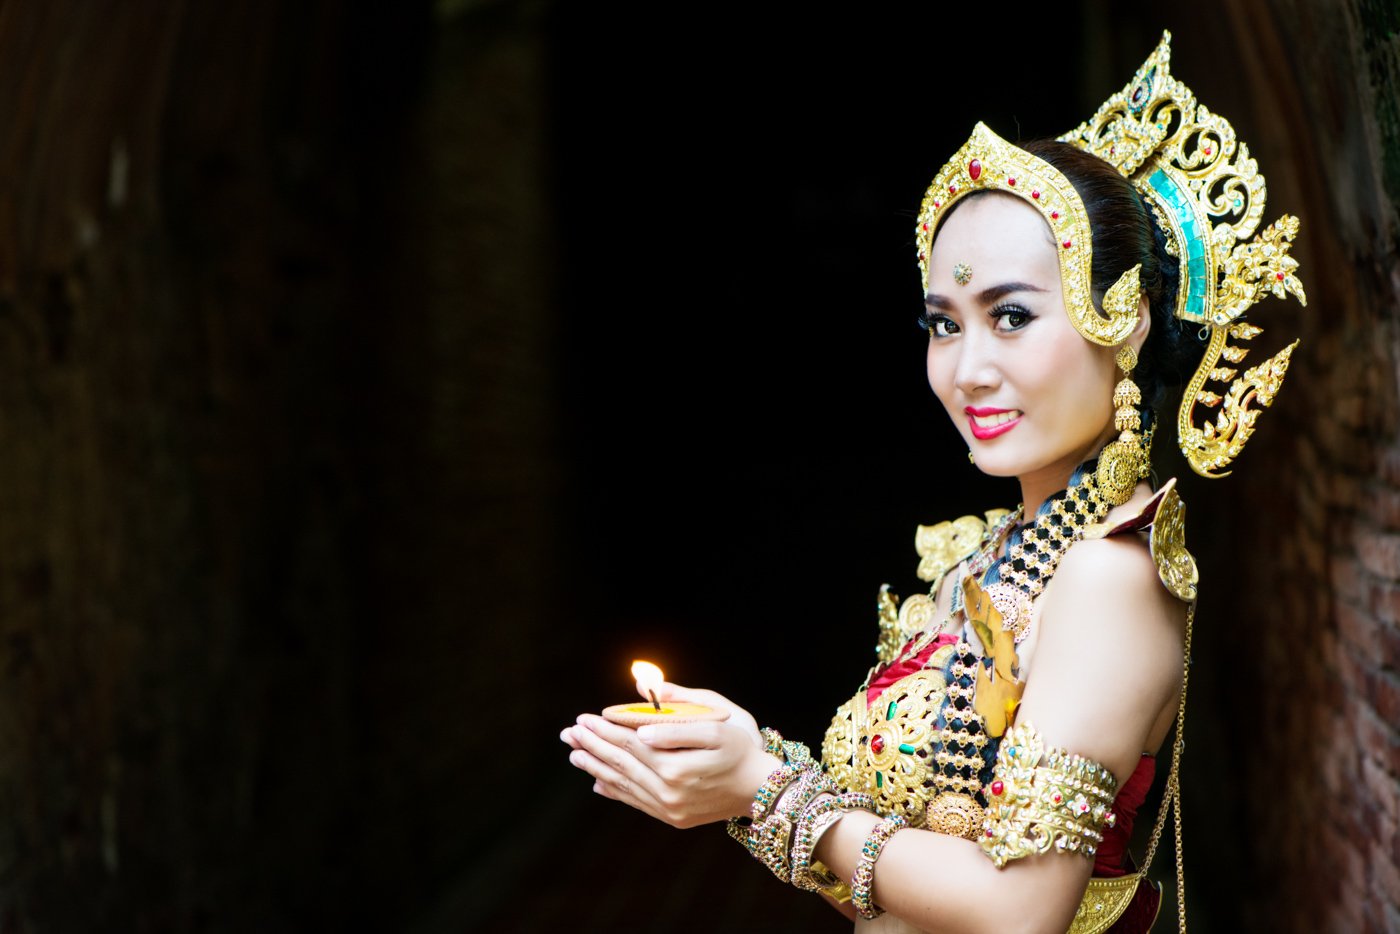
Figure to Ground
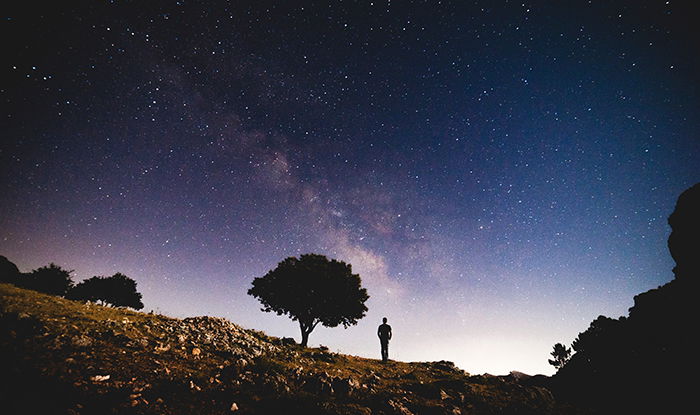
Figure to ground photography is a composition technique that creates stark contrast between the main subject and the background. This contrast can be achieved through differences in lighting or color. The most dramatic example is a silhouette, but there are many other ways to use figure to ground composition.
To create a figure to ground photo, look for scenes where the subject is much lighter or darker than the background. You can also use contrasting colors, even if the lighting is the same. Squint your eyes to blur the details and make it easier to see the contrast.
Extreme contrast isn’t always necessary. Sometimes you may want to keep enough background detail to provide context for your subject. In these cases, aim for a more subtle contrast that still draws the viewer’s eye to the main subject. Figure to ground photography is a powerful way to create depth and visual interest in your photos.
Composition Principles
The composition principles section is crucial for advanced composition. These ideas guide us on what works and what doesn’t work in photography. These principles are formed from years of photographic experience, so it’s wise to take advice from their lessons.
These principles range from simple points to consider in every photo to more niche concepts that may only be relevant to some styles of photography. Read more about each below, and make sure you try them out for yourself!
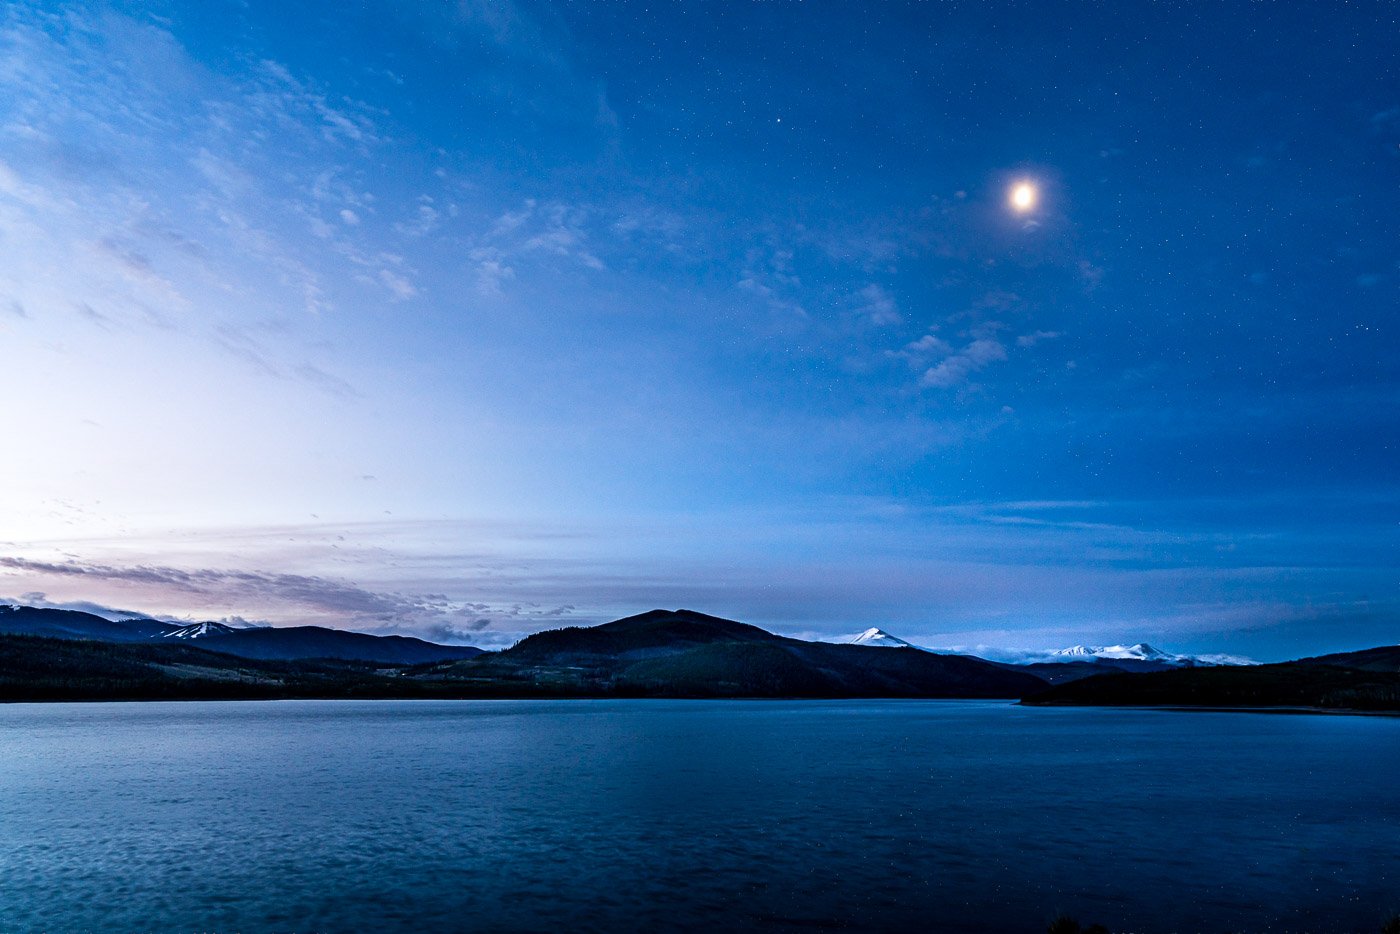
Value
Value in photography describes the range of light in your image. Altering the light is how you create contrast. Photographers group tones into blacks, shadows, midtones, highlights, and whites.
A histogram maps the tonal values with darker tones on the left and lighter tones on the right. The higher the peaks, the more of that tone is found in the scene. Most photographers avoid extreme tones, but you decide if you want to include pure black and white.
Understanding value will help create an emotional response to your images. High contrast images are bold and dynamic, while low contrast images are calmer and more mysterious. Value in photography is an important concept to learn to capture stunning photos.
Art and Design in Photography
The seven principles of art and design are balance, rhythm, pattern, emphasis, contrast, unity, and movement. These principles help photographers create compelling compositions and engaging images.
Balance refers to the visual weight of an image, while rhythm is about the recurring distribution of visual elements. Patterns are repetitions of art and design elements that work together in a single frame.
Emphasis shapes the center of interest in a photo through color, space, texture, and line. Contrast is created by including opposing elements like light and dark or different textures. Unity describes the visual relationship between elements in an image, helping create a cohesive look. Movement guides the viewer’s eye through the photograph using lines, colors, and other elements.
By understanding and applying these principles of art, photographers can take greater control of their images and create more impactful photographs.
Fine Art
Fine art photography is a creative area of image capturing that relies on the photographer’s ideas and vision. These works are meant to be wall art, either for a private client or a gallery. Fine art images can resemble some meaning or be as abstract as the photographer desires.
Fine art photography contrasts with representational photography, such as photojournalism. It combines photography and conceptual ideas as a process where the artist tries to express their perceptions and emotions, which are then shared with others. While both fine art and commercial photography produce saleable images, fine art photography is not commissioned like commercial photography is.
Inspiration for fine art photography can come from many sources, such as movies, visual art, and reading. By using topics that interest them, photographers can work harder and stay focused longer. Famous fine art photographers to look to for inspiration include Damiano Errico and Brassaï, who blurred the lines between street photography and fine art with his images of Paris at night. Click here to learn more about fine art photography, including tips for getting started and avoiding common mistakes.
Gestalt Principles
The Gestalt principles are a set of rules that help photographers create more appealing and powerful images. By understanding how the human mind perceives visual elements, you can organize your compositions in a way that makes them more engaging and emotionally resonant.
Some of the most important Gestalt principles for photography include proximity, similarity, closure, and segregation. Proximity suggests that objects close to each other are related, while similarity implies that elements with similar characteristics form a cohesive group. Closure allows the mind to fill in missing information, creating a sense of completeness, and segregation helps the subject stand out from its background.
By applying these principles to your photography, you can create images that are not only visually appealing but also convey a stronger message or story. To learn more about how to effectively use gestalt principles in photography, explore the in-depth article that covers each principle in detail and provides practical examples.
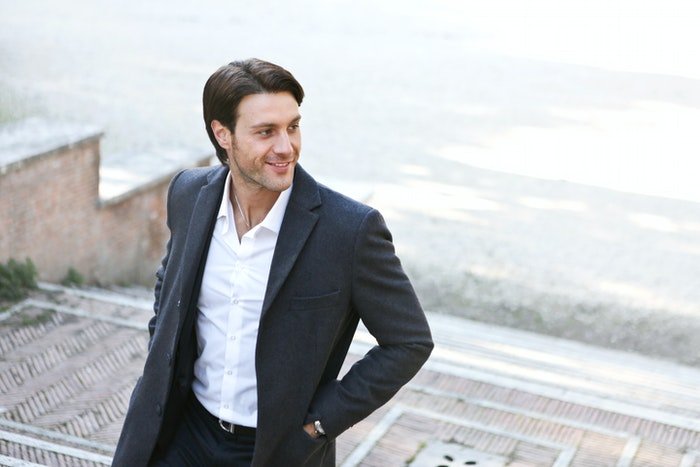
Lead Room Principle
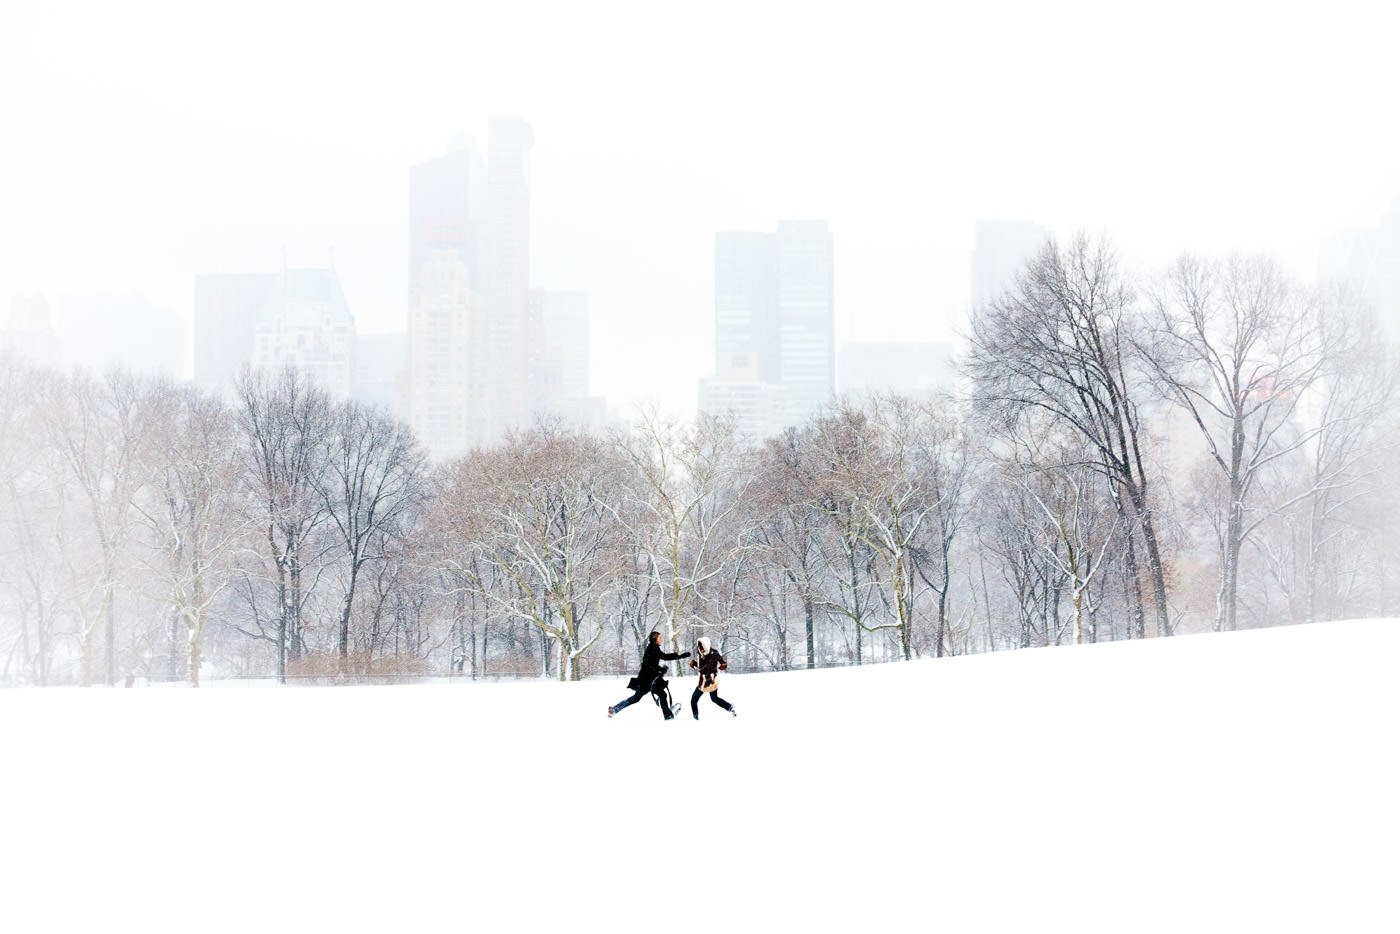
Lead room is the negative space in front of where the subject is facing or moving. This simple composition technique is essential in many types of photography, including portraiture, fashion, and events. By including extra space within the frame, you allow the viewer’s eyes to travel and provide context to understand the narrative.
When you don’t leave enough lead room, it creates a frustrating and uncomfortable feeling for the viewer. People prefer to see where the subject is moving or looking. Too little space makes the image feel suffocating and unappealing.
To apply lead room, shoot wider compositions and leave negative space, which you can always crop later. Experiment with extra-large negative spaces to create striking images that imply movement and freedom. Lead room will improve your compositions in portrait, landscape, sports, and street photography. If you’d like to learn more about lead room, there are great resources available.