Figure to ground photography is when the main subject is in stark contrast with the background. This could be light on dark or dark on light, or using contrasting colors. The most dramatic example of figure to ground photography is a silhouette.
But that’s not the only example of figure to ground composition. There are plenty more! Read on to learn how to use figure to ground composition in your photos.
[courses category="Composition"]
Everything You Need to Know About Figure to Ground Composition
There are a few different ways to create a figure to ground photo. Continue reading to learn more!
How to Create Contrast with Figure To Ground Photography
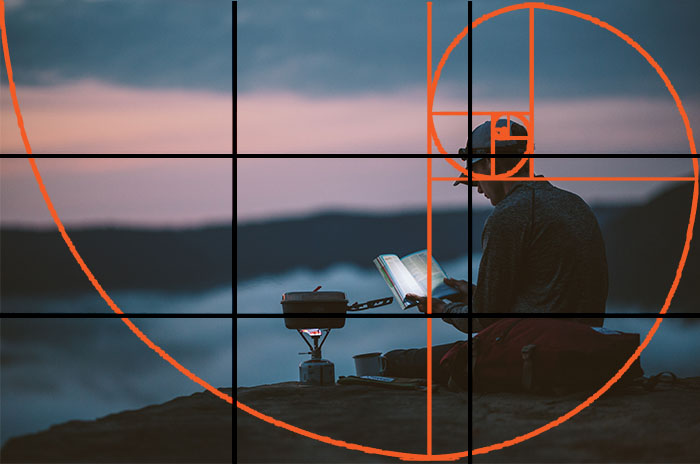
It’s often the difference in lighting in the frame that creates contrast. Good black and white figure photography is often punctuated by light contrast.
When there’s significantly more light falling on the subject than on the background, that’s an example of figure to ground composition.
You can also create contrast with color and tone differences alone. This is when your subject and background are in the same light, but the subject has a different tone than the background.
Some people “see” good photography composition. They perceive figure to ground compositions consciously, but others aren’t aware of it.
You can learn this technique. And the more you look for it, the more you will see it!
© Kevin Landwer-Johan
Why Figure to Ground Is Important to Photography Composition
If the contrast is between the main subject and the background, you’ll notice the main subject instantly.
When there’s little or no contrast, the viewer may find it difficult to make out the main subject. Using figure to ground can also add depth to your photographs.
Your mind finds it easier to separate elements in photos that contrast one another. Pictures using a figure to ground composition are more likely to grab the viewer’s attention.
This is a basic principle of visual perception. If you learn to use it well, more people will take an interest in your photos.
© Kevin Landwer-Johan
Best Exposure Settings for Figure to Ground Photography
You need to know how your camera will record a scene to get the most contrast in it. This will help you “see” when the conditions are right for figure to ground.
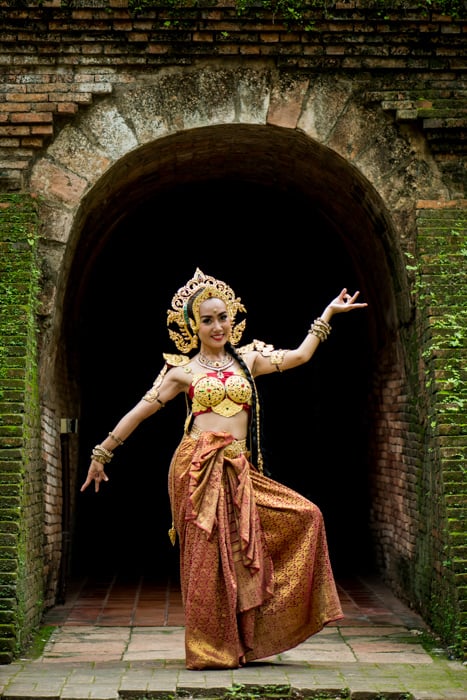
This scene with a Thai model in front of the meditation tunnel is a good example. When I was looking at this, I could see a lot of detail inside the tunnel. But I knew it would be a stronger photo if that detail wasn’t visible. So I darkened the tunnel to create a sharper contrast between the subject and background.
© Kevin Landwer-Johan
I positioned my model just at the mouth of the tunnel because there’s a lot more light than further back. I manually set my exposure to make sure her skin was the correct tone and that the background was underexposed.
My camera settings for this photo were 1/125th of a second, f/4, and ISO 800. I had taken a spot meter reading from her face.
Getting the exposure correct is vital to getting the most from this technique. If you have your camera set on an automatic or semi-automatic mode, it won’t work as well.
If you are using a spot meter, it can help. But it is best to be in full control in Manual mode. In Auto mode, the camera will try to balance your exposure. It will take a photo with too much detail in the shadow areas and won’t capture enough contrast.
You will be more successful with figure to ground if you are in control of the exposure settings. This can be achieved by using manual mode or exposure compensation.
Placing my model further back in the tunnel would not have given me the same result. The deeper into the tunnel I place her, the less light would be falling on her. You would lose the sharp contrast.
If I did that, I would need to increase my exposure and let more light reach the sensor. But then the tonal difference between my model and the background would be too similar. The color of her skin and the bricks in the tunnel wouldn’t contrast sharply enough.
© Kevin Landwer-Johan
Use Tone Contrast for Figure to Ground Photography
Even if the lighting on the subject and background is the same, you can still take figure to ground photos. To do this, make sure the color and tone of your subject and background are different.
In my photo of the two muddy boys below, the light is the same on the figures as in the background. It was an overcast day, and the light was flat and even.
This is figure to ground because the mud-covered boys are a much darker tone than the green grass behind them. If there was a muddy field behind them, there would be little or no contrast. And without that contrast, it wouldn’t have the figure to ground effect.
You can make figure to ground work without significant light contrast on your subject and background. But it is more difficult. This is especially true when the light is flat and dull, like on days with overcast skies. Look for subjects wearing clothes that contrast with what’s behind them.

© Kevin Landwer-Johan
How to Spot Figure to Ground Compositions in Everyday Scenes
Look for contrast and think like a light meter. Think about how the light is reflecting off your main subject and off the background. Is there a significant difference? If so, you can create a figure to ground composition.
Tips to Keep in Mind
To help you see the contrast, squint your eyes. Looking with your eyes almost closed will blur out most of the details. This makes it easier to spot the contrast. If you try this technique when there is little or no contrast, you will see a greyish blur.
Set your camera monitor to black and white. See how the scene will look without the distraction of color.
To be more precise, use your camera’s exposure meter. Using the spot metering mode allows you to make one exposure reading from your subject and one from the background.
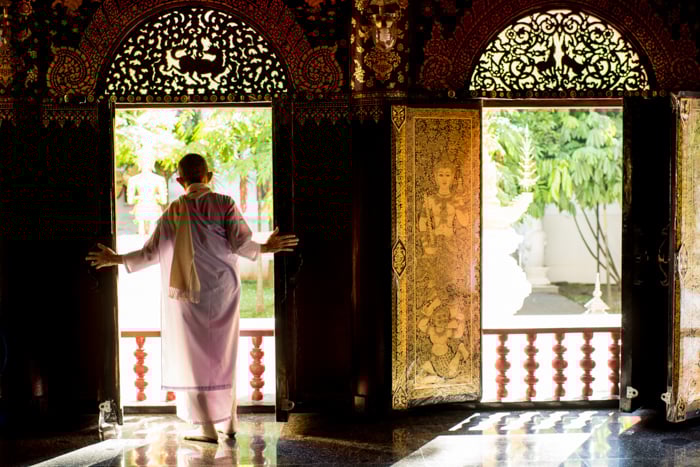
You want to have a difference of two or more stops between your subject and background. For example, in my photo of the old Buddhist nun opening the temple doors, I took a spot-metered reading from her.
I set my camera to 1/80th of a second, f/2.8, and ISO 400. To expose the background, my settings would need to be something like 1/500th of a second, f/8, and ISO 400.
This is a difference of over five stops, which creates a significant contrast.
© Kevin Landwer-Johan
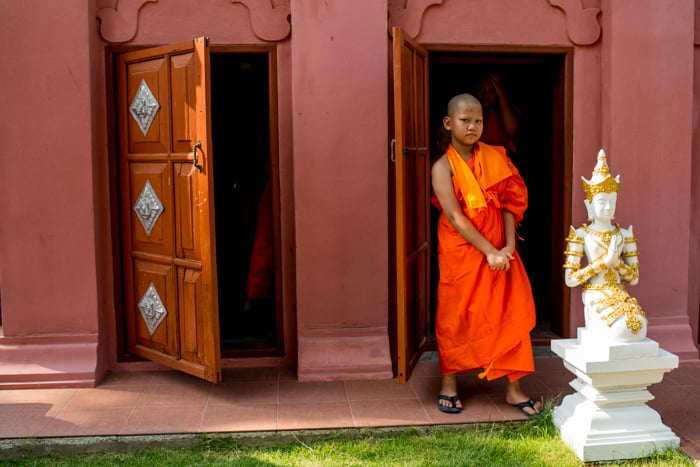
For a light figure on a dark background, your exposure setting will be different. In my photo of the young monk standing in the doorway, I took a spot meter reading from the boy. My settings were 1/400th of a second, f/4.5, and ISO 200.
To properly expose the background, my settings would have needed to be something like 1/60th of a second, f/2.8, and ISO 1600. But the room’s dark interior showing in the open doorway creates a strong contrast.
© Kevin Landwer-Johan
To take both these photos, I positioned myself so the open doorway was behind my subject. Doing this provided the contrast I wanted and also framed my subjects well.
I could have stood a little to my left or right when taking either of these photos. But part of the door frame would have been behind my subject. This figure to ground composition would not be effective. Even a slight change in your position can affect your composition.
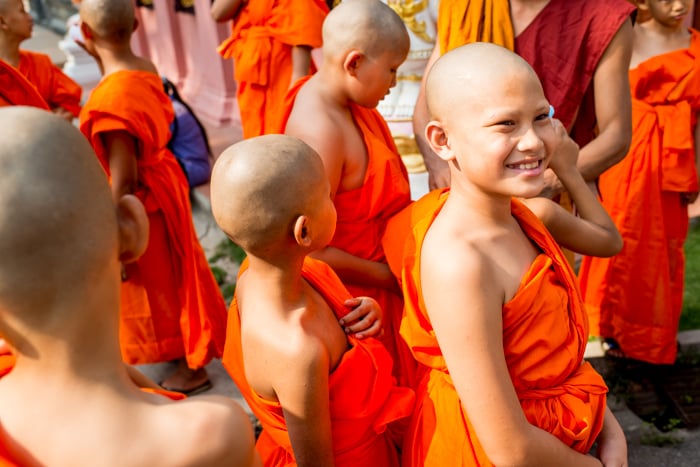
This photo of the smiling novice monk below is not figure to ground photography. The light on him and on the other novices is the same. The color and tone in the whole image are very similar, with low contrast.
The reason he is the main subject is because of his smile and the fact you cannot see any other face. If he had been in the sun and the others behind him were standing in the shade, there would be more contrast. This would have been a stronger photo if there had been a stronger contrast.
© Kevin Landwer-Johan
Why Extreme Contrast Is Not Necessary
In figure to ground photography, the greater the contrast, the stronger the impact. A silhouetted figure on a bright background is the most extreme. I like to use a black background with my outdoor studio portraits because the contrast is high.
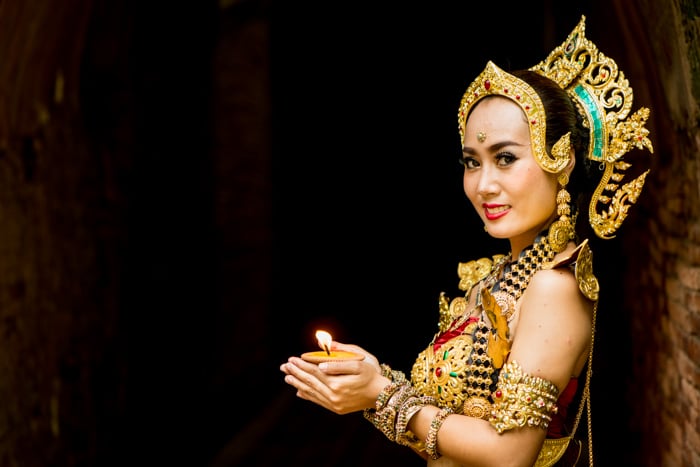
Sometimes, you will want enough of the background sharp to keep your main subject in context. In my photo of the monks lighting candles, if the background was much darker, the context would be lost.
If the background had been well-lit, there would be less contrast. The figure to ground effect would be diminished.
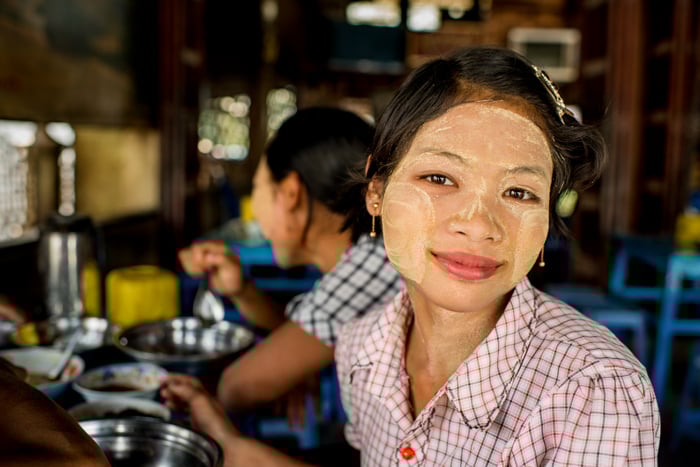
For environmental portraits, it is often best to have a more subtle contrast between them. In my portrait of the woman serving in the street side restaurant, the light on her is soft and even. This is because she was near the open front of the restaurant.
Further into the room, there was less light, creating just enough contrast for her to stand out while also showing her environment.
She remains connected but also somewhat removed because of the subtle contrast. The viewer’s eye is immediately drawn to her. And she appears to be lifted forward from the background because she is lighter.
This creates the impression of depth in a two-dimensional photograph. My close proximity and choice of a 35mm lens are also factors in this increased perception of depth.
© Kevin Landwer-Johan
Post-Processing Figure to Ground Photography
Modern camera sensors are capable of rendering a very broad tonal range. This is more noticeable in RAW files.
You can heighten the figure to ground effect during post-processing. One common method to achieve this is by using the Dodge and Burn tools. You can use the Dodge tool to make the main subject of your composition lighter. Or use the Burn tool to make the background darker.
If you were to use only contrast control, this would influence the whole image and wouldn’t be as effective as making local edits.
© Kevin Landwer-Johan
How to Use Dodge and Burn Tools
When using the Dodge and Burn tools, set the exposure level very low—around 5 to 10%. This allows you to work with these tools so the edges of the affected area will not be obvious.
You can go over the same part with a low-exposure brush until you see the desired result. With enough careful post-processing, it’s possible to create figure to ground composition from a low-contrast photo. This will work best if you have a RAW file, which is why we always recommend shooting RAW.
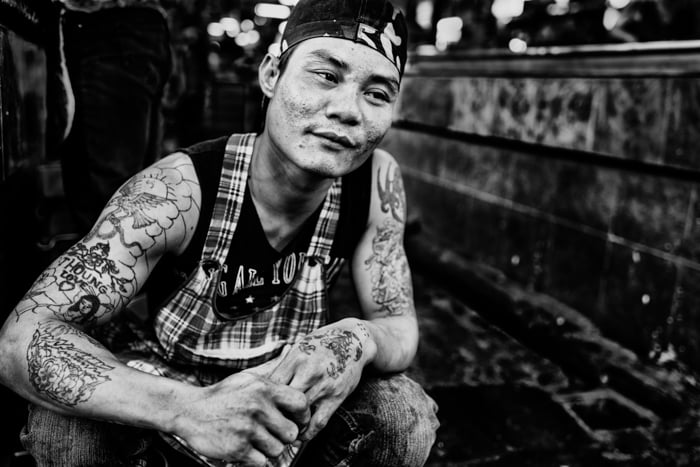
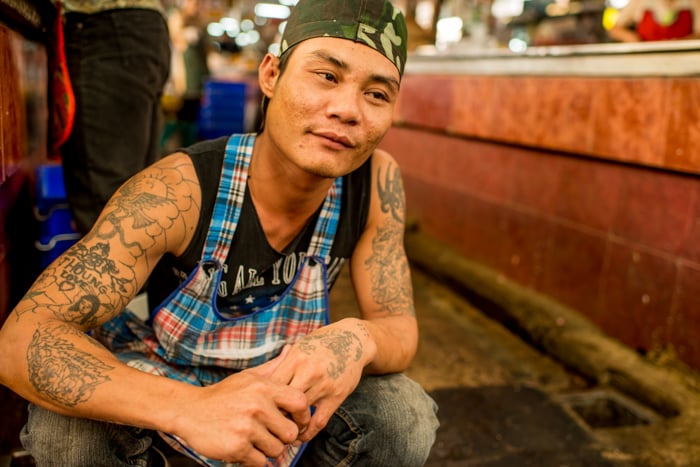
I created figure to ground contrast in this photo of a butcher at the markets. He was taking a break and I asked if I could make his portrait. I knew he was a bit shy and didn’t want the attention of his workmates. So I photographed him where he was sitting.
The room is illuminated with fluorescent lights and is open around the sides. The light is very even, so there isn’t much contrast. The tone of the butcher and the background are very similar.
I wanted him to stand out more from the background. To achieve this, I used the Dodge tool at 5% to lighten up his face and arms. I used the Burn tool at 10%, going over the background until it was dark enough.
The lighter background helps separate him from the background and creates more depth in the photo.
© Kevin Landwer-Johan
There are many ways you can alter tone values during post-processing. I prefer dodging and burning because I am old school, and that’s how I worked on prints in a darkroom.
Conclusion—How to Use Figure to Ground in Photography
You can learn to see figure to ground compositions everywhere you go. Walk around squinting at things until you get used to seeing when it will happen.
Think in black and white. Look for the contrast between the subject and background in tone and lighting. Photograph it when you see it. Then experiment with enhancing the effect during post processing.
[courses category="Composition"]