If you’re looking to give your photos a classic, old-school feel, you can do so by adding a sepia filter in Photoshop. This simple step will add an antique look to your images that can be really appealing. Here’s how to do it.
Using a Sepia Filter in Photoshop
Converting to Monochrome Before Adding Sepia Tone in Photoshop
The sepia tone is an offshoot of the monochrome. By that logic, the first step is to convert your image to black and white. Here are two ways of doing this in Photoshop.
Desaturate the Image
To quickly convert a photo to monochrome, Photoshop has a desaturate command.
Go to the Image drop-down menu and select Image > Adjustments > Desaturate (Shift-Ctrl or Cmd + U). This method is quick, but it is destructive. Also, it doesn't allow you to control the monochrome conversion. You can add richness to your image using a black and white adjustment layer.
Black and White Adjustment Layer
A non-destructive way to make your photo monochrome is to add an adjustment layer. Go to the Layer drop-down menu and select Layer > New Adjustment Layer > Black and White. Photoshop will do a basic monochromatic conversion. But you can also adjust each color channel. For instance, you can brighten or darken the reds or blues in your image.
You may not see a difference between these two methods of desaturating your image. The results depend on the colors in your image and how much you adjust them. For this comparison, I darkened the reds of the covered bridge and lightened the yellows of the trees. The method you use depends on how much control you want over the tones in your image.
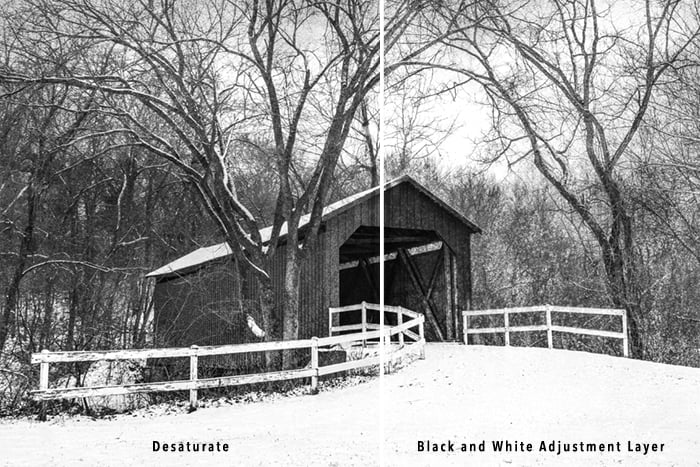
Comparing two different methods of desaturating an image in Photoshop. Using the adjustment layer, I darkened the red bridge and lightened the yellows in the winter trees.
Adding the Sepia Tone
Once your image is monochromatic, you can add a sepia tone. Here are four ways to do this in Photoshop. Each method gives you slightly different options for adjusting the sepia tone.
Using the Photo Filter Adjustment Layer
Using the Photo Filter Adjustment Layer is a popular method of adding a sepia tone.
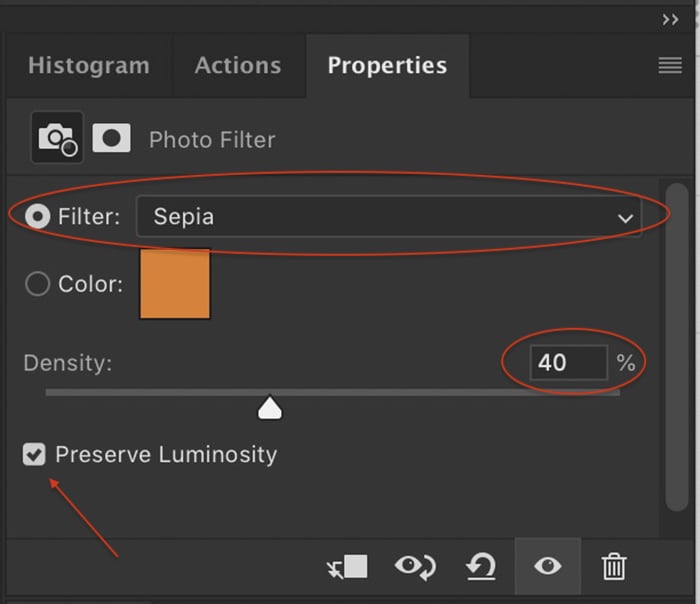
Go to the Layer drop-down menu and select Layer > New Adjustment Layer > Photo Filter. Select the Sepia setting in the filter settings. Use the Density slider to adjust the strength of the tint from 0 to 100%. I used a Density of 40%. If you don’t like the color of the sepia tone, click the “Color” button and then select the colored square. You can select a different tint.
Checking the Preserve Luminosity box brightens the whites.
Altering Hue & Saturation
Photoshop also includes a sepia filter in the Hue/Saturation adjustment layer.
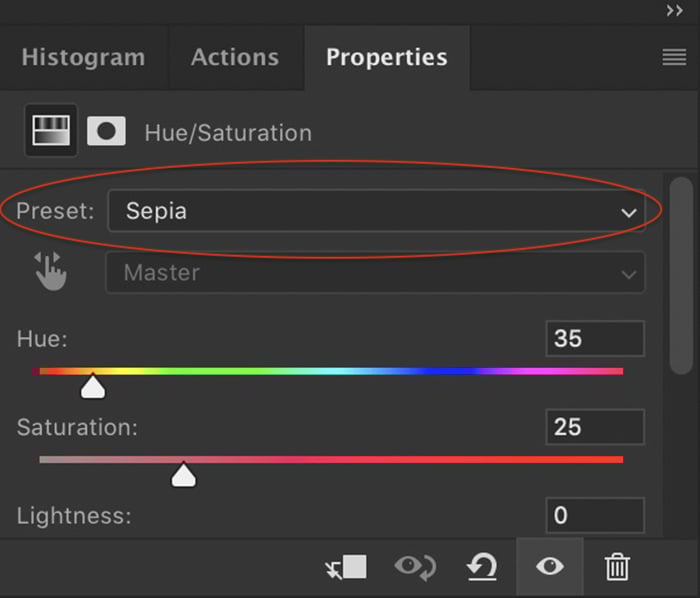
Go to the Layer drop-down menu and select Layer > New Adjustment Layer > Hue/Saturation. From the presets, choose Sepia. You have the option to adjust the color of the sepia tint, the saturation, and the exposure.
Color Fill Layer
Another way to achieve a sepia tone in Photoshop is to apply a Color Fill layer to your image.
Go to the Layer drop-down menu and select Layer > New Fill Layer > Solid Color. Click OK and choose a brown color. I use #604b1a color hex. But I recommend that you experiment with different shades of brown until you find one you like. Then select a blend mode. I use Soft Light, but each blend mode will give you a different look. If the effect is too strong, lower the opacity of the layer.
Color Balance
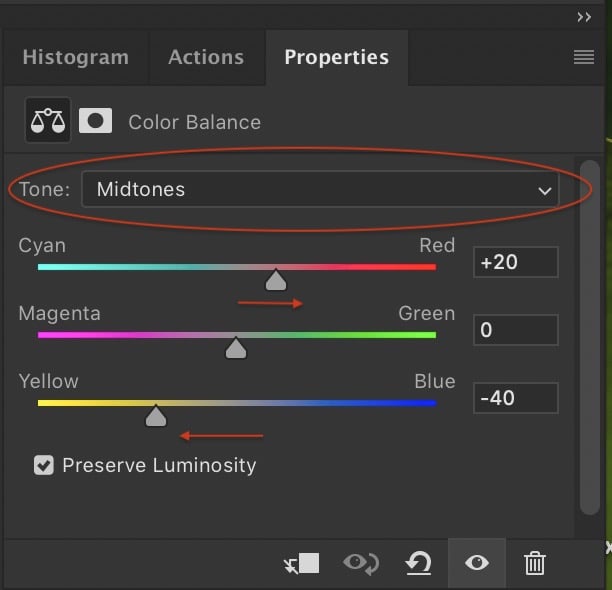
Finally, you can create a sepia tint in Photoshop using Color Balance.
Go to the Layer drop-down menu and select Layer > New Adjustment Layer > Color Balance. Select the midtones. Lower the yellow slider and raise the red slider. For the image in this article, I chose -40 for yellow and +20 for red, but every photo is different. Using this method, you can fine-tune the color of your sepia tint. You can also choose to tint highlights, midtones, and shadows differently.
I created images using the four methods of applying a sepia tone.
The images look similar, but if you take a closer look, there are some differences. Both the Photo Filter and Color Fill methods tint the whites to a greater extent than the other methods. For this comparison, I've adjusted the browns to appear somewhat similar. In each of the methods, you can select a mix of yellows and reds to create the brown tint that you want.
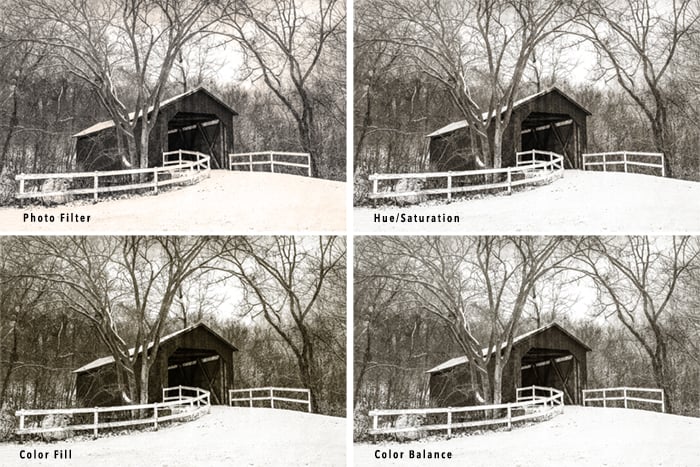
Results of four ways to apply a sepia tone in Photoshop.
Conclusion: Sepia Filter In Photoshop
It’s easy to create a sepia effect in Photoshop.
By adjusting a few sliders, you can control the temperature and opacity that best suit your image. We have explored four tested methods to achieve the sepia glow. Over time, you may find other Photoshop commands that further enhance this effect.
In fact, consider adding a Gaussian blur or a light vignette and see where that takes you!
Every photographer has a signature toolset. Want to define yours? Check out our Lightroom Presets to make the most out of your post-procession sessions.