Are you looking for a way to make your images pop off the screen? If so, let’s create a 3D effect in Photoshop. It is so quick and easy, even for a Photoshop beginner.
In this step-by-step Photoshop tutorial, I will show you the secret. It is so easy that you can do it with just a few clicks. It will take you less than a minute and it even works on video.
What is a 3D Effect in Photoshop?
We make photos and videos in two dimensions—length and width. We project the real world on a flat surface. It does not matter if the flat surface is a screen or a piece of photo paper. But, we see the world in three dimensions. The missing dimension is depth.
Photographers use a lot of compositional techniques to try to add depth. But there is another way. We can trick the brain into seeing a 3D illusion. We can create a 3D movie effect by offsetting two images in different colors—usually red and blue (cyan). A 3D movie effect is sometimes called a red-blue 3D effect because of how we offset colors in the image.
Anaglyph, or 3D, glasses filter the colors coming into each eye. They trick the brain into seeing a 2D image in 3D. It is a simple yet effective way to create 3D images. Without the 3D glasses, you see the classic retro outlines (red and blue) of the 3D photo effect. Put on the glasses, and you add depth to the image.

3D anaglyph glasses
How to Create a 3D Effect in Photoshop
It is simple to create a 3D picture in Photoshop. The 3D effect is powerful. But your brain does all the work.
In this step-by-step tutorial, we will work with an image. We use a different approach when creating 3D text in Photoshop. We will cover this in another tutorial.
Step 1. Open an Image in Adobe Photoshop
Start by opening a photo in Photoshop. You can find a free image in Adobe Stock or another stock site. I chose this retro-themed image from Unsplash.
You can send an image from Lightroom or go to the File drop-down menu and select File > Open (Ctrl/Commnd+O). Then, navigate to the picture.
Click Open.
If you are working with video, the Timeline window will open.

Step 2. Duplicate Layer
To duplicate the original image, go to the Layer drop-down menu and select Layer > New > Layer via Copy (Ctrl/Command+J). Or you can drag the Background layer to the new layer icon (plus sign) at the bottom of the Layers panel.
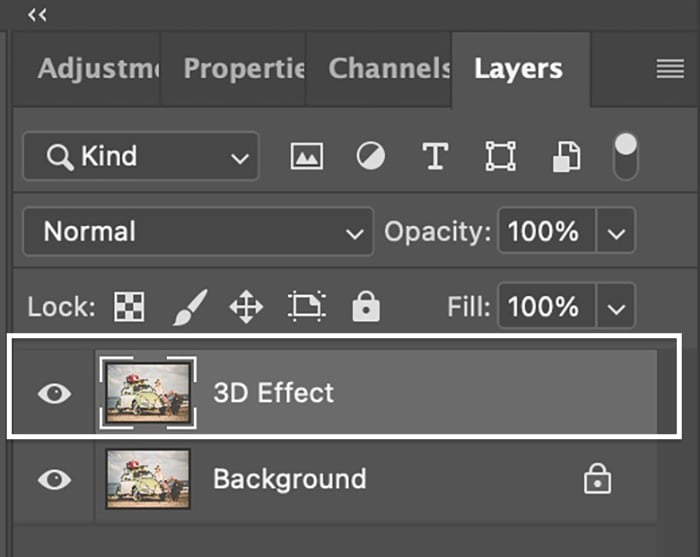
Rename this layer “3D Effect.” You should have two layers in the Layers panel—the 3D Effect layer and the original image on the Background layer.
Right now, we have stacked the duplicate on top of the original image. The 3D effect is created by offsetting these layers. But we have to do one other thing first.
With video, drag the Video Group layer to the new layer icon.
Step 3. Open the Layer Style Dialog Box
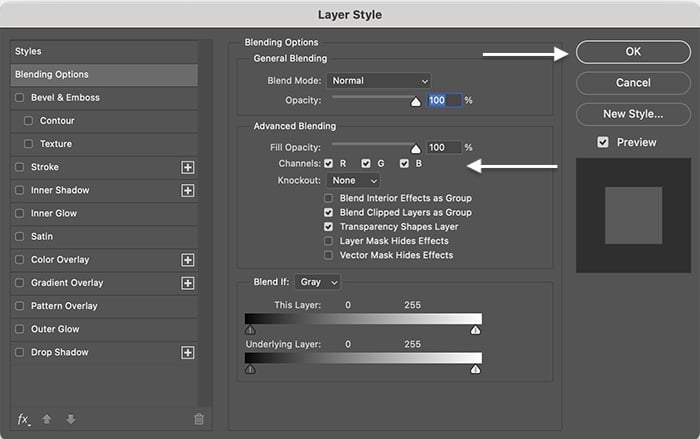
Open the Layer Style dialog box by double-clicking on the 3D Effect layer. You can also click the Fx icon at the bottom of the Layers panel and choose “Blending Options.”
Step 4. Turn off the Green and Blue Channels
There are a lot of fun things you can do in the Layer Style dialog box. But we are only going to make two small changes.
In the center of the window under the Advanced Blending section, find the Channels checkboxes. “R” stands for red, “G’ is green, and “B” is for blue. That is what RGB stands for in the RGB color space.
Uncheck green (G) and blue (B).
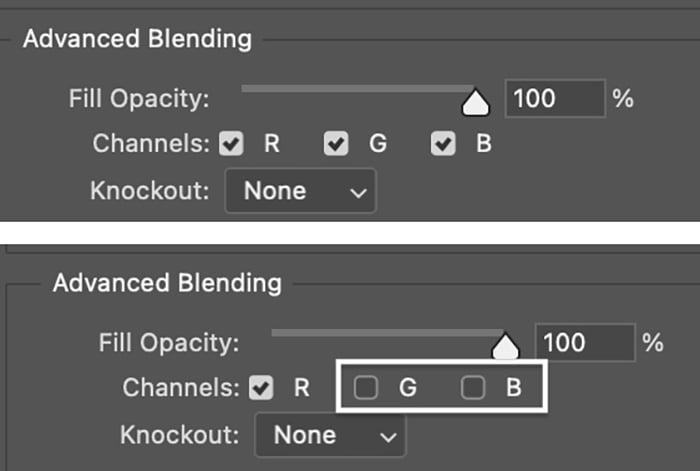
Click OK.
In various combinations, reds, greens, and blues make up a color image. The 3D Effect layer now only contains the red pixels. With the green and blue channels turned off, we see only red.
We can see this if we turn off the Background layer by clicking on the visibility icon. The image appears red. Turn the Background layer back on to see all the colors.

Step 5. Move the 3D Layer
Highlight the 3D Effect layer in the Layers panel. Select the Move tool (shortcut “V”). Hold the Shift key and press the left arrow key five to ten times or drag the layer to the left.
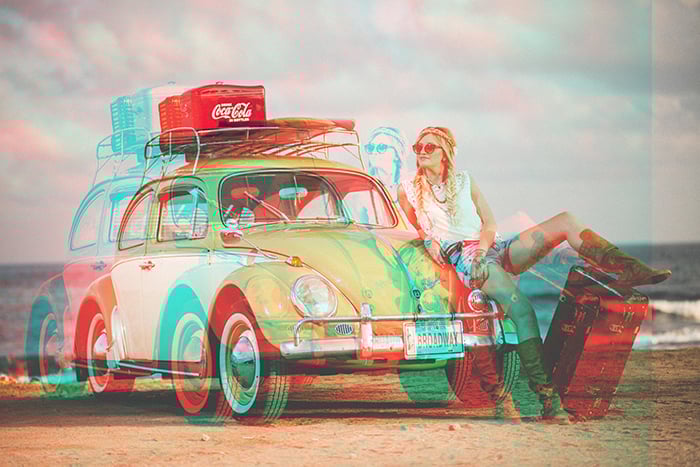
A colored outline appears on the original image as the red layer separates from the background layer. The colors become thicker the more you drag.
You will see a red halo on the left. A cyan outline appears on the right. (The opposite of red is cyan or blue.) My sample image is complex and has a lot of overlapping lines.
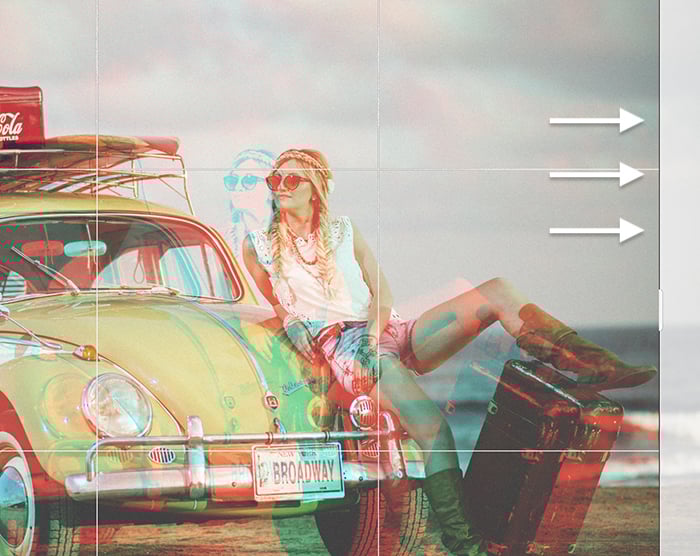
The offset layers should be noticeable. But don’t offset them too much, or it looks like a double exposure.
Move the layer too far to the left, and you get a double exposure
Moving the 3D layer creates the classic 3D picture effect that works with blue-and-red colored glasses.
You can get a little creative if you are simply after the retro effect. In the Advanced Blending section, try keeping the green and blue channels on and turning off the red channel. You can also drag the layer up instead of left.
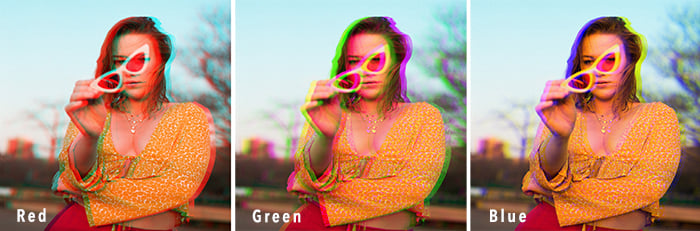
Comparison of offset RGB channels
Step 6. Crop the Image
Check the edge of your frame. There may be a hard line showing where we offset the layers. In some images, the overlap is more noticeable than in others. Use the Crop tool (shortcut “C”) to remove the overlapping edge.
Conclusion
In this Photoshop tutorial, we made an image pop off the page with a cool retro 3D movie effect. We isolated the red color channel and offset a copy of the picture. The result screams retro 3D.
The 3D effect in Photoshop is easy to get, but you look like an Adobe Photoshop master. To see your 3D effect in action, grab a pair of red-cyan 3D glasses.
Try out The Magical Photography Spellbook e-book to create more vivid and vibrant shots!


