back to top

How to Take Creative Photos (30+ Creative Ideas)

Last updated: April 30, 2024 - 29 min read
ExpertPhotography is supported by readers. Product links on ExpertPhotography are referral links. If you use one of these and buy something, we make a little money. Need more info? See how it all works here.
Subscribe Below to Download the Article Immediately

You can also select your interests for free access to our premium training:

Your privacy is safe! We will never share your information.

Creative photography is something all photographers aspire to produce. But sometimes it isn’t so easy. We’ve all experienced ruts and creative blocks, when we feel like we’re going through the motions. If that’s where you are right now, fear not. Expert Photography is here to help.

This article explores creative photography from every angle, looking at skills and techniques that will breathe new life into your photography. Covering everything from conceptual ideas like abstract photography to photo editing with software. 

With such a wide range of topics and tutorials, this article is the perfect remedy for a creative rut. Any photographer will be able to find something to re-ignite their passion for photography. 

A creative exploding glass photo
© Dina Belenko

How to Take Creative Photos

Anyone with a camera, or even with a smartphone, can try their hand at creative photography. There are many ways you can add extra creativity to your work, as you’ll see in this article.

You can explore new conceptual ideas to help you find new perspectives. There are practical camera effects and techniques you can harness for unique images. You can experiment with different lighting styles. And you can even find new levels of creativity in photo editing. 

We cover all those topics in this article, leaving no stone unturned in the quest for more creative photography. We start with abstract photography and move through DIY, flat lay, and water photography just to name a few. 

If you like what you’re reading, each section has a link to an in-depth article on that specific subject. That means you can learn even more by following those links.


Abstract

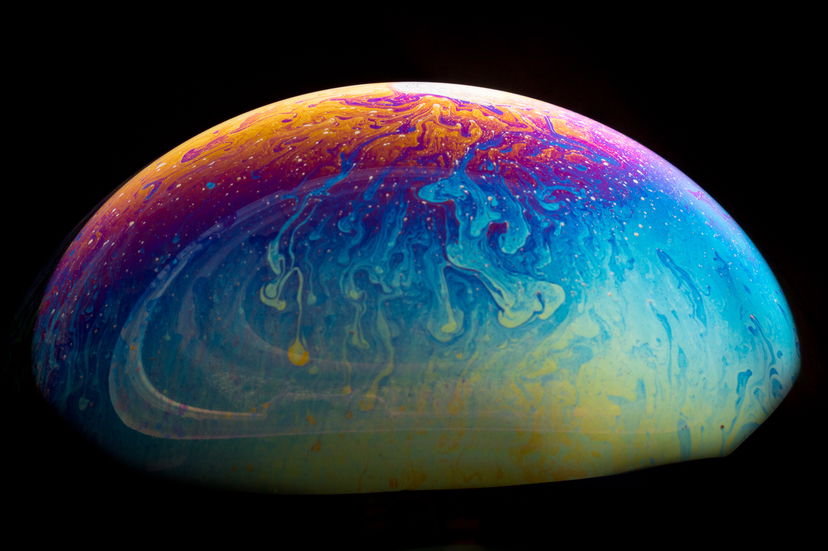
Abstract photography is a unique way to capture the world around you. It’s all about emphasizing colors, textures, lines and shapes rather than focusing on a subject.

There are many ways to create abstract images. Using intentional camera movement during a long exposure can produce painterly effects.

Photographing reflections on water surfaces takes advantage of the fluid nature of water to create surreal scenes. Getting in close for macro shots removes a sense of scale and highlights intriguing details.

Abstract photography principles can be applied to many genres like landscapes, nature, and portraits. By focusing on the key elements of light, shadow, lines and textures, you can find abstract beauty in unexpected places.

If you’d like to dive deeper into the world of abstract photography, our complete guide has plenty of tips to get you started.


Visual Metaphor

Visual metaphors are a powerful way to add depth and meaning to your photos. By using everyday objects to represent ideas and emotions, you can create images that are both beautiful and thought-provoking.

One simple way to create a visual metaphor is to use symmetry to convey a sense of peace or balance. You can also use negative space to symbolize hope and possibility, or incorporate props like paper butterflies or fake clouds to emphasize specific emotions.

Mirrors are another great tool for creating metaphors related to self-reflection and personal growth. And by using elements from nature, such as flowers or trees, you can evoke feelings of life, growth, and change.

With a little creativity and experimentation, you can use visual metaphors to take your photography to the next level.

To dive deeper into the world of metaphor in photography, be sure to explore our in-depth guide.

metaphor in photography

Minimalist

Minimalist photography is about capturing simple yet compelling images. The key is to use as few elements as possible to tell a story. Move around to find a composition that draws the viewer in while keeping things simple.

Negative space is an important part of minimalist photography. It refers to the area around your subject that is usually plain and simple. This space makes your subject stand out and appear more appealing.

Clean lines, symmetry, patterns, and textures can also create powerful minimalist images. Color contrast and complementary colors are great ways to make your subject pop.

Black and white photos strip an image down to its bare essentials, making them perfect for minimalism.

Follow the link to learn more about minimalist photography.

minimalist photography

Surreal Photography

Surreal photography challenges photographers to question reality and create unforgettable images. It’s a unique genre that breaks the shackles of imagination and redefines the possibilities of photography.

Surrealism began as an artistic movement after World War I, with artists like Salvador Dali and Rene Magritte.

Early surrealist photographers included Lee Miller, Man Ray, and John Havinden, who used techniques like forced perspective and double exposure to create images that question reality.

Modern technology has opened up even more opportunities for creating surreal photographs. Photographers can use in-camera and post-production editing techniques to subvert the world we perceive as real.

From underwater portraits to resized objects and distorted landscapes, the possibilities are endless.

Explore more examples of surreal photography in this blog post.

surreal photography

Color

Unless you’re shooting in black and white, color is an ever-present feature in photography. But you can use color in scientific ways to add new levels of creativity to your work. 

Adjust your camera’s white balance based on the lighting conditions. This will prevent colors from looking too yellow or blue. You can also manually set the color temperature for more control.

Keep your compositions simple and focus on one main color. Avoid including too many different colors that may clash. Look for appealing color combinations in nature, like blue and yellow.

Use a large aperture like f/1.8 or f/2.5 to blur the background and make certain colors stand out. You can also selectively desaturate colors when editing to emphasize the most important ones.

Lighting has a big impact on color. Direct light will create a bright, commercial look. Diffused light can give colors a more mysterious mood.

Colorful photography is a great way to learn about color theory and create eye-catching images.


Color Gels

Color gel photography is an exciting way to add vibrant colors to your photos that you can’t get with natural light.

To start, you can use your camera’s built-in flash and attach a piece of colored cellophane over it. This will produce a uniform color across the flash beam.

For better results, use an external flash unit like a speedlight or strobe light. These allow you to change the direction and intensity of the light. Wireless remote triggers let you position the flash at different angles for more natural-looking light.

Experiment with different color gels to create specific moods in your photos. Use a color theory wheel to choose complementary colors. You can also mix white light with color gels or use the gels as DIY lens filters.

Color gel photography works great for portraits and even outdoor shots.

color gel photography

Infrared

Infrared photography lets you capture the invisible. It reveals a world beyond what the human eye can see. To get started, you’ll need a camera that can detect IR light and an infrared filter to block visible light.

Midday sun is ideal for infrared photography. Landscapes work best, as foliage reflects IR light while water and sky absorb it. This creates striking contrasts between light and dark elements in your image.

Editing is key to achieving the final look. Convert to black and white for an uncanny feel, or swap color channels for false-color infrared.

With some experimentation, you can produce surreal and captivating results that will make viewers do a double take.

Infrared photography opens up a whole new world of creative possibilities.

infrared photography

UV

Ultra Violet (UV) photography captures light that’s invisible to the human eye. It uses wavelengths between 320 and 400 nm, which is shorter than visible light.

To take UV photos, you need a camera that’s sensitive to UV light. Film cameras can use special filters, while digital cameras need a full-spectrum conversion. This replaces the camera’s internal IR filter with clear glass.

UV photography opens up creative possibilities. It can make green trees look purple or create mystical black-and-white images.

UV photography is a fascinating way to capture the world in a new light.

uv photography

DIY Photography

DIY photography is all about using your creativity to solve problems. Instead of buying expensive gear, you can make your own tools using basic items from home. This helps you save money and think outside the box.

There are many DIY tricks you can use to improve your photos. Use a sandwich bag over your lens to create a dreamy effect or hold a prism close to the lens for cool reflections and blur.

You can also cut shapes out of paper to change the look of bokeh in the background.

Household items are great for modifying light too. A kitchen strainer makes unique spotted light patterns and a smartphone screen under the lens adds a mirror effect. Most of these DIY photography tricks use simple things you already have, so give them a try.

Check out our guide if you’d like to learn more about DIY photography.


DIY Tricks

You don’t need expensive gear to take cool photos. Try these simple DIY photography tricks to add interest to your images.

Use a sandwich bag to create a dreamy effect. Place the bag around your lens, leaving a hole for the lens to poke through. The plastic will blur the edges of your photo.

A prism held in front of your lens can add rainbows or reflections. Cut shapes out of paper to place over your lens and create custom bokeh. Wrap a piece of cardboard in tinfoil for a DIY reflector.

DIY Photography tricks are a great way to get creative without spending much money. With a few simple household items, you can capture unique images.

photography tricks

DIY Lighting

You can create your own DIY photography lighting at home using simple items like flashlights and light modifiers made from repurposed materials.

A basic diffuser can be made by stretching white fabric across a large picture frame or plastic pipe frame. Place your light source closer to the diffuser for harsher light or further away for smoother light.

Reflectors and flags are also easy to make using white and black poster boards. Fairy lights are another versatile option that can be used to light up your subject in creative ways, held by the model or strung behind them for a dreamy effect.

With a little creativity, you can craft your own DIY photography lighting solutions that produce impressive results without breaking the bank.

diy photography lighting

Smoke

To create smoke for photography, start by gathering props like glass jars, incense sticks, paper silhouettes, and a dark background. Cut out silhouettes to help tell your story, whether it’s a spooky Halloween scene or a charming fairy tale.

Arrange your scene with the jars as the central element. Place the silhouettes inside and use double-sided tape to keep them in place. Set up backlighting to make the smoke glow and outline the silhouettes.

Light the incense sticks and place them in the jars, allowing the smoke to condense. Take a series of shots capturing the swirling smoke. In post-processing, adjust the contrast and color to enhance the magical effect.

To learn how to make smoke for photography, our article is a must-read resource.

make smoke for photography

Creative Photography Ideas

Trying new creative photography ideas is a great way to improve your skills. 3D photography creates images with depth by merging two offset photos. Abstract photography focuses on geometrical shapes and hard lines.

Food photography at home is simple with props, lighting, and backdrops. Capture toy photos outdoors on a cloudy day for the best light. Tilt-shift lenses make subjects look like miniature models.

Wet-plate photography dates back to the 1800s and produces unique, timeless images. Experiment with horror photography to excite people’s imagination through storytelling.

Impressionist photography encourages breaking the rules with blurred subjects and artistic effects.

To learn more about creative photography ideas, our creative photography ideas post is a great place to start.


3D Photography

3D photography creates images with depth, making them look more lifelike and detailed. It uses two offset photos of the same subject, which are then merged to create a photo with three dimensions.

To make 3D photos, you can use post-processing software like Photoshop or even smartphone apps. Manual methods include the rocking technique, where you lean slightly in different directions for each shot, or using a tripod to move the camera left or right between shots.

When taking 3D photographs, keep the subject still and minimize movement. Frame the images in the same way, position the subject strategically in the center, and take plenty of pictures to ensure good framing.

With these tips, you can create impressive 3D images that add depth and realism to your photography. cCheck out our in-depth guide if you want to learn more about the fascinating world of 3D photography.

3d photography

Instant

Polaroid and instant photos have a nostalgic charm that digital photos can’t match. To get the best results, take photos on cloudy days or in shaded areas for even lighting.

Avoid photographing details up close, as instant cameras like the Fujifilm Instax are better suited for atmospheric shots taken from a few feet away.

Steer clear of harsh contrasts and shadows, which can ruin your composition. Keep your fingers away from the lens and flash to prevent unwanted distractions in your images.

Experiment with various subjects, backgrounds, and even black and white film to create different moods and keep your photos interesting.

Some instant cameras offer double exposure features for creating surreal and imaginative photos. You can also use colorful lenses, frames, and stickers to add a fun touch to your shots.

Your instant photos can even serve as examples to take good Polaroids and impress potential clients or showcase your creativity in your portfolio.

take good polaroids

Wet Plate

Wet plate photography is one of the oldest types of photography, dating back to the 1800s. The process involves covering a metal or glass plate with a light-sensitive emulsion, which reacts when exposed to light.

Unlike modern film, the plate must be developed immediately after the photograph is taken.

The wet plate collodion process went through three stages: daguerreotype, ambrotype, and tintype. Tintype was the most popular and lasted into the early 20th century.

Today, photographers are rediscovering this classic technique to create timeless images with beautiful golden tones.

To try wet plate photography yourself, you’ll need a large format camera, film holder, red light, metal plates, and various chemicals. The process can be complicated and requires the right knowledge, but the results are unique and breathtaking.

Our article on wet plate photography is the best place to start if you want to learn more. 

Wet plate image of cowboy leaning on a fence, man holding a surfboard, and a woman on a horse
© Joni Sternbach

Creative Editing Ideas

Creative editing techniques can transform your photos into unique works of art. Digital collages combine multiple images to create a new context. You can cut out sections of a subject to reveal layers underneath or incorporate various media like painting and drawing.

Double exposure is another fun way to merge images for surreal or emotional results. Experiment with combining textures and portraits or express yourself through self-portraiture.

The Droste effect creates an illusion of an infinitely repeating image. In Photoshop, duplicate the image, scale it down, and erase unwanted parts. With patience and experimentation, you can achieve exciting results.

Creative editing ideas can help you escape a creative rut and make the most of photo editing software.


3D Models

Creating a 3D model from photos is a process called photogrammetry. To do this, you need a camera, 3D modeling software, and optionally, a 3D printer.

Use a DSLR or mirrorless camera with a wide-angle lens and a sturdy tripod. Capture your subject from many angles, ensuring an 80% overlap between each shot. Take three images at each position, with the subject in the center, left, and right of the frame.

Once you have your photos, use 3D modeling software like Agisoft Metashape to align and process them. This can take some time and troubleshooting, but the result is a detailed 3D model of your subject.

Creating a 3d model from photos isn’t has difficult as you might think. Find out more by clicking the link.

3d model from photos

Digital Collage

Digital collage is a technique that combines multiple images using editing software to create a new context. It takes the same cut-and-stick approach as traditional collage but applies it in a digital environment like Adobe Photoshop.

To make a digital collage, start by selecting photos for your project. Cut out sections of the main subject to reveal images beneath it. Add detailed layers underneath and use collage elements to create different layers.

You can also cut and stick more collage elements, erase parts of layers to reveal what’s underneath, and duplicate elements for an interesting effect. With time and practice, you can create exciting digital collages.

Our post on digital collage is a fun starting point if you want to learn more.

digital collage

Multiplicity

Multiplicity photography is a fun and creative way to combine multiple photos of the same person or object into one image using Photoshop.

To get started, set up your camera on a tripod and take several photos of your subject in different poses or positions, ensuring the lighting remains consistent.

In Photoshop, open your favorite image and drag the other photos onto it as new layers. Use the Polygonal Lasso tool to roughly cut out each subject, then create layer masks to refine the edges.

Paint around the shapes with a soft brush for hair and a harder, smaller brush for the rest of the body.

Experiment with duplicating and transforming layers to create interesting compositions. Save your layered Photoshop file and make final adjustments to individual layers or the merged image. With practice, you’ll master the art of multiplicity photography.

We’ve made multiplicity photography in our detailed tutortial.

multiplicity photography

Flat Lay Photography

Flat lay photography has become a popular form of creative photography. It’s commonly used in product photography, but it’s also popular with food photographers and social media content creators. 

Capture the season with props that represent your favorite time of year. Add hands to the frame to bring your image to life. Get creative with coffee by making up a character or using the cup as a metaphor.

Use decorative ornaments made from food like honey swirls or ingredient drops. Show the ingredients instead of the final product with flour drawings or decorated crusts. Create big shapes from tiny objects by making silhouettes or using negative space.

Make a unique ice cream photo with chalk drawings, small decorations, or a levitation effect. Use color blocking with bold geometric shapes and a limited color palette.

Flat lay photography ideas are endless, so let your imagination run wild!


Food

Flat lay food photography is a creative way to capture delicious dishes from above. To get the best shots, choose a simple background that won’t distract from the food. Pastel colors, wood, or subtle textures work well.

Position your camera high and parallel to the scene for the perfect overhead view. A tripod with a 90-degree arm is a great investment for serious flat lay photographers. Arrange ingredients, spices, and props to tell a story and add depth to your 2D scene.

Experiment with composition by using the rule of thirds, leading lines, and creative framing. Manage light and shadows with natural light and diffusers for realistic colors and subtle effects.

Including human elements like hands reaching for food can make your photos more relatable. Flat lay food photography is a fantastic way to showcase mouthwatering dishes.

For more tips on capturing stunning flat lay food photography, explore our in-depth guide.

flat lay food photography

Clothes

Flat lay photography is a popular way to show off your style and creativity. To take excellent flat lays, make sure your camera is pointed straight down at a 90° angle. Use a tripod with a spirit level for the best results.

Before you start shooting, iron your clothes thoroughly to remove wrinkles. Allow the natural characteristics of different materials to stand out. Use a grey card to ensure accurate white balance and colors.

Style your clothing so the most important details are recognizable. Use lower-angle lighting to add depth and texture to your images. A 50mm focal length or higher will minimize distortion.

For the best results, use an ISO of 100-200, an aperture of f/11-f/16, and let your camera choose the correct shutter speed.

Flat lay photography clothing is a skill that takes practice, but these tips will help you master it in no time.

flat lay photography clothing

Creative Apps

You can explore different types of creative photography with nothing but your smartphone. Thanks to a wonderful array of photography and digital art apps, you can experiment and explore using your mobile. 

This section looks at some of the best creative apps for photographers. Remember to click on the links to find out more. 


Photo into Painting

Turning photos into paintings is easier than ever with the latest apps. There are many options available, each with unique features and painting styles.

Some of the best include Oilbrush for oil painting effects, Brushstroke for customization, and Waterlogue for beautiful watercolors.

Using these apps is simple. Just upload a photo, choose a painting style, and adjust the effects. Within seconds, you’ll have a stunning digital painting to share or print.

Whether you want to create a masterpiece or just have fun, these apps make it possible. To learn more about how to turn a photo into a painting, check out the in-depth guide.

turn a photo into a painting

Cinemagraph

Cinemagraphs are a popular visual art form that combines still photos with subtle animation. These “moving pictures” loop endlessly, drawing the viewer’s attention.

Cinemagraph apps make it easy to create these captivating images on your smartphone or tablet.

The best cinemagraph apps offer user-friendly interfaces and helpful tutorials. They allow you to select the area of your video or Live Photo to animate while keeping the rest still.

Many apps provide filters, effects, and even audio libraries to enhance your creations.

With a variety of cinemagraph apps available for iOS, Android, and Windows devices, you can find the perfect tool to explore this creative trend.

Whether you’re a photographer looking to add something unique to your portfolio or just want to have fun with friends, cinemagraph apps make it simple to create mesmerizing moving pictures.

cinemagraph app

Creative Lighting Ideas

Lighting is a key element of photography that can be used creatively to transform the mood and atmosphere of an image. Experimenting with different lighting techniques can improve your skills and give you more control over your photos.

DIY lighting is a great place to start, using simple items like flashlights, white fabric, and poster boards to create diffusers and reflectors.

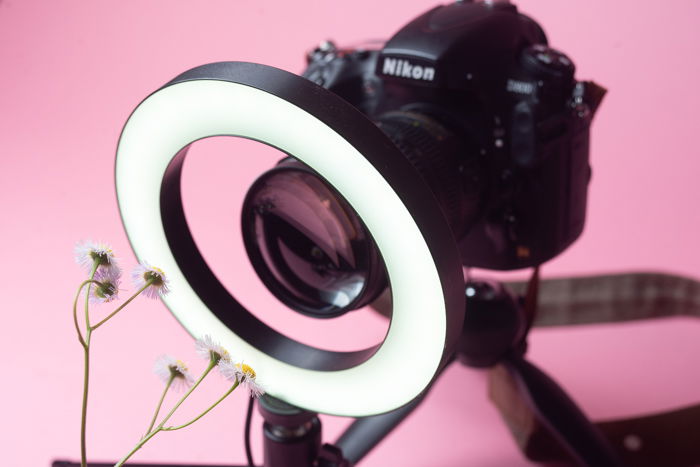
Slow-sync flash combines a slower shutter speed with a flash to freeze motion while capturing ambient light trails. Ring flashes provide even, 360-degree lighting that reduces harsh shadows and creates unique catchlights in the subject’s eyes.

Natural light is the best light for photography and is available any time of day. Direct light emphasizes textures, sidelight creates a moody look, soft light from cloudy days is balanced, and backlight can create silhouettes or sun flares.

Creative lighting ideas like these can take your photography to the next level.


Candle Light

Candlelight photography creates a soft, warm glow that can result in beautiful, emotional images. To capture the best shots, use a tripod to minimize camera shake and adjust your camera settings for the low light.

A wide aperture lens, such as a 50mm prime, will allow more light in and create a shallow depth of field that complements the soft candlelight.

Carefully check your framing and background before shooting to avoid any unwanted elements in the image. You can use extra candles to add light to the background, or reflectors to bounce light back onto your subject and define their outline.

Meter the light based on your subject, and experiment with their placement and angle to the light source to find the most flattering shadows.

Candlelight photography takes some practice, but with these tips you’ll be capturing stunning, atmospheric images in no time.

candlelight photography

Fairy Lights

Fairy light photography is a fun way to take eye-catching photos while improving your lighting skills. You can use fairy lights to create dreamy self-portraits at home or stunning background bokeh.

White string lights are perfect for glowing portraits in the dark. Cover part of your lens with the lights to add a gorgeous foreground to your shots. You can also use long exposure to capture surreal photos of moving light.

Combine a clear umbrella with fairy lights for moody results. Or turn a kerosene lamp into a unique fairy light holder. With a little creativity, the possibilities are endless.

Click on this link to learn more about fairy light photography.

fairy light photography

Starburst

To create a starburst effect in your photos, you’ll need a small aperture like f/11 to f/22. This closes the blades inside your lens, creating a small opening that diffracts light from the sun or other bright sources, resulting in the starburst look.

During the day, partially cover the sun with an object like a tree or building to avoid overexposure. At night, street lamps work well without needing to be covered. Use a tripod and low ISO to minimize noise in low light.

Experiment with different aperture sizes and compositions to get the perfect starburst effect for your shot. In post-processing, use the “whites” or “recovery” slider in Lightroom to bring back detail in overexposed areas.

Our tutorial provides step-by-step instructions so you can add the starburst effects to your photography work.

starburst effect

Creative Projects

Learning new skills and techniques is a great way to improve as a photographer, but you can also push yourself by setting yourself creative projects. 

Projects and challenges are one of the best ways to push yourself forward. They give you objectives and obligations, making you work hard to achieve the goals you set. You’re constantly trying to solve problems and overcome hurdles, which strengthens your creative skills. 

These are some of the best creative project ideas for photographers. Give them a try if you’re dedicated to improving your photography skills. 


30-Day Challenge

A 30-day photography challenge is a great way to kickstart your creativity and improve your skills. Each day, you’ll face an exciting new challenge that pushes you out of your comfort zone. This helps you learn to take better photos in almost any situation.

The challenges encourage you to experiment with new ideas and techniques you might not normally consider. You’ll learn about composition, lighting, and more.

By the end of the 30 days, you’ll have a collection of unique images and plenty of inspiration for future shoots.

To find out more about how a 30-day photography challenge can boost your skills, take a look at our detailed guide. It covers all the basics and provides 30 days worth of challenges to get you started.

photography challenge

New Techniques

Experimental photography is a great way to get creative with your camera. Intentional motion blur, light painting, and impressionistic focus are just a few techniques to try.

You can also experiment with alternative filters like clingfilm or sheer fabric. Double exposures and mirroring effects add unique dimensions to your images.

Many digital cameras have built-in effects like selective color and posterization. Photoshop offers even more options, such as polar coordinates and liquify filters.

With so many experimental photography techniques, you’re sure to find new ways to express your creativity.

Check out the full experimental photography guide to see how you can push yourself.

experimental photography

Home Projects

Looking for creative photography ideas at home? Try pet photography and capture your furry friend’s personality. Food photography is another great option – use lighting techniques to turn your home-cooked meals into works of art.

Shadows can add drama and intrigue to your photos. Find interesting patterns around your house or create your own using everyday items.

Water is also a great subject for creative photography, from raindrops on windows to manipulated water droplets.

Still life photography allows you to experiment with composition using objects like utensils, bottles, or family heirlooms. You can also use mirrors to create surreal images and illusions or incorporate smoke for a spooky atmosphere.

Photography ideas at home are endless, so grab your camera and start exploring the creative possibilities right away.

photography ideas at home

Photo Essays

Photo essays are a great way to tell a story or evoke emotion through a series of photographs. They allow you to explore a single idea or topic in a creative way.

Some awesome photo essay examples include photographing a protest to capture the atmosphere, creating a transformation photo essay to show change over time, or documenting a local event like a festival or market. You can also photograph an abandoned building to provide a unique look at the past.

If you’re looking for more inspiration and ideas for creating your own photo essay, our article can help you get started.

photo essay example

Games

Photography games are a great way to overcome creative blocks and make photoshoots more fun. Guess Where a Photo Was

Taken challenges you to figure out the location of photos, which can improve your travel photography knowledge. Photography Pictionary is a silly drawing game that teaches beginners about photography terms.

Life Is Strange is a video game that follows a photography student who can rewind time. Throughout the game, you can take photos with her camera to earn rewards.

Photograph the Same Object From Different Angles forces you to find potential in a single subject by taking unique shots of it.

By playing photography games, you can develop your photography style, preserve memories, and bond with other photographers.

If you want to dive deeper into the world of photography games, we have a detailed guide that covers everything you need to know to get started.

photography games

Water Photography

Water is a great proper for creative photography when used in the right way. Of course, you have to be careful. Water and digital cameras don’t mix. But there are several ways use a use water to creative interesting images. 

You can capture water splashes for impactful images. Water droplets are another types of water you can use. And mixing oil and water gives you incredible abstract shapes. 

Let’s look more closely at how you can use water in your photography.


Water Splash

To freeze motion in water splash photography, you need a light source with a short flash duration, like speedlights or strobes. Set the flash duration to at least 1/4000s to keep the water drops sharp. Lower the flash power if needed to reach the required speed.

Arrange your props in a simple composition, leaving space for the falling water. Glue each item to the backdrop, then carefully flip it upside down.

Set up your lights, with the key light illuminating the background and a fill light softening shadows.

Put your camera on a tripod and use manual focus for sharp images. Set the shutter speed to the flash sync speed and adjust aperture for proper exposure.

Pour water onto your subject to create dynamic splashes and take a series of shots. In post-processing, layer your favorite splashes over a clean shot and adjust colors and contrast.

Splash photography is a fun way to capture creative images of all kinds of liquids and objects.

splash photography

Color Splash

Color splash photography is a fun and creative way to capture dynamic images. The key is using a light source with a short flash duration, like speedlights or strobes. Keep the power settings low for the best freezing effect.

Composition is important. Sketch out your idea first, then carefully arrange your subjects using supports and a glue gun. Experiment with different angles and placements to make the image more interesting.

When you’re ready, take a “blank canvas” shot before adding any liquid. Then pour in your coffee or other liquid and shoot in burst mode. You may need to try a few times to get the perfect splash.

In post-processing, combine your favorite splashes with the clean background shot. Remove any visible supports and make final color and contrast adjustments.

To learn more about the techniques behind captivating color splash photography, we have a detailed guide available.

color splash photography

Water Drop

Capturing creative water drop photography is a fun way to add excitement to your images. You’ll need a few simple items like a bowl of colorful sweets, a glass pane, water, and a dropper. Precision is key when creating appealing water droplets.

Experiment with the focus to make the drops act like little magnifying glasses, reflecting the sweets below.

Use a wide aperture like f/2.8 for a strong contrast between the drops and background. Adjust the camera distance and focal length to get the best drop shape and composition.

Post-processing can enhance your final image with cropping, exposure adjustments, and contrast boosts.

With practice, you’ll become an expert at this creative water photography technique in no time!

creative water photography

Oil and Water

Oil and water photography is a fun way to create abstract images. You’ll need a few simple materials like a camera, macro lens, glass dish, cooking oil, water, and colorful backdrops.

Set up your camera on a tripod pointing down at the dish of water. Use manual settings with a wide aperture around f/3.5 and focus on the water’s surface. Add a few drops of oil to the water and watch the magic happen.

Experiment with different amounts of oil and water to create unique shapes and patterns. You can also mix in some dish soap to make the oil droplets smaller and more vibrant.

Don’t forget to swap out your backdrop for added visual interest. With a little creativity, you can capture stunning abstract photos using oil and water.

Check out this in-depth tutorial if you want to learn more about oil and water photography.

oil and water photography

Paint and Water

Paint in water photography creates stunning liquid photos. Mix acrylic paint with water to form colorful clouds underwater. Use a small fish tank and secure your subject with supports like clamps or glue.

Set up your camera on a tripod and use two speedlights on low power to freeze the motion. Pre-focus manually and use burst mode to capture the paint as it flows through the water.

Pour the paint close to the surface behind your subject. Combine colors for more interesting results. Touch up your best shot in Photoshop by removing bubbles, adjusting colors and contrast, and adding details from other shots.

Paint in water photography is a fun and creative way to capture unique images. With some basic supplies and editing, you can create your own colorful liquid masterpieces.

paint in water