It takes practice to create a picture-worthy cake. Don’t let your cakes get less attention than they deserve! But how can you avoid taking cake pictures that are badly exposed or poorly styled?
Here are eight tips to help you take gorgeous cake photography.
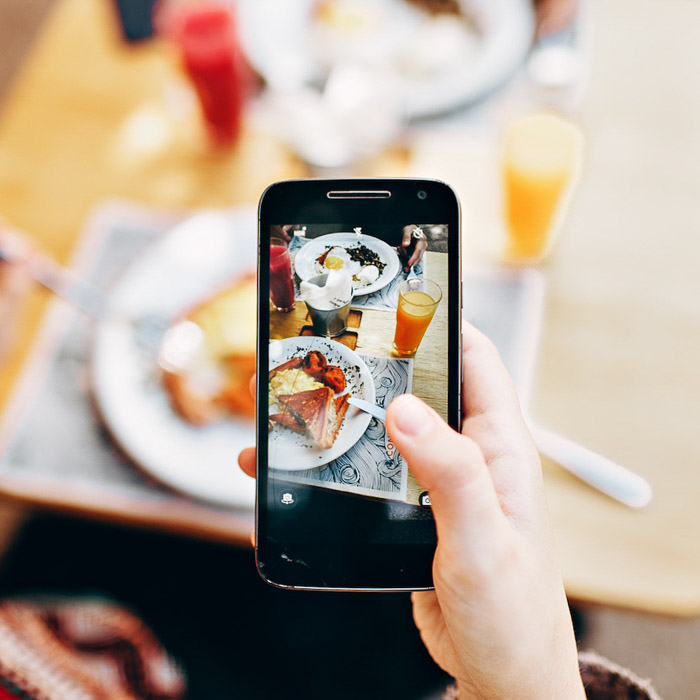
8. Cake Photography: Use Natural Light to Make the Shoot Easier
I always hear people say that natural light is better than artificial light when it comes to shooting food.
Most food photographers actually work with artificial light, but it can be quite complex and requires expensive gear.
Natural light is the best option when you’re new to photographing food. Or if you don’t have a lot of experience with flash. It takes only a few simple tricks to make the natural light work for you when shooting cake photographs.
Make sure you’re working close to a window so you get the most out of the available light.
Use a diffuser or translucent material as a diffuser. A curtain can get you fantastic results. This will soften any harsh light or sunshine coming through the window. You’ll avoid hard shadows on the cake. If it’s a cloudy day, you might not need a diffuser.
7. Choose the Best Light Direction
Having good quality light to work with is not enough. You also need to work with the light in the right direction.
There are three types of lighting direction you can work in food photography: side lighting, backlighting, and side backlighting.
- Side lighting is when the light is coming from one side. If you imagine the face of a clock, it’s at either 9 o’clock or 3 o’clock.
- Backlighting is when the light is coming from directly behind the subject, at 12 o’clock.
- Side backlighting is in between the two, at around 10 o’clock or 11 o’clock.
When you take photos of cakes, you want to avoid frontal light. Sure, it lights your cakes evenly. But it also creates shadows behind your subject. Frontal light can make any food look flat and dull.
It is a great light direction for portraits. But it’s not so great for when you take food photos.
The best food photos are those with contrast and dimension to the light. If you check out stunning food pictures, you see that the light doesn’t look the same through the whole frame. That’s what you should aim for.
The lighting style you choose will depend on the type of cake you’re photographing.
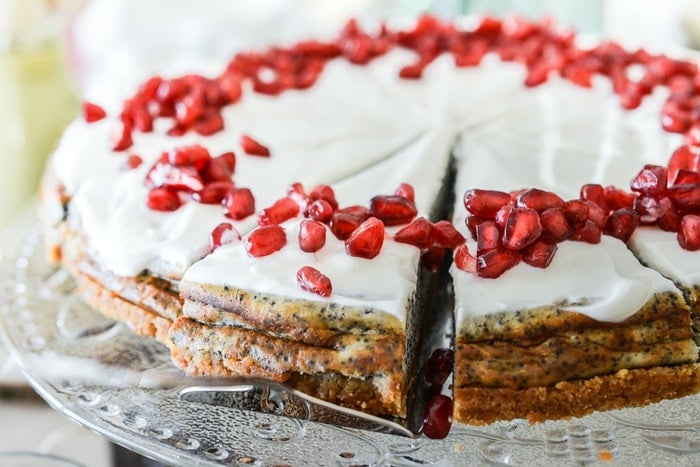
If you have a cake with a shiny glaze, or a lot of texture on the surface, like a coconut cake, you might want to choose backlighting. It enhances texture and brings out the shiny parts.
Side backlighting will give you a similar result. But it will be a bit easier to manage. Backlighting can be tricky, though. Sometimes the back of your image is too bright while the front is too dark.
You’ll have to experiment with the distance of your light to the set. Bounce some of the light back onto the front of the cake.
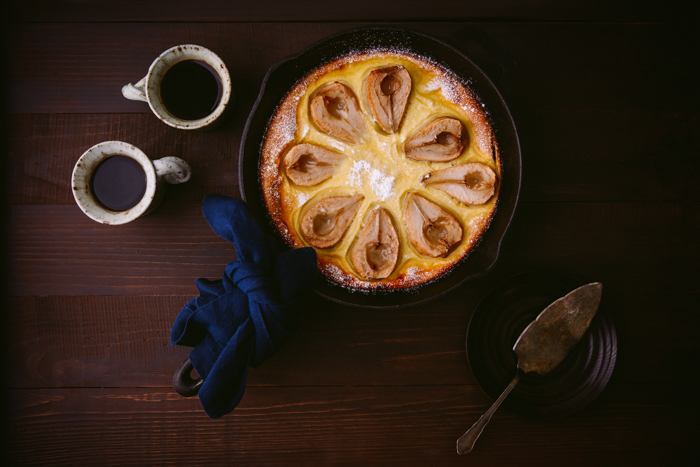
6. Keep It Minimal
When taking pictures of cakes, you want to make sure your beautiful creation is the star.
When you use too many props, they detract from your main subject. Then your cake ends up competing for attention. This is especially true if you are presenting a whole cake.
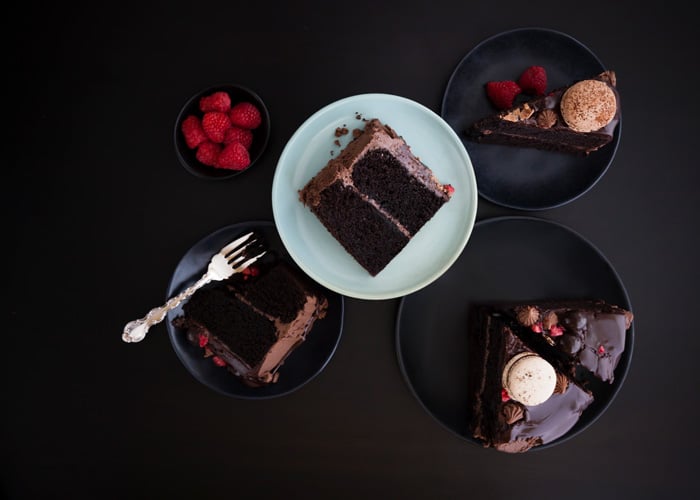
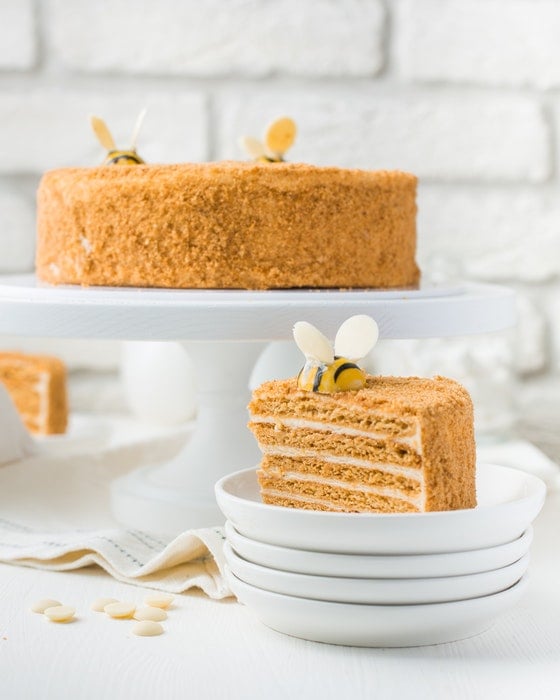
You can also photograph several cake slices on plates, as in the image above. You can use matching plates or a variety of plates. Place them in an asymmetrical pattern, so your picture has some flow.
Don’t use too many utensils, supporting ingredients or linen. You want to keep the focus on the slices of cake.
When composing your slices of cake, remember the rule of odds. Use three or five plates, which is better than an even number like two or four.
Even numbers tend to compete with each other and split the viewer’s attention. If you do have an extra item, have it just poking into the frame. This will add some interest and tension to the photos.
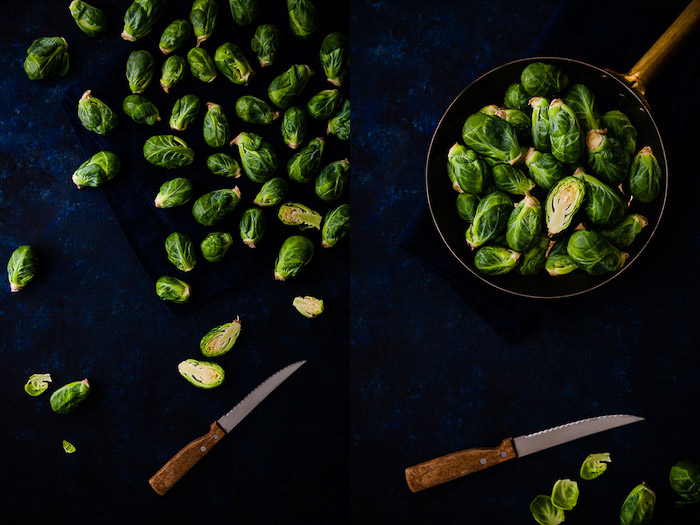
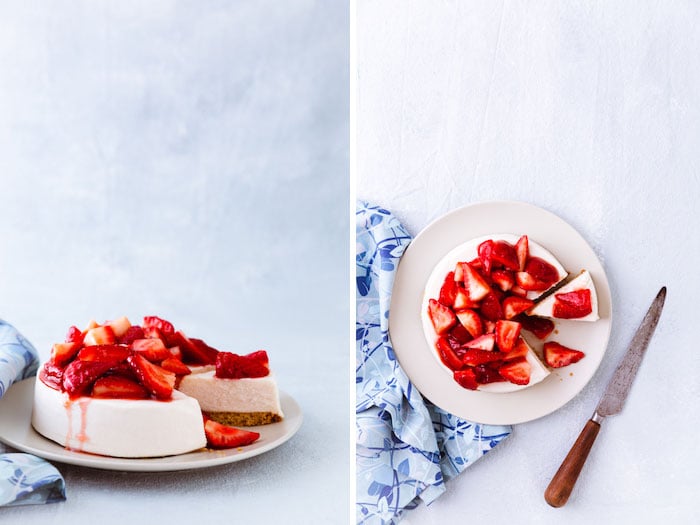
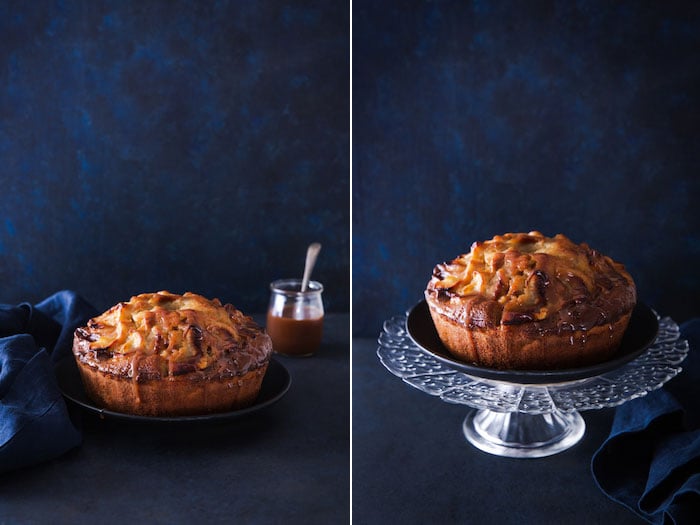
In the photos below, I tucked a piece of linen next to my cake. This gave an anchor in the shot. In the image on the left, I placed a small jar of caramel sauce. It gives the viewer an idea of what was drizzled on the cake.
In the shot on the right, I placed a plate on the cake stand to add an extra layer. This added a bit more interest, as I didn’t use any other prop, like a knife.
Composing minimal shots seems easy. Because there are so few items in the image, they have to be styled and perfectly placed to work.
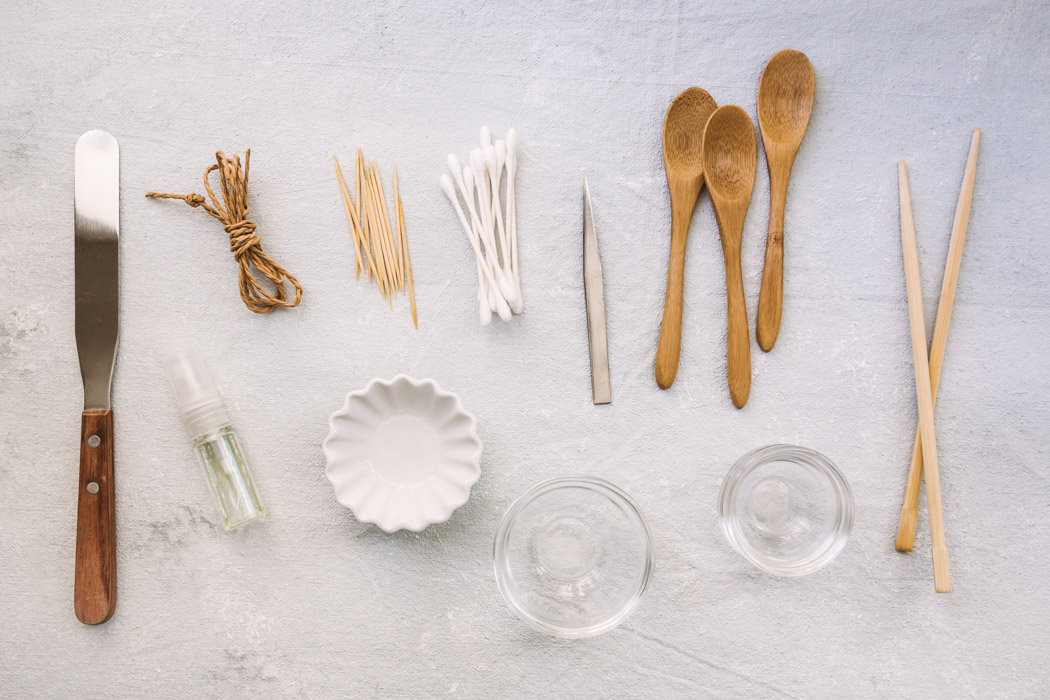
5. Pick Your Props Carefully
When it comes to taking food pictures, your choice of props should never be random.
They should be cohesive with the other elements in the image. And they should make sense in the context of your visual story.
It makes sense to put a knife in your cake story. But if the blade doesn’t look sharp enough to cut through butter, then it’s not the right choice.
Same goes with placing a pair of botanical scissors in your shot. You can see a lot of these kinds of shots on . If you wouldn’t cut anything in your shot with it, then don’t put it in there.
Here are some more guidelines about selecting your props:
- Stay away from very bright colors and bold patterns. They will distract attention from the cakes. Sometimes colorful pieces add a point of interest. They need to work with the overall composition and feel of the photo. Sometimes I will layer a more colorful or patterned plate under a white or black one.
- Use small props. Even regular-sized dinner plates will look huge to the camera and dominate the image. Scale and size is a very important aspect of composition. I usually use salad plates, and smaller cake stands in my cake photography
- Watch for glare. Shiny utensils and dishes will reflect the light in a way that can be very distracting. This is one reason why I love the patina of vintage cutlery.
- Get creative with props by using them differently than their intended use. You can place several cupcakes on a cake stand. Or place your cake on a vintage tray or a stack of plates.

4. Choose the Best Angle to Highlight Your Cake
There is no all-around “best” camera angle for your cake photography. The best angle is always the one that brings out the qualities of your subject.
What might work very well for one image, won’t get you the best results for another.
Before you pick up your camera, consider the cake you’re shooting. Decide which camera angle will bring out its best features and serve the story you want to tell.
In general, frosted cakes with layers look best shot straight. This way, you put emphasis on the layers and height of the cake. If the swirls of icing are the focus, a three-quarters shot might work nicely.
Overhead shots don’t work as well. Unless you want to keep the focus on the top of the cake. Or you want to create a story where you have several other elements in the frame, like plates and utensils and perhaps a beverage. Flat lay cake shots are good for storytelling.
3. Use Food Styling Tricks to Enhance the Subject
If you have to work with a cake that you didn’t bake, you have to rely on lights and angles to get the best shots.
But if you are there during the preparation of the cake, you can apply a few food styling tricks to enhance your subject.
If you photograph a slice of cake, you can add extra layers of cardboard between the layers to make the slice look higher. Cut out the same shape but a bit smaller than the cake slice. Place it between two layers, and cover it with frosting.
Pay attention to get rid of the extra frosting on the sides. The slice has to look natural.
If you photograph a whole cake, you can use the same method but with round-shaped cardboard pieces between the layers. Or, you can also create the cake from styrofoam and cover it with the frosting.
This is the best option if you want to focus on the decoration of the cake. It saves you time and food ingredients.
2. Use Fill and Bounce to Shape the Light
To get the most out of your light, you need to shape it.
A few diffusers and reflectors in different sizes are an important part of your food photography kit. You can buy a professional kit online. Or DIY one with a translucent white curtain and some pieces of black and white foam core.
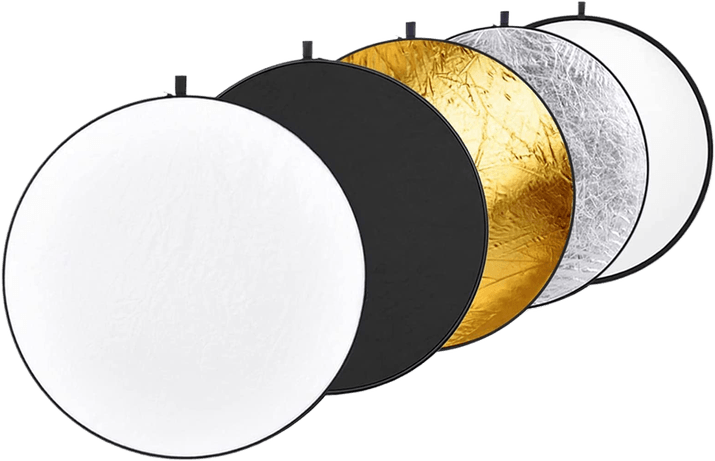
A set of professional reflectors is a good investment. These are foldable discs that come with gold, silver, white, and black material. You can use them interchangeably, depending on your lighting scenario.
You can use the gold reflector to add warmth to your cake photos, while the silver can brighten it.
Diffusion softens the light and affects how much light hits your set-up. When working with strong sunlight, I like to use a very large diffuser. This keeps too much light from spilling onto my scene and creating any hard shadows.
You also need some tools to manage these shadows and direct the light to where you want it.
This is where the sheets of black and white foam core come in handy. Use them to reflect the light or create more shadows and contrast.
Place a reflector or piece of foam core opposite your light source. White will bounce back some of the light onto your scene. Black will fill in some of your shadows for greater contrast.

1. Use a Smaller Aperture to Nail Your Focus
Last but not least, take care of your focus when photographing cakes.
In all likelihood, you are using autofocus when shooting your food photography.
Autofocus is not foolproof and comes with its own set of challenges.
The AF system can end up focusing on the wrong part of a scene. Sometimes it can struggle to lock onto anything, resulting in a blurry image.
The most important factors influencing autofocus are the level of light and contrast.
Your camera can struggle to focus when there’s not enough light. Or when it’s faced with a low-contrast or uniformly-colored scene. The AF system can’t locate a clear edge.
In these situations, the lens will focus back and forth, looking for something to lock onto.
You can have this issue in cake photography. A large part of your frame may be dominated by one color or tone. You may not be able to focus where you want.
If you want, you can also use manual focus. In food photography, we often work with macro lenses and a narrow depth of field.
This means that you need to be very precise with your focusing. Being just a touch off can cause you to completely miss focus.
When shooting cake, try shooting at a smaller aperture, like f/8. More of your subject will be in focus. You should also focus on the front of the cake.
Conclusion
Cake photography can be a lot of fun. It needs a bit of practice to learn to take amazing shots. But with time, you will see improvement.
With the right props and a bit of planning of your composition and lighting, you can take some gorgeous photos of your pretty creations.
And remember, if something is not working after several trials, change it! Try a new angle, light or composition till you get better results!
To create incredible food photos without any fancy equipment, check out our eBook – Edible Images!