As a food blogger, beautiful photos of your recipes are the way to get noticed online.
To get ahead, you need food photography that will get people’s eyes popping and mouths watering. This means developing your food styling skills.
Food photographers always work with a food stylist on professional shoots. Food stylists have specific knowledge of getting the best out of food to make it look great in front of the camera.
Here are some food styling tricks you can borrow to make your creations look extra delicious.
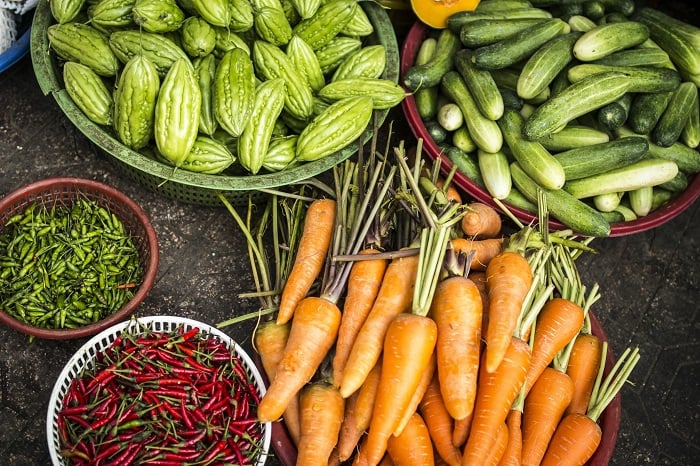
1. Food Styling: Always Have More Than You Need
When shopping for a food photography shoot, be sure to buy more than you think you need. Food dries out, melts, goes brown, or begins to look unappealing faster than you might think.
Having spares of every ingredient means you can style and restyle when you need to. If a cut apple starts to go brown, grab another one. If your salad starts to wilt, replace it with new leaves.
When it comes to styling the plate, you may also need many items to fill the frame. This typically happens when shooting fruits and vegetables. If you’re using garnishes for meat or fish, they can quickly lose their vitality.
Having extra food also allows for mistakes or accidents. If you only have enough ingredients for one shot, you’ll be in trouble if there’s a mishap or error when shooting. More than you need can quickly turn into just enough if things don’t go to plan.
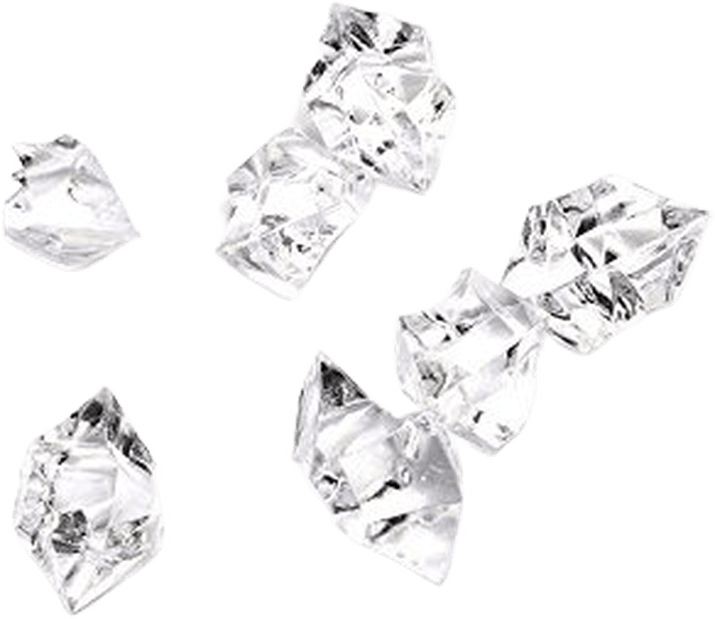
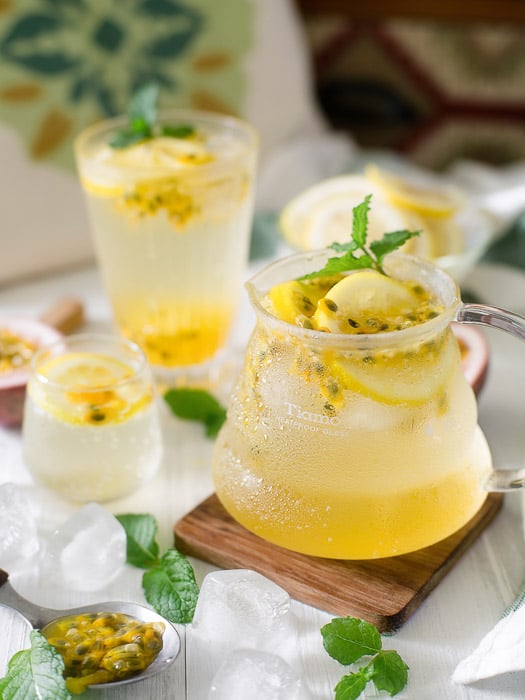
2. Use Fake Ice to Make Life Easier
When shooting for your blog, you can use real ice. But for food styling purposes, fake ice cubes are more convenient.
Real ice looks white instead of clear and shiny. And, of course, it melts very quickly. This can create a hassle for you when you’re shooting.
Beverage photography can take a long time due to the difficulty of managing reflections in the glassware. You may have to use stand-ins. Or switch out your drinks several times to get the lighting right. By the time you’re set up, your ice cubes have turned to water.
Cheap artificial ice looks fake. Investing in some good quality fake ice cubes can make a big difference when photographing beverages. And you can work with these simple tricks of food photography for many years.
If you decide you want to splash out for some excellent fake ice, you can buy them online.
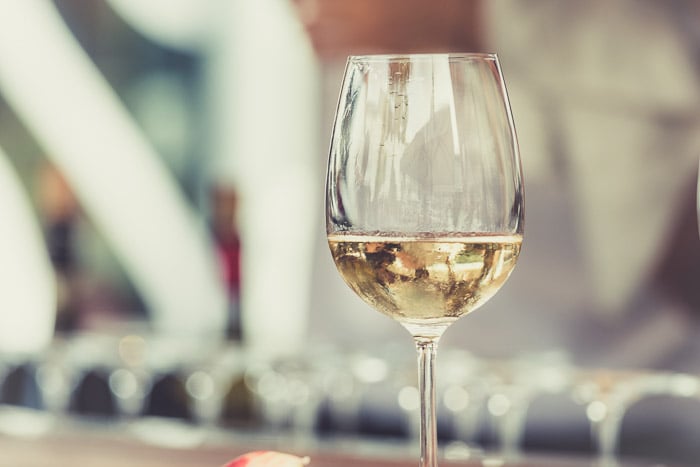
3. Use Fake Drinks to Keep the Budget Low
Chances are high that when you see a glass of white or red wine in a food editorial, it’s not actual wine in there. It’s another food styling trick.
Purchasing real wine adds unnecessary expenses to a food styling budget. And there is an easy and cheap way to fake it.
There are problems with shooting the real thing, too. For example, red wine often shoots too dark. So food stylists often mix a few drops of red food colouring into the water as a substitute.
As for white wine, a few drops of a product called Kitchen Bouquet can make a convincing chardonnay.
Kitchen Bouquet is used for browning and seasoning meat. It is a liquid product composed of caramel color and seasonings. It is an American product, but most countries have an equivalent. Soy sauce also works very well if you can’t find such a product.
Add it to the water drop by drop until you get a realistic shade. A little goes a long way.
When styling coffee or tea, you may want to show steam coming off the top of the beverage. You can do this in Photoshop. But it’s easier to create the look of steam in-camera.
The important thing to know is that you can only create this effect when using backgrounds that are on the darker side. Otherwise, the steam won’t show.
Put a smaller cup or dish behind your subject. You will have to position your camera so it doesn’t show. This means you have to be shooting your scene straight on.
Boil some water in a kettle and when your camera is set up and ready to go, pour the boiling water into the cup behind your coffee or tea and take the picture.
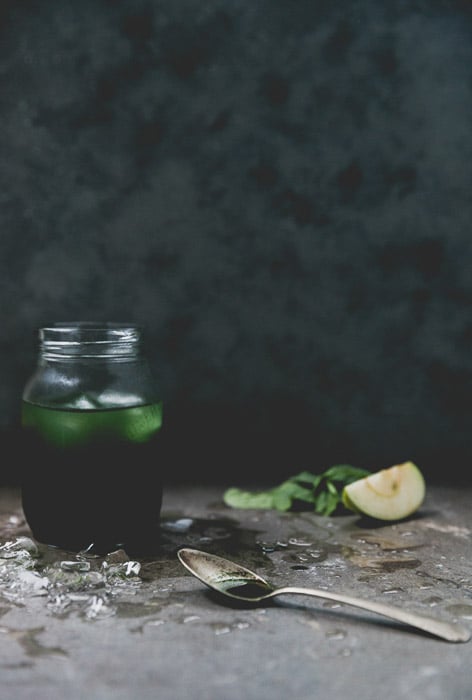
4. Add Condensation on Glassware
Nothing makes a cold beverage look more refreshing than some condensation on the glass. Think of a mug of beer or a frosty cola with water beading on the glass.
You can spray the glass with some water to achieve this effect. But that won’t last too long.
A better approach is to work with a mixture of glycerin and water. Glycerin is a gel-like product that you can find in the beauty section of the drug store. Or you can try using corn syrup instead.
The ratio of glycerin to water will depend on how large you want the droplets. I find 50:50 to be a good start.
Mix the glycerin or corn syrup with water in a small spray bottle and spritz the mixture onto the glass. Use an eyedropper or a chopstick to put bigger droplets strategically. The mixture won't evaporate or move when you're trying to get your shot.
You can also use this trick to create water droplets on fruit that won’t evaporate within seconds as they would do with a spritz of water. The glycerin can be rinsed off with warm water.
5. Bring Your Meat and Fish Back to Life
Foods like steak, chicken breast, and even some vegetables look great with grill marks. It gives the impression that they have just come fresh off the barbecue.
When you see such items in magazine photos and advertisements, chances are they haven’t actually been barbecued. But have been prepared to look so by a food stylist.
There is an inexpensive and easy way to do this at home with a charcoal starter.
To create grill marks on steak or chicken, trim off any part of the meat that looks ragged and uneven. Then brush it with oil and cook it in a non-stick pan over medium heat. Add some oil to keep the meat from sticking and encourage browning.
To get the food looking its best, you will have to undercook it. Once the meat has browned, move it to a baking sheet covered with aluminum foil.
At this point, if you have a kitchen torch, you can brown the edges where they would naturally be darker. Brown the surface of the meat if needed to look even and golden.
Take the charcoal starter and lightly press it into the meat to create the grill marks. Use a slight rocking motion to help you make even marks.
Be sure to space the marks out as evenly as possible to look realistic.
You might have to practice using the charcoal starter before you are satisfied with the results. Don’t press too hard. A light hand is all that you need.
Also, be sure to season the meat after it’s cooked, not before. Seasonings tend to burn when cooked in the pan. Brushing the meat with oil will keep it looking moist and appetising.
The oil will preserve the meat. If you are not using it right away, place it in a dish of oil. Otherwise, it will start to look unappetising very quickly.
This is called “holding”. You can wipe off the oil before you place the meat on set. And touch it up with a brush where needed.
You can also apply this grilling method to seafood and vegetables like zucchini.
But some of these items should be blanched rather than browned in the pan. For shrimp, put them on a wooden skewer and move them into simmering water for a couple of minutes until they turn a nice pink color.
Then dunk them in a bowl of ice water before removing them to a tray. This will stop the cooking process.
You can use the same process for zucchini or other vegetables.
6. Under Cook and Under Dress
A lot of the food you see in photographs is under-cooked. The poultry that looks so delicious in that advertisement would probably poison you if you ate it.
If you cooked it until properly done, the skin would wrinkle a few minutes after taking it out of the oven. Great food styling isn’t the same as great cooking.
When styling for a shoot, fresh vegetables are often blanched and barely cooked at all. They’re then dunked in an ice bath to bring out and preserve their vibrant colors.
Once you add a dressing to a salad, it will start to wilt immediately due to the acidity. For this reason, it’s best to add it at the last minute. And only add enough to make it glisten. You might even want to strategically brush it onto some of the leaves instead.
Similarly, sauces will also dry out or coagulate and quickly start to look unappetising. Add them only when you are ready to shoot and have decided on the placement of your composition. Make sure they’re not still too hot, though, or that will affect your main ingredient.
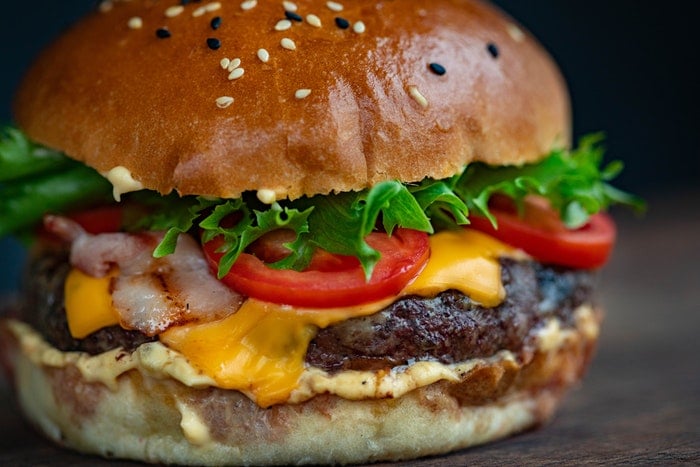
7. Build Your Burgers to Build Appeal
Burgers are among the most difficult items to style. They can look sloppy if you don’t take the time to “build” them properly or if you’re unsure what food styling tricks to apply.
Start by laying out all your ingredients and tools beforehand. Ensure your knife is very sharp and have a small pair of scissors on hand. Cook whatever meat or veggie patty you will be using in your burger beforehand.
The top and bottom buns should look as perfect as possible, without any dents. You don’t have to photograph the top and bottom of the same bun if you have bought a bag with several buns. Always choose the best looking items.
Trim any raggedy bits from the edge of the bun, if necessary.
Preserve your lettuce in a bath of ice water. This stops it from wilting before you can put it on your burger. When it’s ready to use, wipe off the excess water by putting it on a paper towel.
If you are using tomato and onion, cut pieces from the middle to get the cleanest and biggest cuts. If your knife is not sharp, you won’t get clean cuts. The liquid and seeds from the tomato will seep out, making a mess.
Tomatoes have a lot of liquid. So when you put your slices on the burger, be sure to not have them touching the bun. Otherwise, the bread will become wet and soggy very quickly.
Food stylists found the perfect way to prevent the tomato from ruining the burger. They tuck a small piece of cardboard or paper towel between the tomato and other burger elements.
For the cheese, squares of processed or ‘American’ cheese work best, as they melt very well. A bit of steam from a boiling kettle can encourage a bit of melting before you put it on your patty.
Finally, using an elevated surface like a cake stand will make building your burger easier. It allows you to see how the burger will look to the camera.
Not sure how to make your burger appear taller in your photos? Here is another food styling trick for you. Work with toothpicks to keep the layers stable. Put a few extra hidden layers of ingredients or cardboard pieces between the layers.
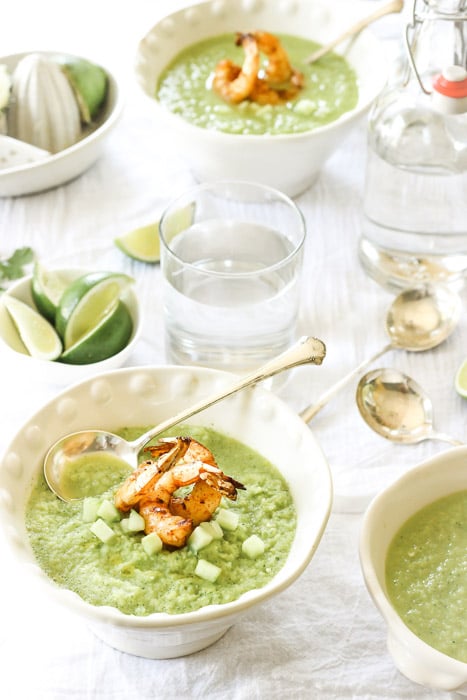
8. Style Your Soups
One problem with photographing soup is that it can look quite bland in the photos.
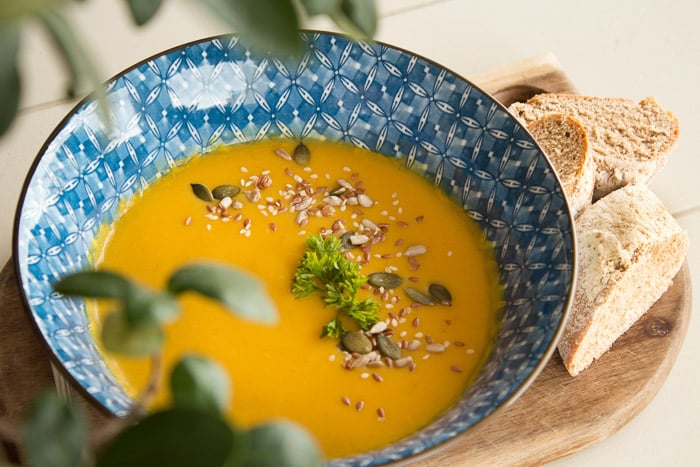
Food stylists found ways to make them prettier. For example, items like bread, croutons, or garnishes can enhance soups.
Chunks of fresh sourdough, slices of a French baguette, dinner rolls, and even the crumbs can really bring a food photo to life. It gives the viewer the sense that there is a wider story going on than what appears in the frame.
Bread in your soup will add texture and also create context by suggesting that it will be used to dip in the soup.
Place the bread where it won’t overpower your main subject, and don’t add pieces that are too big.
You can elevate a plain bowl of soup with a drizzle of cream and a sprinkling of chopped herbs or seasoning like black pepper.
You can sprinkle colorful peppercorns on the surface, along with a smattering of coarse salt to add texture and interest. A little goes a long way, and too much can look messy.
When using herbs to garnish your soups, choose the freshest possible and replace them as you shoot. They wilt or oxidise quickly.
While you’re shooting, you can keep your chosen sprigs of herbs in a bowl of ice water. When they are ready to use, pat them dry and place them onto your scene. You may have to change them out a few times as you go along.
To store, place cut herbs in a mason jar filled with cold water and cover them with a plastic bag. If you change the water every day, your herbs will last up to a week in the fridge.
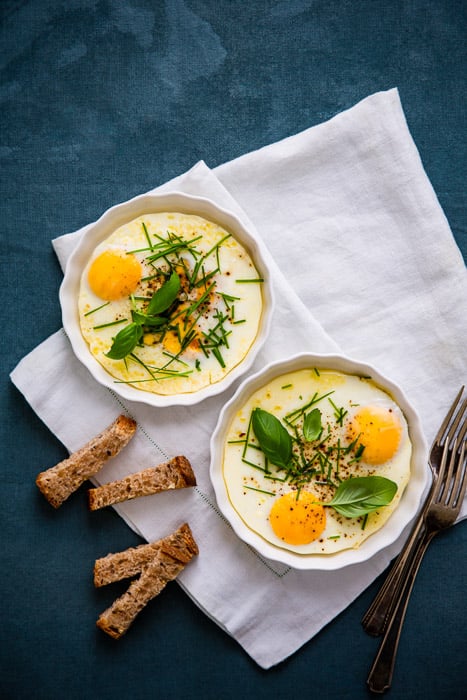
9. Enhance Your Eggs
Styling eggs in the perfect way is tricky.
Use a preheated, dry, non-stick pan when frying eggs for your shoots. Don’t use oil to make sure you’ll get nice edges and bright yolks. Crack each egg individually into a fine-mesh sieve over a small bowl to drain, then gently transfer it into the pan. This will get rid of any water that can cause uneven edges.
Cook the egg slowly, over medium-low heat. Once the white is completely set, spray a spatula with a bit of cooking spray and transfer the egg carefully onto your plate.
To cook soft-boiled eggs, undercook them by a minute and then place them directly into a bowl of ice water.
When cooking soft-boiled eggs, you definitely want to cook more than you think you need. Once you’ve set up the shot, spoon some of the runny yolks from an extra egg onto the ‘hero’ egg. This is a great way to capture that runny yolk drip you see in soft boiled egg photos.
Sometimes an egg will sit too low in an egg cup. In that case, place a bit of tissue or paper towel in the bottom of the cup to prop up the egg and ensure that more of it is visible.
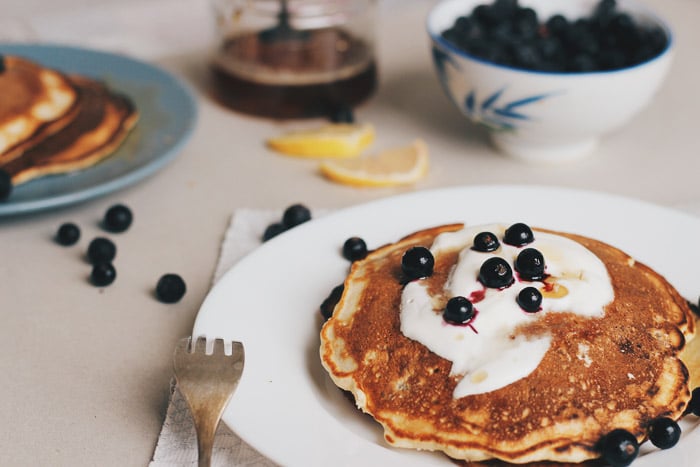
10. Style Breakfast Items and Baked Goods
Breakfast items come with their own set of challenges in food styling. Many of them are on the brown side and a bit dull-looking on their own. You can overcome this with supporting ingredients, garnishes, and the right composition.
When styling baked items like pancakes, waffles, and muffins, be sure to make ones that are a nice golden brown and are uniform in size. Use the elements that would accompany the food you are shooting—butter and maple syrup with pancakes, or milk with granola.
If possible, add some extra color and texture with some berries or other fruit. The more textures you have, the better. Sprinkling some cocoa nibs or hazelnuts on top is a great way to add texture.
One problem with using syrup in food styling is that it seeps into the food, making it soggy. When working with waffles and pancakes, you can prevent this problem by spraying them with Scotch Guard, a fabric and upholstery protector.
Of course, the food will not be edible if you use it.
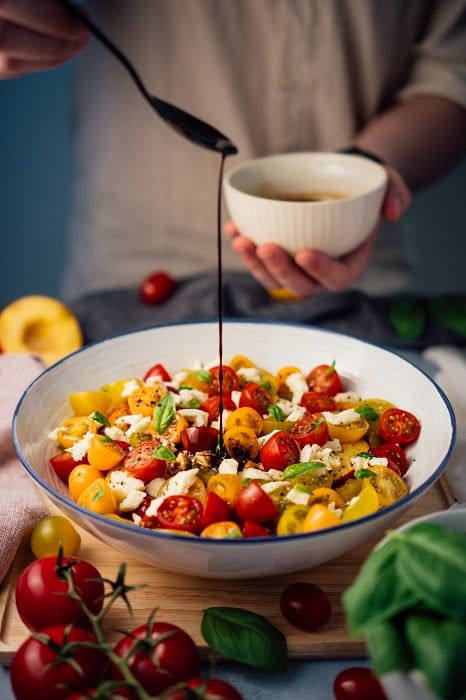
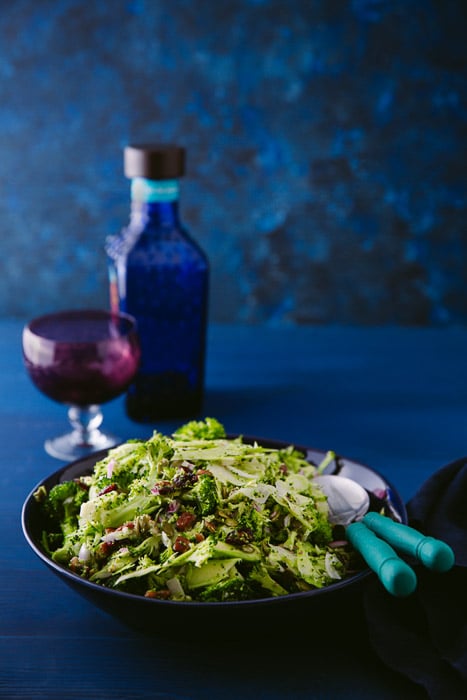
11. Work With Dressings and Sauces
Once the dressing is added to a salad, the greens will begin to wilt due to the acidity. For this reason, you want to have your lighting and camera set up and ready to go first. Add the salad dressing at the very last moment.
Apply the dressing by drizzling it on with a small spoon or a squeeze bottle. There is no need to dress every leaf or component of the salad. You can also use a brush to add dabs of dressing or oil to emphasise the highlights.
Too much dressing on a salad can weigh it down.
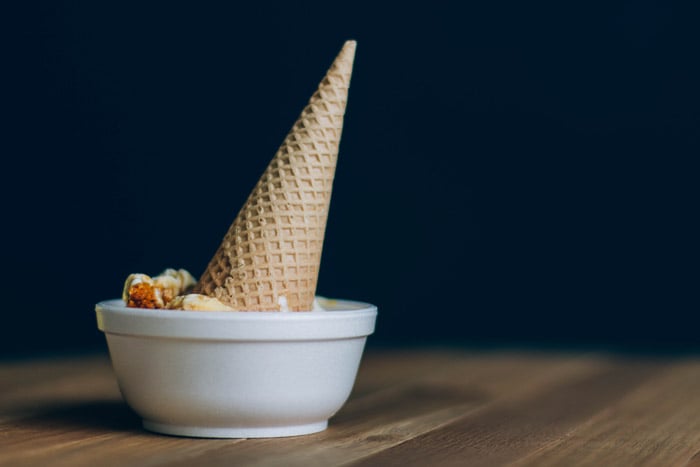
12. Simple Tricks to Improve Ice Cream
Out of all the foods to shoot, ice cream can be the most difficult. In fact, there are food stylists who refuse to work with this cold dessert.
For some professional shoots, ice cream is replaced by mashed potatoes or icing sugar mixed with conditioner and food colouring. These won’t melt but will seem like real gelato in the images.
But you might not have the desire to use these techniques. So let’s look at how to make your ice cream last longer on set.
When working with scoops of ice cream, place several scoops individually on a cookie sheet lined with parchment paper. Put the cookie sheet back into the freezer for about twenty minutes.
You can also freeze the bowls or cups you’ll use to plate the ice cream. This will give them a frosted or dewy look once you have them on set and they start to come to room temperature. If you don’t like how it looks, just wipe them down.
Always make sure that your set is ready before placing your ice cream. It won’t wait while you are tinkering with your props. However, sometimes melted ice cream can actually look appealing, depending on the shot.
If you’re shooting ice cream in a cone, place a piece of crumpled paper towel inside the cone to keep it from becoming soggy. Fill the cone evenly with ice cream, then place your nicest scoop on top.
Conclusion: Food Styling
As a food blogger, you have to do it all. You’re the photographer, the food stylist, and the prop stylist, not to mention the recipe developer. It can be a lot to juggle, and it takes time.
Being as prepared as possible, with everything laid out and organised will reduce stress and help you have a smooth workflow.
As you can see from these food styling tips and tricks, sometimes the dishes won’t be edible after the shoot. These days, the goal is to be as natural with food styling as possible. But getting the food to look its best often means using methods that leave the food inedible!
Check out our Edible Images ebook to create beautiful food photography that would make any mouth water!