Burger photography can be tough to pull off. But when you do, the results are stunning. It’s among the most popular niches in food photography.
Getting a great burger shot is fifty per cent styling, fifty per cent photography.

Here are 10 tips to help you build a better burger and shoot it like a pro.
10. Burger Photography: 10 Tips For Utilizing Creative Freedom In Editorial Shots
The first thing you must know is if you’re shooting a burger for advertising or editorial purposes.
Editorial photography is the kind of photography that appears in magazines and cookbooks.
In editorial photography, you have more creative freedom. The food looks more natural. There are organic styling and elements like crumbs and drips that give an honest and candid feel to the burgers.
When shooting burgers for editorial, you can usually choose the kind of bun and meat you want. You can construct it in the way you think will look best to support the messaging of that assignment.
In comparison, advertising photographs are expected to look perfect. Every element of the burger needs to be prepared to exact specifications. This is how fast-food chains want their pictures of burgers to be taken.
You must use the client’s ingredients. And you must build the burger in the exact order as they do when making burgers for the public.
9. Choose The Right Buns for Delicious Burger Photos
Finding a good hamburger bun can be a lot of work. But is wort the search because the bun can make a huge impact on your burger photography.
In general, good stylists on fast-food burger shoots go through 200 hamburger buns to find the right top and bottom. And then they’ll glue sesame seeds on them individually with tweezers!
If you’re doing an editorial assignment, you can use a kaiser bun or another type of bread roll. The bread doesn’t have to look perfect. But it should look as attractive as possible to be appetising.
It’s best if the buns have not been pre-sliced so you can cut them into the thickness you prefer. Make sure that you have several buns to work with.
You can slice them to your specifications. For example, a thick top from one bun and a thick bottom from another.
You should also have replacements on hand if the ketchup or other sauces begin seeping into the bun.
8. Choose Fattier Meat for a Juicier Look
For editorial assignments or photos for your food photography portfolio, buy meat that is not extra lean. The extra fat will make the burger appear nice and juicy.
The patty should be wider than the bun and thinner than you want in the end result because it will shrink and thicken.
Cook the meat with oil in a non-stick pan until it’s a little lighter than you desire for your photos. The meat will darken as it cools.
You can always selectively certain brown areas like the edges with a pastry torch.
To keep the meat patties ready for their moment in front of the camera, professional food stylists place them in a baking tray and cover them with cooking oil.
Or they cover the patties individually with plastic wrap. This way, any exposure to air won’t darken them further or dry them out.
When you’re ready to shoot your burger, be sure to brush it with some extra oil to keep it juicy looking. Your aim is to make the viewer want to eat your burgers when looking at the photos.
7. Add Some Grill Marks for an Authentic Look
Grill marks are a fantastic way to add something special to your burger patty. The marks will make your burgers appear more realistic.
If you shoot the burger at eye level, you’ll need to exaggerate the grill marks a bit over the edge of the patty. Otherwise, they will not be visible.
Pro food stylists use an electric charcoal starter to carefully press grill marks on the patty.
Another trick is to use a pastry torch to heat a metal kebab skewer and then press it immediately into the patty. The skewers have to be very hot.
You can also use the flame of a gas stove to heat your skewer. An electric range will not provide a very high temperature that is required.
When you make grill marks on your burger patty, be careful to place them an even distance away from each other. Try to make them as even as possible in terms of thickness.
6. Melt the Cheese for an Awesome Gooey Look
When you buy burgers from your favourite burger joint, the cheese is placed on top of a hot hamburger patty so that it melts.
But when you’re shooting burger photography, you’ll be working with meat at room temperature. You need extra help to make the cheese melted and gooey.
If you’re shooting commercially for a fast-food chain, you will get the cheese that they use on their own burgers.
For other commissions, you might choose processed cheese or natural cheese. Each type of cheese responds to heat in a different way.
Natural cheese doesn’t melt as quickly as processed cheese.
You can dip the corner of processed cheese in boiling water. Or hold it over the steam of a kettle for a moment. These techniques help you make it appear melted.
For natural cheese, you’ll need that trusty pastry torch. This is a staple in everyone’s food photography kit.
When you’re styling the cheese for your burger, compare the size of your cheese slice to your cooked burger patty.
If it’s too big, you may want to trim it a bit. So it doesn’t end up engulfing the burger once it melts.
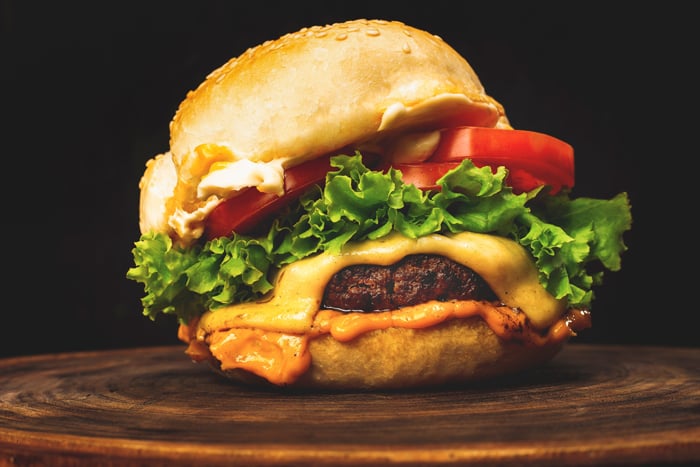
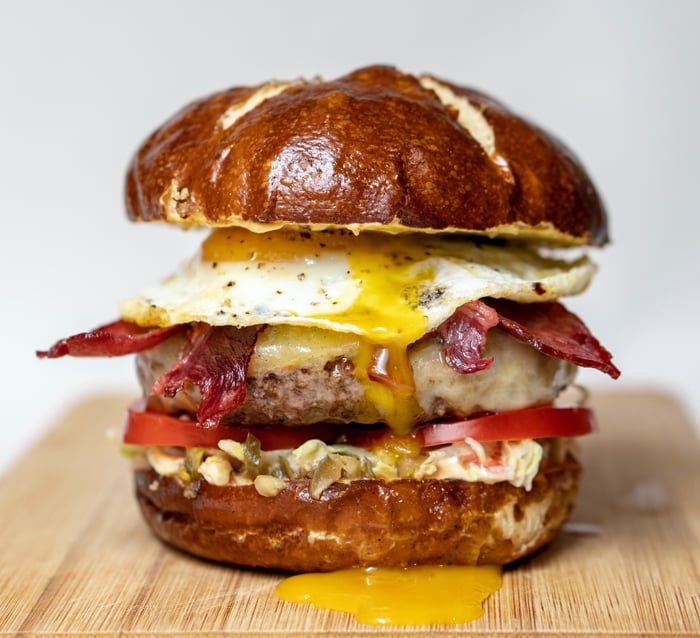
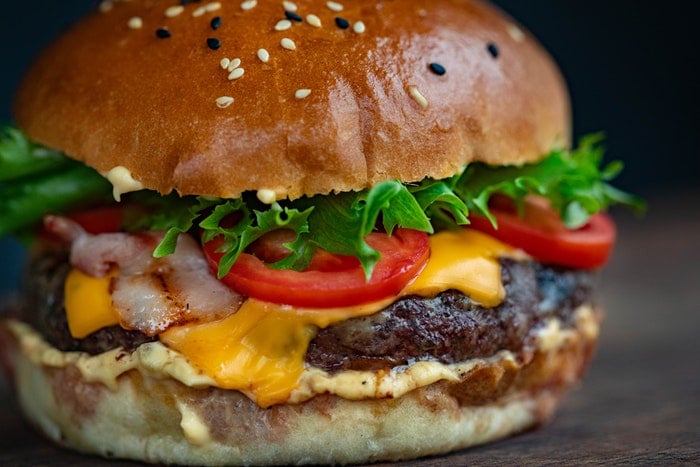
5. Add Veggies for a Bit of Contrast
The fun part of a burger shoot is deciding what to put on your burger. Burger pictures are mouthwatering when they have lots of different ingredients.
Depending on the assignment, you might use pickles, tomatoes, or lettuce on your burger.
Or you might really doctor it up with a variety of ingredients. These can range from onion rings to crumbled blue cheese. A great thing about food photography is that you can often style your subject as you like it.
Cut or prepare the items you would like to include. Lay them out on a baking tray to have on hand when you’re ready to place them on your burger.
When slicing tomatoes, use the thickness required and only use the slices from the middle for straight up and down edges. If you’re using two slices, cut one slightly on an angle. Place the two thinner edges on top of one another to create a flatter surface.
Burgers are usually shot at eye level. You don’t want to see any empty spaces between the layers of toppings.
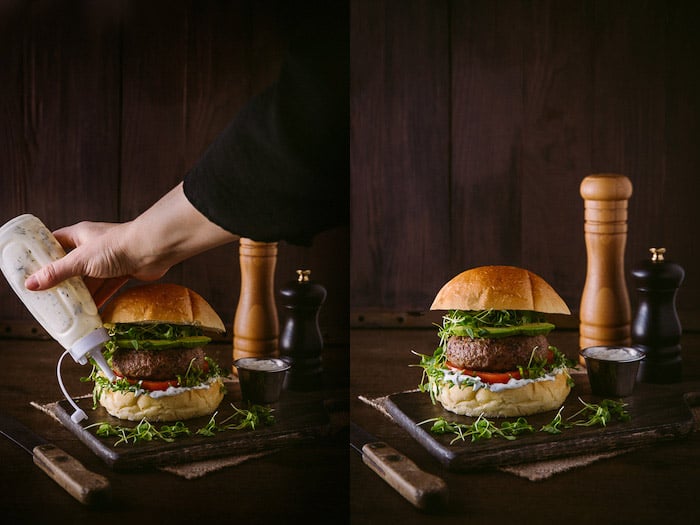
Then wait until just before you shoot to add the sauces onto the edge of the bun. Otherwise, the sauces will make your burgers soggy.
Use an eyedropper or squeeze bottle with a narrow tip. This will allow the viewer to see what sauces are in the burger.
4. Choose The Right Props for Great Balance
When you choose backdrops and props for food photography, you should always pick the best items to go with your food story.
Your props and backdrops should look cohesive and make sense within the context of the photo.
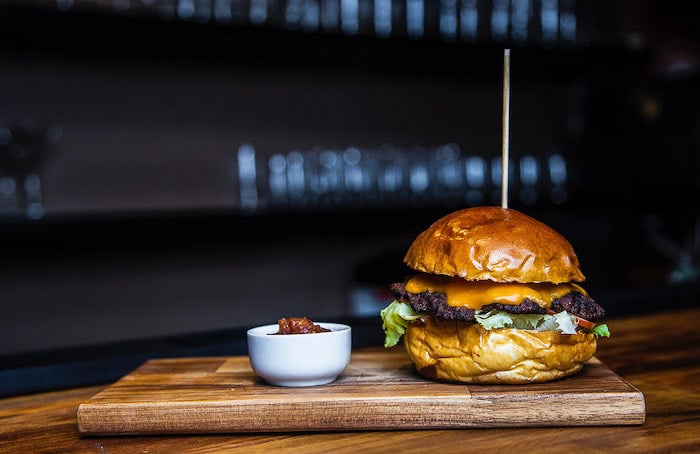
If you want your photo to give the idea of a burger served in a pub, choose props that are more on the rustic side. Shoot your burgers against a darker backdrop and surface.
Wooden cutting boards, vintage utensils with a patina and darker, natural linens support such a narrative.
The way you place your props also carries a lot of visual weight.
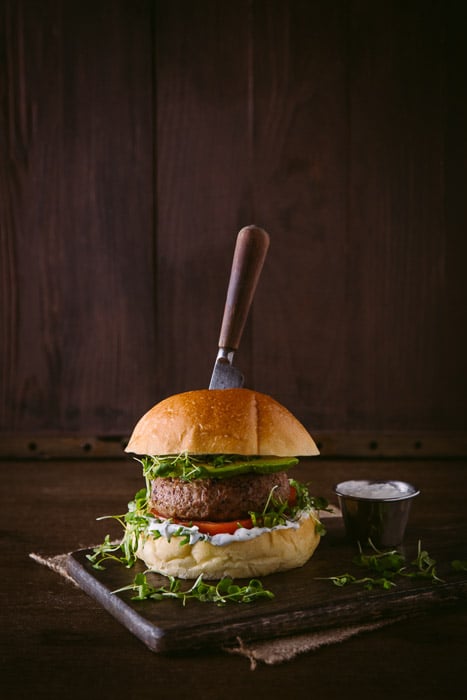
In the below, I speared the knife through the burger to give my photo a steakhouse vibe. I chose a wooden backdrop and surface for a rustic feel and monochromatic look.
I also placed a piece of burlap under my cutting board to add an extra layer of interest and complement my rustic theme.
3. Try Different Perspectives to Entice the Viewer
Burgers are usually shot at eye level, especially in advertising photography.
In editorial photography, you’ll sometimes see them photographer from a 45-degree angle. The top is partially moved away so we can see the toppings.
Very seldom will you see a burger shot from above because this way all you’ll see is the bun.
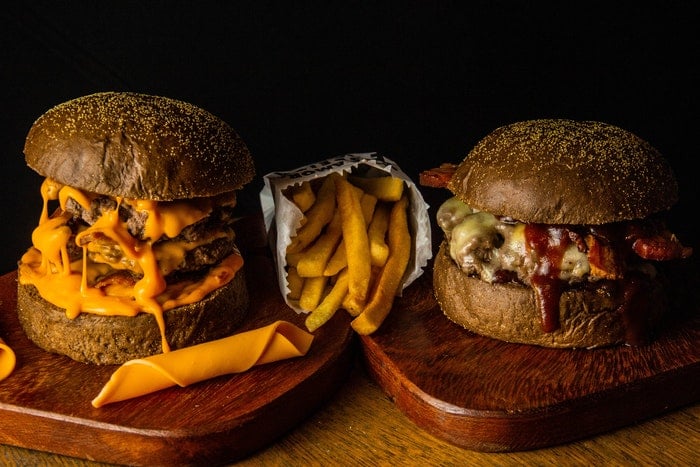
In these kinds of shots, there will be a lot of other elements in the frame. You can include toppings, fries and beverages. The focus is more on a narrative of building or serving a burger than the burger itself.
In food photography, you want to choose the angle that will “sell” the food and highlight its best features. In the case of a burger, that is the height and layers.
This means shooting the burger straight-on or slightly below or above eye level.
In general, you would never shoot a food subject from below. In burger photography, having your camera slightly tilted up at your subject will make the burger look extra tall and imposing.
You can also add some extra hidden layers to make the burgers appear taller.
2. Zoom In to Highlight All the Layers
Burgers look best when they are shot close up.
How close you get will depend on your food story.
You may want to include some fries and a glass of beer or cola in your shot. This will require you to pull back a bit to give a sense of atmosphere.
If you’re just shooting the burger, getting closer will make it look larger-than-life and ready to eat.
Just be sure that you don’t get so close that the viewer doesn’t know exactly what they’re looking at.
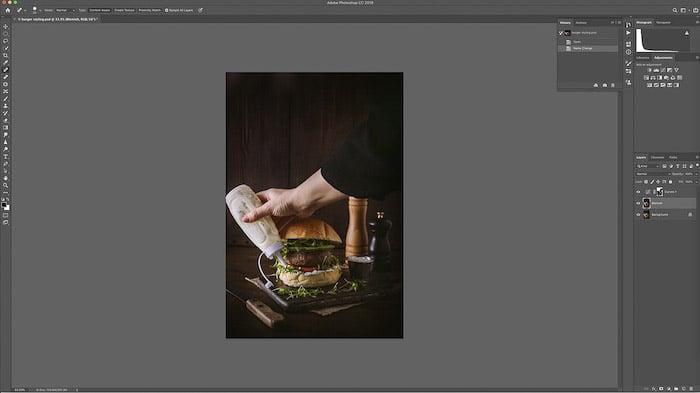
1. Post-Edit Your Photos for Perfect Results
Food photographers tend to do most of their editing in Lightroom and then move into Photoshop to finesse their images.
The perfect burger picture needs more post-production than other types of food photography. This requires some of the tools Photoshop offers. And the ability to work with individual pixels.
Lightroom is a fantastic global editor. But there are certain types of edits it cannot do, like compositing and working in layers.
If you’re not an expert in Photoshop, that’s also fine. You can get a lot of mileage out of the spot removal tool and the clone stamp. Use them to clean up any imperfections in your photo.
If you’re an advanced user, you can hone in on various parts of your photo. Work on the colourization, and dodge and burn to balance out the shadows and highlights.
Because a burger is a layered product, the various toppings can create shadows on one another. You need to deal with these in the editing process.
Conclusion
Burger photography can seem intimidating, but it’s a lot of fun.
The proper styling techniques will make a big difference in your final photo. So will choosing the right camera angle and perfecting the photo in Photoshop.
We hope that these tips will give you the inspiration to create your own mouth-watering burger photo.
Eager to learn more awesome food photography tips? Why not check out our course Edible Images next!