Exposure value (EV) in photography is a number that combines aperture and shutter speed. It represents how much light is in the scene and tells you what settings will give you the right exposure.
Some aspects of EV are obsolete in today’s world of digital cameras. But the idea behind it is the key to understanding the exposure triangle. Let’s look at how exposure value relates to aperture, shutter speed, and ISO settings.
Exposure value has its roots in film photography. Photographers used a light meter or their personal experience to judge how much light was in the scene. EV is the number that represents the light in front of your camera.
Digital cameras have taken over light metering and let you shoot in semi-automatic modes like Aperture Priority. EV is still the foundation behind these modes but is largely hidden in the background.
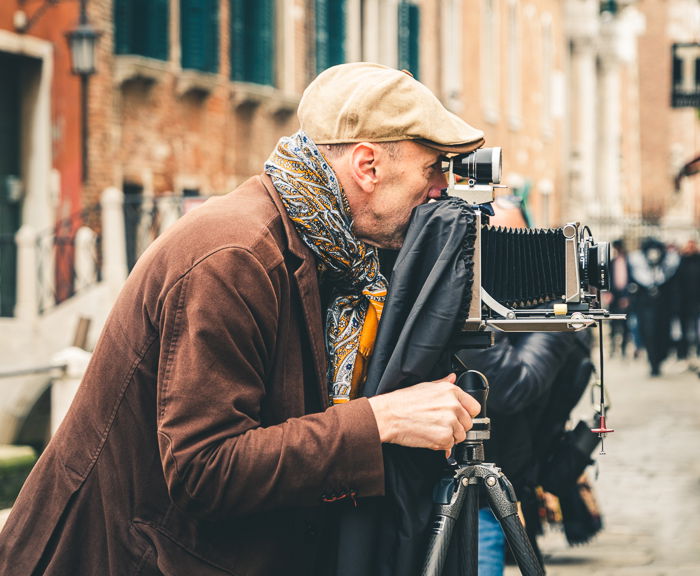
The concept of exposure value was originally developed for film photography.
Exposure values are determined mathematically. A formula calculates which f-stop and shutter speed combinations would properly expose the light in the scene. For practical purposes, the mathematical formula does not really matter. But this is the formula if you are interested in how EV is calculated.

Exposure value formula. N represents f-stop, and t represents time.
Notice that the formula does not include ISO. The formula assumes ISO is 100. These values were computed when ISO was less flexible than it is on today’s digital cameras. Film photographers would physically have to change the film roll to change the ISO. Later in the article, we will expand the idea of EV to include ISO.
This equation is a little daunting and will likely challenge the mental arithmetic of most photographers! But thankfully, photographers of the past did the math for us and came up with charts we can now use.
Before the concept of exposure value, film photographers had to rely on their eyes and trial and error to figure out the correct camera settings. EV charts helped them quickly set their camera settings based on the light in the scene.
In theory, EV extends to infinity. But the EV scale on most charts includes the usable range for photography, from about -6 to +17.
This chart shows the aperture at the top, and the shutter speed is in the left column. The combination of these settings results in an EV. These represent how much light is in the scene. F-stops and shutter speeds interact to expose the photo.
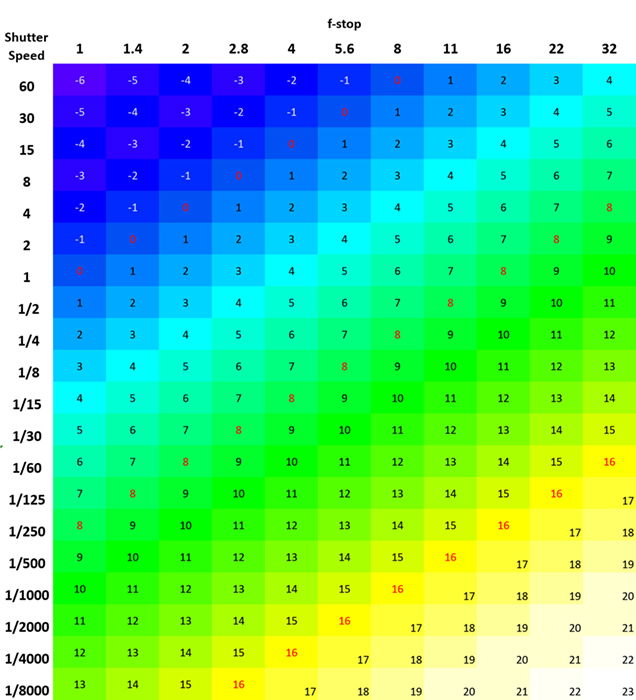
Exposure value chart showing combinations of f-stops (across the top) and shutter speed (left column) at ISO 100.
The higher numbers tell you there is more light in the scene. The negative numbers indicate scenes with less light. Notice that as the EV goes down, indicating a darker scene, the camera settings are tweaked to let more light into the camera.
For instance, at EV -6, we would use a wide-open aperture of f/1.0 for 60 seconds. When more light is in the scene, the settings restrict the light hitting the sensor.
The EV number by itself doesn’t really tell us much. Photographers in the past learned to look at a scene and estimate the EV. Let’s look at some examples of EV in real-world situations.
EV 16: A bright sunny day on a beach or in the snow
EV 12: Overcast day or open shade
EV 10: Just before sunrise or after sunset
EV 8: Bright street scene at night
EV 6: Home interior
EV 4: Floodlit building
EV 1: Blue hour
EV -3: Scene lit by a full moon
EV -6: Night scene with little moonlight
We can use light meters to measure the exposure value of images. These meters use the EV to work out the camera settings that properly expose the scene.
Here are two screenshots of the Lightmeter app by Lumu. On the left, the +7.8 EV meters the light on flowers in the shade. The +14.8 on the right is the measurement for a sunny sky. You can change the f-stop, shutter, and ISO to balance the exposure.
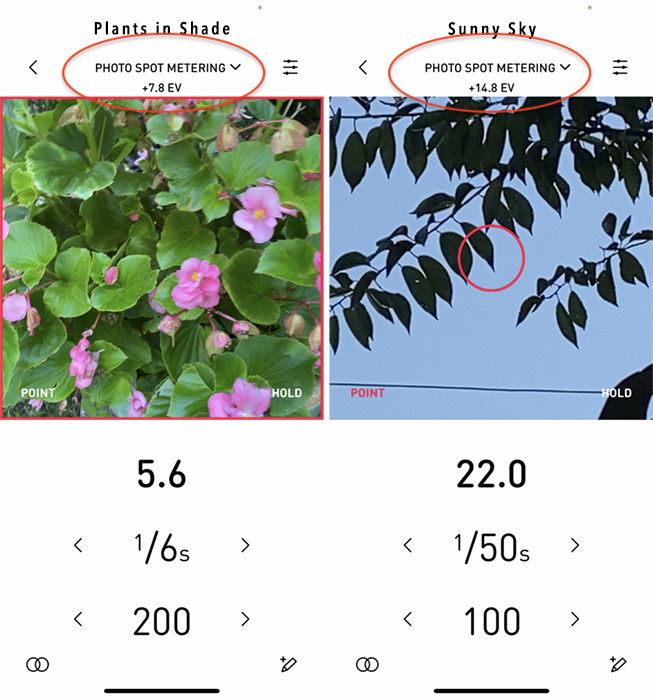
The Lightmeter app shows the exposure value of two different images.
Look at the EV chart again. Notice how different combinations of aperture and shutter can result in the same EV. There are often many ways to expose a scene properly. If you are trying to wrap your head around the exposure triangle, understanding EV may be just how to unlock the door.
EV 16, which is a bright sunny day, can be properly exposed with the following aperture and shutter speed:
EV 8, which is roughly the amount of light you get at sporting events or an artificially lit street at night, can be properly exposed with these camera settings:
The settings for the image below were f/16 at 1/100 s, ISO 400. This exposure would be the same if the aperture were widened to f/11 with a shutter speed of 1/200 s. Or, by reducing the ISO by two stops to ISO 100, the shutter speed would need to be slowed to 1/25 s.
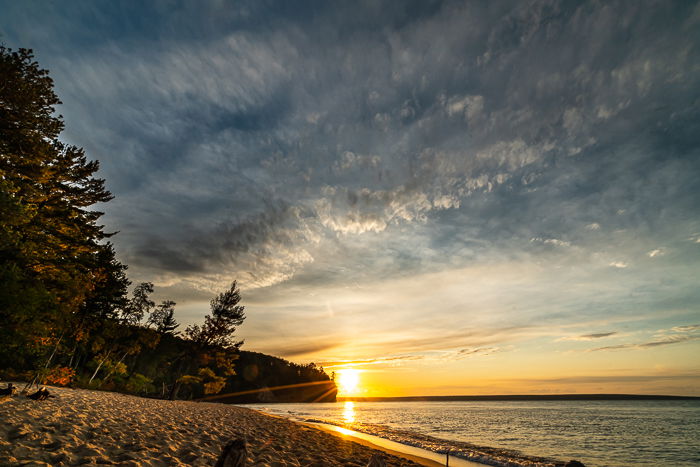
© Jenn Mishra
The original computation of EV holds ISO at a constant of 100. But we can expand the idea to make ISO a full partner in our exposure decisions. Doubling your ISO adds a stop of light. For each stop of light, the ISO adds, you can take away a stop of light with either aperture or shutter speed.
EV 16 can be properly exposed at these settings:
EV 8 can be properly exposed at these settings:
If you add a stop of light, like changing your ISO from 100 to 200, the settings shift to balance the increased brightness. Here is an updated EV chart to help you visualize the changes.
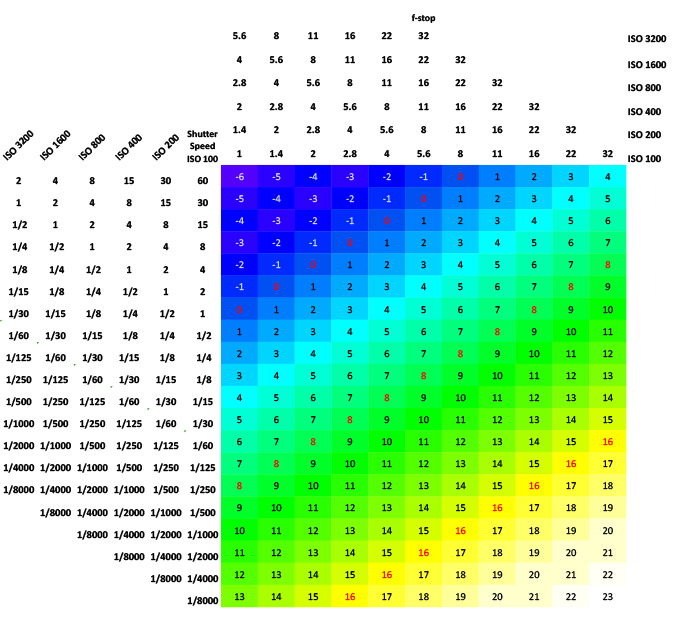
Exposure value chart showing combinations of f-stops (across the top) and shutter speed (left column) at different ISOs.
Exposure value is a handy way to give a simple number for the exposure of an image. It’s much simpler than understanding the exposure triangle, which consists of aperture, shutter speed, and ISO.
So why don’t camera companies put an EV setting on our cameras? Wouldn’t it let us dial in the light we see and get the right exposure? For example, we could dial in EV 15 on a sunny day. The camera would then automatically figure out the right aperture, shutter speed, and ISO.
This would be simpler, but it would limit your photographic options and your creativity.
At EV 12 (shady), f/11 at 1/30 s with an ISO of 100 and f/2.8 at 1/250 s at ISO 100 will expose the scene properly. But the look of your image would be very different. You would have a shallower depth of field at f/2.8, and the background would blur.
You can also properly expose a night scene of EV 8 at f/1.4 at 1/250 s with ISO 200 or f/16 at 1 second with ISO 100. But you are much more likely to capture motion blur at 1 second than at 1/250 s.
Capturing an image is about more than just the exposure. The camera settings you choose will affect how your image looks. Mastering camera settings is crucial to capture the style you want.
These images of the same scene below were both shot at f/14. The image on the left was shot at ISO 3200 with a shutter speed of 1/13 s. The image on the right was shot at ISO 100, reducing the shutter speed to 3.2 seconds. The slower shutter blurs the water.
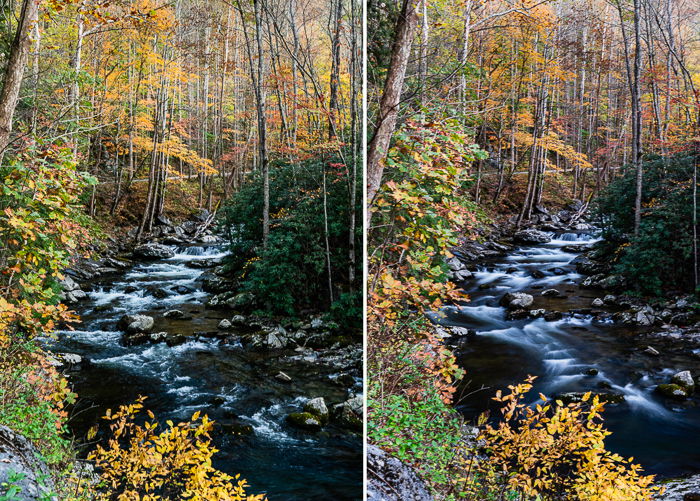
© Jenn Mishra
Today’s digital cameras use a built-in light meter to measure the EV in the scene. You can find a light value in the EXIF data for your image. The brightness value is similar to, but not the same as, the exposure value.
If you are in Aperture Priority or Shutter Priority mode, your camera adjusts the other settings to keep the EV constant. This sometimes confuses photographers who expect their images to get lighter or darker if they change a setting.
In Aperture Priority mode (A or Av setting), changing to a wider aperture will not make your image brighter. The wider aperture lets in more light, but your camera compensates using a shorter shutter speed. The EV remains constant.
It’s similar if you are in Shutter Priority mode (S or Tv setting). Opening your shutter for a longer amount of time will not brighten your image. You will let in more light, but using a smaller aperture, your camera compensates. As a result, you will get the same exposure.
Move to Manual mode if you want your image to be lighter or darker. This mode lets you control both the aperture and shutter speed values. Or you can use the exposure compensation dial available on many cameras. This dial tells the camera that even though it detects a certain EV when it meters, you want it to be brighter or darker.
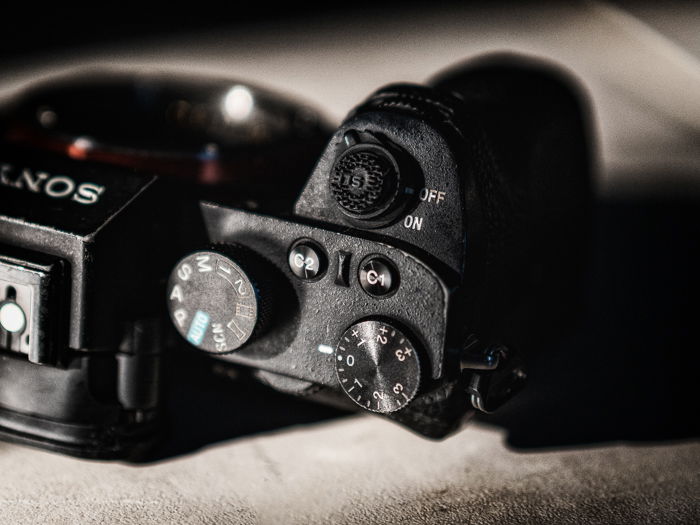
The exposure compensation dial found on many cameras changes the exposure value.
Sometimes, our cameras are confused when metering a scene, like when we shoot into a rising sun. Changing exposure compensation will make the scene darker or lighter.
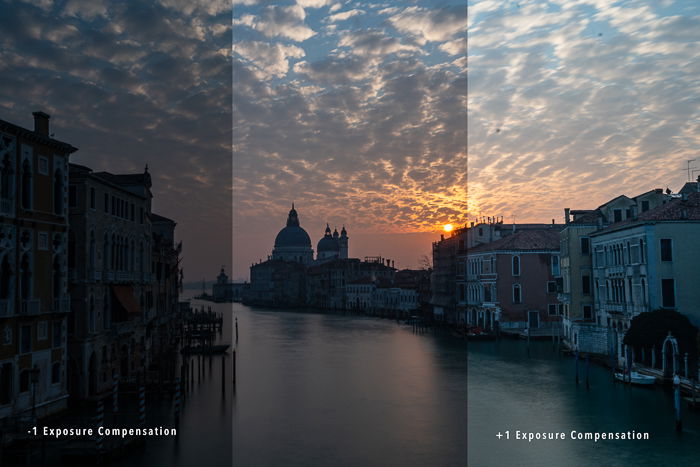
Comparison of an exposure compensation decrease (left) and increase (right)
Some photographers are confused by how neutral density (ND) filters affect EV. For example, using a three-stop ND filter reduces the light coming into your camera by three stops of light.
You use ND filters mainly to slow down the shutter speed and capture motion blur. You usually do not want to make the image darker. You still want a properly exposed image.
With a three-stop ND filter, your camera thinks there are three stops less light in the scene. If the scene is an overcast day with EV 12 light, your camera now thinks the light is EV 9.
If your settings without the ND filter are f/16 at 1/15 s at ISO 100, adding a three-stop ND filter changes your settings to f/16 at 1/2 second at ISO 100. As a result, the shutter speed is three stops slower. But the image is exposed the same in both cases.
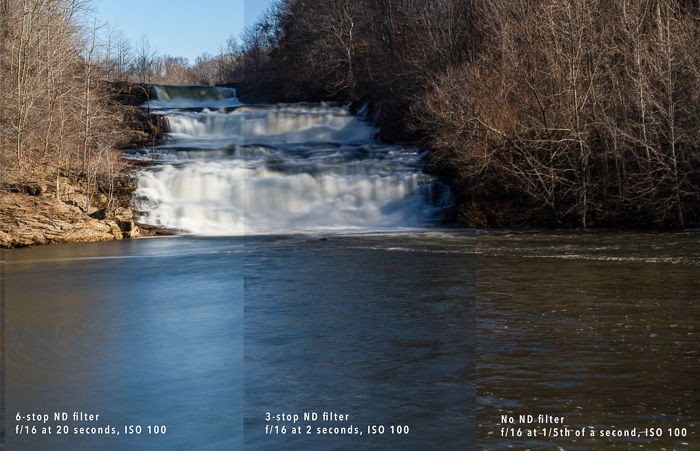
Comparison between a 6-stop ND filter (left), 3-stop ND filter (middle), and no ND filter (right). The only setting that changed was the shutter speed.
Today’s digital cameras have made practical use of exposure value largely obsolete. But understanding EV is essential for understanding your camera settings and the exposure triangle.
We hope this article has helped you understand how EV is used in modern photography.