Fire photography is an exciting genre. You can take powerful photos of fire by itself or with people and environments. We’ll take you through examples and tips to take photos of fire safely and creatively.
Besides photographing the beauty of fire, you can also use something as simple as a candle flame. This can light up your subject, create atmospheric photos, or add a pop of color to an image.
Important Safety Tips for Fire Photography
Fire photography is one of the most dangerous photography genres. This means you need to take all the necessary precautions as you plan your photoshoot. Here are some of the most important tips you must keep in mind before, during, and after your photo session:
- Ensure you take photos in an area with lots of space and air.
- Avoid locations with dry grass and other flammable objects.
- If you’re a portrait photographer, never ask your models to get too close to a fire. Ensure their hair is neatly tied back and their clothes aren’t too loose.
- If you’re an absolute beginner, experiment with small fires like candles and sparklers first.
- Invest in a small fire extinguisher. Even if you’re very careful, having something nearby won’t hurt if a fire gets out of control.
Canon EOS R50, 90mm, f/2.8, 1/1600 s, ISO 2500. Photo by Olivier Leysen (Unsplash)
How Do You Photograph Fire?
Fire can be photographed in many ways. Capture details, atmospheres, or beautifully lit portraits. You can use fire to turn your ideas into powerful photos. Plus, you can photograph fire in different forms.
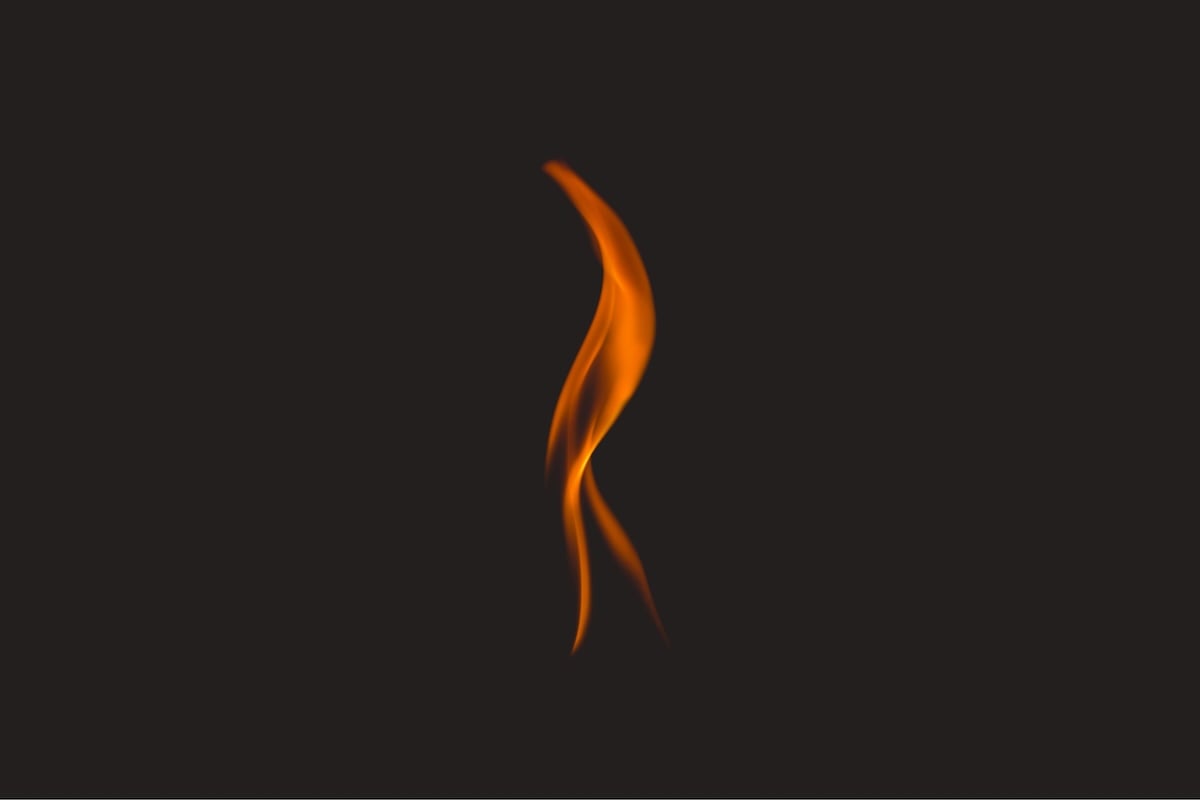
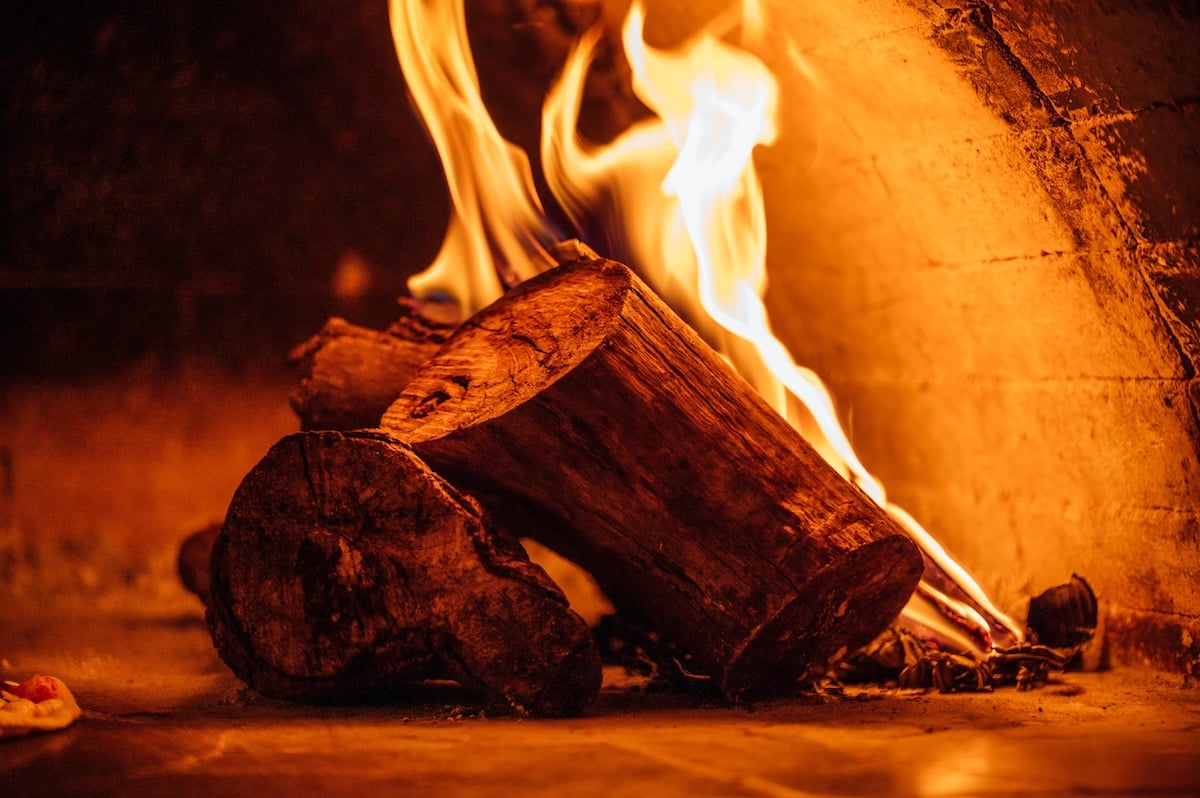
How to Take Sharp and Detailed Fire Photos
If you know how to take sharp photos, you can take atmospheric landscape photos and unique close-ups of sparks.
To capture as much detail as possible, use a narrow aperture (a large f-number) like f/8. The larger your f-number, the darker your photos will be.
This won’t be a problem if you’re photographing only fire. Even an f-number like f/4.0 will let you take relatively sharp photos. If you want to include other subjects in your photo, increase your ISO to better expose them.
Canon EOS 5D Mark III, 50mm, f/4, 1/200 s, ISO 125 . Photo by Ricardo Gomez Angel (Unsplash)
How to Take Photos of Fire to Show Movement
Photos created using long-exposure photography settings help you emphasize fire movements. You can also manually create letters or shapes like the ones below.
To achieve this effect, use a slow shutter speed. The slower your shutter speed, the more time you have to move your light source around.
You can manually select your shutter speed in Shutter Priority mode. This ensures your shutter speed stays the same while the camera automatically changes your other settings.
If you want to capture random fire movements, you can take photos of bonfires and fireworks. You can also have a model wield a sparkler if you want to create your own shapes.
Avoid manipulating large flames of fire unless your subject is a professional fire dancer!
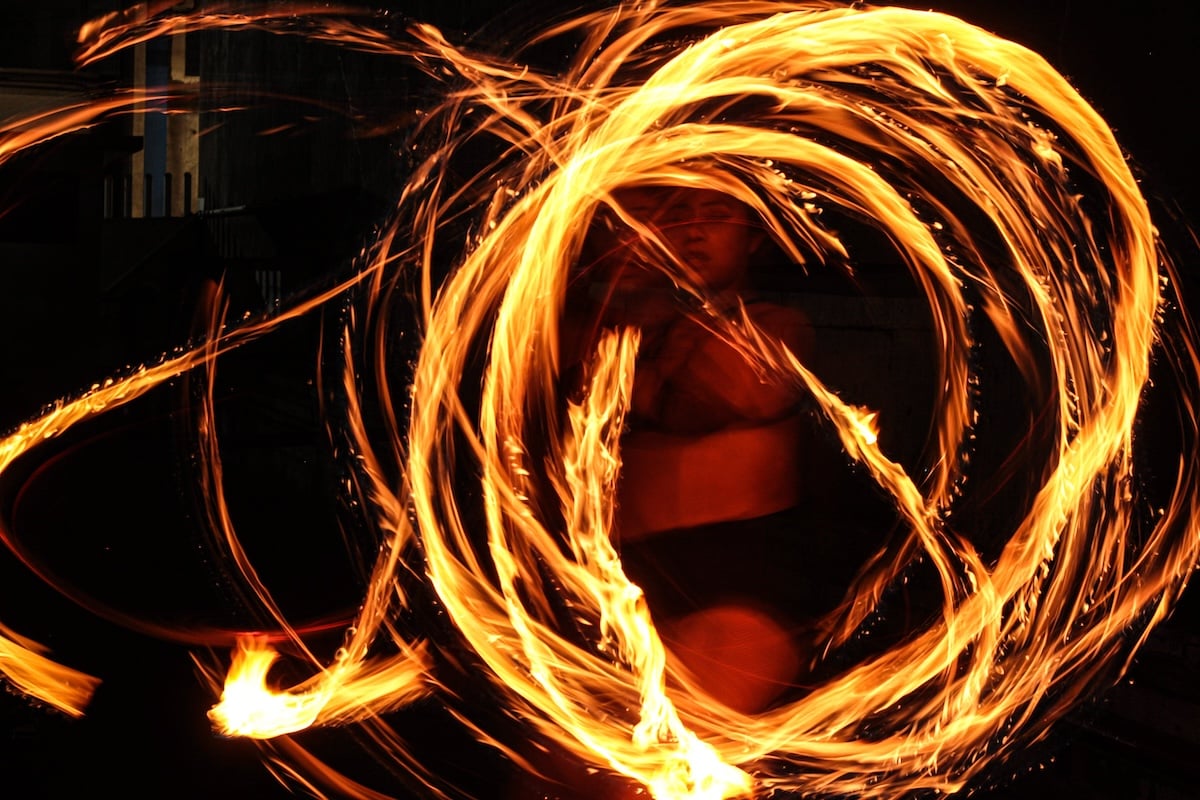
Shot with a Canon camera. 50mm, f/8, 1.6 seconds, ISO 100. Photo by Sebastian Fuentes (Pexels)
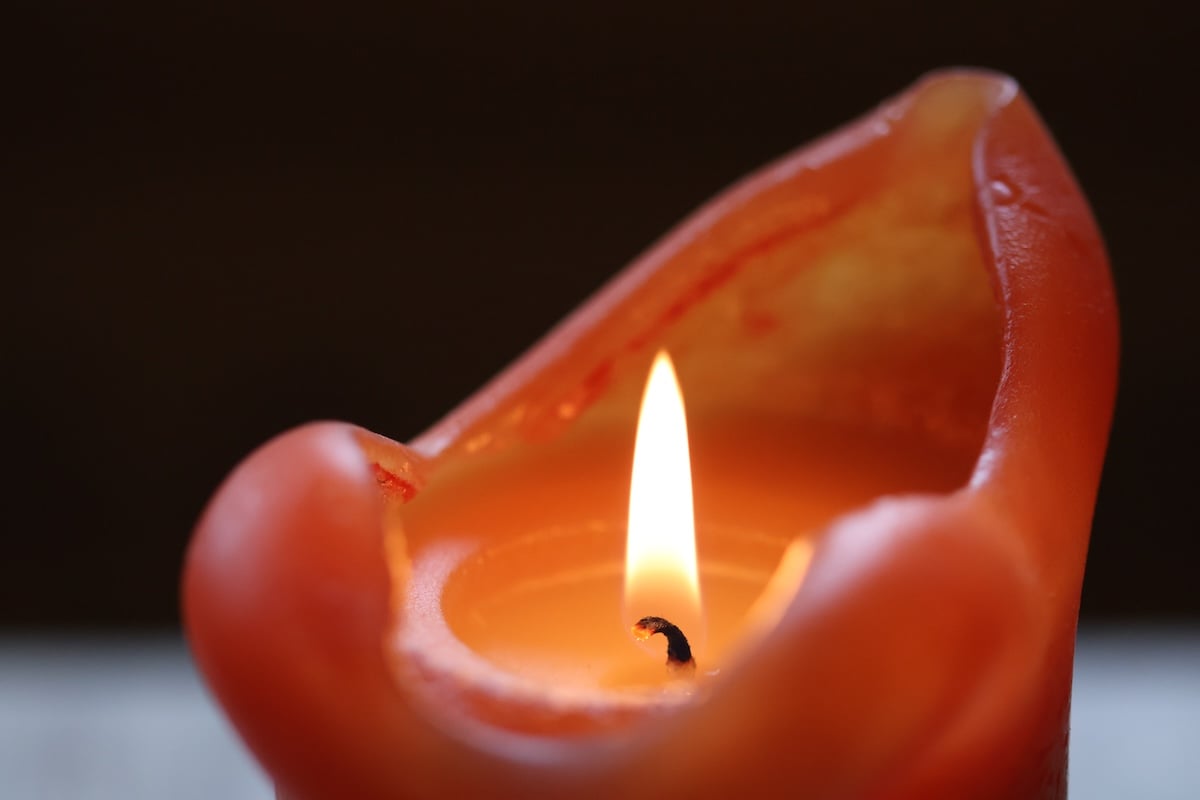
How to Photograph Flames With No Background
There are two simple ways you can photograph a flame without a background. You can either use a black piece of cardboard as a backdrop. Or you can shoot in a dark room.
If you use a piece of cardboard, ensure it’s far from the fire.
The safest and easiest method is simply taking photos in a dark room. If you want a simple photo of the flame alone, you can remove the candle with Photoshop’s Clone Stamp or Spot Healing Brush tools. Or you can use Adobe Lightroom or an alternate program.
Canon EOS 750D, 50mm, f/1.4, 1/800 s, ISO 400. Photo by Paul Bulai (Unsplash)
How to Create Perfect Portrait Lighting Using Fire
The warmth and brightness of fireworks work well with portrait photography. You can also use bonfires, lighters, sparklers, and candles to create moody, atmospheric photos of people.
The brighter the fire, the harder it is to take properly exposed photos. This is why many photographers, like Ivona Podlasińska, use small light sources like candles. These add a touch of warmth to their portraits.
When you light your subject, ensure an even amount of light is on their face. For instance, if they hold a candle right underneath or above their head, the light will cast unflattering shadows on their face.
Learning various light patterns for portraits helps you take the best possible photos of your models.
The background in the photo below is relatively detailed, which means the photographer used a large f-number. If you want to separate your subject from their background, use a small f-number like f/1.8.
Canon EOS 80D, 35mm, f/2.5, 1/200 s, ISO 400. Photo by Jono Hirst (Unsplash)
9 Powerful Fire Photography Ideas
Now that you know some fire photography safety tips and techniques, you can play with different ideas.
1. Capture a Friendly Bonfire Atmosphere
One of the best ways to experiment with fire and portrait photography is to take photos of a bonfire party. Since your models are distracted by the fire, you can use this opportunity to take candid photos.
If you want to add more light to your images, don’t overexpose them. Your photos will lose a lot of image data and look unflattering. If you accidentally underexpose your shots, you can recover shadow details when you edit your results.
If the fire is too bright compared to your models, mute the highlights in an editing program. This will make the brightness less distracting.
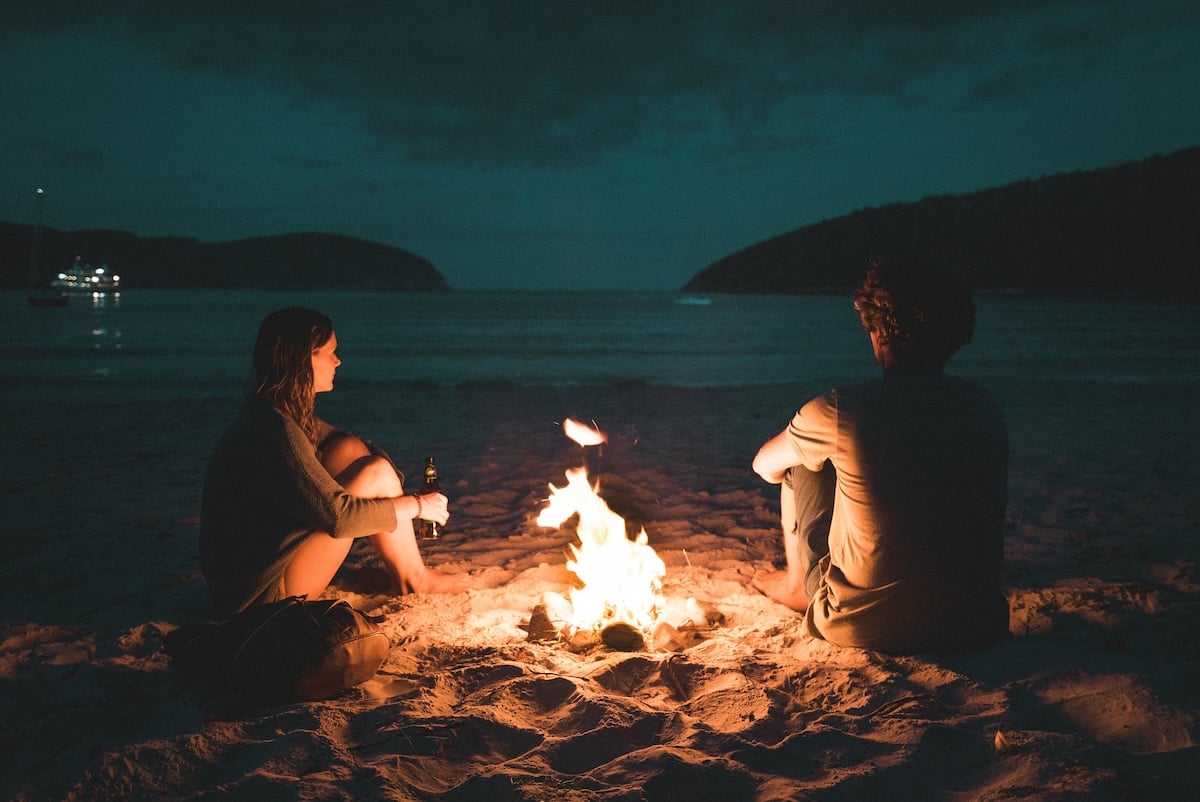
Sony a7S II, 35mm, f/4, 1/50 s, ISO 1250. Photo by Manuel Meurisse (Unsplash)
2. Create a Mysterious Portrait Silhouette With Fire
You can use a silhouette technique to take creative photos or photograph people who don’t want to show their faces.
Create a silhouette by photographing your subject in front of a bright source of light. A large bonfire is perfect for this. If you take nighttime photos, your silhouettes stand out even more.
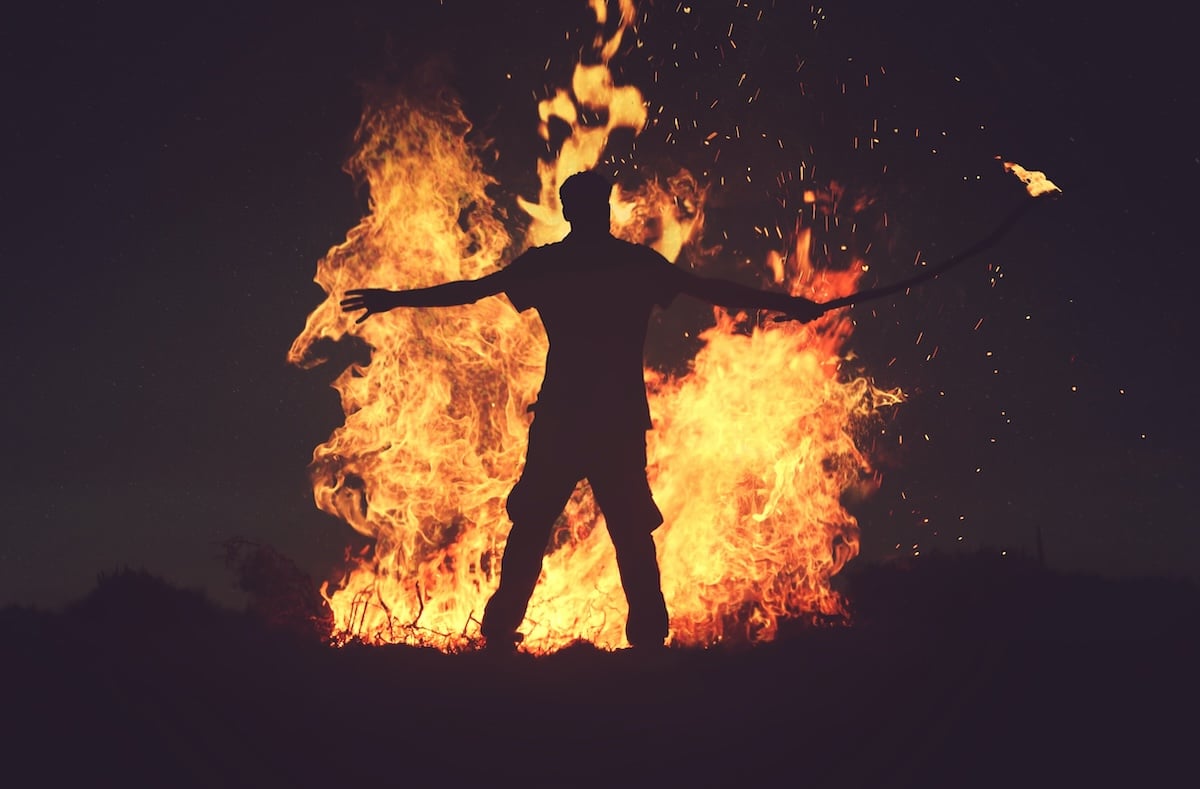
Canon EOS 60,. 50mm, f/4.5, 1/160 s, ISO 100. Photo by Mohamed Nohassi (Unsplash)
3. Capture Fire Details Using a Zoom Lens
It’s a given that getting too close to a fire will put you and your camera at risk. It’s also a given that close-up shots of fire are breathtaking. The solution? Use a zoom lens.
A zoom lens lets you shoot close-up details without getting too close to your subject. This is ideal for portrait and fire photography, where distance helps avoid discomfort and danger.
Nikon Z6, 105mm, f/2.8, 1/125 s, ISO 640. Photo by Chuttersnap (Unsplash)
4. Use a Wide Aperture to Create Bokeh
Bokeh complements your fiery subject and makes your photos look dreamy. You can create it using a wide aperture (a small f-number). Sparklers are great for creating small, sharp bokeh. You can also have lights in the background.
The smaller your f-number, the larger your bokeh will be. Examples of wide apertures are f/1.2, f/1.4, and f/1.8. The higher the number you use (narrower aperture), the sharper your photos will be.
Canon EOS 5D Mark III. 50mm, f/1.4, 1/125 s, ISO 1000. Photo by Nine Koepfer (Unsplash)
5. Create Patterns and Contrast With Lots of Candles
Fire can be used to create interesting patterns and contrasts like the one below. If you’re feeling extra creative, take photos of fire sources in different stages. The stark contrast between the lit and unlit candles can make an image stand out.
This also challenges you to work with different color tones and exposures. It might also inspire you to start a new fire-related photography project. To avoid blurry images, use a tripod if you use a slow shutter, especially at night.
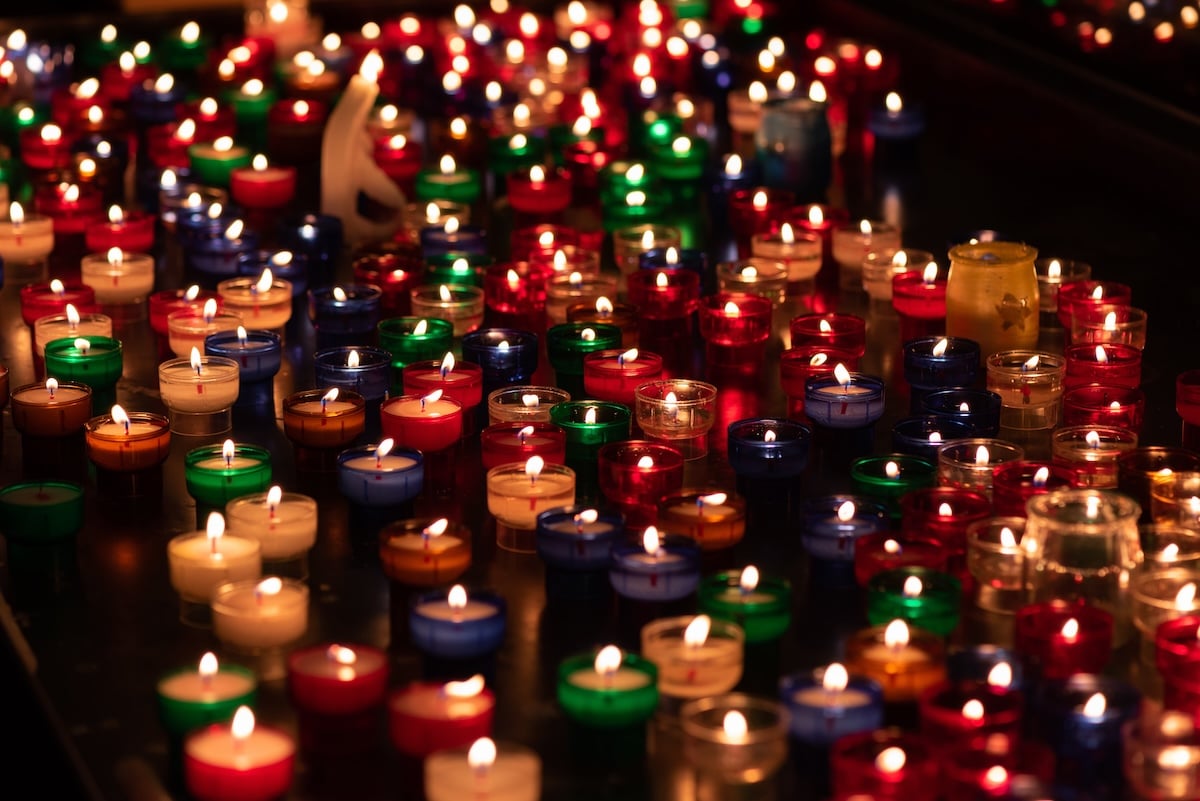
Nikon D810, 105mm, f/5, 1/50 s, ISO 500. Photo by Eduardo Casajús Gorostiaga (Unsplash)
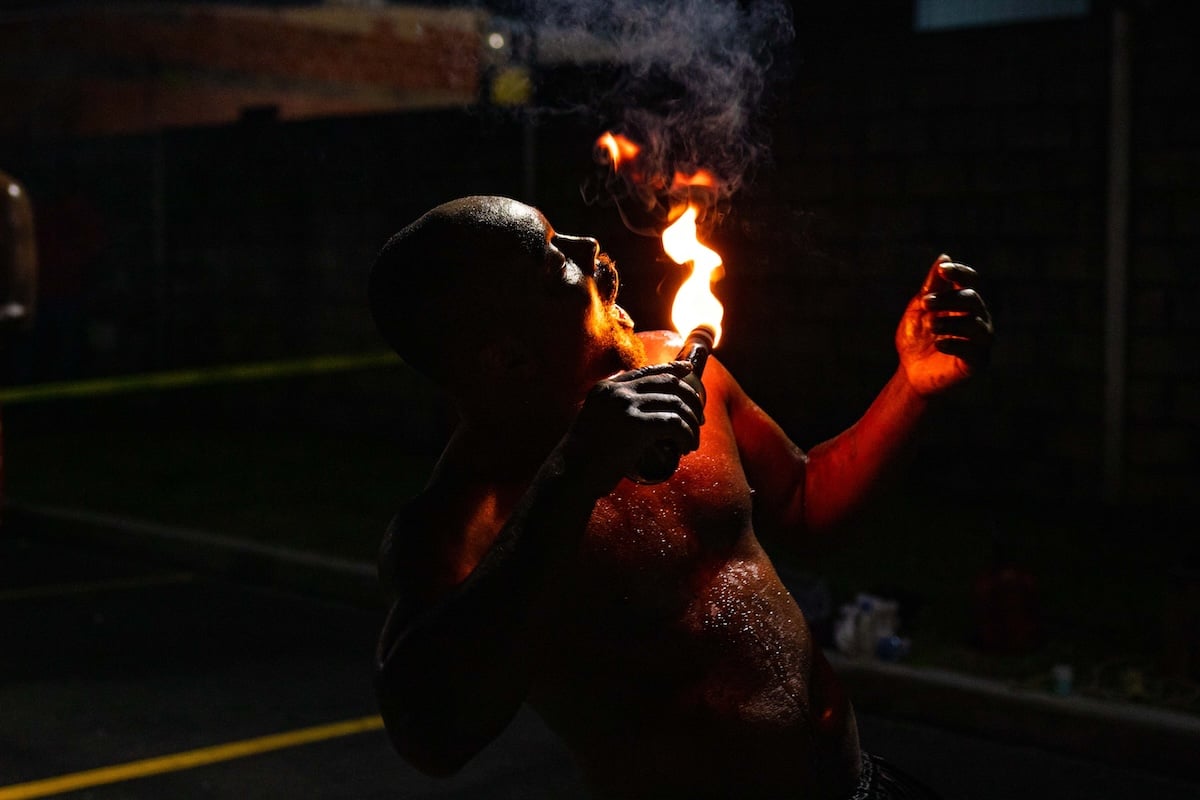
6. Take Photos of Professional Fire Handlers
Event photography is a fun way to experiment with subjects that may not be accessible to us daily. If you have the opportunity to photograph a professional fire handler or dancer, you can improve in the following areas:
- Action Photography: No one will wait as you prepare your settings, so you must think quickly to take sharp photos.
- Lighting: Event lighting is unpredictable, especially when fire shows are involved. You can play with exposure (aperture, shutter speed, and ISO) and camera modes.
- Portrait Photography: You can experiment with different angles and poses without giving instructions to your model. This also strengthens your candid photography skills.
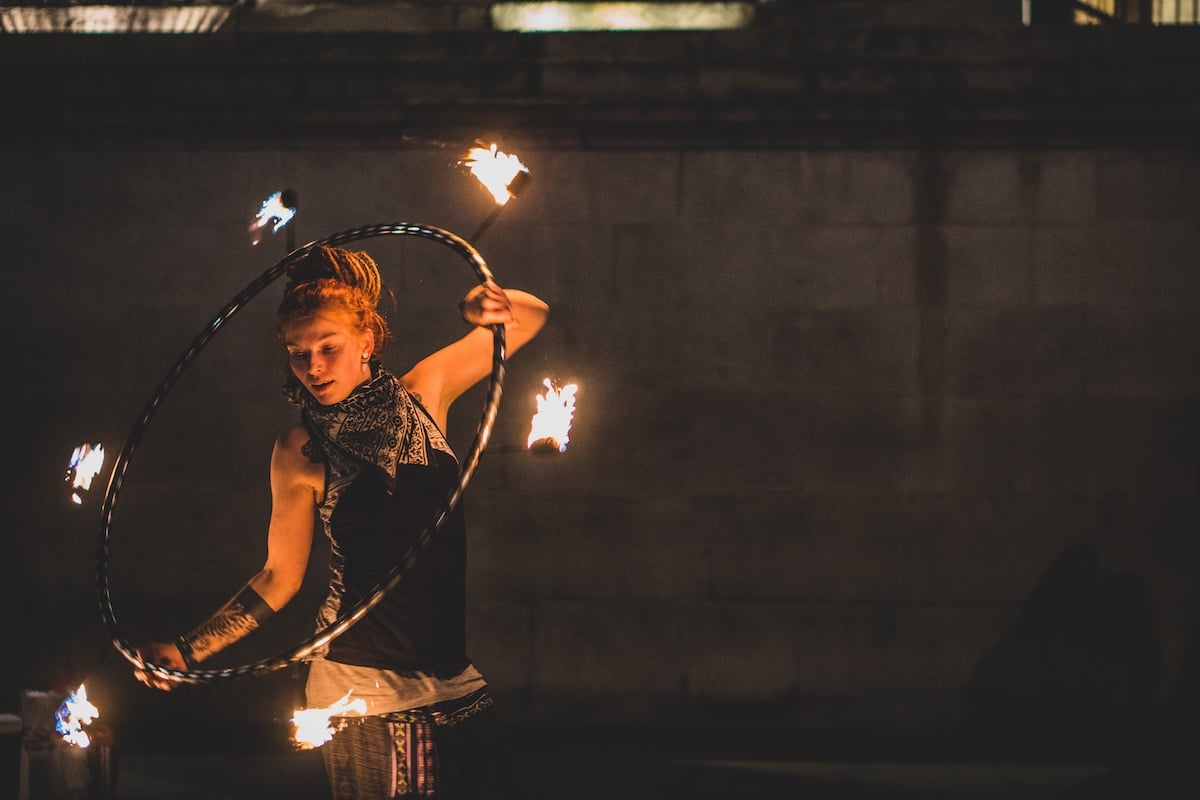
Sony a6300, 50mm, f/2, 1/160 s, ISO 5000. Photo by Conor Samuel (Unsplash)
7. Take an Adventurous Photo in the Dark
If you’re a fan of adventure stories, you’ll love using fire as a prop in your photos. For the best results, take photos in a location with beautiful, non-flammable architecture.
If you shoot in the dark, most focus is on your subject and the fire, making your results more powerful.
Make sure your light source is bright. If you use a small lighter, you won’t be able to illuminate your subject’s surroundings. You can take impressive photos using something larger, like a fire torch. A citronella torch could be a safe option. But take necessary precautions.
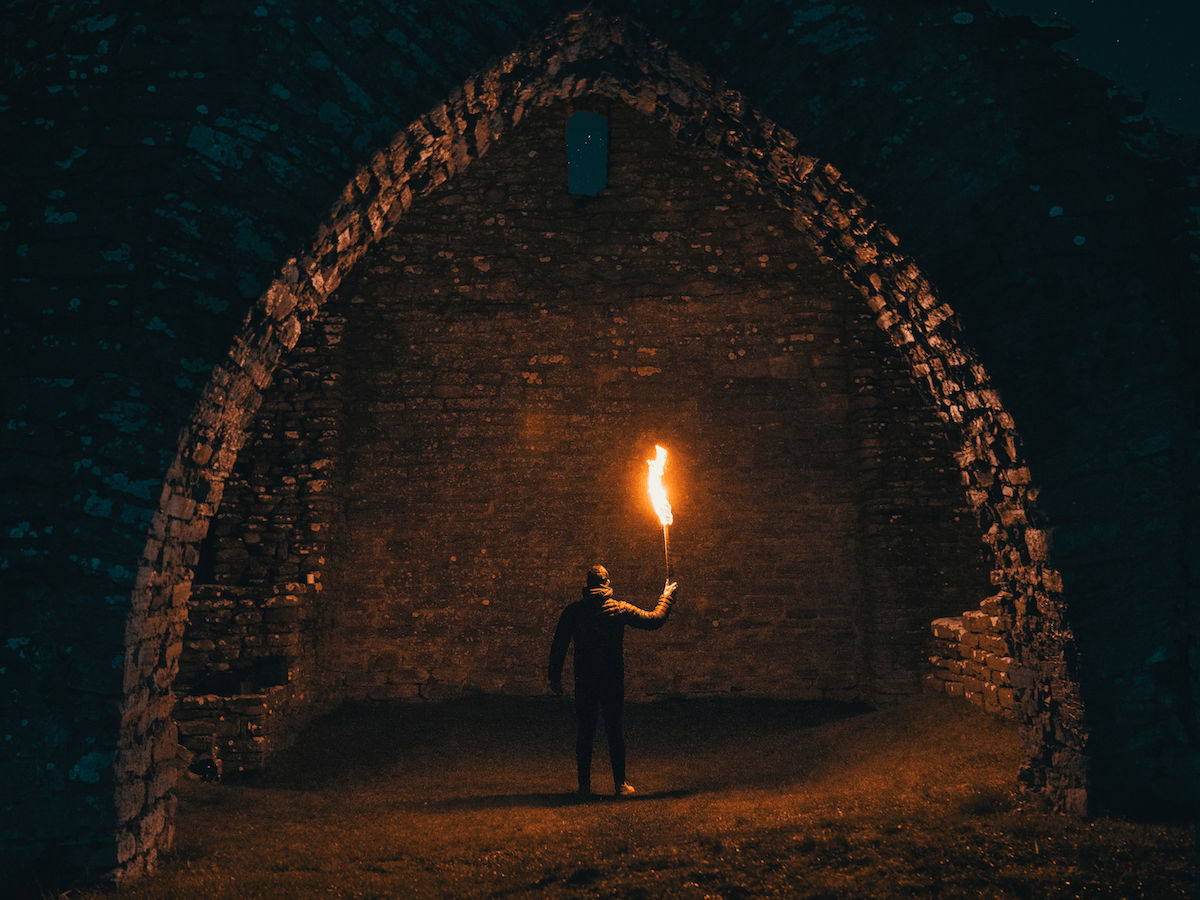
Sony a7R II, 26mm, f/4.5, 1/30 s, ISO 3200. Photo by Linus Sandvide (Unsplash)
8. Use a Lighter to Create a Light Leak
You’re probably familiar with light leaks. They are bursts of color that sometimes appear in analog photos. As beautiful as they are, not every photographer can afford to experiment with them. Fortunately, there’s a cheap alternative to this.
Light leaks can be recreated with the help of a small flame. Focus on your subject and hold a flame in front of your lens. Make sure you cover only a part of the lens. Of course, don’t get too close to the flame with the lens, or you’ll damage it.
The wider your aperture, the blurrier the flame will look, and the more it will resemble a light leak.
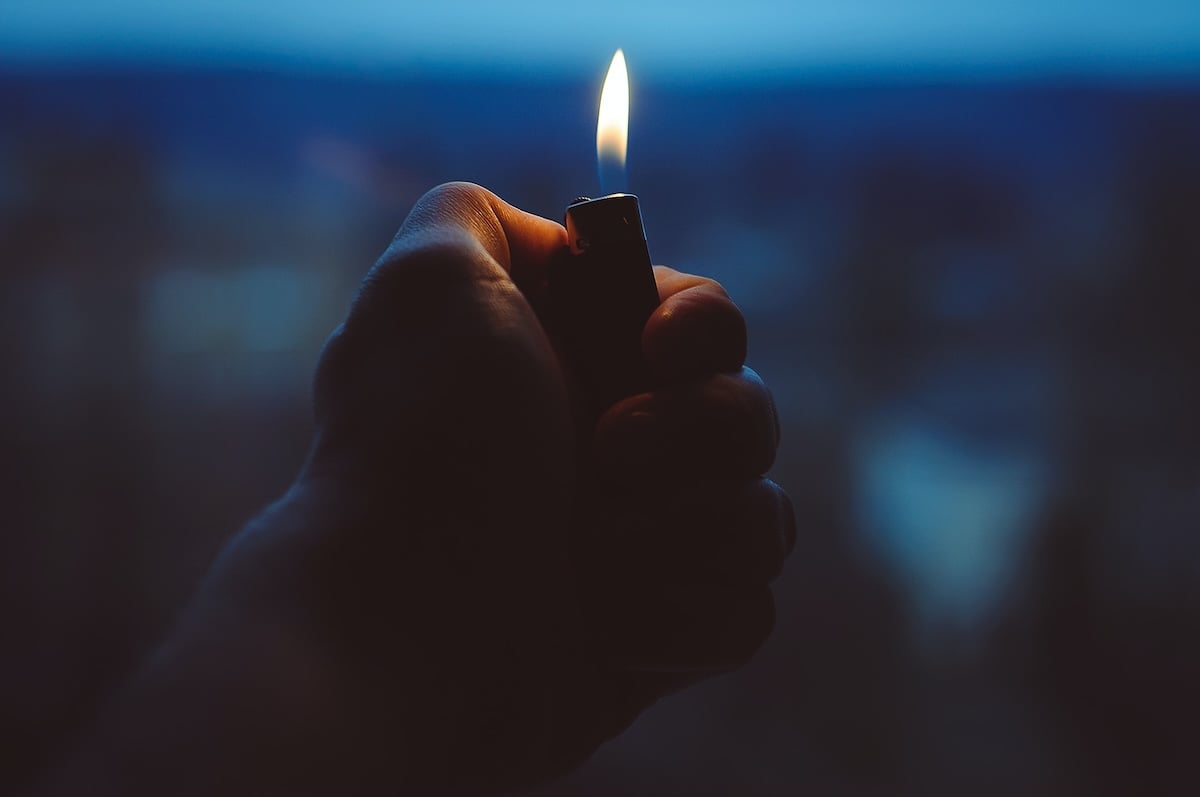
Nikon D90, 50mm, f/3.5, 1/80 s, ISO 200. Photo by Yevgeniy Gradov (Unsplash)
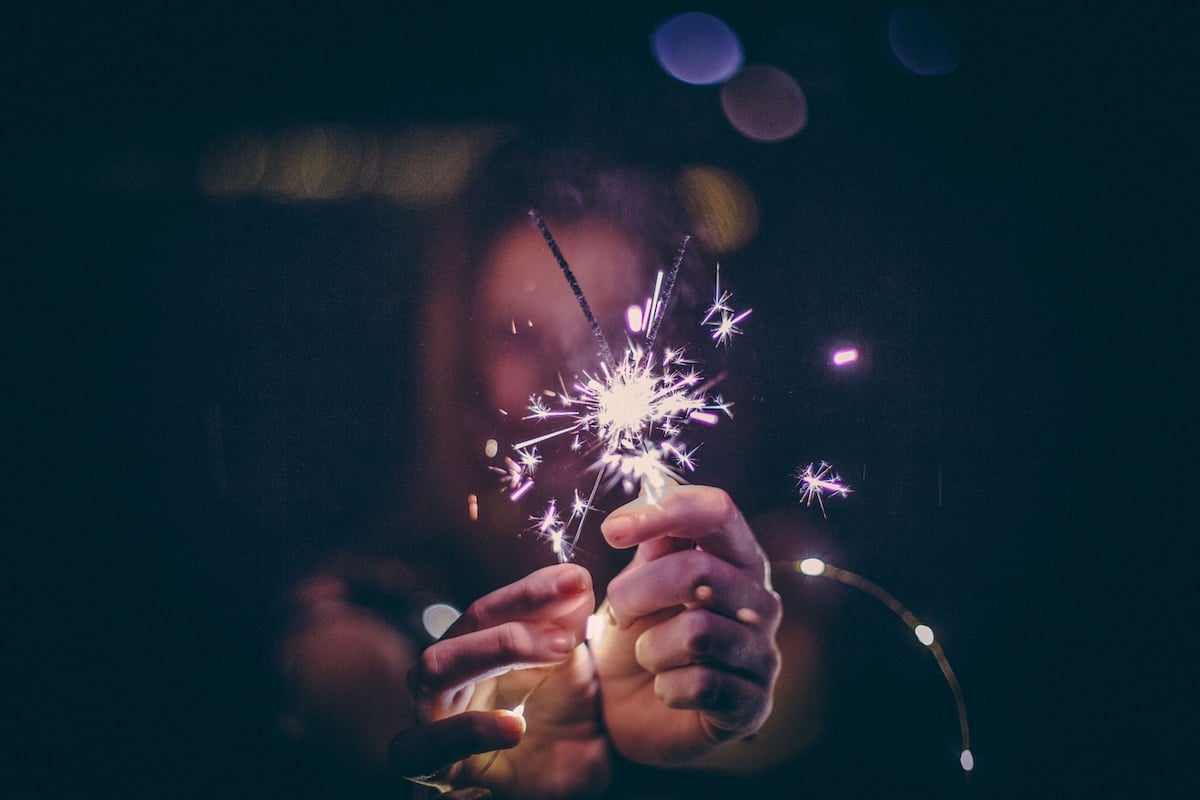
9. Look for Fire in Unique Places
Though fire is often associated with bonfires, fireworks, and lighters, it exists in many other places. If you want to experiment with fire safely, use sparklers to add a pop of brightness to your photos.
If you want to create a fiery bokeh, take photos during a lantern festival. Some of these festivals mark the end of the Chinese New Year and are an incredible event for photographers who love light and bokeh.
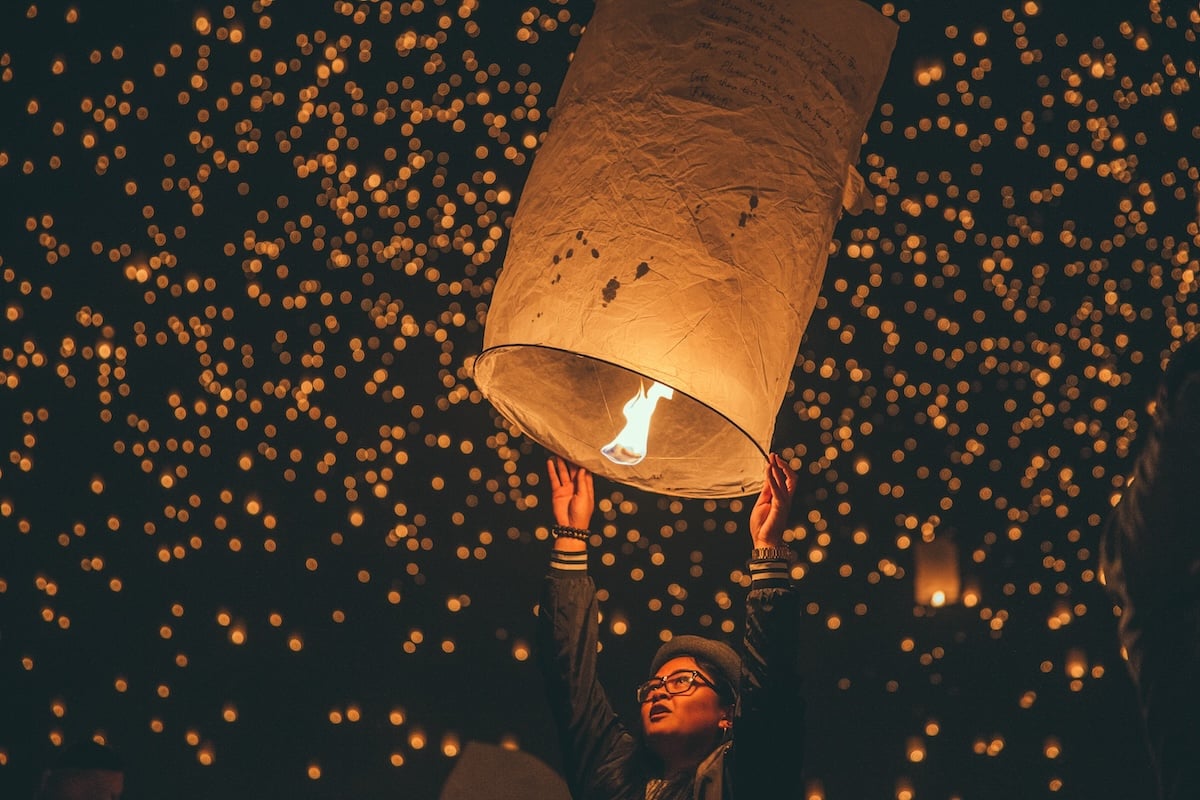
Canon EOS 6D, 70mm, f/2.8, 1/160 s, ISO 2000. Photo by Austin Neill (Unsplash)
Conclusion: Shooting Fire Photography
As long as you approach every photoshoot safely, there isn’t a limit to what you can do with fire photography. The more you experiment, the closer you get to creating powerful fire photos.
Fire photography encourages you to know your camera settings better and think quickly. Plus, it opens you up to a variety of creative ideas to try.
Check out our Magical Photography Spellbook for more exciting projects and tips!