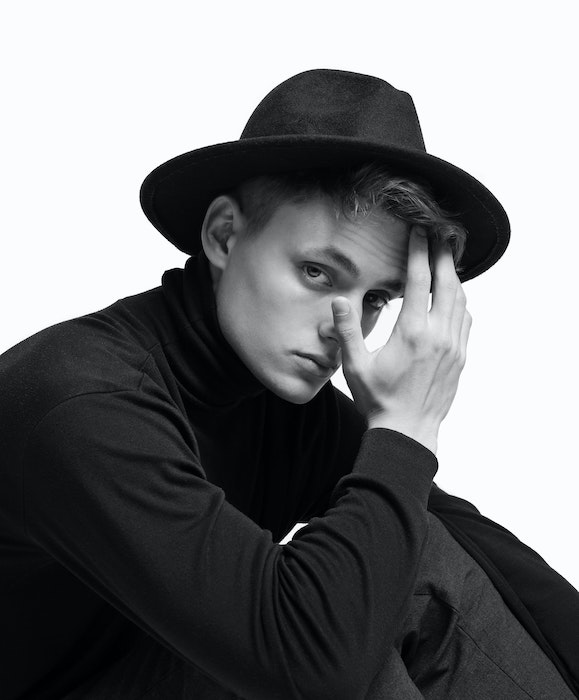
Frequency separation in Photoshop puts skin texture and color on separate layers. You can then correct a patch of uneven tone without painting over pores, or repair a small texture flaw without changing the underlying color.
This guide shows you how to build the layers for 8-bit and 16-bit RGB images, then use them for portrait retouching. The setup should leave your photo looking unchanged. The retouching comes afterwards.
What Is Frequency Separation in Photoshop?
Frequency separation splits a photo into a high-frequency layer for fine detail and a low-frequency layer for broader color and tone. Pores, fine hairs and small lines belong mainly to the texture layer. Broad shadows and patches of color belong mainly to the low-frequency layer.
The split depends on the blur radius you choose. It is a way to control different parts of an image, not a reason to remove every line or pore. Keep the features that make the portrait look like the person you photographed.
How to Create Frequency Separation in Photoshop
We will call the lower layer “Shadows & Color” and the upper layer “Skin Texture.” The original screenshots sometimes shorten the upper layer's name to “Texture.” Both names refer to the same layer.
Check Image > Mode before starting. The Apply Image settings differ between 8 Bits/Channel and 16 Bits/Channel. The recipes below are for RGB images at those bit depths.
Step 1 – Create and Name the Layers
Open the portrait and duplicate the image layer twice. Select the layer and press Ctrl+J on Windows or Command+J on a Mac for each copy. Keep the original Background layer below them.
Name the lower copy Shadows & Color and the upper copy Skin Texture. I usually put these two layers in a group called Skin Retouching. Select both copies and press Ctrl+G or Command+G. Leave the original outside the group so you can compare the retouch with it.
Expand the group to see both layers.
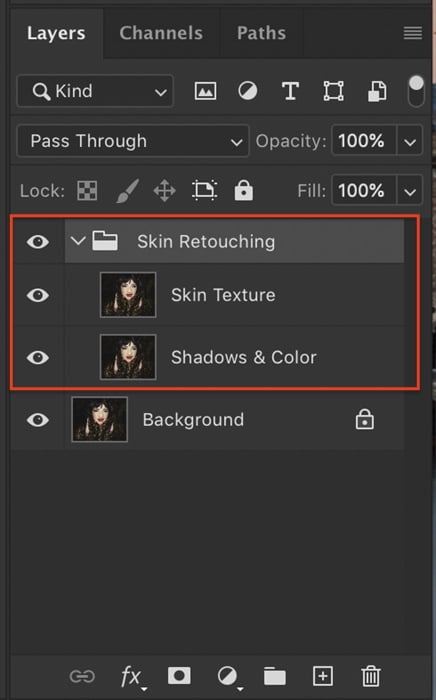
Create two duplicate background layers and add them to a group. Re-label the layers so you can keep them straight.
Step 2 – Blur the Low-Frequency Layer
Turn off the Skin Texture layer with its eye icon. Select Shadows & Color so you can see and edit the lower copy.
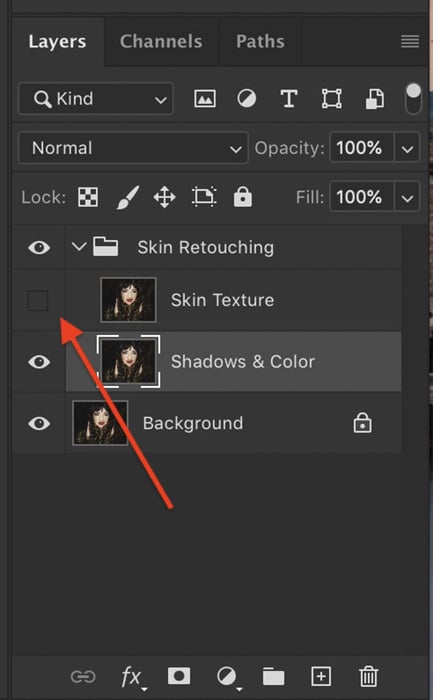
Turn off the high-frequency layer and select the low-frequency layer.
Go to Filter > Blur > Gaussian Blur.
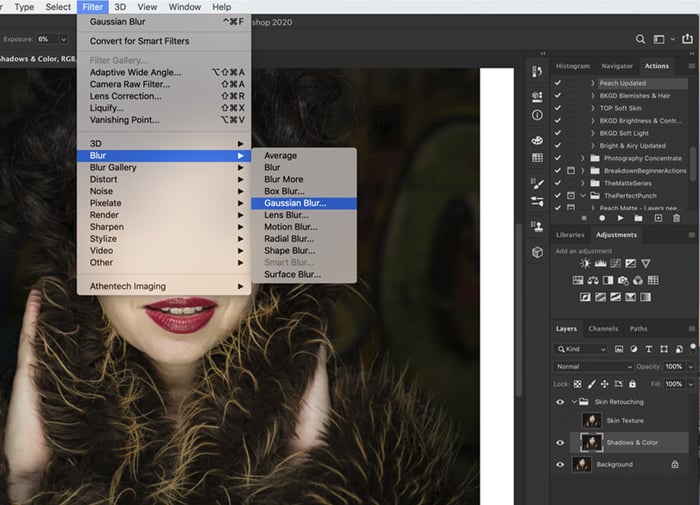
Screenshot showing how to navigate to Gaussian blur.
Increase the radius until fine skin texture just disappears while the broader shape of the face remains visible. Check a textured area such as the cheek at 100% view. A radius that works for one portrait may be wrong for a different image size or a tighter crop.
Do not try to flatten every shadow with this first blur. You are separating detail from tone. Click OK when the texture is blurred enough. Our Gaussian Blur guide explains the filter in more detail.
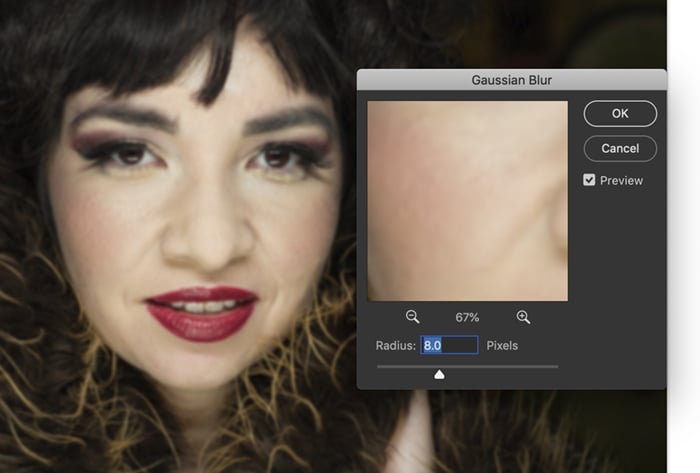
Gaussian blur dialog box showing blur preview.
Step 3 – Build the High-Frequency Layer
Turn Skin Texture back on and select it. This upper copy is the layer that will receive the Apply Image calculation.
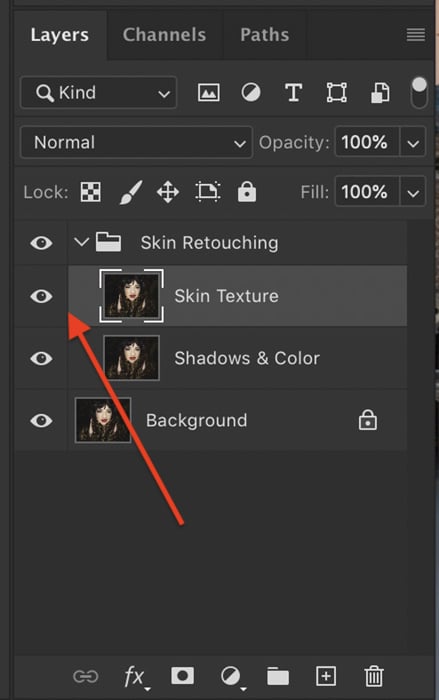
Turn on and select high-frequency layer.
Choose Image > Apply Image. Check the settings each time because the dialog can retain values from previous work.
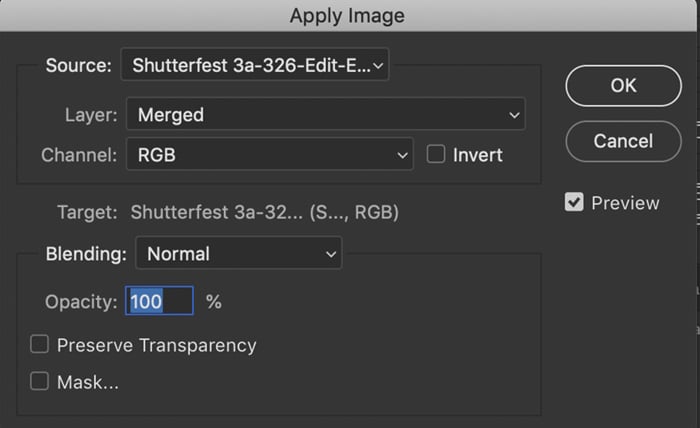
Original Apply Image dialog example. Check every setting before using it.
Use the current document as the source, select Shadows & Color as the source layer, and use the RGB channel. Set Opacity to 100% and leave Mask unchecked. Then match the remaining settings to your document's bit depth:
| Apply Image setting | 8-bit RGB image | 16-bit RGB image |
|---|---|---|
| Source layer | Shadows & Color | Shadows & Color |
| Blending | Subtract | Add |
| Scale | 2 | 2 |
| Offset | 128 | 0 |
| Invert | Unchecked | Checked |
The preview should look mostly gray with fine detail visible. The original screenshot below shows the 8-bit Subtract recipe. Use the 16-bit column for a 16-bit file.
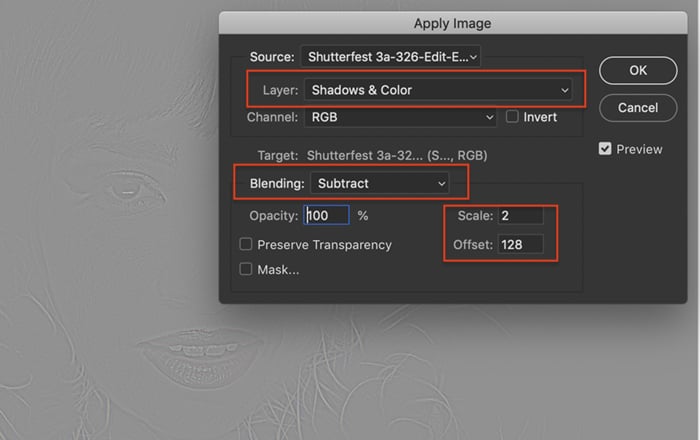
Apply Image settings for an 8-bit RGB image: Subtract, Scale 2 and Offset 128.
Click OK. In the Layers panel, change Skin Texture's blend mode to Linear Light. Keep both working layers at 100% opacity for the setup check.
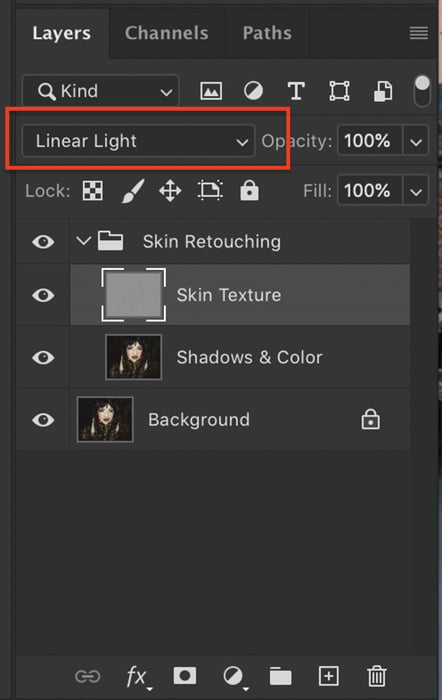
Change the blend mode on high-frequency layer to Linear Light.
Step 4 – Check the Setup Before Retouching
Toggle the Skin Retouching group off and on. Before you edit either layer, the combined result should look like the original. If its brightness, color or contrast changes visibly, stop and check the source layer, document bit depth, Invert setting and Linear Light blend mode.
Save a layered working copy so you can return to these layers as you edit.
How to Retouch with Frequency Separation
Use Skin Texture for small texture repairs. Use Shadows & Color for uneven color and broad shadows. Some marks contain both, so correct each part on its own layer.
I tend to make most changes on Shadows & Color. Work in small areas and compare the group with the original often.
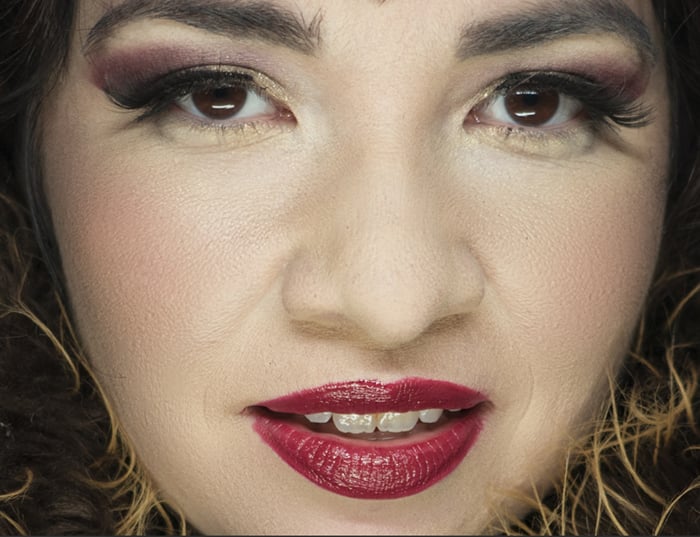
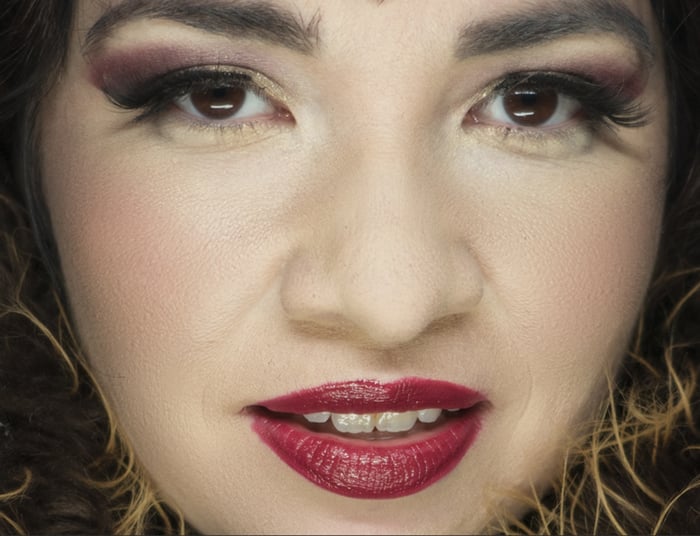
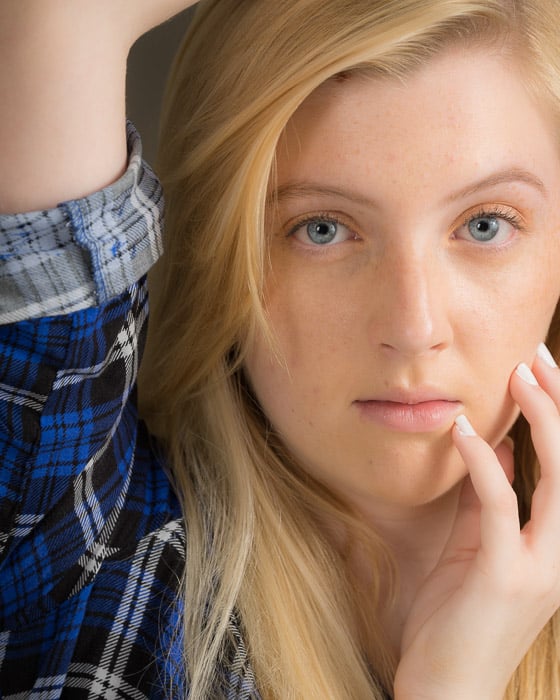
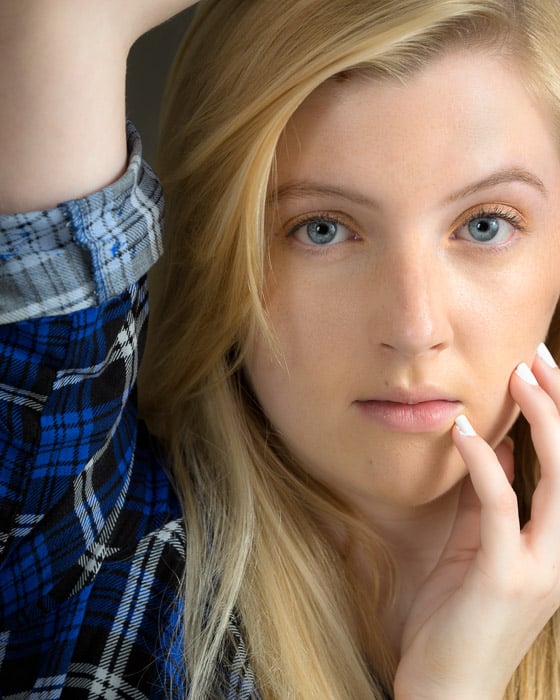
The comparison below shows Skin Texture at 100% and 80% opacity. Lowering that layer exposes more of the blurred image across the whole portrait, including hair and facial features. It demonstrates the separation, but it is not a substitute for local retouching. Restore Skin Texture to 100% before making the edits below.
Smooth Uneven Tone
Select Shadows & Color. Choose the Lasso tool and set a Feather value before drawing your selection. If you have already drawn it, use Select > Modify > Feather instead. Changing the Lasso toolbar's Feather value does not feather an existing selection.
Draw around a small patch of uneven tone. Keep the selection within a similar area of skin rather than crossing an eye, lip or the edge of the face. Choose enough feathering for a soft transition. The useful radius depends on the image and selection size.
Press Q to inspect the selection in Quick Mask mode. Press Q again to return to the normal view.
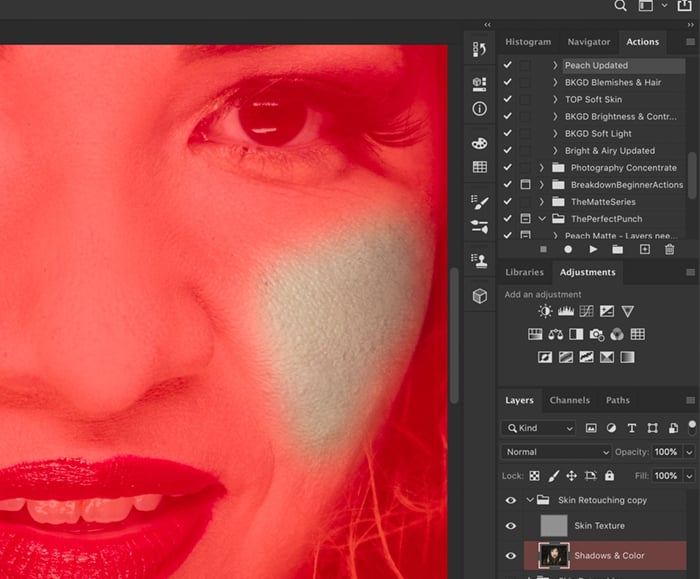
Press the Q key to enable a quick mask. A quick mask will show the selected area and feathering.
Choose Filter > Blur > Gaussian Blur and preview the result. Increase the radius only enough to even the selected tone without flattening the shape of the face. The Skin Texture layer above it should retain the fine detail.
Deselect and repeat only where needed. Blurring this layer will not remove a texture blemish that remains on Skin Texture.
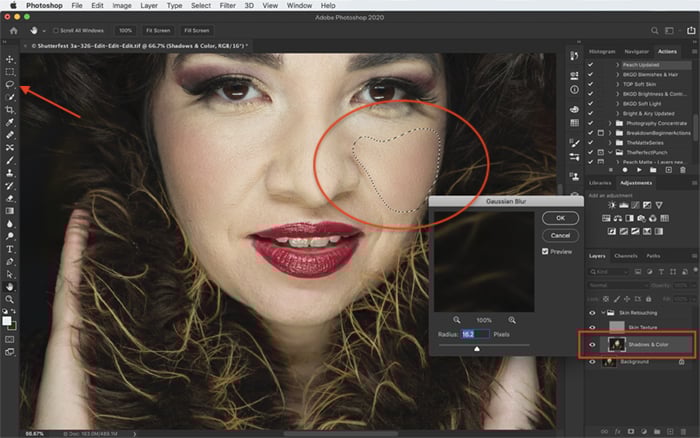
Even a selected patch of tone on Shadows & Color. Use a feathered selection and preview the blur.
Reduce Wrinkles Without Erasing Them
Wrinkles can contain both a fine crease and a broader shadow. Decide which part needs attention before choosing a layer.
To soften uneven tone around a wrinkle, use a feathered selection on Shadows & Color and preview a small amount of Gaussian Blur, as above. Keep the crease and the face's natural shape visible.
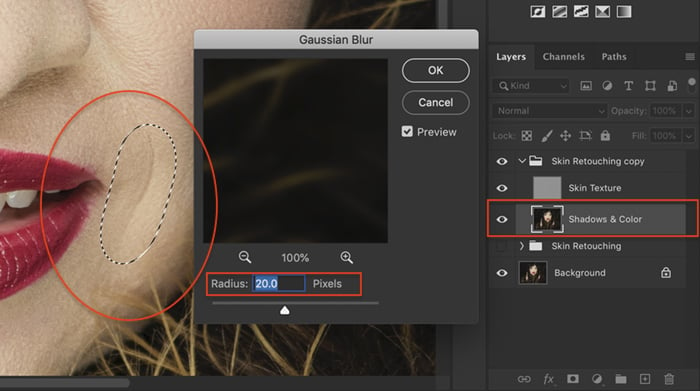
Soften uneven tone around a wrinkle on the low-frequency layer. Feather the selection and preview the blur.
To lighten the wrinkle's shadow, stay on Shadows & Color and select the Dodge tool. Choose a soft brush, set Range to Shadows, and start with a low Exposure such as 10%. Enable Protect Tones to help limit clipping and color shifts. Paint lightly and check each pass.

If a small texture defect still needs work, switch to Skin Texture and use the Healing Brush or Clone Stamp as described next. Avoid painting the whole wrinkle away. Lightening its shadow and repairing its texture are separate tasks.
Repair Small Blemishes
Select Skin Texture and choose the Healing Brush. Set its Sample option to Current Layer so it reads the separated texture, rather than the combined image beneath it.
Make the brush slightly larger than the texture flaw. Adjust its hardness and spacing to suit the area; the toolbar values in the original example are not universal settings.
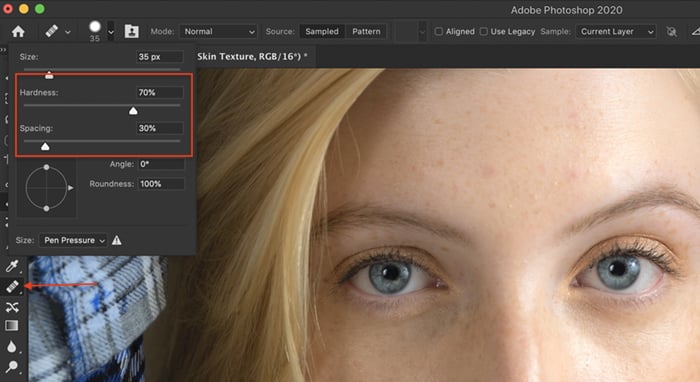
Original Healing Brush toolbar example. Sample Current Layer and adjust the brush to suit the area.
Hold Alt on Windows or Option on a Mac and click a clean nearby area with similar texture. Release the key and paint over the blemish with short strokes. Sample again as the texture or direction changes.
The comparison below shows the original blemish, the result after blur, and the result after using the Healing Brush. Blurring the tone alone did not remove the texture mark.
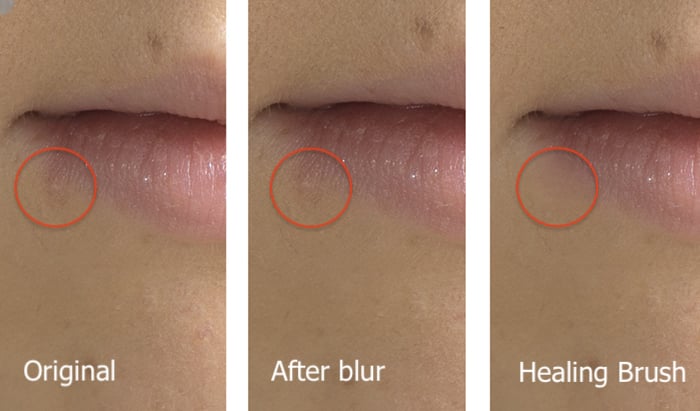
Comparison of two methods of retouching blemishes. The left screenshot is the original blemish. Adding blur to smooth the area did not remove this blemish (middle). A brush tool is needed to remove this blemish (right).
If you use the Clone Stamp, set Sample to Current Layer as well. It copies the sampled texture directly, so choose the source carefully to avoid obvious repeated patterns.

In the Clone Stamp toolbar sample from the current layer.
Work on distracting texture marks rather than removing every feature. A red or dark patch may also need a separate correction on Shadows & Color.
Lighten Broad Shadows
For an under-eye shadow or another broad dark area, select Shadows & Color. Use the Dodge tool with a soft brush, Shadows as the Range, and a low Exposure. Keep Protect Tones enabled and build up the adjustment with light passes.
Do not move to Skin Texture to brighten a broad shadow. That layer holds the fine detail you are trying to preserve.
Zoom out and compare the complete portrait with the original. If the finished retouch is too strong, reduce the Skin Retouching group's opacity to blend the edited result with the untouched Background layer. Keep the Skin Texture layer itself at 100% so the two-layer reconstruction stays balanced.
Frequently Asked Questions
What Are the Apply Image Settings for Frequency Separation?
For an 8-bit RGB image, select the low-frequency source layer and use Subtract, Scale 2, Offset 128, with Invert unchecked. For 16-bit RGB, use Add, Scale 2, Offset 0, with Invert checked. Set the resulting high-frequency layer to Linear Light. Check the complete settings table above before applying either recipe.
What Blur Radius Should I Use?
Use enough Gaussian Blur to hide fine skin texture while preserving the broader shapes and tones. There is no single radius for every portrait. Judge the image at 100% view. For later local smoothing, preview both the selection's feathering and the blur so the adjustment blends into the surrounding skin.
Should I Retouch on the High- or Low-Frequency Layer?
Repair small texture flaws on the high-frequency layer. Correct uneven color and broad shadows on the low-frequency layer. A wrinkle or blemish may contain both detail and tone, so it can need a small correction on each layer.
When Is Frequency Separation Useful?
It is useful when a portrait needs separate control over texture and tone. It takes more setup than a quick spot repair and can look unnatural if overused. Use it for the specific areas that need work, then check the result against the original.
Conclusion
To create and use frequency separation:
- Duplicate the image layer twice and keep the original below the copies.
- Blur the lower copy until fine texture disappears.
- Select the upper copy and use Apply Image with the correct 8-bit or 16-bit recipe from the table.
- Set the upper layer to Linear Light and check that the group reproduces the original before retouching.
- Repair texture with the Healing Brush or Clone Stamp on Skin Texture, sampling Current Layer.
- Correct uneven tone and lighten broad shadows on Shadows & Color.
- Compare the complete result with the original and reduce the group opacity if needed.
The aim is controlled, natural retouching. Keep real skin texture and the shape of the face. Practice on a layered copy until choosing the right layer becomes familiar. For help with the photograph before editing, see our portrait photography guide.
For all the tips you need to start a portrait photography business, read our eBook – Profit from Portraits!