Macro food photography is a great way to capture the beauty and detail of your food. It’s also a great way to stimulate your viewer’s taste buds!
In this article, we’ll help you get started with macro food photography. Continue reading for everything you need to know, from choosing your subjects to which gear to use!
Prepare for Macro Food Photography
The Food
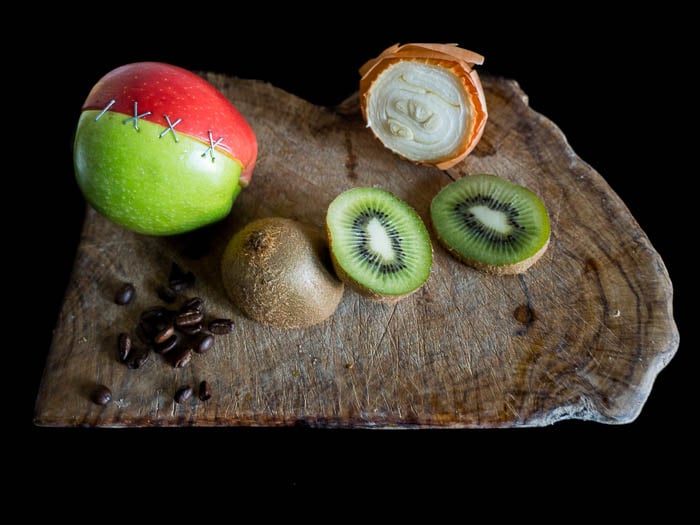
The first thing you need to do is go out and get some interesting food. Be sure to think out of the box and remember to be creative. Buy anything that attracts your attention with its external look and feel, but also anything that you think looks great on the inside, like kiwi fruits.
Vegetables, fruits, sweets, beans, and grains are all very interesting subjects. They’re also cheap, easy to find, easy to work with and come in a great variety of sizes, colors, shapes, and textures.
I will not focus here on dishes, such as risotto, or lasagne or meat. They are more difficult to work with. You need to prepare them, style them and work fast, as they rapidly lose their fresh look.
Creative food photography with various dishes is a more challenging subject you can tackle once you get a bit more experience in the field. For now, let’s stick with simple ingredients.
The Style
When you do close up or macro photography, the food is your subject and the only star of your image. Focus on it and don’t forget to be creative.
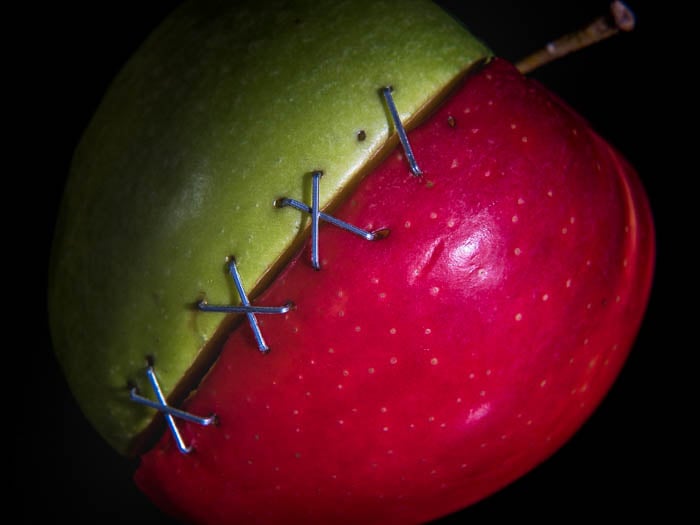
Frankenstein apple
Try to avoid over complicating your scene with many different elements. This will distract the viewer from the main subject and will make your image confused. A minimalist approach and clever use of negative space is often better, in particular if you do not fill the frame with the food.

While not technically a macro nor a close up, this photo is all about highlighting the large ripples of the salad with a slick style.
When you do close up and macro, you are working with very shallow depths of field. And most of your image will be out of focus.
Blurred objects are difficult to recognise and they can confuse the viewer. But you can also use blur creatively.
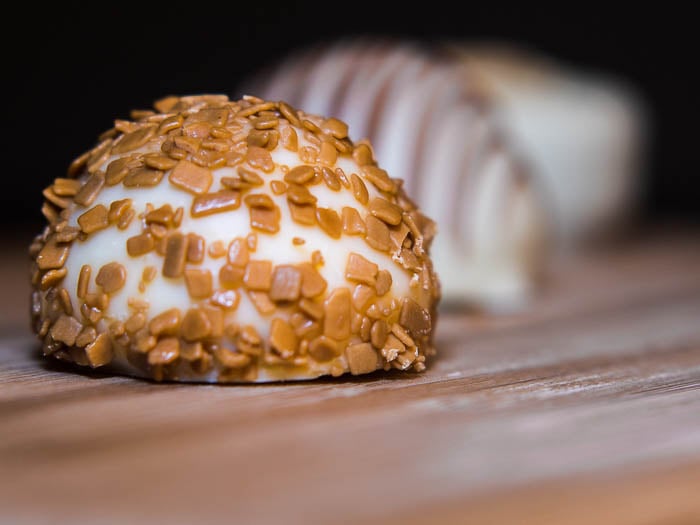
The pralines in the background are completely blurred but still recognisable. Instead of distracting from the praline in the foreground, they compliment the scene.
For the same reason, real macro photography, where you have high magnification, is better reserved for insects and other small, yet highly detailed, subjects.
With food, the interesting details and textures are many times larger than, say, a dragonfly’s eye. You don’t need the same level of magnification.
High magnification in food photography can, in fact, make it difficult to recognise what you have photographed.

Ginger root or random stick? Extreme close up and macro do not work well with large subjects.
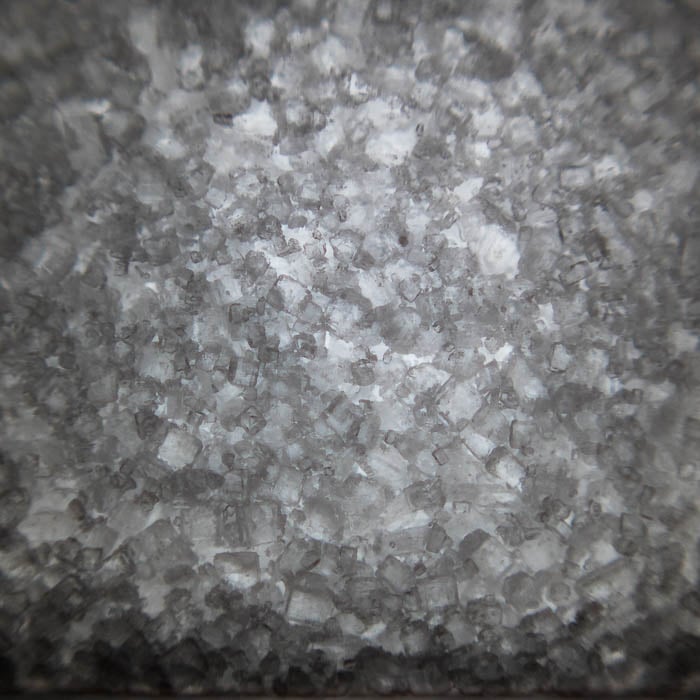
Extreme close ups and macros give far better results with grains of pepper, sugar cubes or salt crystals.
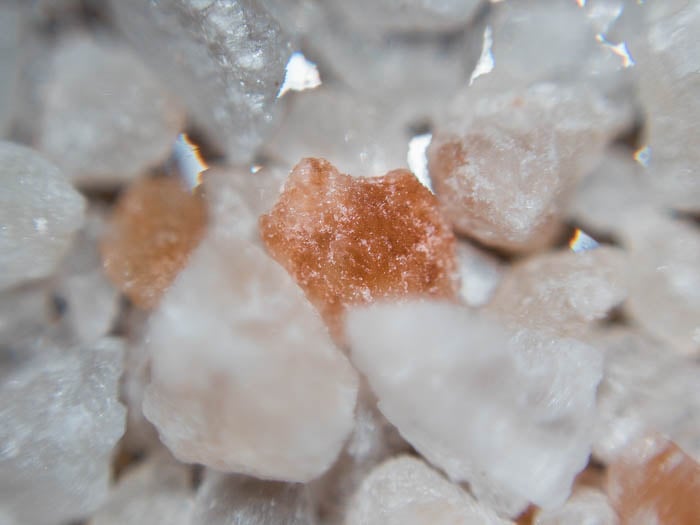
Salt crystals.
The Gear
?
The camera you will use is not important. You can use a good compact camera, a smartphone, a or a mirrorless camera.
If you have a DSLR, it is easy to work with the live view or to shoot tethered. You can see in real time the effects of moving lights around or changing your settings.
And you can use aids such as view magnification and focus peaking to achieve the perfect focus.
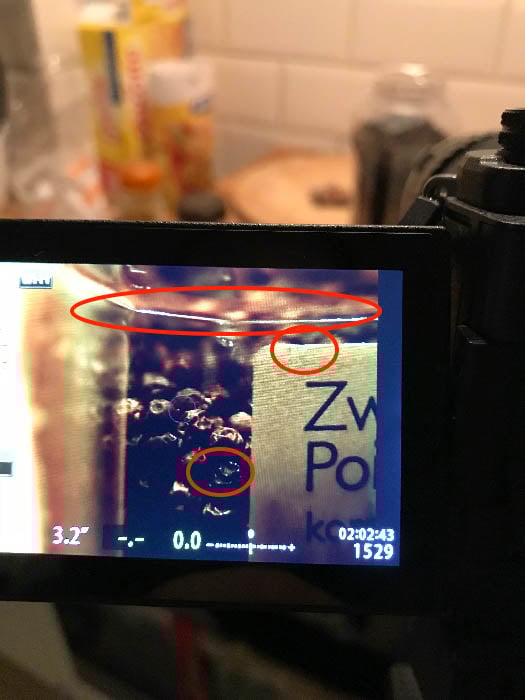
The bright borders and dots are the focus peaking indicators.
Which Lens?
If you use a cameraphone, the Olloclip macro lens is your best bet. Some compact cameras can mount filters via an adaptor so you can use close up lenses and macro converters, same as DSLR and mirrorless cameras. Otherwise, you can use a macro lens.
Macro lenses ensure the best image quality and high magnification, but they are expensive.
Close up lenses are like filters and you place them in front your objective. They are cheaper than macro lenses, and come in different strengths.
Close up lenses cut short the minimum focus distance of your lens, thus helping fill the frame with the subject. Different close up lenses can be stacked together to achieve the desired magnification.
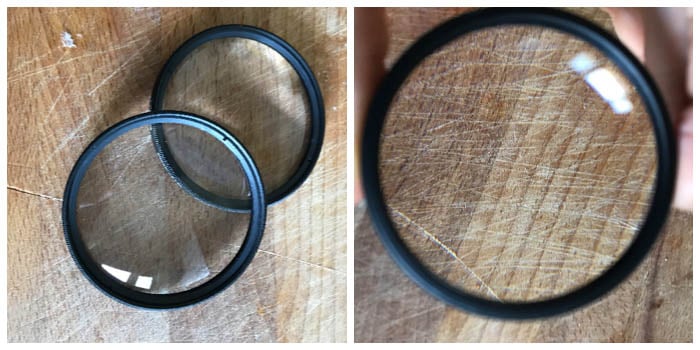
Polaroid Close Up lenses.
Polaroid Close Up lenses.
The main downside of close up lenses is that they are prone to image degradation towards the edges of the frame. The more they magnify, the more distortion and loss of quality at the edges.
One of the best close up lenses on the market are the Canon 250D and 500D. These are double lenses that are coupled so to reduce optical aberration towards the edges. The 250D is best used with normal focal lengths, while the 500D is better for telephoto lenses.
Extension tubes and reverse adaptors are other ways to achieve high magnification without using a macro lens.

The problem with extension tubes and reverse lenses is that you will loose the ability to control your lens with your camera. You cannot rely on your auto focus, the light metering can be off and the lens can be stuck wide open.
When I work with a reverse lens adaptor I like to use old legacy lenses. Those are fully mechanic so I can still control the aperture. I also prefer to use with a , as I can easily control magnification and focus.
A plus to inverted telephoto lenses that can zoom is that you can stay farther away from your subject.This is good if you don’t have a flash ring. Increasing the distance between the lens and your subject will let more light in.
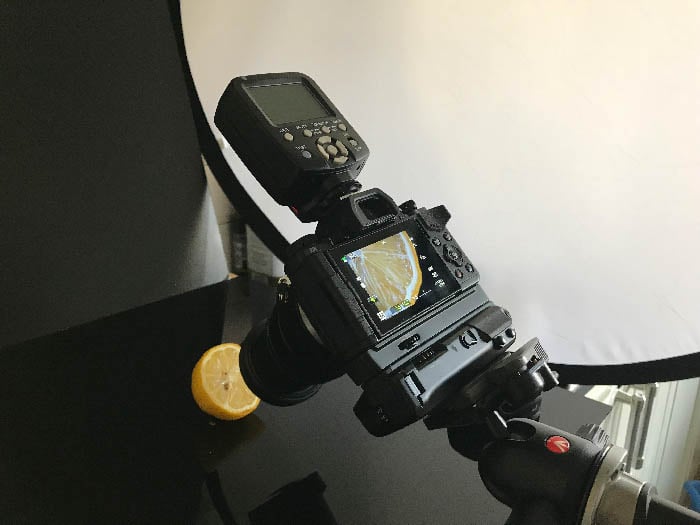
Being far away from the lemon, I can have enough ambient light to get the shot done.
Accessories
Tripod. A is a must have. I use a Manfrotto 055XPRO be, which is stable and has a central column. It is often said using the central column comes at the cost of stability. This is not a problem indoors with light equipment and it helps frame the shot.
Also, because the central column rotates 90 degrees, I can take photographs from directly above the food.
5-in-1 circular reflector. These reflectors are cheap and great. Remove the cover and you will have a diffusive, shoot through, panel that will help soften natural light from a window or flash.
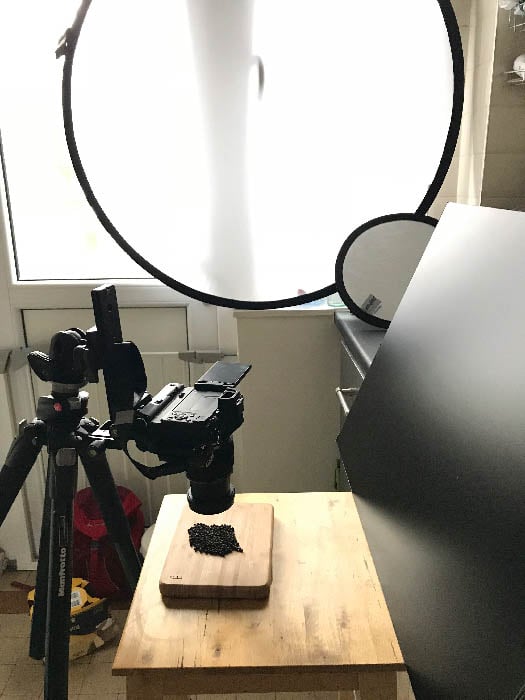
Smaller reflectors are great to fill the shadows by bouncing light back into the scene. You can also use multiple speedlights for this. It all depends on the look you want to give to your image.
Flashguns. If you don’t have enough ambient light, or if you want to give a different feel to your image, you can use normal speedlights. I use cheap, fully manual Yongnou speedlights with their radio trigger.
In this article you can find more info about the gear used in close up and .
Focus Stacking
As mentioned before, the closer you get to your subject, the shallower your depth of field. This means that if your subject is not flat, like a lemon slice, only a small part of it will be in focus. If you want more, you need to do focus stacking.
To do this, you should move your focus on a different part of the image and take a new photograph. Do that as many times as you need so that all the important areas of the scene are sharp in at least one photo.
You will then combine all these images in Photoshop (or similar software) to have a final image with more of the subject in focus.
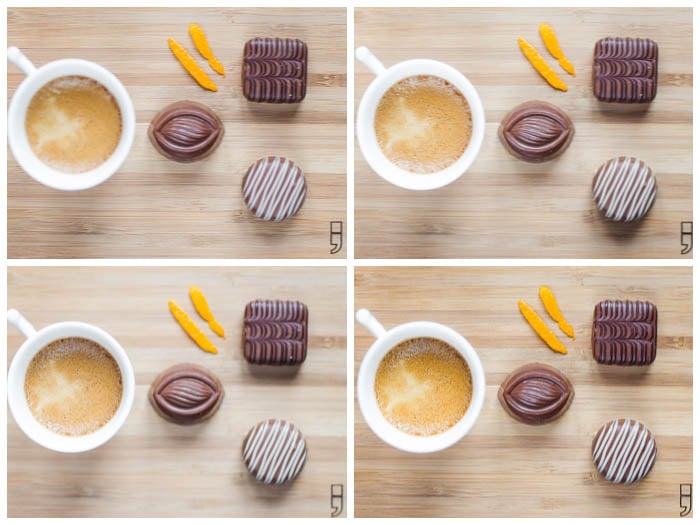
In these four images the focus is on different planes. They will be combined in a single image where all the elements are in focus.
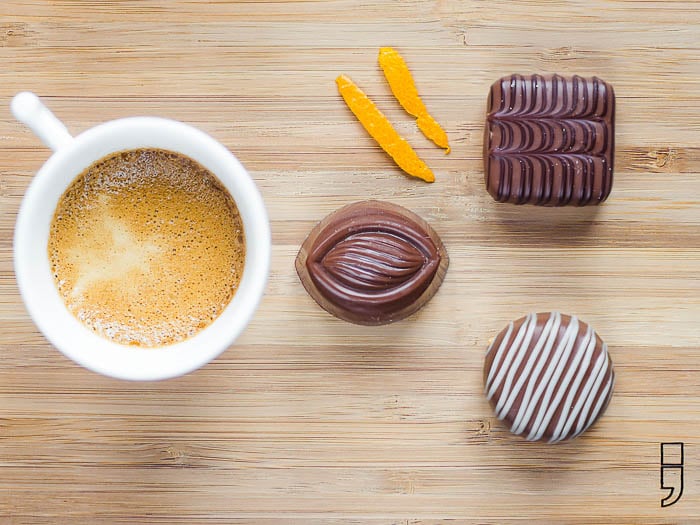
The result of the focus stacking.
Let’s now see what can be done with this kind of photography for different kinds of food.
Vegetables And Fruits
Veggies and fruits are the first subject you should focus on. You can get creative photographing them in many ways.
The Portrait
Veggies often present large features on their surfaces that are quite interesting. In this kind of images the subject is alone in the scene and you take advance of the large structures and their shape to create an interesting image.
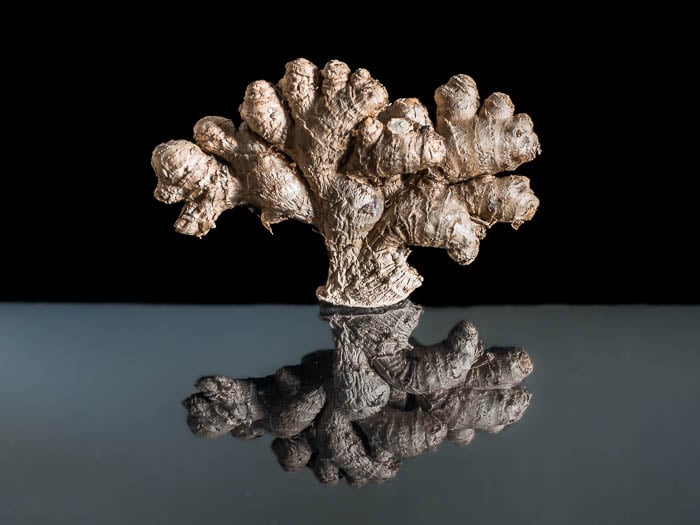
Try to capture them in a creative way, so that the image will not be trivial or boring. I like to use low key and reflective surfaces, like for the ginger root shown above.
In the image above, because the ginger reflection was darker, I had the idea to put a white panel on the scene so to split the background in two. Each part provided contrast with the brightness of the subject.
The Close Up
Small food can still be shown as a whole in a close up that is highly detailed.

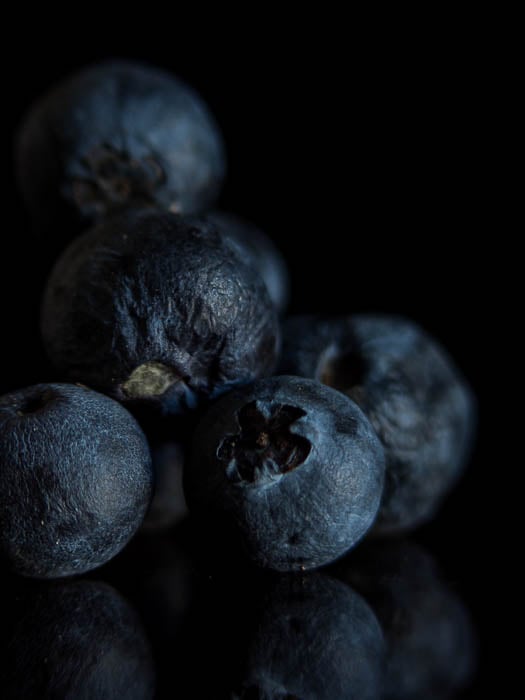
The Physalys above highly contrasts with the black background, but you can still place dark food on a dark background for moody images, like for the blue berry below.
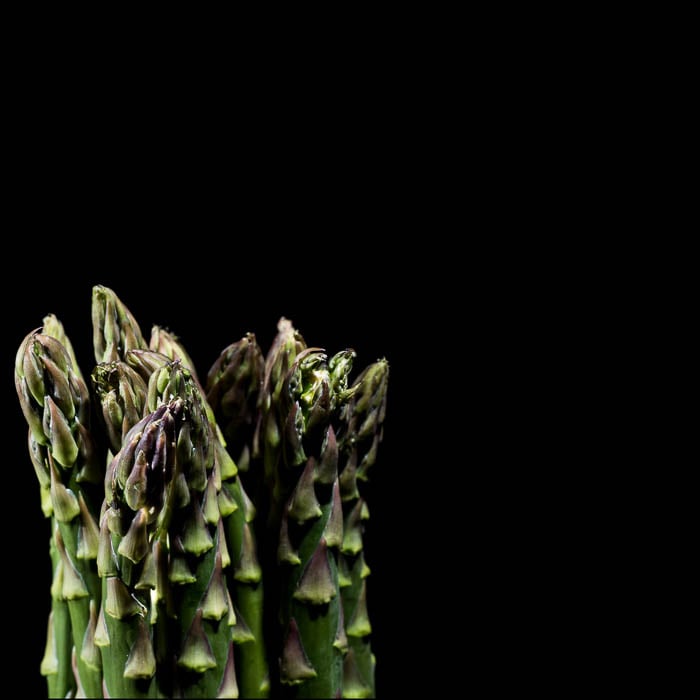
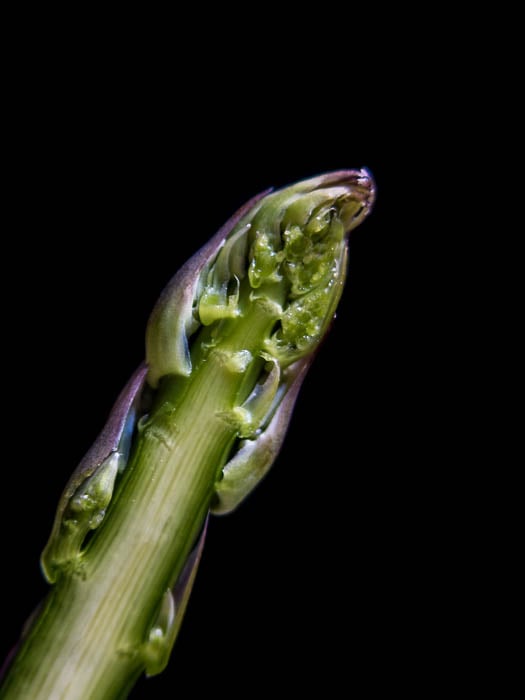
Finally, you can really focus on food texture, like I did for this asparagus. The use of negative space allows me to be more creative.
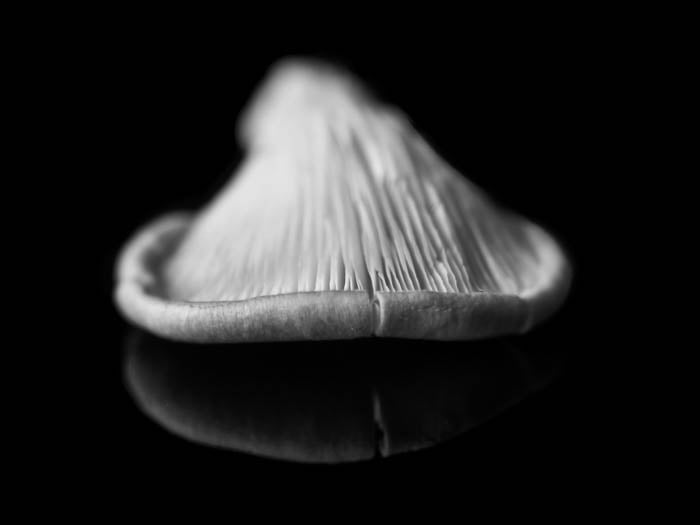
Mushrooms have nice, delicate and highly detailed umbrellas that are a joy to photograph.
Open Them Up
Cut your fruit or vegetables in half for a different image and choose how close to go depending on the structure and size of the inner part of your food.
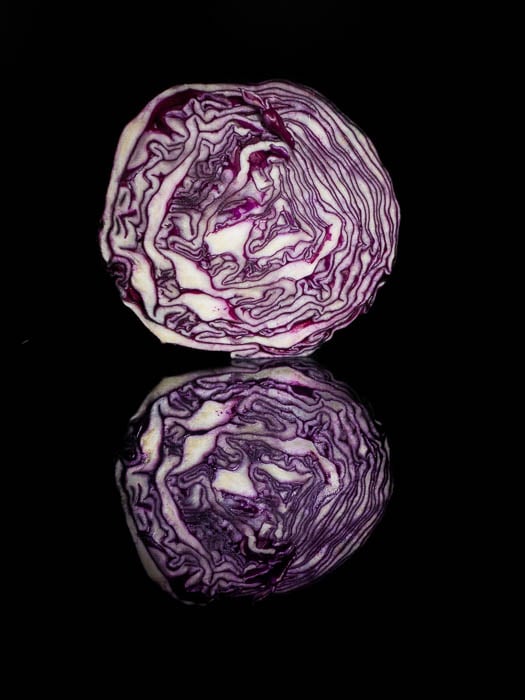
A red cabbage is known to be as boring on the outside as it is trilling and crazy on the inside.
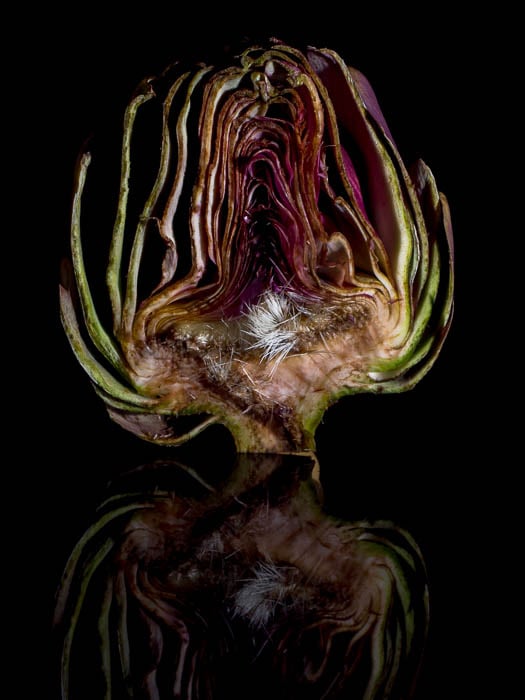
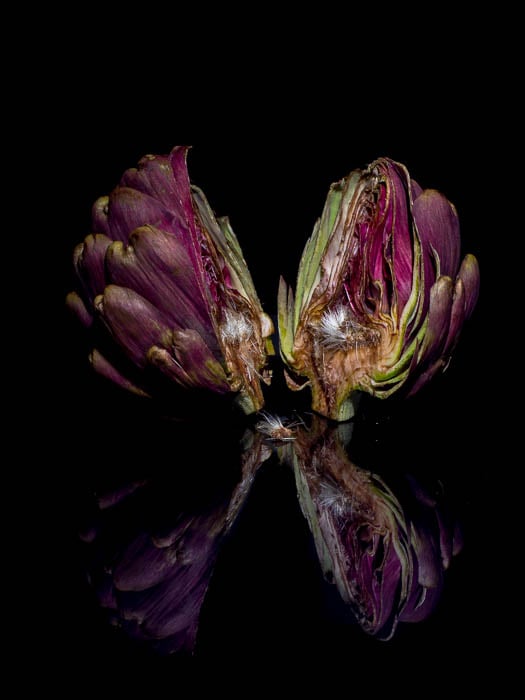
Artichokes are also quite amazing once sliced open. You can see all the different layers, the different textures of the core and the colors. To me, chiaroscuro is the best style to photograph them.
With smaller food you can get closer to capture the finest details, like I did with this asparagus.
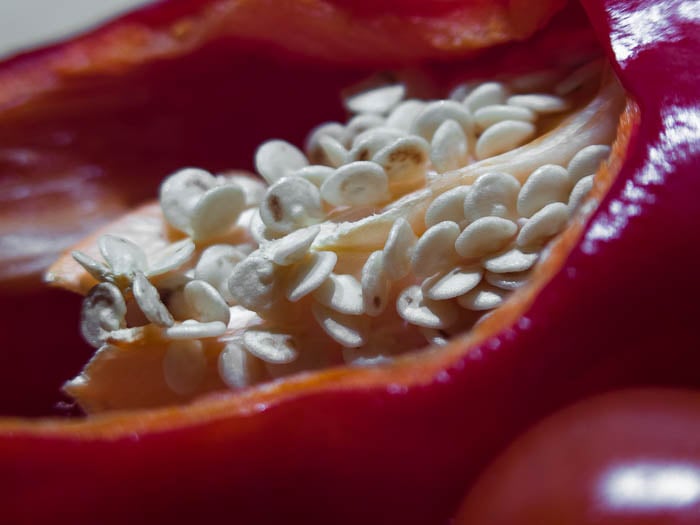
Red peppers are great too. My wife likes to eat them whole, without cleaning the seeds on the inside. Last night, when our baby started crying and she went to her, I took the chance to snap a quick close up.
You never know where your next image can come from, so be ready.
Be Creative
Don’t be afraid to be creative and experiment with things, even if they sound crazy or silly at first.
Take this photo, for instance. Physalis fruits give me the idea of a winter berry (I don’t know if it is true) and when I opened one up and the image was lacking interest, I gave it an extra punch by adding some snow in post.
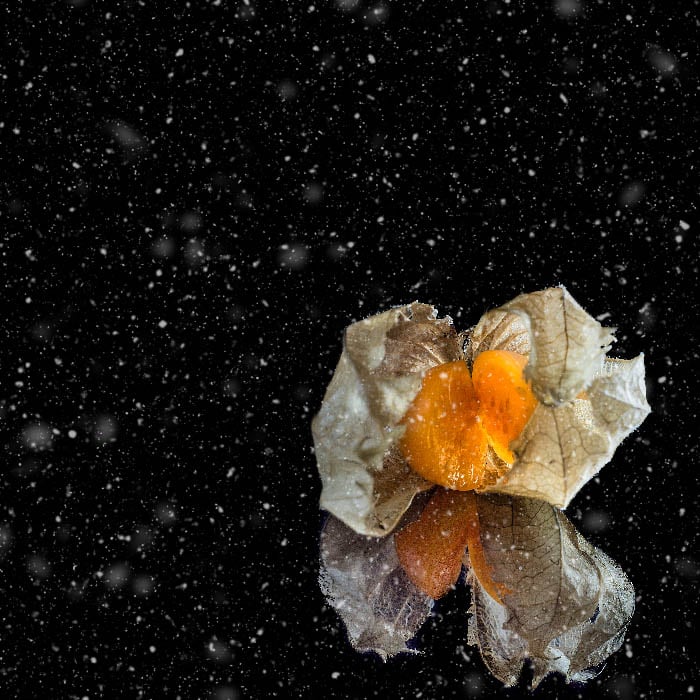
That’s better or, at least, more interesting.
Slice Them Up
Oranges, kiwis and lemons are great food to slice up and light from behind in a classic or more creative way.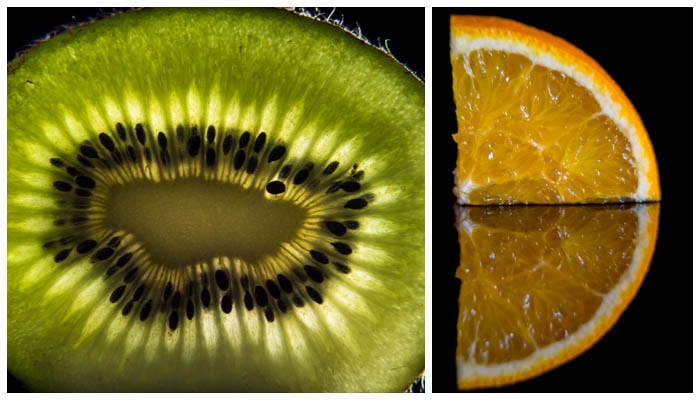
Because it is easy to recognise orange and lemon pulp, you can fill the frame with it and get an interesting, abstract image that does not confuse your viewer.
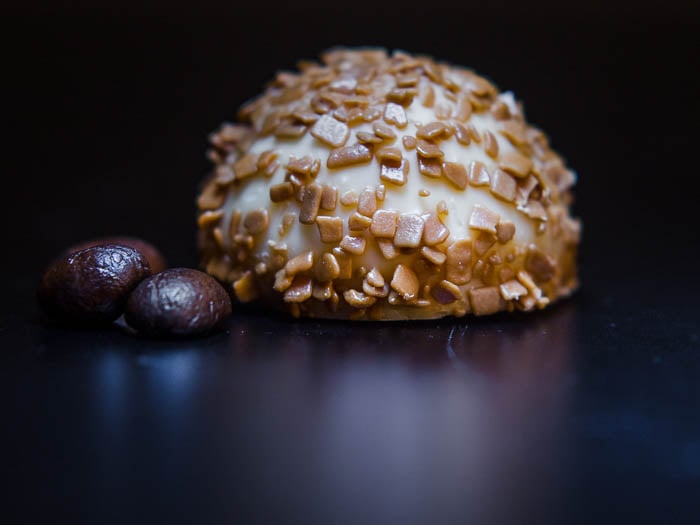
Sweets
Pralines and other small sweets are also an interesting and easy photography subject. They are small, have complex colors and decorations and you can eat them when you’re done.
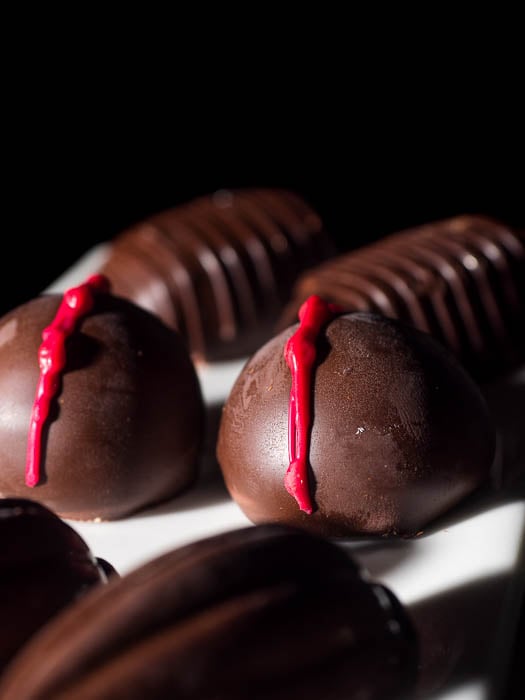
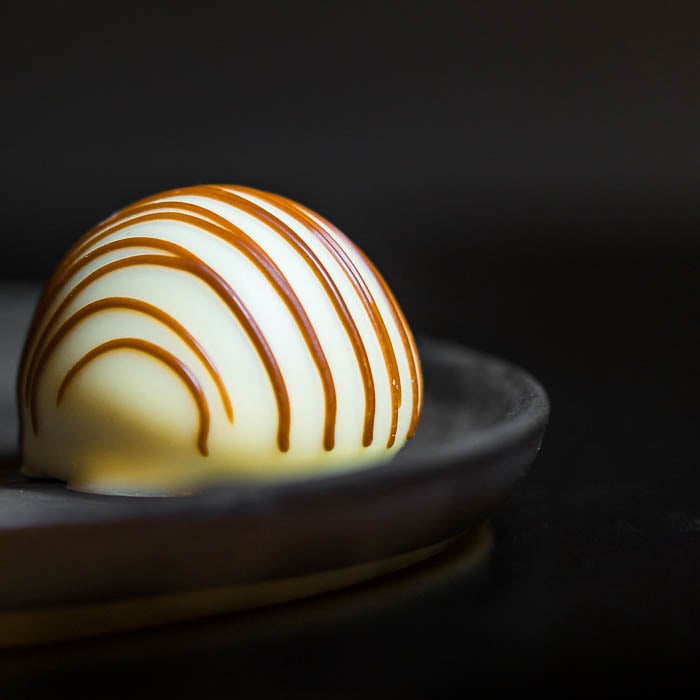
Pralines are often sprinkled with nuts, which makes for interesting textures.
When in doubt, take a knife and cut the food you’re photographing open. Should you find nothing interesting, just eat it and move on.
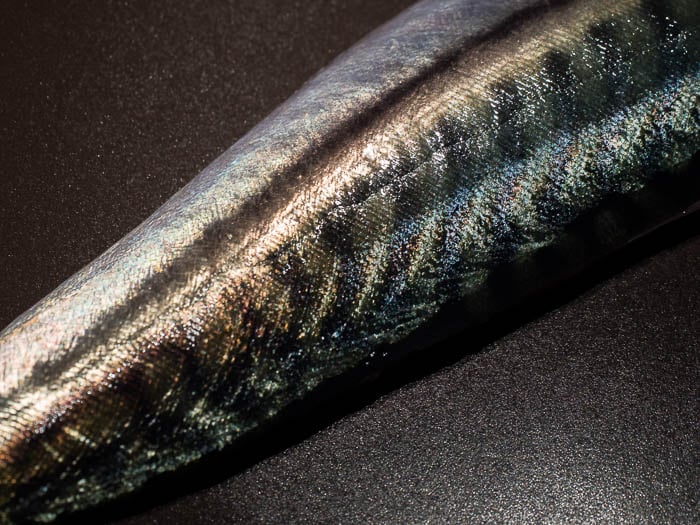
Fish
Raw fish is interesting because of the color and texture of the skin (or scales). Make sure it looks fresh or wet it with a bit of water if necessary.
Be aware of glares and hot spots from light reflections. A circular polariser filter can help to keep those at bay.
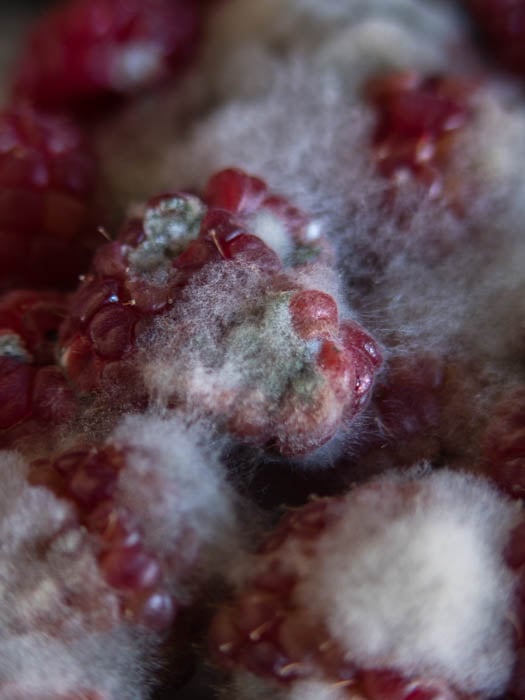
Mold
This one may seem weird and disgusting at first, but mould can be interesting. I forgot a box of red berries in the back of the fridge for quite some time and this is how I found them the other night while hunting for food for this article.
Small Foodstuff
Small ingredients, like coffee beans, black pepper and even sugar and salt crystals can be the perfect subject for a macro and extreme close up image.

The trick when you have more food in the image is to isolate a subject among the others you’re using for composition purposes and to fill the frame.
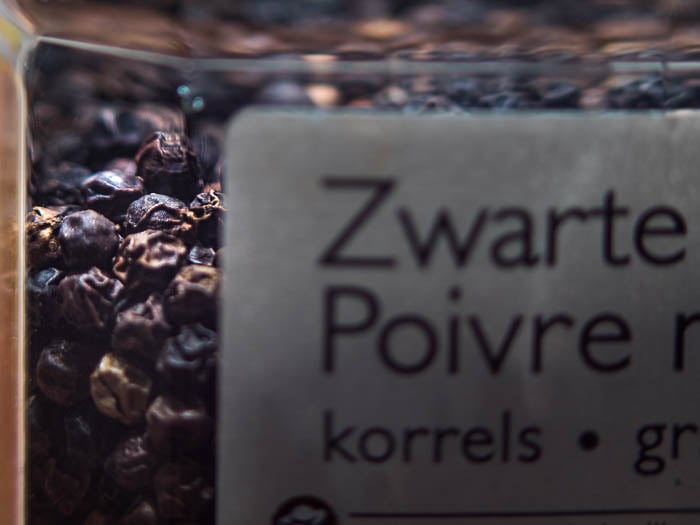
Grains of black pepper are always photographed as I did for the featured image of this article, but you can be more creative. Show them as they are in their packaging, for example.
Again, it’s important to isolate a few grains to give the viewer a focus point. You can do that by ensuring those grains are as sharp as possible and in post-processing you can dodge them a little to make them stand out. Our brains, in fact, are immediately drawn to the brightest areas of an image.
Once again, even with this kind of food you should always be curious.
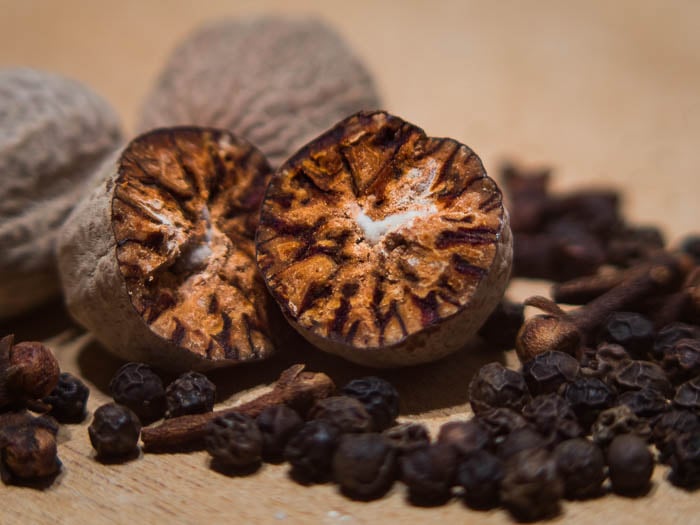
Do you know what nutmeg looks like on the inside? No?
Before this article I did not know either. Now I know and it looks amazing.
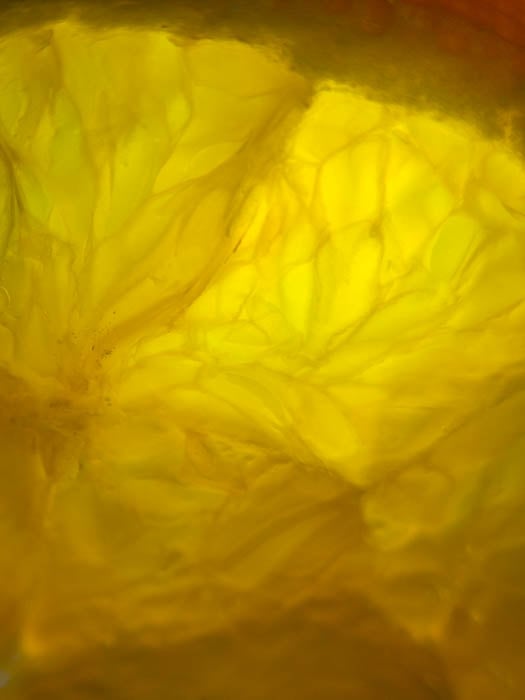
Backlit sugar cubes can reveal the tiny sugar crystals. In the image below you can clearly see how the 10x close up lens I used for achieve high magnification degrades the image, except at the very center of the frame.
As a tip, when you use high magnification, particularly with close up lenses, try to be as square as possible with your food.
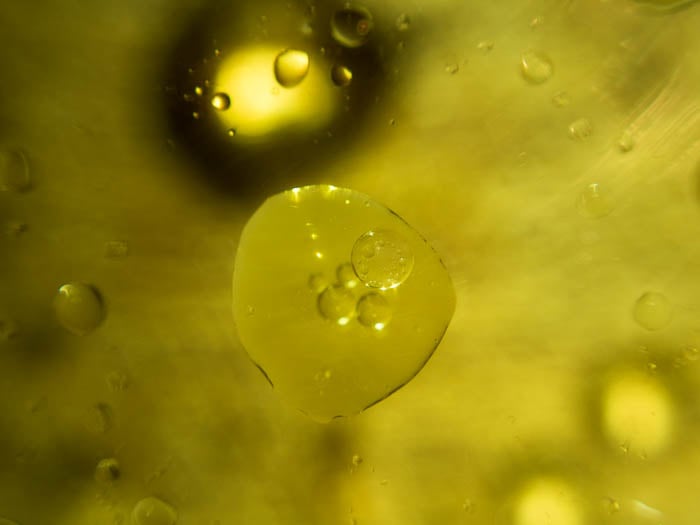
Water and Oil
A final example of interesting macro food photography is when you mix two liquids that are not miscible, like water and oil.
In the image below I put a small glass, with some water and few drops of olive oil, on top of the LED torch of my mobile to back light the oil bubbles floating on the water surface.
Conclusion
I hope this article has inspired you to have fun with food and you will give food macro and close up photography a try. It is also a good exercise to learn how to light your subject and readily see how different light setups highlight texture and details.
And it’s a great way to get out of a photography rut.
We have some more great macro photography projects to try in our article here. Enjoy!