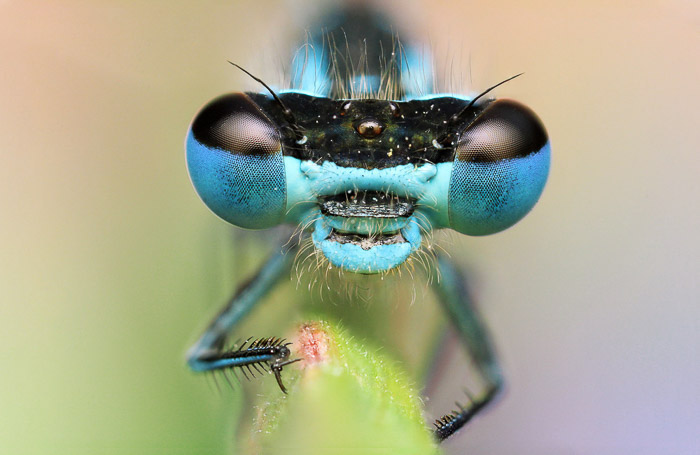
Many people find insects creepy. But for macro photographers, there might not be a better subject for insect photography. Creepy as they may be, insects are also very photogenic if you get close enough.
Trying out insect photography is like discovering a whole new world. Insects can be found in nearly all environments, including the woods, fields, lakes, swamps, homes, gardens, and streams.
Continue reading for everything you need to know about insect photography!
What Is the Best Time to Shoot Insect Photography?
Mornings
The best time to photograph insects is probably in the mornings. The temperatures are low and the insects are still asleep and less active.
And much like humans, it takes a little while for insects to become active. With the insects just beginning to crawl out into the world, you have tons of opportunities to shoot images. It is the perfect opportunity to practice your macro skills.
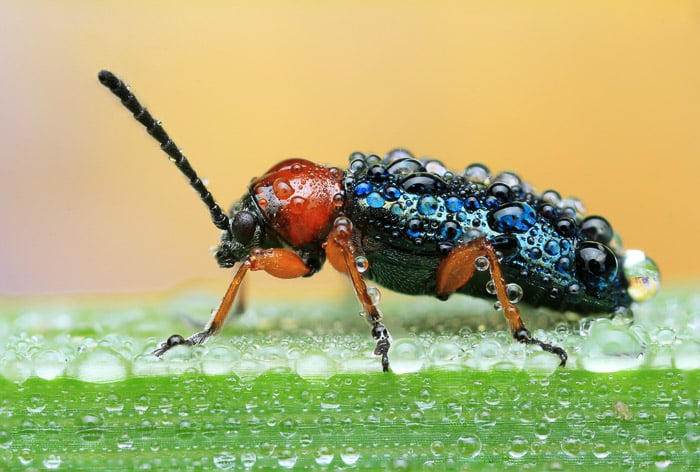
The other great thing about the morning is that there are often dew drops present. Sometimes, they’re on the insects themselves. Other times, they surround the insect. Wherever they are, dew drops in the mornings can add lots of interest to your macro images of insects.
It’s a good idea to head out into nature before the sun rises. This gives you time to find the insects and set up your gear.
Another great advantage of photographing insects in the morning is you get to shoot at golden hour. This is the hour after sunrise or before sunset when the light is ideal.
Daytime
In my experience, photographing insects during the day isn’t the best time. That's when insects are most active and this will make it difficult to approach them. Most insects regulate their body temperature by the surrounding environment.
That means they’re most active during midday when it’s usually warmest. If you want to photograph them during the day, shoot on a slightly cooler day. Autumn and spring are best for daytime insect photography.
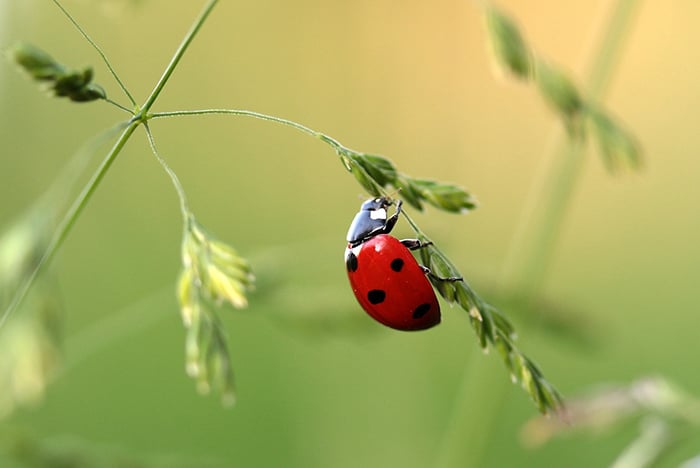
© Julian Rad 1/60 s, f/9, ISO 200
Evenings
Late in the evening, after the sun has set and temperatures have gone down, is also a good time to photograph insects. This is when the insects start resting. You also have magical light and beautiful colors thanks to the golden hour and blue hour.
Another reason to photograph insects when they’re resting is so you can use different perspectives and angles. Once the insects have settled down on a plant, they will stay there for the whole night. This gives you plenty of time to get the right shot of otherwise restless critters.

© Julian Rad 1/40 s, f/4.5, ISO 100
Respect the Insects
I have seen photographers use various methods to freeze uncooperative insects. This slows them down in order to get clear and sharp images, but that’s not how you should do it.
Never interfere with nature or harm the insect you are photographing. It will take longer to get your perfect shot, but you will be rewarded for your patience. Get up early and photograph the insects when they are lethargic and cooled down by the early-morning temperatures, not by a freeze spray.
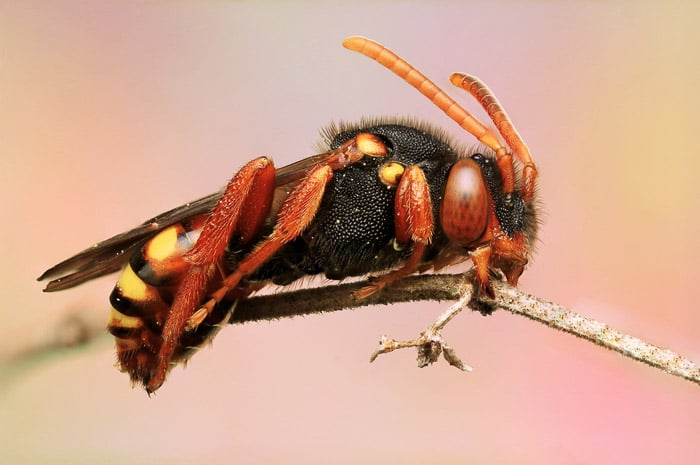
Best Insects to Photograph
Dragonflies
There are more than 5000 species of dragonflies living on this planet. This amazing insect has the ability to fly straight up and down, hover like a hummingbird, and catch their prey while flying. That's fantastic for action shots if you try to photograph them in flight. Like most insects, dragonflies are active when the sun is shining.
You can usually find dragonflies near bodies of water like lakes, ponds, streams, and wetlands. Dragonflies need water to lay their eggs, so they never stray too far from a source.
If you have a pond, stream, or lake nearby, that’s a fantastic starting place for finding dragonflies.
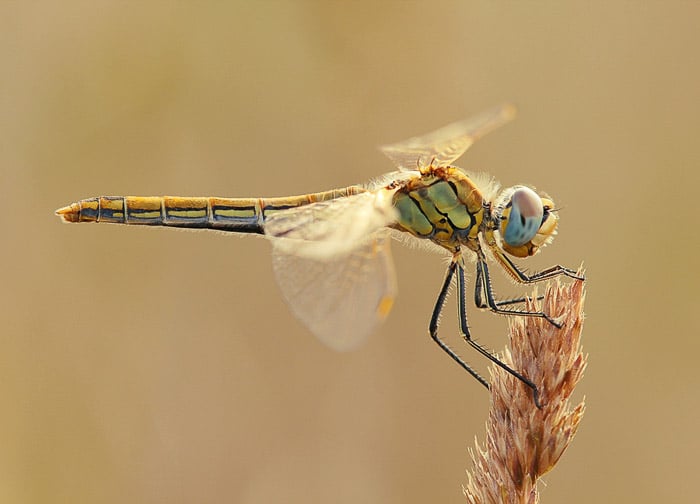
© Julian Rad 1/50 s, f/7.1, ISO 100
Butterflies
Beautiful wing patterns make butterflies one of the most photogenic insects. They can be found all over the world, and they’re most active during the warm months between spring and summer.
They love sunny places and areas with wildflowers. Simply take a walk and look for a flower field. You’ll be surprised by how many different butterfly species you find.
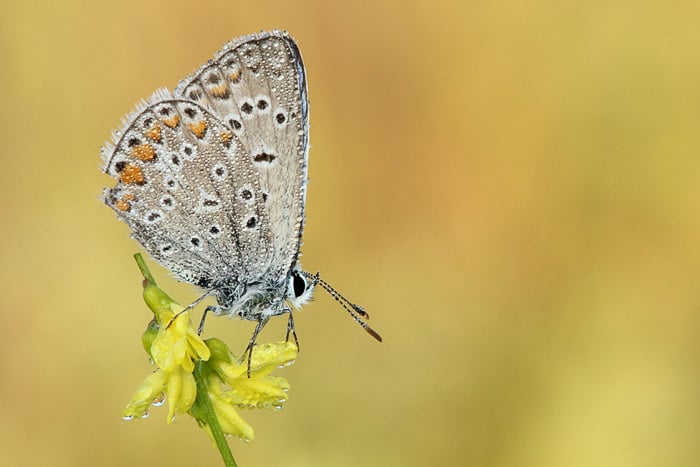
© Julian Rad 1/8 s, f/18, ISO 200
Bees
There are actually around 25,000 known species of bees all over the world. Bees are as photogenic as they are important for the environment. One of the ways they help the natural world is by pollinating plants. Looking for flower fields is a great way to find good locations for macro bee photography.
If you have trouble locating bees, place a bee hotel in your garden. Bee hotels provide a nesting location and offer protection from cold weather. Bees and other insects can also use it for hibernation. Using bee hotels is a natural and harmless way to bring insects to you. You can also spray flowers with a mix of sugar and water!
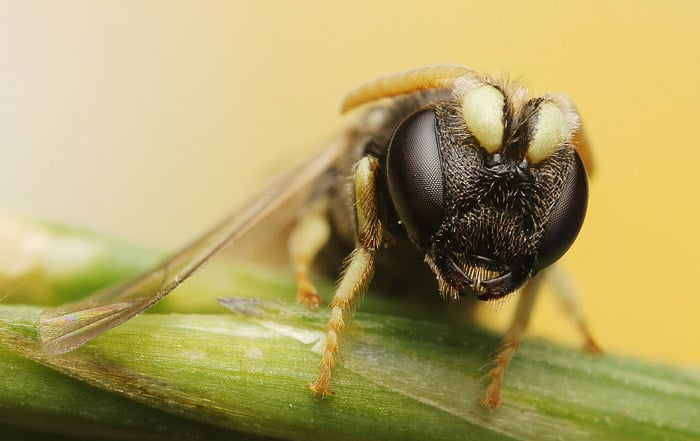
© Julian Rad 1/160 s, f/4.5, ISO 100
Equipment for Insect Photography
Macro Lens
Macro lenses offer different focal lengths, from wide-angle to telephoto. In terms of numbers, this could range from 15 to 200mm. For insect photography, I would recommend a macro lens with a focal length of at least 90mm. There should be enough space between you and the insect to not scare them off.
When I started with insect macro photography, I had a Canon 60mm f/2.8 lens. I quickly realized getting a macro lens with a longer focal length would be a good idea. The insects kept running away every time I tried to approach them!
The longer your minimum focusing distance, the lower your chances of scaring them off. Most insects’ eyes contain thousands of even smaller eyes called facets. Their excellent vision allows them to spot and react quickly to fast movements. A longer focal length will help prevent scaring them off!
If you already own a macro lens shorter than 90mm and don’t want to buy a new one, try using teleconverters. These can extend the focal lengths of your lens. They’re also great for isolating the insect by giving it more separation from the background.
Let’s take this example. If you are using a full-frame camera and shoot with a 50mm macro prime lens, the working distance between you and the insect would be about eight inches.
With a 180mm macro prime lens, you will have about 18 inches of working distance. That's a huge difference and is often very useful when taking pictures of insects.
If you shoot with a Canon camera, we suggest the Canon RF 100mm f/2.8 Macro USM and the Sigma 150mm f/2.8 APO Macro EX DG OS HSM.
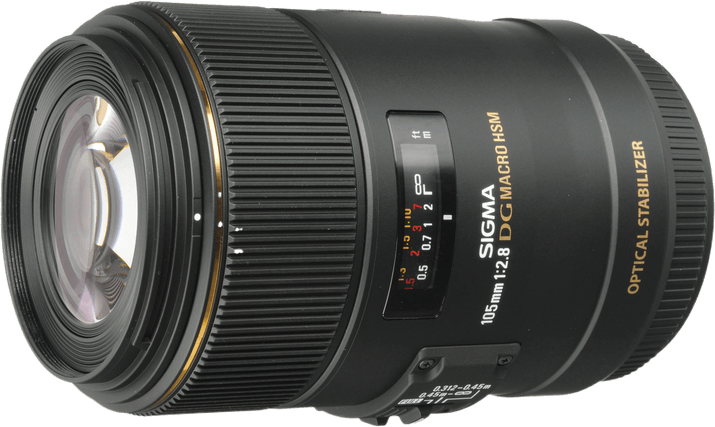
If you shoot with a Nikon DSLR, we suggest the Nikon 105mm Micro-Nikkor, the TAMRON SP 90mm f/2.8 Di Macro, or the Sigma 105mm f/2.8.
Remote Shutter Release
It can be quite challenging to get sharp results when taking images at high magnifications. A remote shutter release minimizes camera shake, giving you much sharper results.
The slightest camera movement can result in a blurred image. But this tiny gadget will instantly increase the quality of your insect macro shots. It's a must-have for every macro photographer. To see our top recommendations, check out our article on the best camera remote shutters.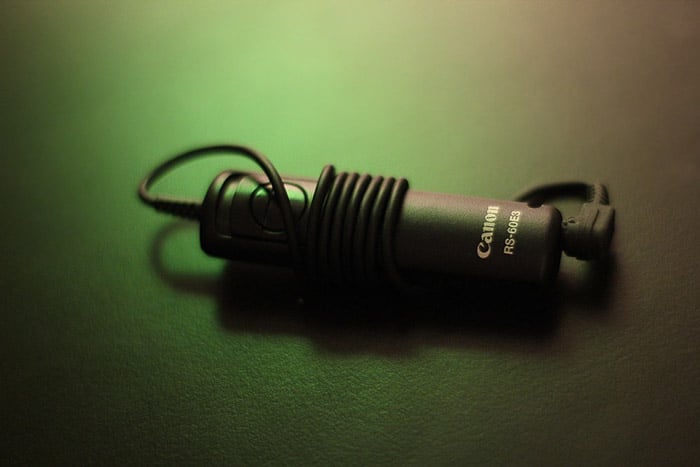
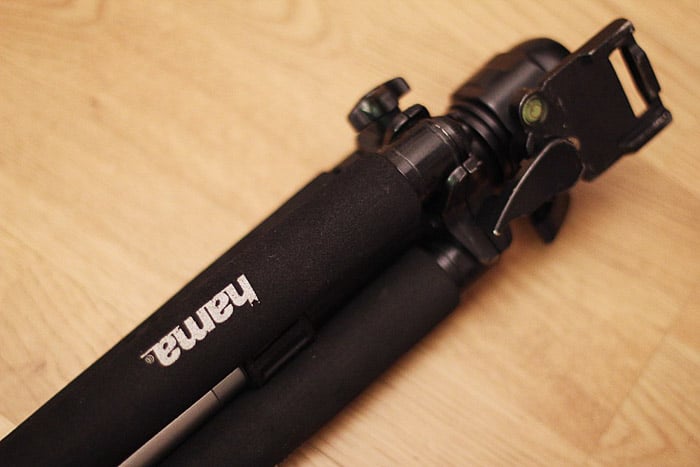
Tripod
The main reason for using a tripod is to avoid camera shake during exposure. It’s useful for insect macro photography when you’re shooting up close with a shallow depth of field.
Some tripods allow you to take low-angle shots, such as the Manfrotto 190XPRO. But if you want more options, here’s our article on the best tripod for macro photography. These are perfect for insect species who live on the ground.
Optional Accessories for Getting the Best Insect Shots
Flash
Flashes provide extra light that can help you use a faster shutter speed. But because they tend to be very bright, you’ll want to soften the flash with a small softbox. Otherwise, the harsh light from a flash may produce unwanted shadows on your subject.
A few years ago, I made a softbox for my external flash that helped me get amazing insect shots.
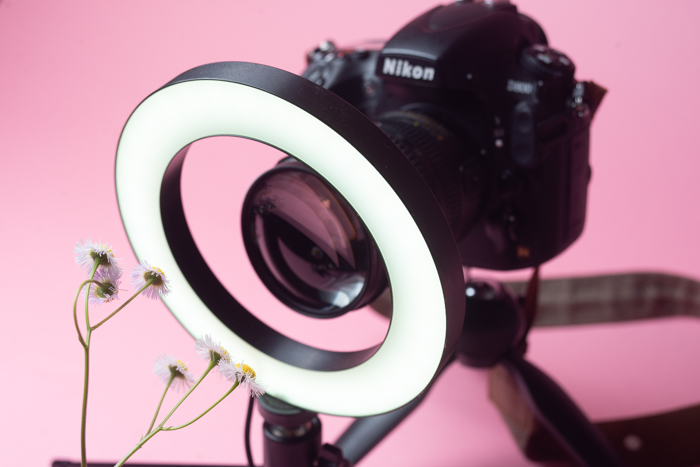
Another light source for macro photography is a ring flash. A ring flash is just what it sounds like. It’s a small, ring-shaped flash that sits on the end of your lens. That’s perfect for insect macro photography because the lens won’t block the light. Here are our top choices for the best ring flash.
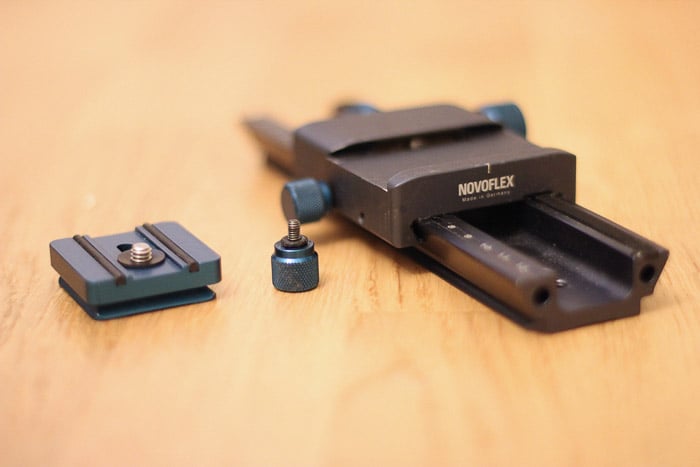
Focusing Rack
For high-magnification insect photography, I recommend using a focusing rack (also called a focusing rail). This will allow you to set the focus where you want it.
You can also use it to shoot multiple images of the same subject with different focus points. This allows you to stack these together in Photoshop to create an entirely in-focus subject.
Live View mode can be really useful while operating your camera on a focusing rack. It allows you to zoom in on your photo to fine-tune the focus. The Neewer 4-Way Macro Focusing Rail is our top choice for insect photographers.
Recommended Camera Settings
ISO
As a golden rule, always keep your ISO as low as possible when taking pictures of insects. Most modern cameras have a low ISO setting of 100 and can shoot noise-free images up to around ISO 1600.
Shutter Speed
Unless you’re purposely using a slow shutter speed, use the fastest shutter speed possible. The less your shutter stays open, the less movement can happen during the exposure of the image. As a result, your image will be sharper.
If you’re shooting in low light and need to use a fast shutter speed, increase the ISO to compensate. Experiment with ISO levels, but try to avoid too much grain or noise in your images.
Aperture
Use an aperture between f/5.6 and f/11 to maximize the depth of field and capture all the details of the insect. You can also use focus stacking as another way to maximize the depth of field.
Because the depth of field is already so shallow in macro photography, avoid using apertures smaller than f/5.6.
Autofocus
Your autofocus might not work correctly when taking insect photos. You are at such a close range to the insect that your lens might have trouble finding the focus. In this case, just use manual focus instead.
Conclusion—How to Shoot Insect Macro Photography
Insect macro photography brings you into a tiny new world of wonder. And with the right techniques and gear, you can take incredible macro images to wow your viewers!
Go to your local field and explore the many different insect species you find. Insect photography can lead to some incredible pictures of the world these little creatures live in.