If you’re having trouble getting your macro photography shots to be as sharp as you’d like, adjusting the focus may help. Here are a few tips on how to master macro focus.
What Makes Macro Focus with a Macro Lens Special?
As a food and still life photographer, I can attest to the magical qualities of a macro lens.
In fact, if I could only have one lens in my kit, my Canon 100mm macro lens is the one that I would choose.
I use it to shoot close up. And I can move back from my subject and get beautiful food portraits. All without the distortion that some other lenses would give me, especially when shooting at a 45-degree angles.
In this case, I’m not actually using the macro capabilities of the lens, but that’s another story.
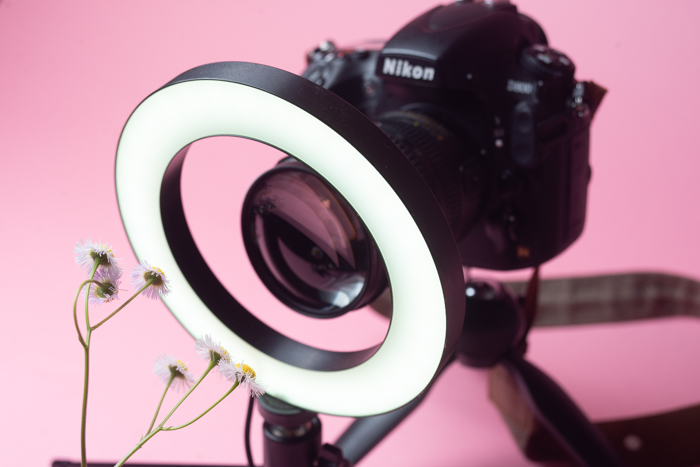
A macro lens gives you the ability to shoot with short focusing distances. It allows you to take sharp photos of very small subjects. A true macro lens has a magnification ratio of 1:1 or greater, and a focusing distance of around 30cm.
This means that the ratio of the subject on the size of the sensor plane is as large or larger as your subject. This magnification allows you to take super close-up shots of tiny subjects like insects.

A food portrait shot with a 100mm macro lens.
Focal Length
It’s important to know how the focal length of your lens and your camera type will affect your results.
You might be shooting on a camera with a cropped sensor. Then your macro lens will behave differently than it will on a camera with a full frame sensor. When I use a 60mm macro on my Canon camera with a cropped sensor which had a crop factor of 1.6, I get a focal length of about 80mm.
When you shoot on a full frame, the focal length is as stated. A 100mm macro works like a 100mm macro. You don’t get that much tighter crop as you do with a cropped sensor.
Minimum Focus Distance
The minimum focus distance of a lens determines how close you can be to your subject and still focus for super sharp images.
The longer your focal length, the farther away you have to be to focus on your subject. My Canon 100mm f/2 macro lens has a minimum focusing distance of 1.02′ (31 cm).
This means that I need to be at least 1.02′ (31 cm) away from my subject to get proper focus.
The Plane of Focus
It’s important to understand the concept of plane of focus and how it affects depth-of-field. This will help you deal with issues around focusing in macro photography.
The plane of focus refers to a two-dimensional imaginary plane that lies parallel to your camera’s sensor. It represents the theoretical plane of sharpest focus and lies in the depth-of-field.
When you change the angle or position of your camera, the plane of focus remains relative to your sensor. The subjects in the plane will be in focus. The subjects or areas outside of it are your depth-of-field. The degree to which your subject is out of focus depends on your aperture and relative distance.
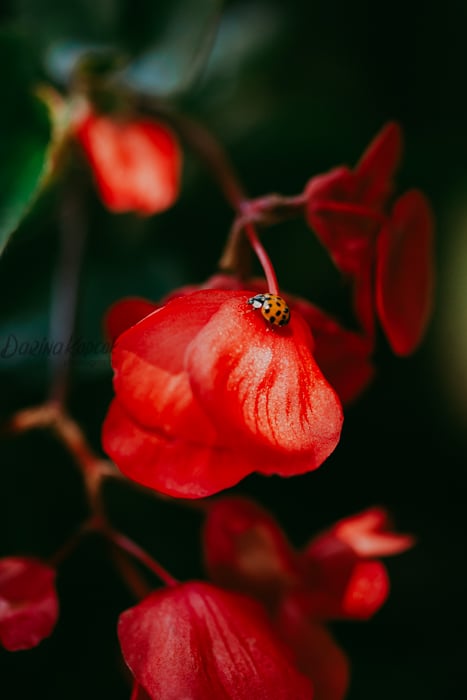
Only the ladybug is sharply in focus.
Depth of Field
The depth of field (DOF) is the distance between the nearest and farthest objects that are in sharp focus.
The depth of field is determined by the focal length of your lens, the distance to your subject, as well as your aperture.
The shorter your distance from your subject, the “thinner” the depth of field will be.
If you want to shoot an image where everything is in focus, shoot with a much narrower aperture (high f-stop).
You might have a subject shot with a macro lens at f/8 (like the ladybug above). This could give you a much shallower depth-of-field than you would get at f/8 on a regular lens.
When I shoot my food photography, I often shoot around f/5.6 when using my other lenses, such as my 50mm or my 24-70mm.
At these f-stops on a macro lens, I get a very shallow depth-of-field. I need to go up to f/16 or higher to get enough of my subject in focus.
It helps if the majority of your subject is on the same plane of focus. If not, you might want to shoot three images with different focus points. You can then use focus stacking in Photoshop to get an image that is sharp enough throughout.
Many people use too small of a small depth of field when shooting macro photography. This causes only a very specific part of the subject to be focused. The rest of the subject and image appear blurry.
This is a depth-of-field issue rather than being a problem with the autofocus.
Manual Focus
When working at high magnifications, you cannot rely on the autofocus of your lens. You need pinpoint accuracy to focus for macro shots.
Macro lenses don’t have the best autofocusing capabilities, especially at high magnifications. The lens will continually pan back and forth, trying to lock focus. This problem is worse in low light situations.
Macro photography magnifies the details in your subjects. When you magnify your subject, you also magnify any mistakes. The smallest error in focusing can make all the difference between a great picture and a bad one.
If you’re having difficulty focusing, move the camera backwards or forwards. As soon as the plane you want to be sharp comes into focus, snap the picture.
Check out our post on manual focus for more information!

How to Get More of Your Frame in Focus for Macro Shots
Depending on what you’re shooting, you might want much of your scene in focus.
Increase the depth of field by shooting at a smaller aperture (higher f/stop number).
The depth-of-field is thinner at shorter distances. Sometimes changing the aperture won't be enough to bring your entire subject into focus.
In this case, you need to change your angle for a different plane of focus.
Conclusion
Last but not least, for super sharp macro photos, use a tripod.
In macro photography, the subject is usually close to the lens. When a lens focuses very close to a subject, some of the light entering the lens can be lost to the side of the camera’s sensor.
Your camera may use a slightly longer shutter speeds to compensate for this loss of light. Longer shutter speeds are harder to handhold and can lead to camera shake.
A tripod will help you achieve sharp photos by keeping your camera stable. This will allow you to shoot at slower shutter speeds without the dreaded camera shake.
It will also bring more light into your camera and give you the ability to stop down with your aperture.