If you're looking to improve your food photography, using natural light is a great place to start. It can be tricky to work with natural light, but with a bit of practice, you can create beautiful photos that capture the essence of your food. Here are a few tips for natural light food photography.
Natural Light Food Photography: Capturing Delicious Dishes with Light Sources
The first thing to consider when shooting in natural light is your light source. Basically, we can say that daylight is the light source in general. Technically speaking, in photography the light source depends on where you are shooting and how you are shooting.
When you are shooting outside in a vineyard, the sun is your light source. However, if you are shooting indoors by a window, as most of us food photographers do when working with natural light, then the source of your light is not actually the sun but the window. The window becomes the light source because it directs the way the light comes into the room.
If you put a diffuser in front of the window, then the diffuser becomes the light source, as it is scattering light in order to soften it. It also cuts down on the amount of light reaching your subject.
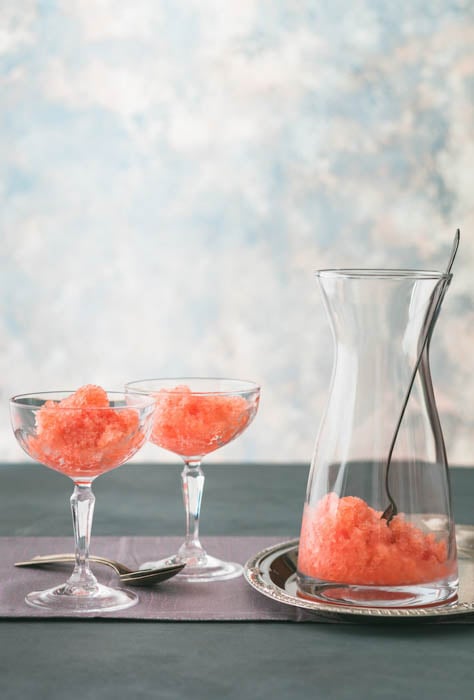
Knowing how you want the final result to look is an important factor when deciding how to modify natural light. If you want your light to be soft but bright, like in the image of the watermelon granita below, you will need to diffuse the light. If you are working with glassware, you will likely need extra diffusion in order to manage reflection and glare.
However, if you want the light to have a harder quality, then allow it to hit your subject directly. Or skip the diffuser in favour of a bounce card to help you direct the light to where you want it to fall. Hard light is stronger than soft light and accentuates shadows and contrast. It is used for a more dramatic effect.
Considering the mood you want to convey in the photo is a good way to decide if you will use hard or soft light.
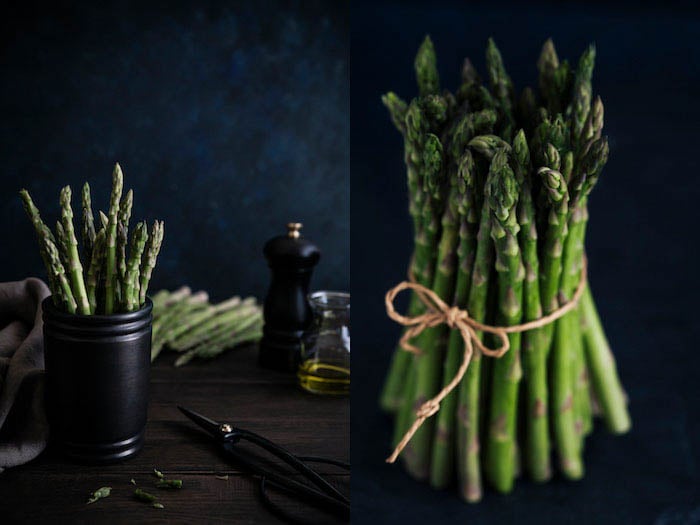
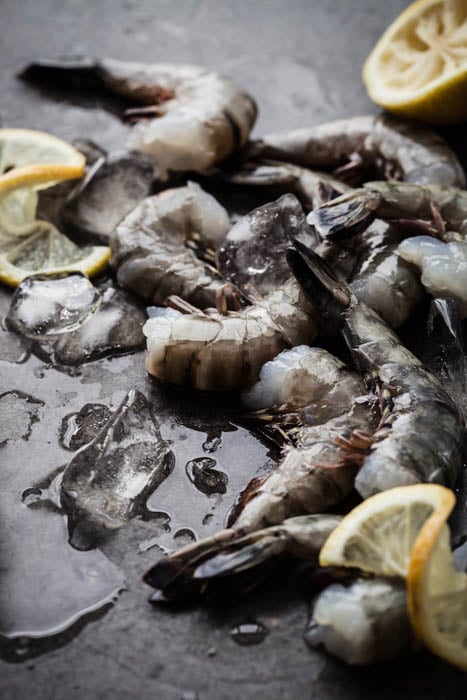
The images below were shot outside with no diffusion. I wanted a bright scene with a lot of contrast and sharp highlights. My light source was the sun.
Light Direction
Natural light is all around us, but when talking about photography, the light direction either comes from the front, the side, the back, or the top.
When shooting portraits, lighting coming from the front looks soft and beautiful. When it comes to food photography, it is the least appealing light direction to work with. It rarely looks good. It usually creates a shadow on your food, and can cause the image to look flat and lifeless.
Side lighting is light that comes in from the left or right side. If possible, I recommend lighting your food scenes from your left. In the Western world we read from left to right. Therefore, our eyes will naturally enter the brightest part of the image the part we are naturally most drawn to.
Backlighting is when you position your light behind the food. It is used a lot in liquor and beverage photography. It can be difficult to light your set evenly with this light direction. The front can look too dark and the back too bright.
However, it works very well to highlight the liquid properties of food, so is a natural go-to for dishes like soups and stews, as well as syrups or sauces or any items that glisten.
Top lighting is when your light source is coming from above. As with front lighting, it can cause the image to look quite flat and isn’t always very flattering. You can see this style of light used a lot in 80s food photography.
Generally, images taken with the light source coming from above will lack the shadows and dimension that is required to make food look appealing.
One of my favourite light directions that I should mention is side-backlighting. Here your light is positioned at around 10 or 11 o’clock if you were imaging the face of a clock. To get this angle in natural light food photography, you would tilt your surface at an angle to your window, rather than placing it parallel to it.
You can also put your table so that the light falls somewhere in the upper left hand corner of your set.
Amount of Light
The distance between your light source and your subject is extremely important. In photography, we apply the principle of inverse square law to our lighting. In terms of physics, the power of light is inversely proportional to the square of the distance.
So if we take a distance of 2 and square it, we get 4, the inverse of which would not be half of the original power but one-quarter.
Mathematics aside, inverse square law basically means that the intensity of a light source will decrease as you move the light away from your subject. When we are shooting with natural light, understanding this principle helps us understand how the amount of available light works over distance.
Doubling your distance from a light source will give you quarter the power, not half the power. Tripling it would give us 1/9th of the power.
Therefore, how close we are to the window when shooting with natural light will make a big difference in the amount of light hitting your scene.
It’s also important to note that fall off happens more quickly with natural light than with artificial light. When you are shooting with a speedlite or strobe, you are dealing with a strong explosion of light.
A good photographer can mimic natural light to the point where most people could not see the difference. However, sometimes the gradations in the light are not quite as subtle, as artificial light does not fall off as quickly.
Fill Light and Shadows
Fill light refers to the amount of light that is bounced back onto your subject. It is used to eliminate or soften shadows caused by the main light source. This is a way of controlling the contrast in food photography.
Most editorial food photography that is, images for cookbooks and magazines uses only one light source. This creates a natural look with one set of shadows. By changing the direction and intensity of these shadows, you can create a variety of lighting scenarios.
A larger, closer light source will give us softer shadows with softer transitions or gradations. If you want more striking shadows, a smaller light source further away will provide that. This can mean that you put your table farther from the window than you ordinarily would.
Unless you are shooting a dark and moody scene, many of your natural food photography set-ups will include a white bounce card opposite of your light source to bounce the light back onto the food.
Lately, there has been a trend on Instagram and such for a type of moody food photography where the whole image looks underexposed. But food looks more appetising when it is relatively bright and well lit or at least the portions of it that you want to draw attention to.
Quite often, what will distinguish one food from another is contrast and how they work with the shadows in their images.
Tools
Think about shooting outside on a cloudy day. The clouds act as a giant diffuser, filtering the harsh rays of the sun as they hit your subject. A softbox acts in much the same way. With natural light food photography, we want to mimic this effect.
A few diffusers in different sizes should be an important part of your food photography arsenal. When working with strong sunlight, I like to use a very large diffuser. This keeps too much light from spilling on my scene and creating any hard shadows.
Diffusion softens the light and affects how much light hits your set-up. You also need some tools to manage those shadows and direct the light to where you want it.
This is where reflectors come in. I always have sheets of black and white foam core on hand. I use them either to reflect the light or in case of the black, to create more shadows and contrast.
It is also useful to have a set of professional reflectors. These are fold-able discs that come with gold, silver, white, and black material. You can use them interchangeably, depending on your lighting scenario. The gold reflector can be used to add warmth to food, while the silver can brighten it.
You don’t always have to have professional equipment on hand in order to sculpt your light. When you’re on a shoot, it sometimes means thinking on your feet. You can use items like menus, a napkin, or even a newspaper to block or bounce light.
I often use small cosmetic mirrors placed out of frame to bounce a concentrated part of light on a specific part of my food. The trick is to get creative. When you know how light works, you can find a tool in a variety of items to help you get that shot.
Color Temperature
Lastly, it’s worthwhile to remember that color has a temperature that is different at different times of day. It also varies from season-to-season, and is opposite in the southern hemisphere to what it is in the northern hemisphere.
When shooting food in natural light in the northern hemisphere, it is ideal to work with a northern facing window. The opposite is true if you live in, say, South Africa.
When you shoot earlier in the day, the light will be “cooler” and have a value more towards blue. When you shoot later in the day, the value of the color temperature will be “warmer”. This means it will contain more red. This is where golden hour photography comes in.
Portraits and landscapes shot before the sun sets have a beautiful glow to them due to this warmth in the color temperature. A useful exercise to understand color temperature and how it affects the images you take is to shoot the same scene every hour on the hour throughout the day and compare the results.
Many food bloggers shoot at the same time every day. This allows them to get a consistent result that matches their style.
You will need to adjust the white balance settings on your camera to accommodate changes in the color casts you will see on whites and neutral tones in your images. Ideally, you would set your white balance manually before a shoot, or take a shot with a grey card and adjust the white balance in post-production.
A grey card is a vital item to utilise in your process to ensure that your colors are turning out true to life and reflect what your eye is seeing in the scene.
Conclusion
Assessing light and figuring out how to use it in food photography is a process that involves exploring and discovering. There are so many variables that come into play. But understanding light and how it works is the foundation of creating great images.
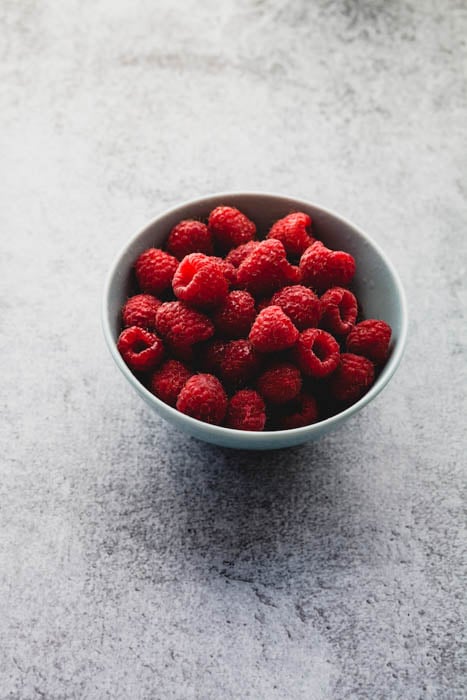
The next time you shoot that chocolate cake or bowl of raspberries, take your time and play around with the distance to your window. Try bouncing or blocking the light with some white or black cardboard.
Take note of the various ways your light hits your scene and what makes the most sense to best present your subject. The more you take care to understand why you are getting the effect you are getting, the more it will come naturally to you to create images that make the most of your light.