Neon signs are retro and cool, but not everyone has the tools to blow glass and safely handle neon gasses at home. In this step by step tutorial, we show you how to make a neon sign in Photoshop, which is both quicker and safer.
Most of the work will be handled by the powerful layer style control window. Using layer styles is easy and fun, and learning to use them can transform your use of Adobe Photoshop.

How to Create a Neon Sign in Photoshop
Here are the steps to create a neon effect in Photoshop. We are using text, but you can apply the techniques we use to any layer in any image.
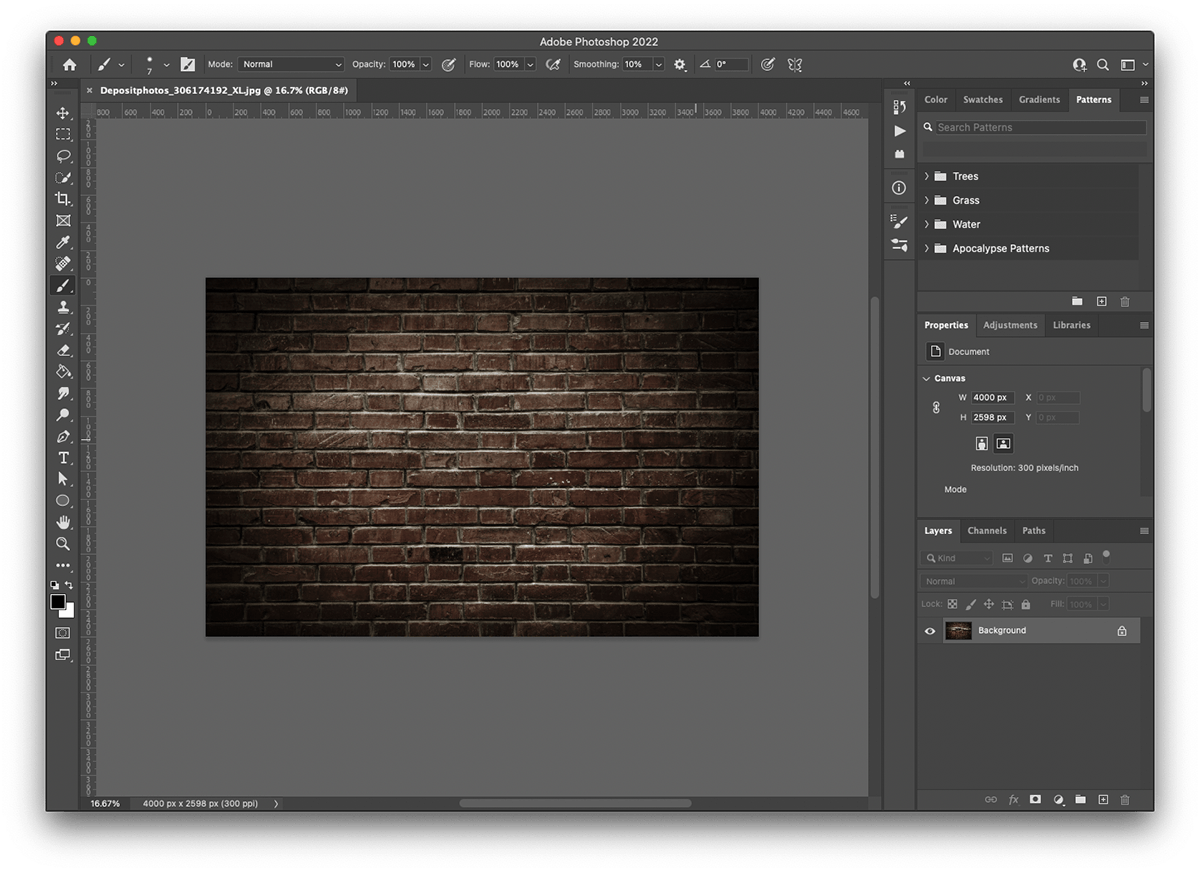
Step 1: Open a Background Image
I am going to use this photo of a brick wall from depositphotos.com. I chose it because of the nice vignette effect (it’s darker around the edges), which will help draw focus to the neon sign we are about to make in the middle.
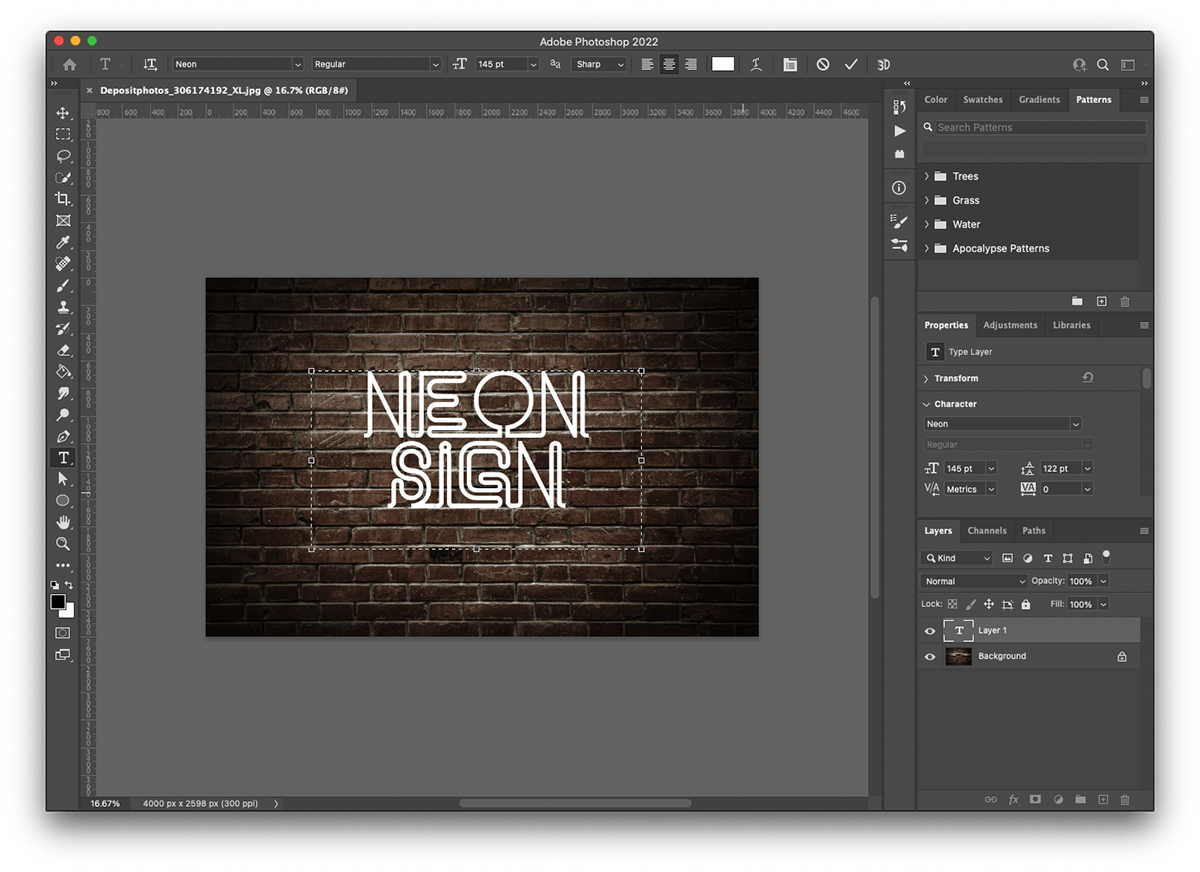
Step 2: Use the Text Tool to Type Your Text
Because I was feeling particularly inventive, I chose to write the words ‘neon sign’. Clicking anywhere on the canvas with the Text tool creates a Text Layer. You will find controls for the font, size, and color of your text at the top of the canvas. The font I used is called Neon by Fenotype and is free to download and use. I made the text white to stand out from the brickwork background.
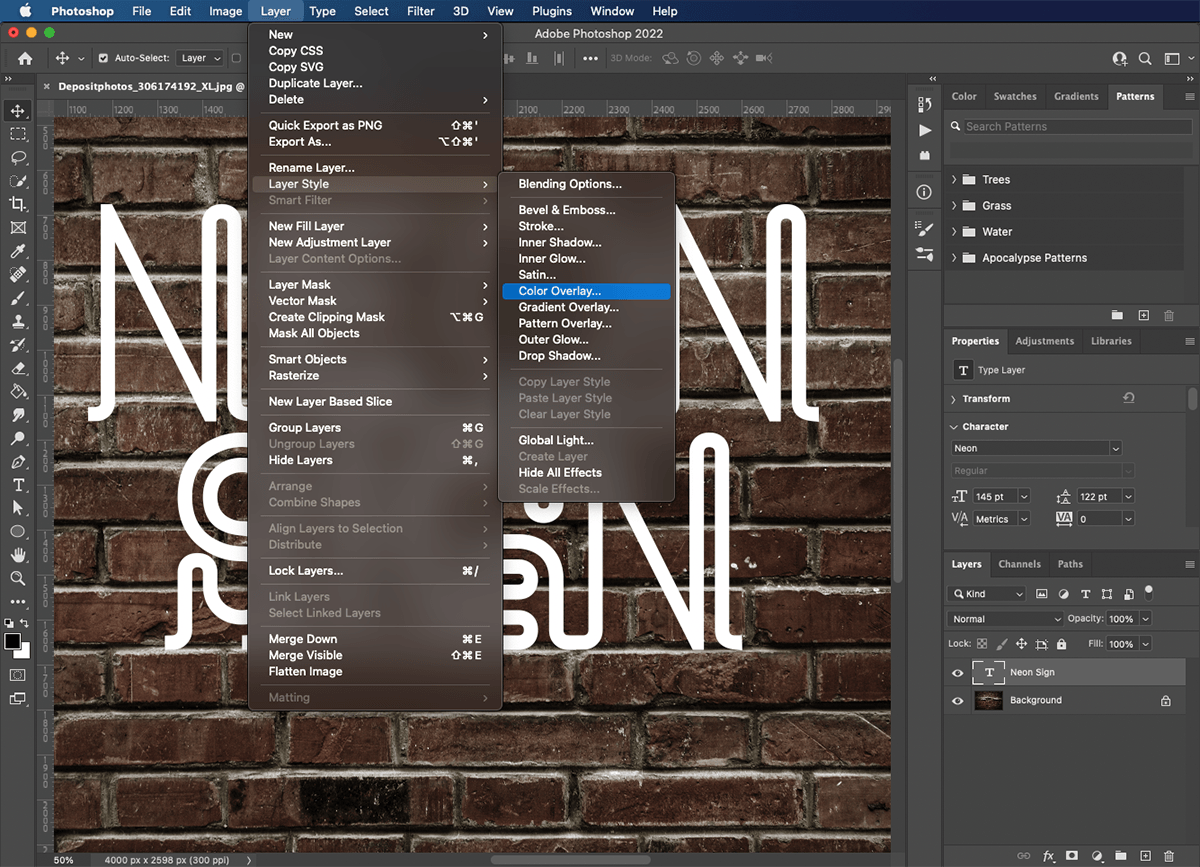
Step 3: Open the Layer Style Effects Window
You can find layer styles under Layer > Layer Style. We are going to start by selecting ‘color overlay’.
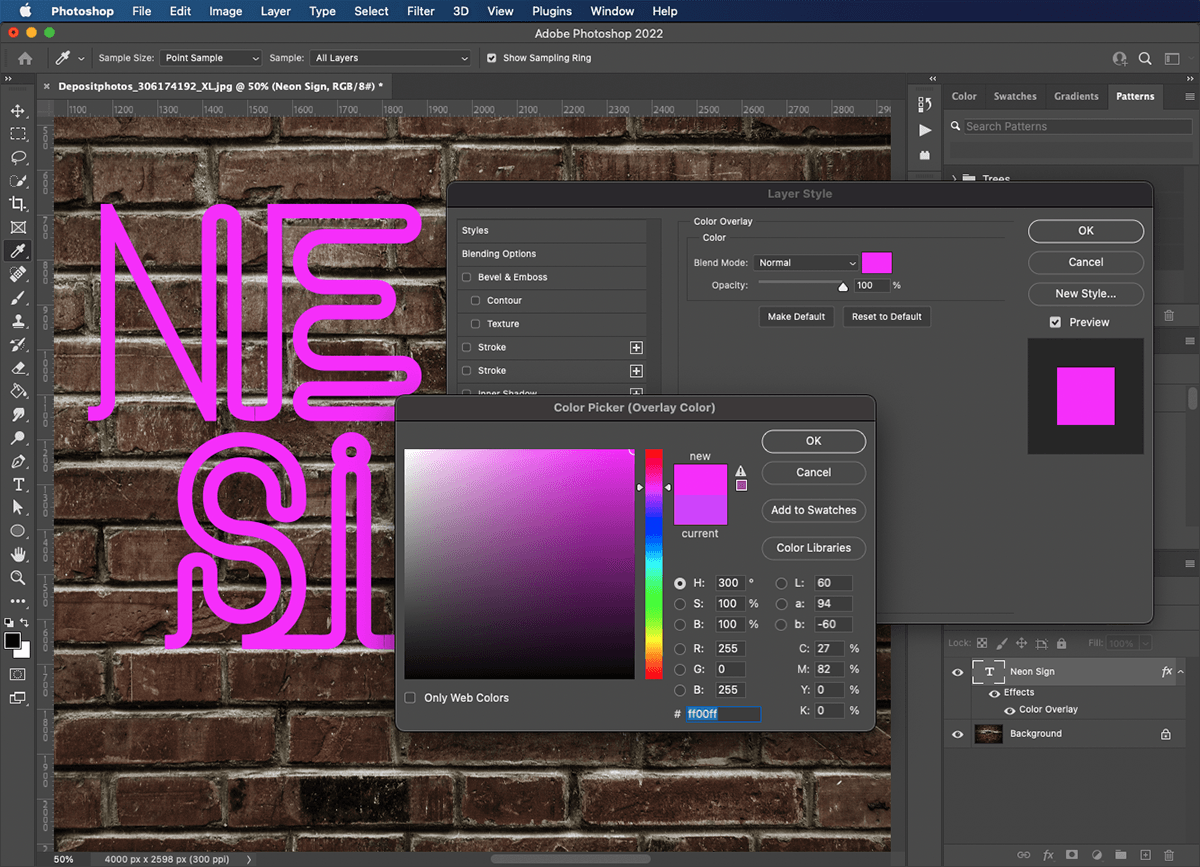
Step 4: Choose a Color for Your Text
Colouring your font in the Layer Style Effects window means you can go back and make adjustments without having to close the window and re-select the text. I went with hot pink, but you can choose any color that fits your personality. Blues and greens work particularly well as neon colors. When you have chosen your color, keep the window open because we will use several more functions while we are here.
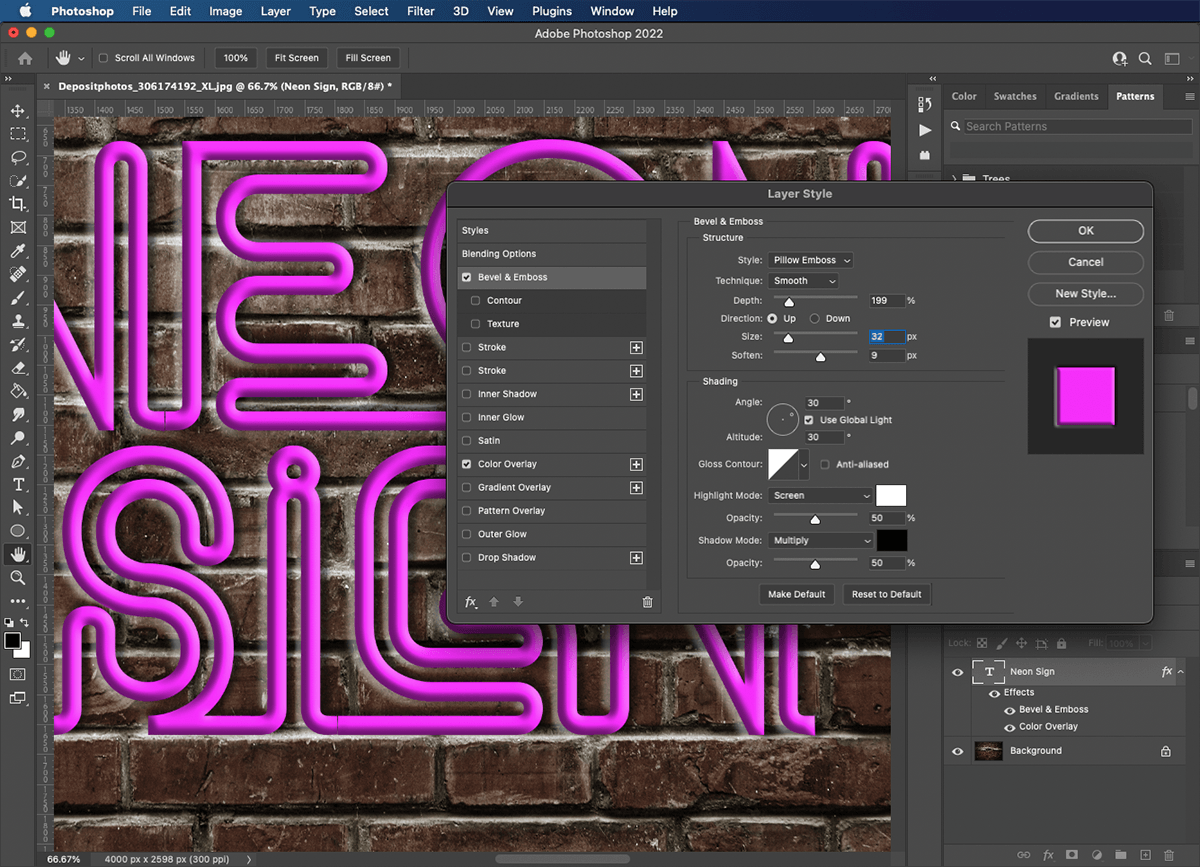
Step 5: Create the Tubular Text Effect
Select ‘bevel & emboss’ from the left-hand panel. We will use this to make our text look round as if made of tubes. The settings will depend on the thickness and size of your letters. The critical control here is depth. If there isn’t enough depth, your text will look flat. If there’s too much depth, it might create distracting shadows and highlights that appear around your text.
The settings I used in this image are:
- Style: Pillow Emboss
- Technique: Smooth
- Depth: 199%
- Direction: Up
- Size: 32px
- Soften: 9px
I didn’t adjust any of the shading parameters in this window.
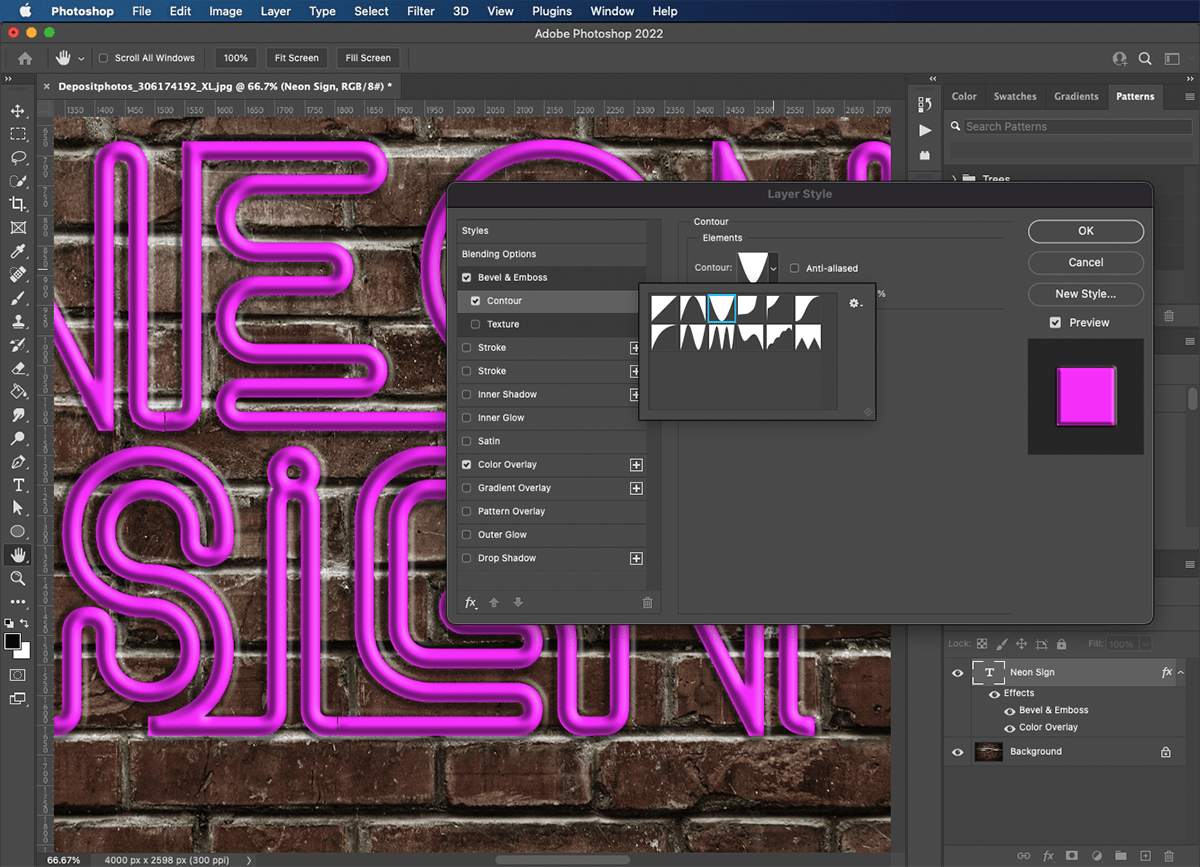
Step 6: Apply Contour to your Text
The Contour control gives a deeper roundness and smoother finish to our text. There are several preset contours to choose from, or you can get creative and draw your own. I tried several from the drop-down list and the one I settled on is ‘cone inverted’.
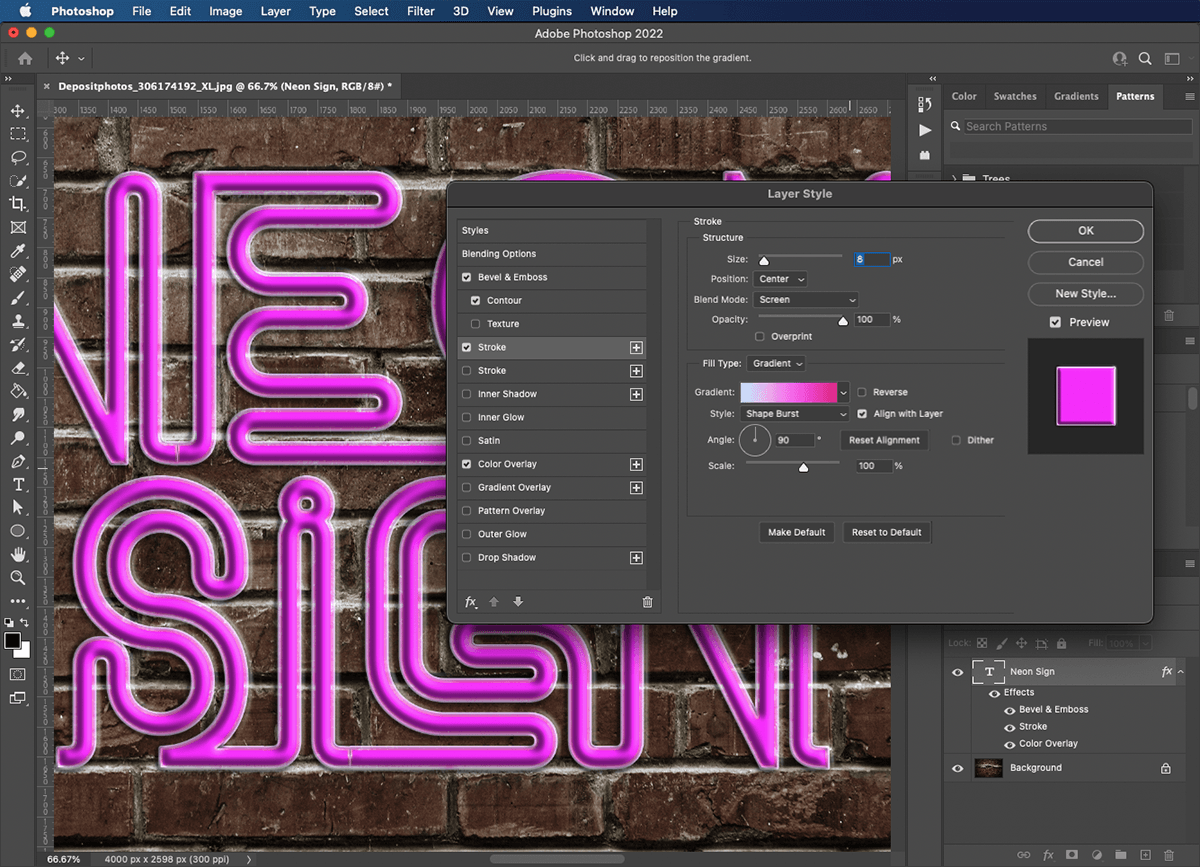
Step 7: Add Glass Tubing to your Letters
Next, use the stroke option to produce the effect of the letters having been made out of glass tubing. Size is the critical control here. You’re much better off starting small and working your way up to get the desired effect.
The stroke settings I used in this image are:
- Size: 8px
- Position: Center
- Blend Mode: Screen
- Opacity: 100%
- Fill Type: Gradient
- Gradient: White to Pink
- Style: Shape Burst
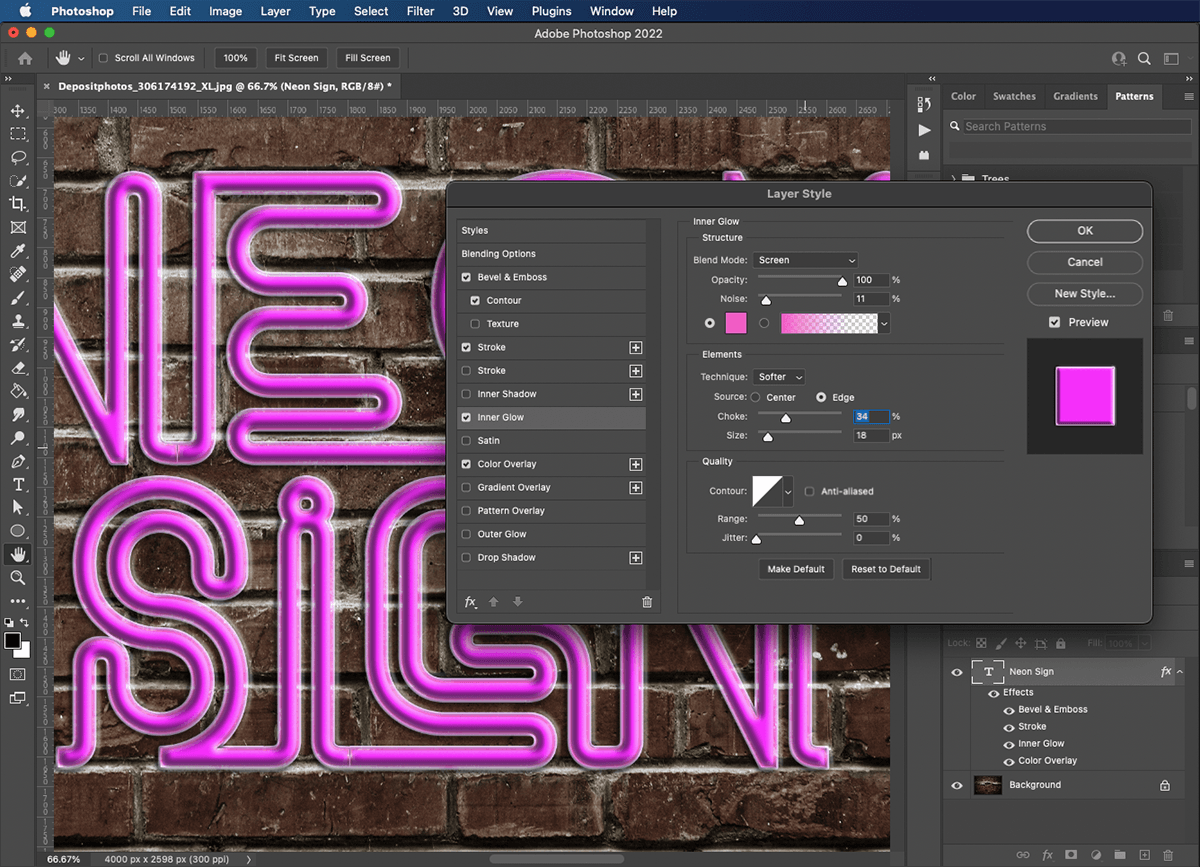
Step 8: Diffuse the Light Inside the Glass
The neon chemical reactions will create light refractions. I am using ‘inner glow’ to diffuse the light inside the glass part of our letters. This effect should give us a nice highlight on the main body of the font.
The ‘inner glow’ settings I used in this image are:
- Blend Mode: Screen
- Opacity: 100%
- Noise: 11%
- Color: Pink
- Technique: Softer
- Source: Edge
- Choke: 34%
- Size: 18px
I didn’t adjust any controls in the quality section.
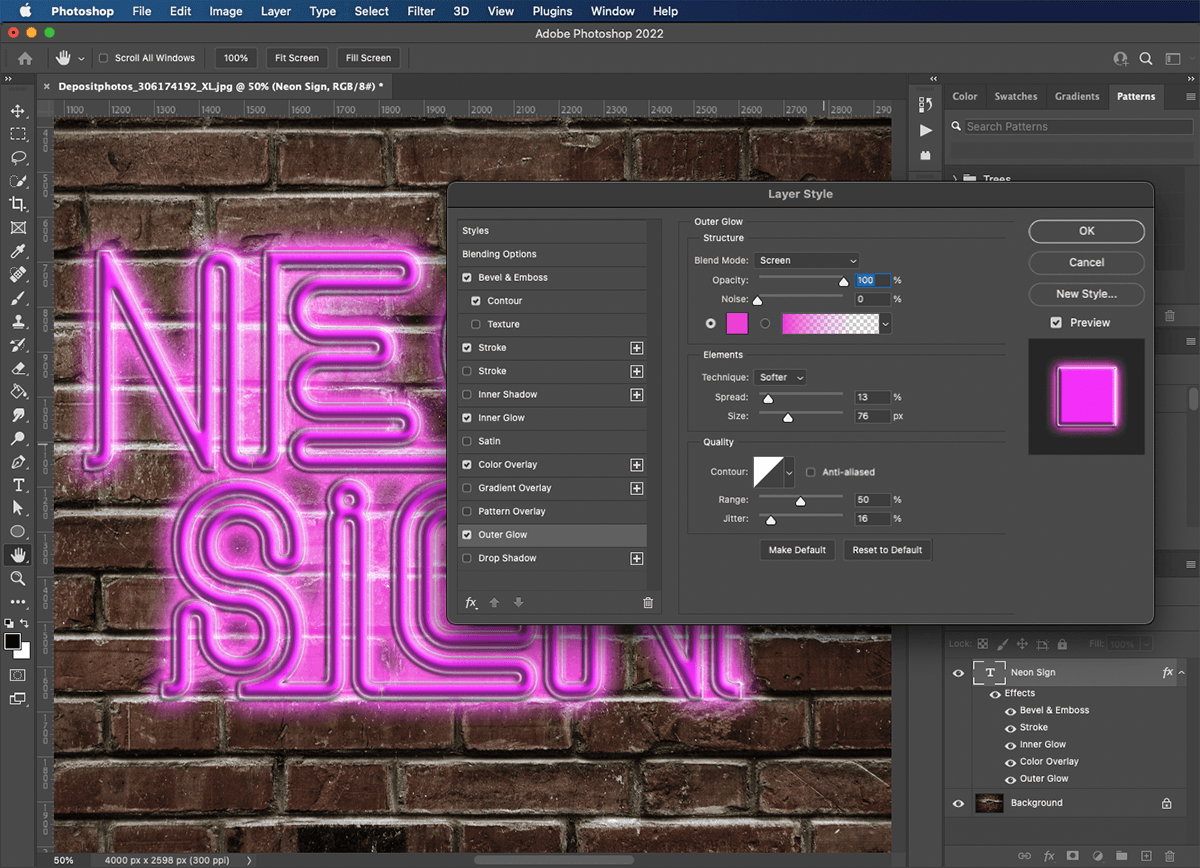
Step 9: Create a Neon Glow for Your Text
Use ‘outer glow’ to create the light emanating from the letters. It doesn’t need to reach too far because we are going to paint more light around the outside in the coming steps.
The ‘outer glow’ settings I used in this image are:
- Blend Mode: Screen
- Opacity: 100%
- Noise: 0%
- Color: Pink
- Technique: Softer
- Spread: 13%
- Size: 76px
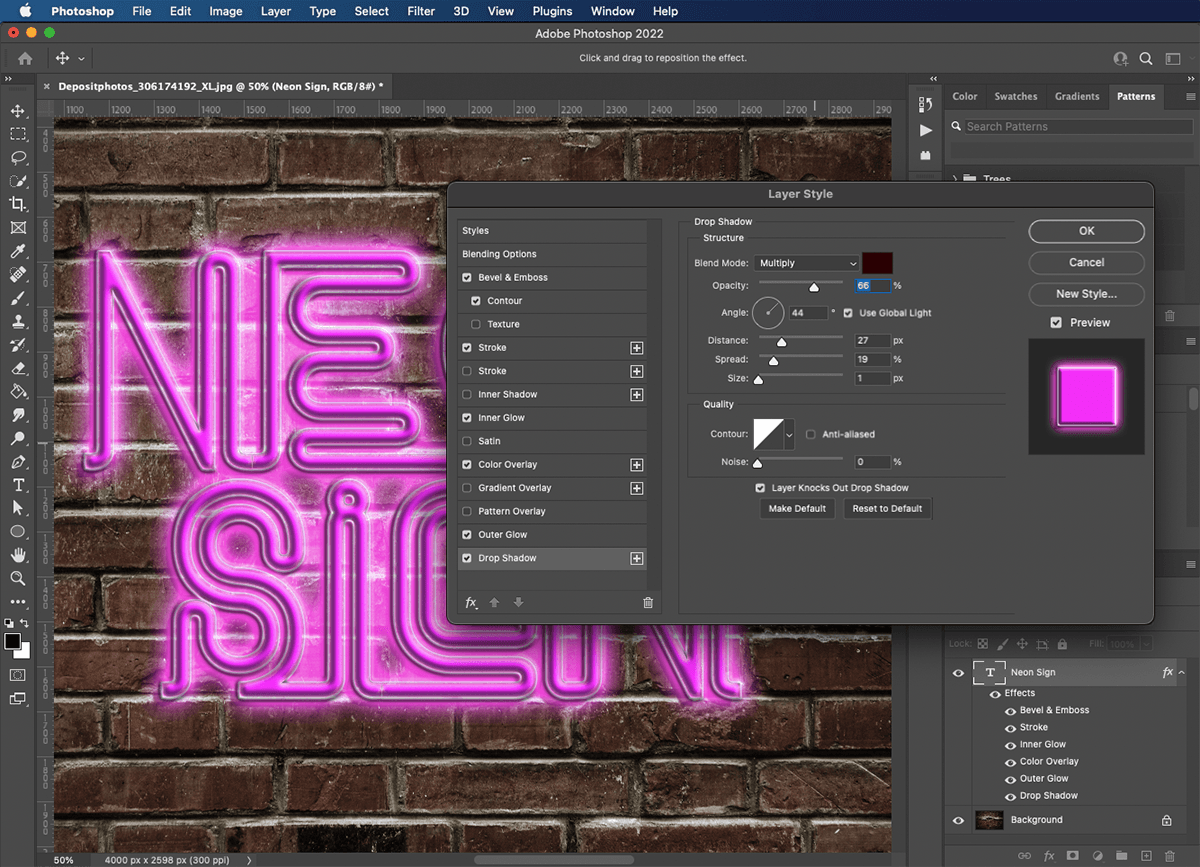
Step 10: Make the Text Stand Away from the Wall
Using the ‘drop shadow’ effect can make things appear to hover above the layer behind. Here we are going to use it to add depth from the wall.
The ‘drop shadow’ settings I used in this image are:
- Blend Mode: Multiply
- Opacity: 66%
- Angle: 44
- Distance: 27px
- Spread: 19%
- Size: 1px
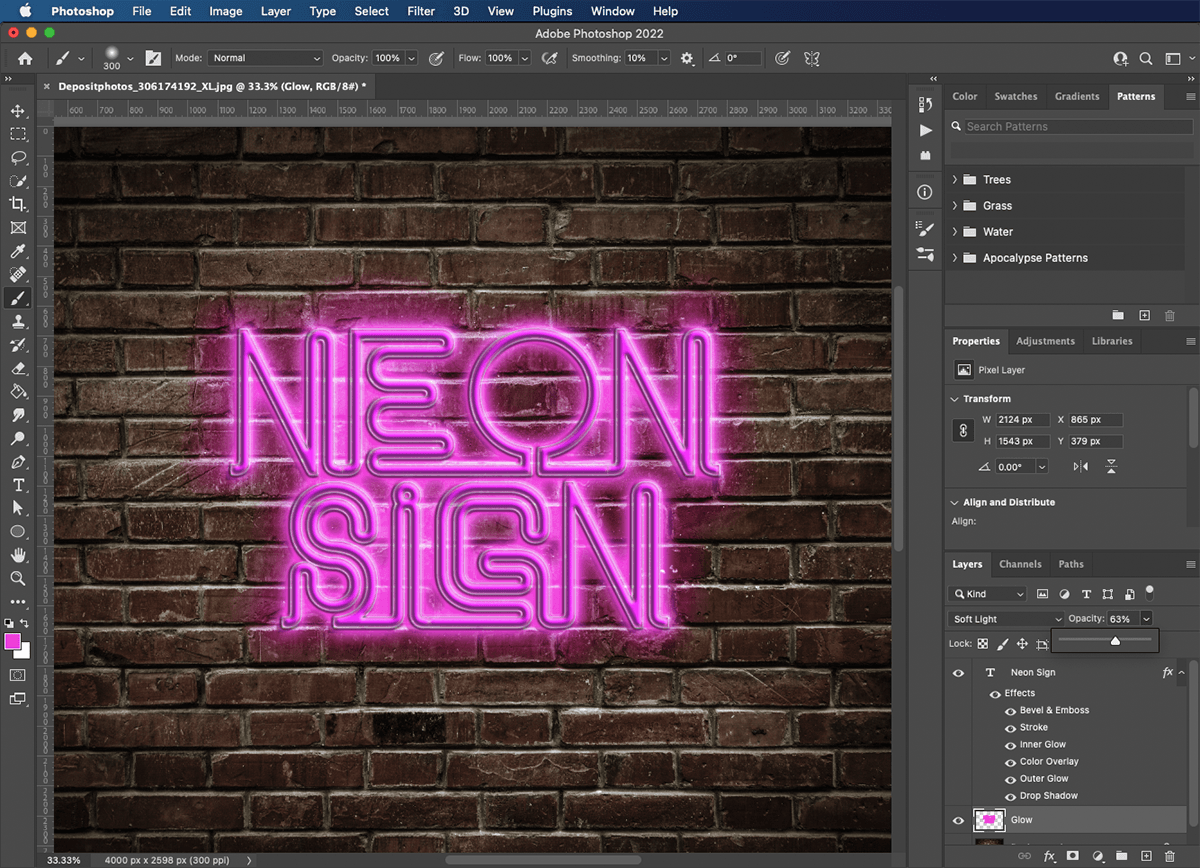
Step 11: Paint a Glow of Light
Now that we have that cool neon glow coming from our text, we need to add light to the wall behind it. Create a new layer above the background layer. Use a medium-sized soft brush in a complementary color to paint along the line of the letters. Set the ‘blend‘ mode to ‘soft light’ and dial down the opacity until it’s not too overpowering.
Step 12: Create a Larger Area Glow
Create another new layer, this time painted with a big soft brush. By layering up the neon glow, we can adjust the balance between the light from the letters and the surrounding area. Set the ‘blend’ mode to ‘soft light’ once again and dial down the opacity to your liking.

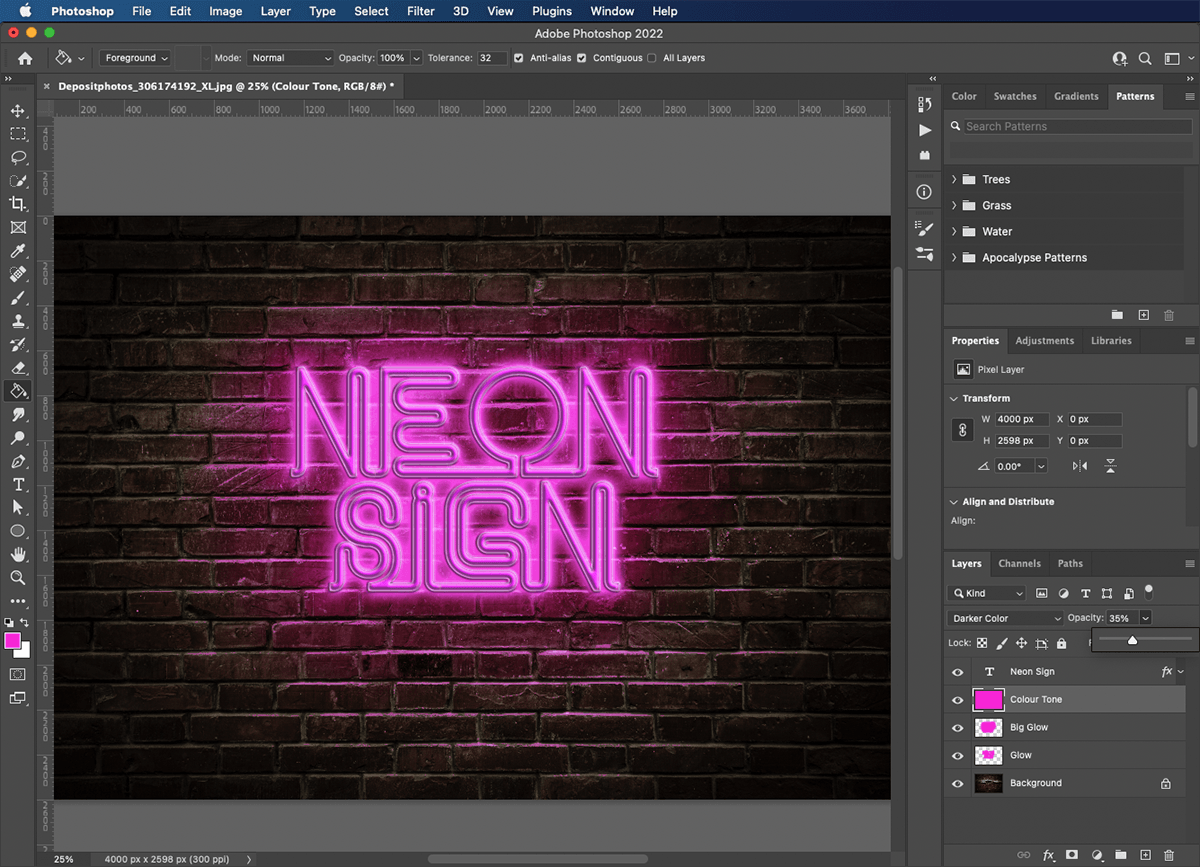
Step 13: Color Tone Your Image
Now we have to tie the brickwork in with the sign. Create a new layer and fill it using the Paint Bucket tool. We are aiming to give the whole wall a hint of whatever color you have chosen for your neon sign. After scrolling through the blend modes, I settled on ‘darker color’. This picks up light parts of the bricks as if the light is shining on them. I set the opacity to 35%.
Depending on your background image, you may need to adjust the ‘levels’ to brighten or darken the image. Command+L brings up your ‘levels’ control. Use the middle arrow to change the brightness and the outer two arrows to adjust contrast.
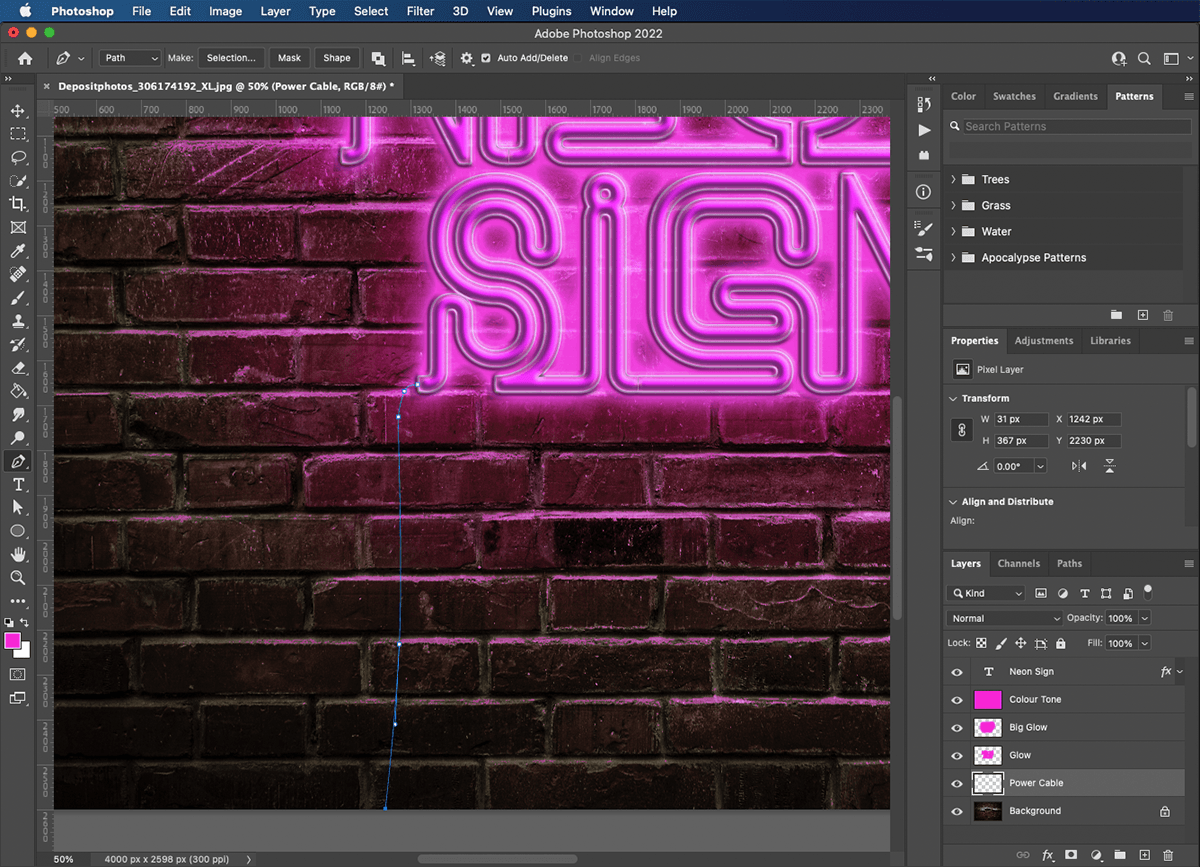
Step 14: Draw a Path for the Power Cable
It should come as no surprise that neon signs need electricity to work. To add a hint of realism, I am going to add a power cable to the image. Create a new layer in the ‘layers’ panel. Make sure it is above the background layer but below the neon glow.
Use the Pen tool to draw a path from one end of a word to the bottom of the frame. Add several control points if you want to loop the cable around the letters. When you click and drag with this tool, your control points will come with handles that let you control the path’s curve.
You can use the Direct Selection tool to move control points and refine your curves.
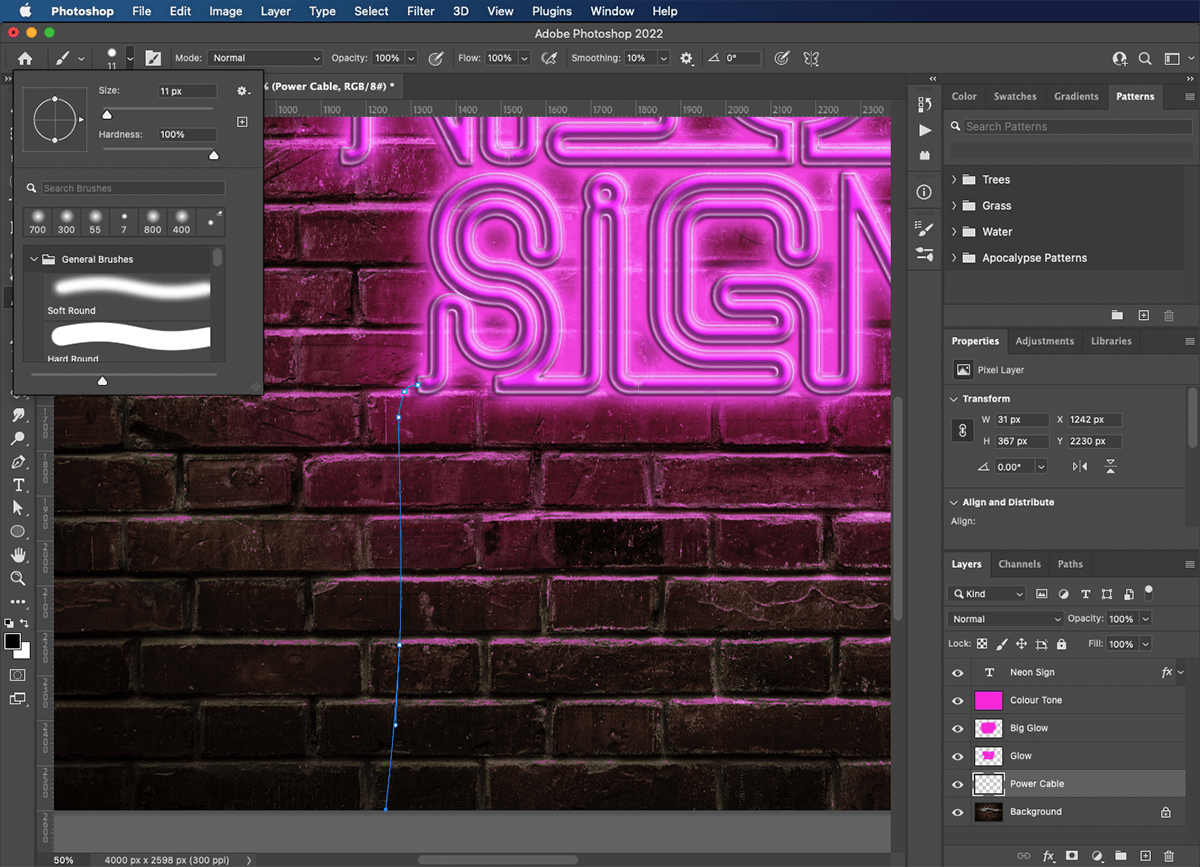
Step 15: Create the Power Cable
First, set your Paintbrush tool to black. Make it small and hard-edged. I went for size 11px. Then right-click with the Direct Selection tool on the path and choose the ‘stroke path’ option. In the pop-up window, select ‘brush’ and click OK. This will draw along the path with the Paintbrush tool, creating your power cable.
You can continue drawing and editing paths, using the ‘stroke path’ command to add power cables between letters or words.
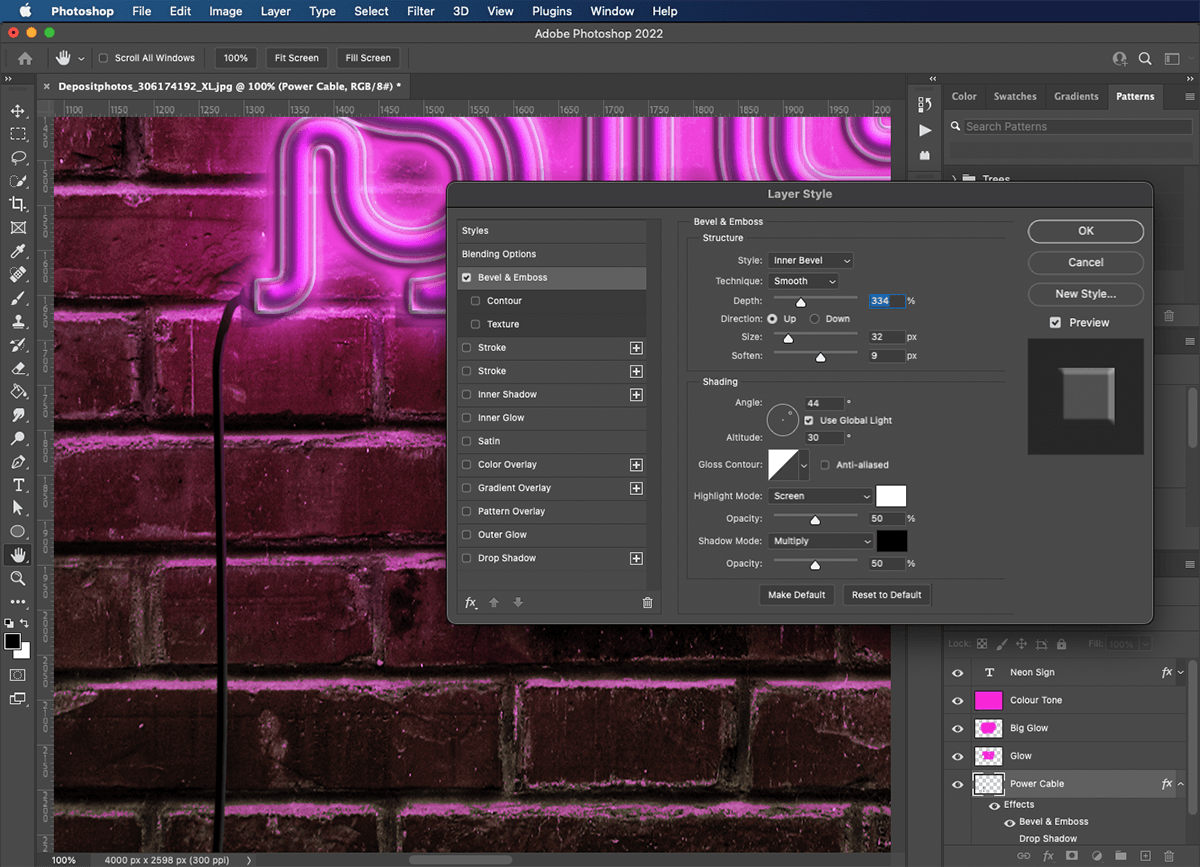
Step 16: Add the 3D Effect to the Power Cable
To prevent our power cable from looking so flat, we are going to use the Layer Style menu to add ‘bevel & emboss’. Set the depth to make the cable look round.
The ‘bevel & emboss’ settings I used in this image are:
- Style: Inner Bevel
- Technique: Smooth
- Depth: 334%
- Direction: Up
- Size: 32px
- Soften: 9px
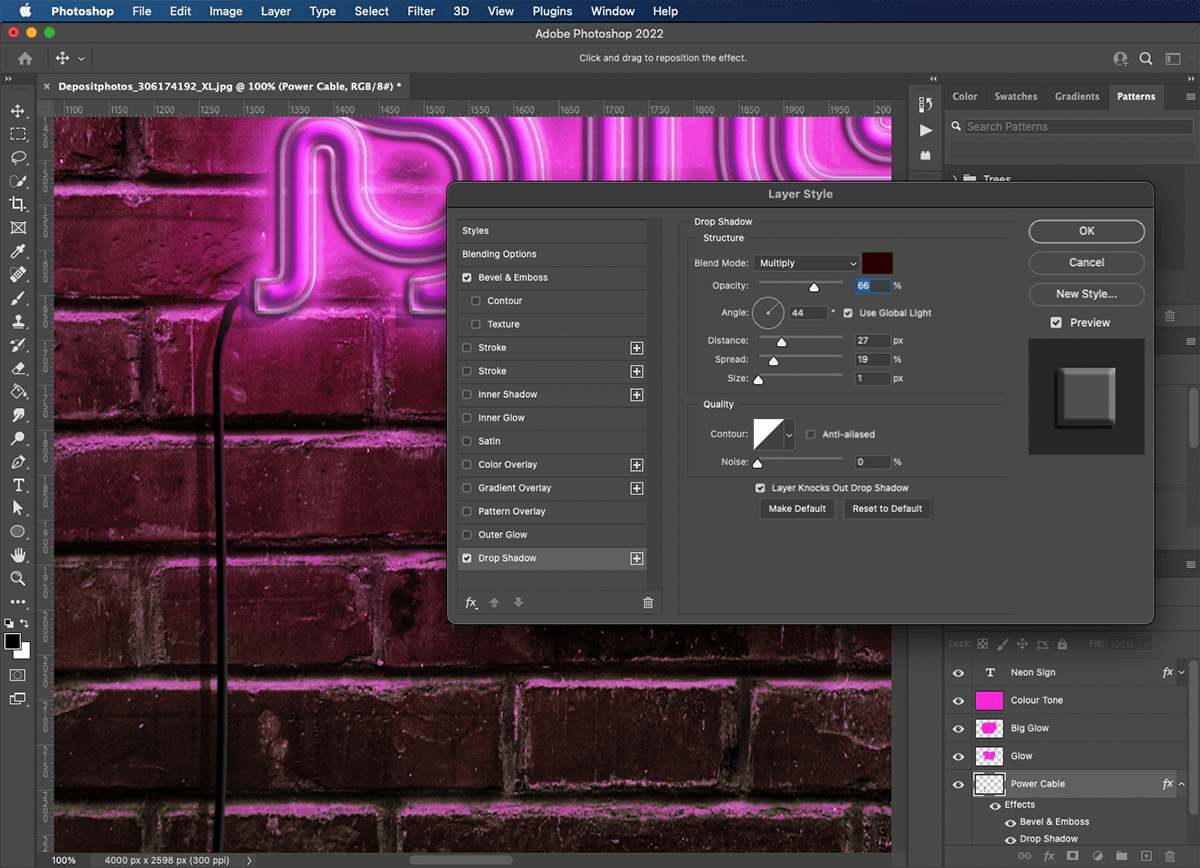
Step 17: Create a Shadow for the Power Cable
As with our text, we want the power cables to look like they are hanging in front of the wall. The ‘drop shadow’ effect will help us achieve this.
The ‘drop shadow’ settings I used in this image are:
- Blend Mode: Multiply
- Opacity: 66%
- Angle: 44
- Distance: 27px
- Spread: 19%
- Size: 1px
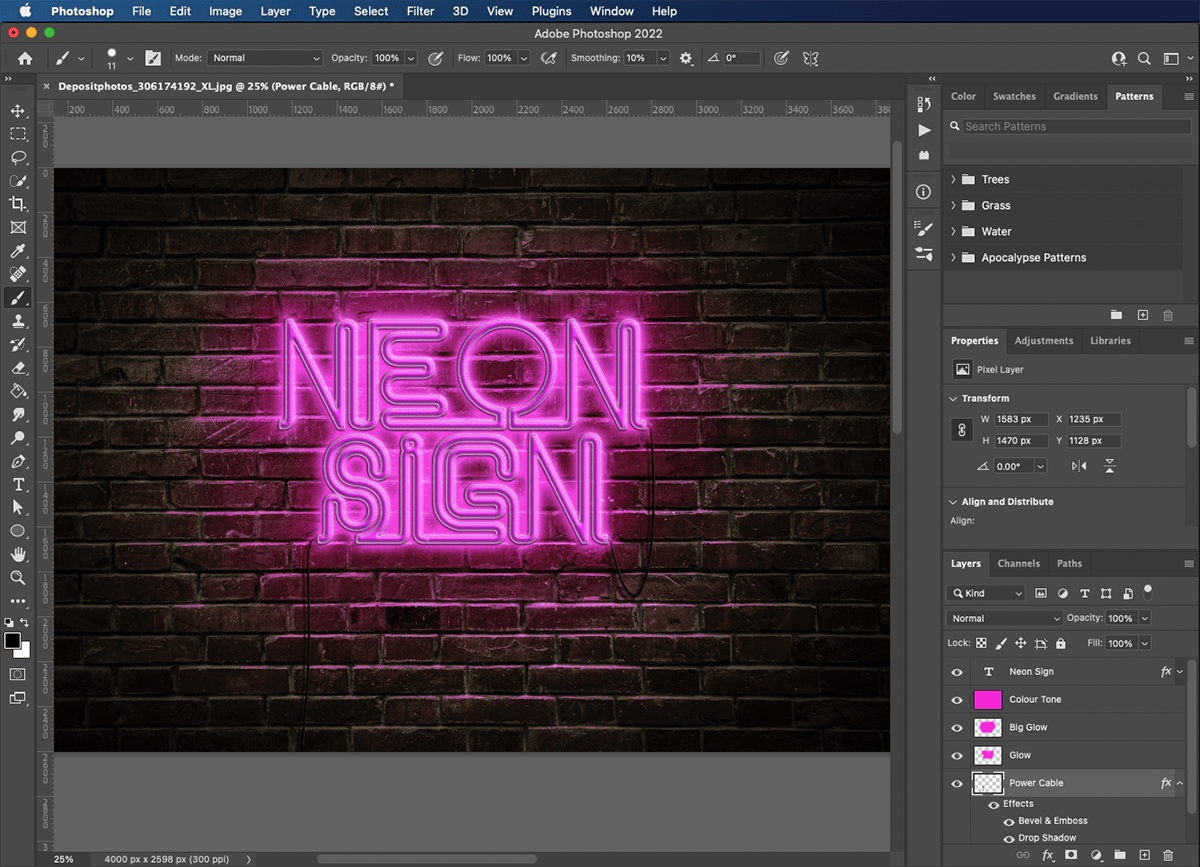
Step 18: Save as a Photoshop File
Save your image as a photoshop file. This will keep all of your layers and effects intact, so you can come back and review your settings or make changes at any time. For posting online, choose a compressed format like JPEG or PNG.
Conclusion
Now you know how to make a neon sign in Photoshop using layer styles and blend modes, and by drawing paths with the Pen tool. These powerful techniques have applications in every genre of art and photography, and the neon effect is just one. Try using multiple text layers in different colors to get that true ’80s vibe.
If you like creating images with fun effects, check out The Magical Photography Spellbook course for even cooler effects!


