The key to an efficient workflow is implementing some strategies to make the most of Lightroom‘s organization options.
Here are ten tips to show you how to organize photos in Lightroom and help you better plan your workflow in Lightroom.
Organize Photos in Lightroom: Choose Where You Want to Store Your Images
Before you get started, you will need to decide where you’ll store your images.
Whether you’re a professional or a keen amateur, you will likely end up with thousands of RAW files sooner or later.
These take a lot of space on your computer’s hard drive. You may want to have your images on external drives.
Luckily, these days external hard drives are affordable.
Since you should have at least two backups of your files too, I recommend having two external hard drives or a RAID Array. This will give you voluminous storage and will speed up data transfers.
You should also back up to a cloud service such as Backblaze. This is in case your hard drive fails, which happens all the time, unfortunately.
Once you’ve decided where you’ll store your images, create your folder structure. There are several ways to do this and you’ll need to figure out what works best for you.
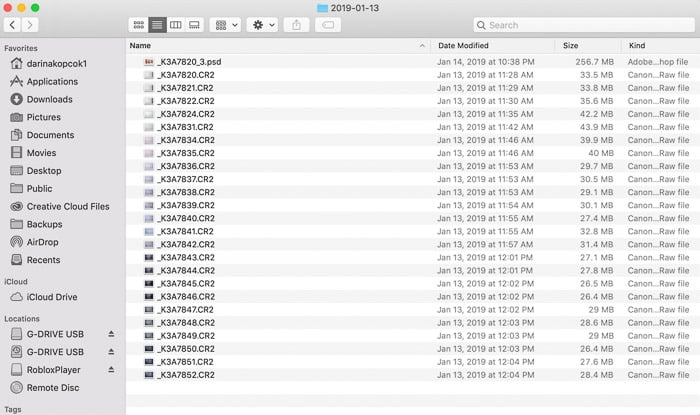
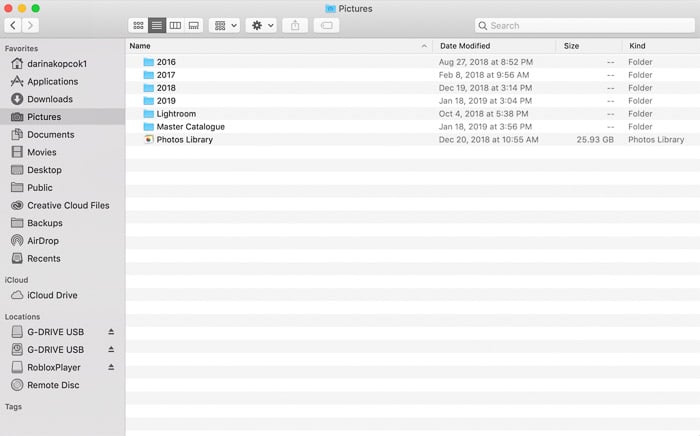
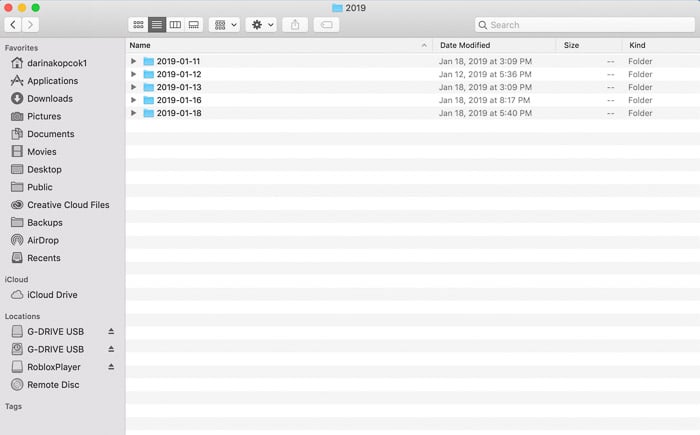
I have a Pictures folder on my iMac that contains all my photographs. Inside this folder, I’ve created folders for each year since 2016. My older photographs are stored on external hard drives. I rarely need to access them.
Inside each of these folders, I have folders stored by date. If I click on those folders, I can see all my RAW files. And the PSD files of images I’ve edited from that particular photo shoot.
This is where I now choose to store my PSD files. I used to store them in one folder entitled “Working Copy”.
Instead of naming your folders according to date, you might want to name them according to the shoot. Some photographers don’t like to organize by date because they can’t remember what’s in a folder by looking at it.
You may prefer to have two separate folders for your professional photographs and your personal ones. In this case, you can add another level of folders in your Pictures/Photos folder.
Or you might keep your folders off your computer’s hard drive altogether. Use external drives in that case.
Create a Master Catalog
There is a lot of debate about having one catalog in Lightroom as opposed to several catalogs.
Some photographers have one Master catalog that contains their images. Others have several catalogs, organized by shoot, theme, or some other criteria that make sense with their workflow.
There is no right or wrong answer. After trying both approaches, I recommend that you have one Master Catalog.
The whole point of using a digital asset management system like Lightroom is to be able to search the database for certain photos.
You cannot search across more catalogs in Lightroom. You need to open each catalog if you’re looking for the best photos from various shoots. It’s cumbersome to keep switching catalogs.
You also cannot switch catalogs when a process is running.
And if you’re using Mobile Sync, you cannot use more than one catalog.
Some photographers do use multiple catalogs. The rationale is that they’ll lose fewer files if your Catalog becomes corrupted.
If you’re backing up regularly, this won’t be a problem.
Sometimes photographers also want to separate their personal work from their professional work. Or they want to have several catalogs for different genres of work. For example, separating wedding photography from portraits.
If you decide to go with more than one catalog, think about how you will divide your catalogs. And make sure they are backed up.
Use as few catalogs as you can if you decide to take this route.
One way to stay organized with one catalog is through Collections, which I’ll go into more detail about below.
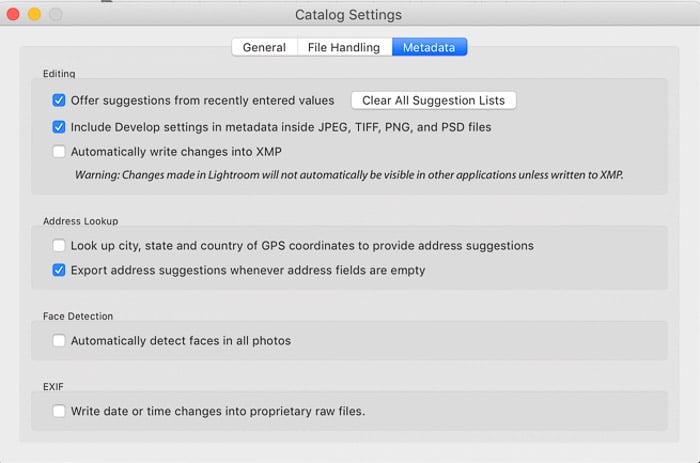
Choose Your Catalog Settings
For every catalog you create, you will need to change your Lightroom catalog settings.
If you only use one catalog, then you only need to do this once.
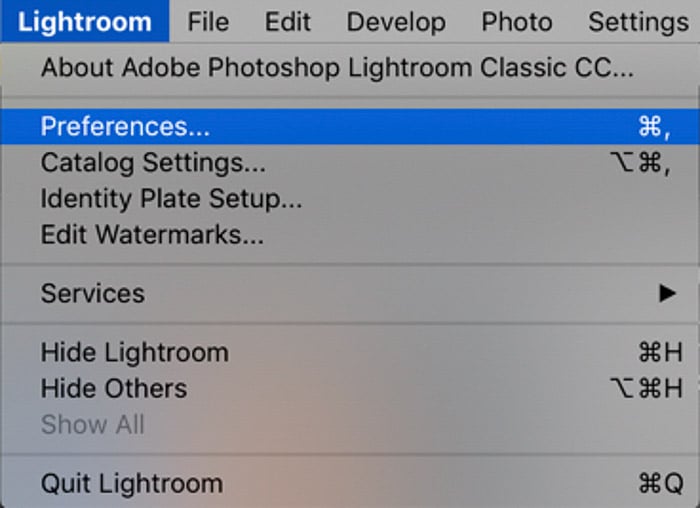
Go to > Lightroom (Mac) or > Edit (Windows) and choose > Catalog Settings.
Under the > General tab, decide how often you want to back up your Lightroom Catalog.
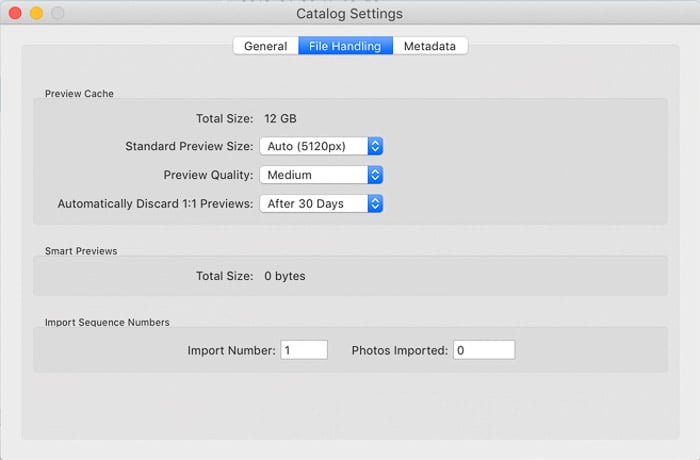
In > File Handling, you can choose to have Lightroom render previews that match your monitor resolution, as I have done.
Note that larger preview sizes will affect performance, as Lightroom’s cache will take up more space on your hard drive
Under the > Metadata tab, you can specify what data will be written into your images.
The important one here is > Automatically write changes into XMP.
It’s useful to leave this option on because all your metadata and develop settings are written into the file this way.
If you were to lose your Lightroom catalog or if it became corrupt, the image file would keep all the changes you made in Lightroom.
I choose to leave this option unchecked. It would slow down the performance of my computer. And it would clog it up with thousands of XMP file that I’ll never use.

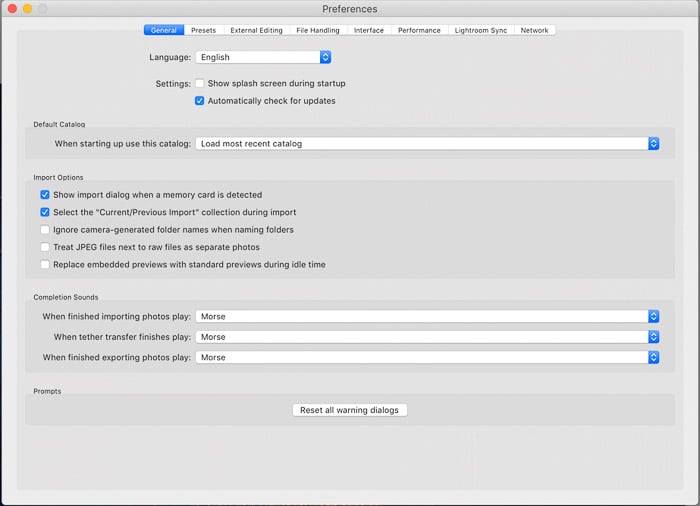
Choose Your Preferences
When you create a new catalog or start using Lightroom, you will want to create your Preferences.
If you use multiple catalogs, you might want to adjust your preferences according to your needs for the catalog.
Under the > General tab, where it says > Default Catalog and > When starting use this catalog you can choose the catalog you want to load when starting Lightroom.
There is no need to change the default setting if you only us one catalog.
Going through every tab in detail in > Preferences is beyond the scope of this article. But > External Editing is an important tab to review.
It allows you to specify the File Format and Color Space used in other external applications such as Photoshop.
If you’re editing RAW files, you’ll want to edit images with the best format in order to preserve image details and color space.
This means using ProPhoto RGB at 16 bits. The resolution should be at 240 or 300dpi. You may choose to use ZIP as a compression method.
I also check off > Stack with Original so that images that are edited externally with stay attached to the original RAW file.
Decide How Lightroom Will Handle Your Files
The File Handling section in Lightroom’s Library module has some choices that you can use for better file organization and performance.
For Build Previews, choosing Minimal, which will save you time during file import.
You can also choose 1:1 to generate full previews. This will speed up the time it takes for your files to render when you zoom in on them. You need ample storage for this option.
This can be a good choice for say, wedding photographers. They need to speed up the process of editing hundreds if not thousands of high-resolution files at a time.
I recommend always having Don’t Import Suspected Duplicates turned on. This will keep Lightroom from importing images that are already on your hard disk.
This can happen if you don’t clean off your memory card after every shoot.
Use Metadata Presets
You can create metadata templates for your files that can be written into every import you make into Lightroom.
Metadata is critical to help you find images in Lightroom.
If you’re looking for images from a certain shoot or images that contain a certain element, you can search for them in the Library Filter Bar using a Text attribute.
For example, if I have a potential client wishing to license an image of cherry pie, I can search by the word “pie”, or “cherry”. This will locate any images with these attributes.
This saves a lot of time and frustration. If you don’t have keywords put into the metadata of your images, then you have to scroll through your whole catalog to find those images!
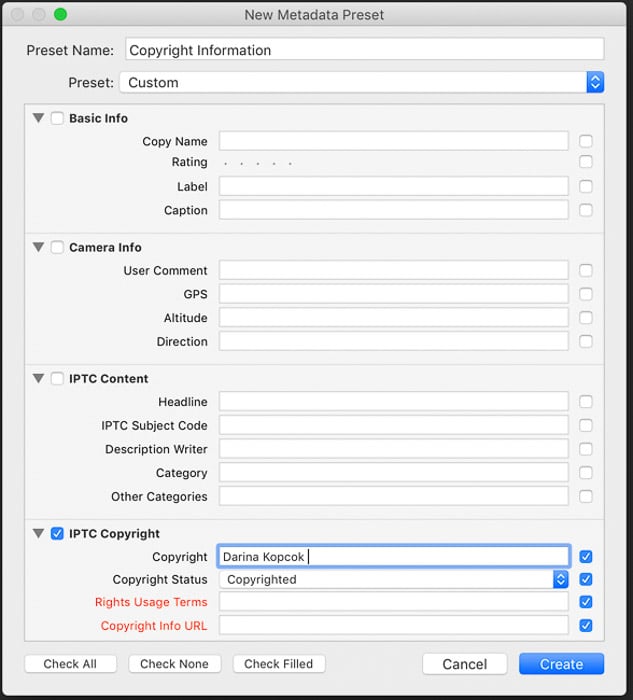
It’s also important to put your copyright information into your images.
You can create a template that you can choose every time you import into Lightroom. It will embed this information into each of your images.
When you are importing your images, go to > Apply During Import. Choose > New. Input the Copyright information and then hit > Create.

Create a System for Using Flags, Stars, and Color Labels
Every photographer has a different system for using the various rating tools in Lightroom. The method you choose can be impacted by the number of photographs you typically shoot in a session.
As a food photographer, I don’t shoot hundreds of images at once in the way a wedding photographer does.
A wedding photographer will need to do an initial selection of the images they want to see again very quickly. Using flags to indicate those images is a good idea.
Hitting X will automatically reject a photo. If you keep your caps lock on, Lightroom will automatically advance to the next image for an even faster selection process.
Only you can decide what will work best for your workflow. But I’ll share my process in case you might want to adopt it.
Once I have imported into Lightroom, I flag the images that I like at first glance. And I delete the ones that won’t work.
When I go through them again, I give the ones I want to edit 3 stars. Once I have edited them in Lightroom, I give them 4 stars and finish my editing process in Photoshop.
I save the image so that the PSD file appears in my Lightroom film strip when I’m done. That is the file I give 5 stars to show that the editing process is complete.
I then assign it a color label. For example, red means that the image is for my stock portfolio. Yellow is for client work.
This is what works for me, but you may choose to do it differently.
Although Lightroom has a 5-star system, I find this too many and it slows down the rating process. I only use 3-5 stars when assessing my work.
Whenever I need to find these images quickly, I can search for them in the Library module with the Library Filter.
Delete Unwanted Images
One impact on your organization is the number of images you have. Especially if a lot of those images are rejects.
Over the years, I developed a bad habit of keeping most of my images in case I wanted to go back to them.
After a while though, the number of useless images I had in my Lightroom filmstrip was stressing me out. And clogging up my hard drive.
Now I make it a point to cull more ruthlessly.
I delete most of my rejected photos upon import when I have gone through them once or twice.
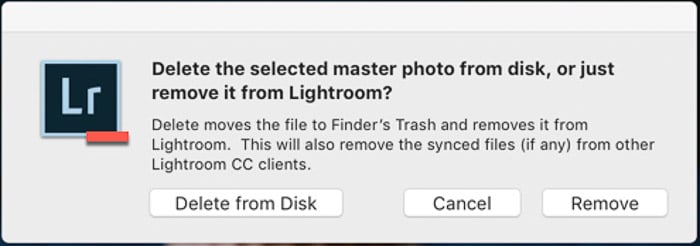
You can do this by hitting X to reject the photos and then right-clicking on an image in the filmstrip.
Choose >Remove Photos. Lightroom will then ask you if you want to delete the image from your hard disk or remove it from Lightroom.
In Lightroom, a Collection is like a photo album.
It’s a way to access your most important or best photographs with one click.
If you’ve not been accessing this feature, you can go back and create collections of your favorite images. Or categorize the final images from a client shoot.
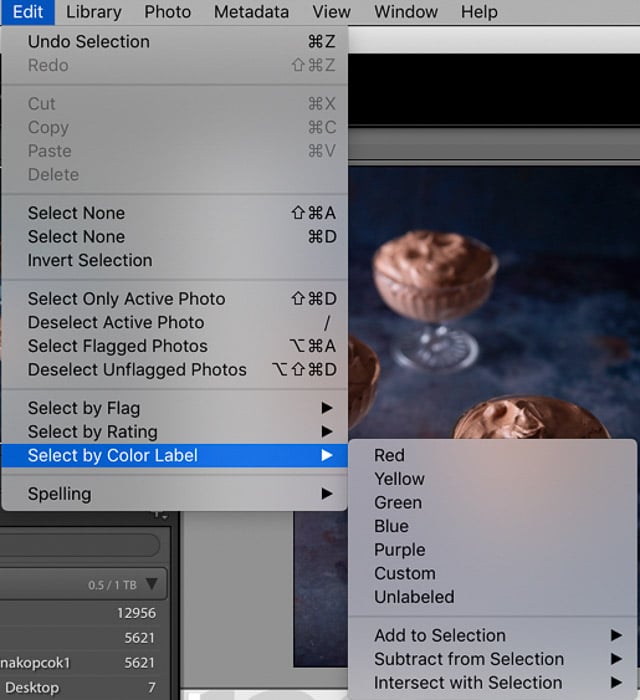
search for the images in the Library Filter bar according to the required parameters.
You can also go up to > Edit and > Select by Flag, > Select by Rating, or > Select by Color Label.
When you have determined your favorites, go to > the Collections panel and click on > the New Collection icon (+) and choose > Create Collection.
Give it a name that will make the contents instantly recognizable.
Conclusion
An important part of Lightroom post-processing begins before you even open the program.
Lightroom doesn’t have a special file structure. When you create a folder in Lightroom, you’re creating a folder on your hard drive.
This means you need a good folder structure before you even get started with editing.
Keep it simple and organized at the root of the program. This will save you a lot of headaches later.