If you’re looking to add a little bit of pizzazz to your portrait photography, why not try neon portrait photography? It’s a great way to add some fun and excitement to your photos, and it’s really easy to do. Here are three simple tips for capturing great neon portrait photos.
3 Neon Portrait Photography: 3 Fun and Easy Ways to Re-Create Neon Lights Indoors
You don’t need to invest in professional lights to re-create neon light photography. In fact, it’s likely that you already have all the items you need!
Use a Large Screen to Create the Perfect Atmosphere
You might need to fill in the darkness on the other side of your subject. Use a reflector or another light source, like a lamp or a torch.
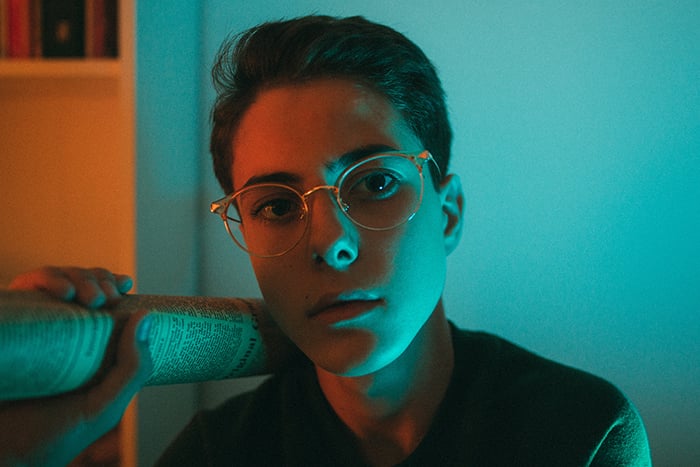
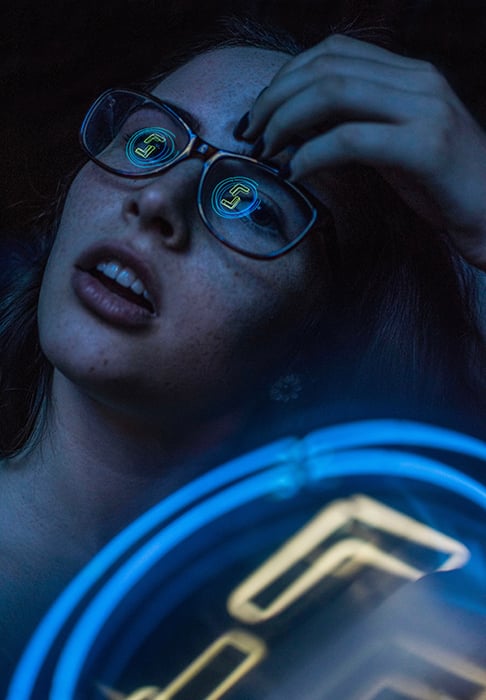
This is possibly the easiest way to re-create neon lights. Open a bright, neon-like image on your laptop or TV. Have your model stand next to it.
This method will create an atmosphere similar to the ones you see in street portraits taken at night. But you’ll have full control over the screen. You won’t need to spend time looking for neon signs outdoors.
You also won’t have to limit yourself to a couple of neon signs.
This is also a great time to find out the kinds of colors, shapes, and lights you work best with.
This will work best in a dark room. But you can include a few lights in the background to add depth to your image. Make sure the lights aren’t too bright. Your model won’t stand out in your composition if they are.
Create Surreal Portraits Using Colored Cello Paper
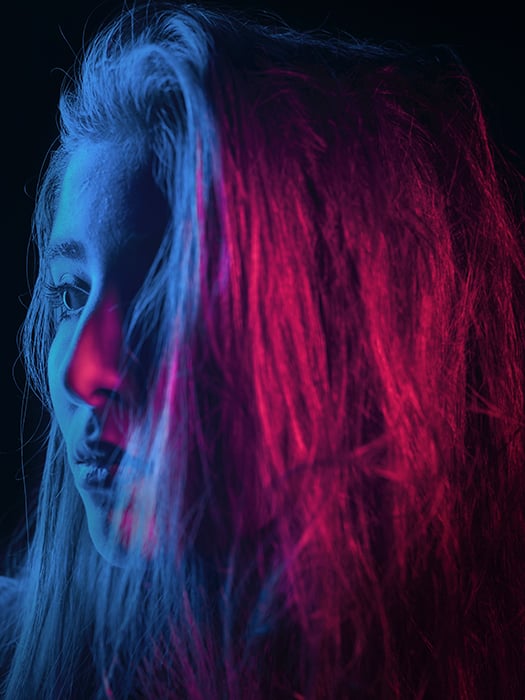
It’s not unusual to find a book or a movie poster featuring a photo like this. If you’re a fan of conceptual or surreal photography, experiment with a variety of neon colors. You’ll create mysterious and unforgettable portraits.
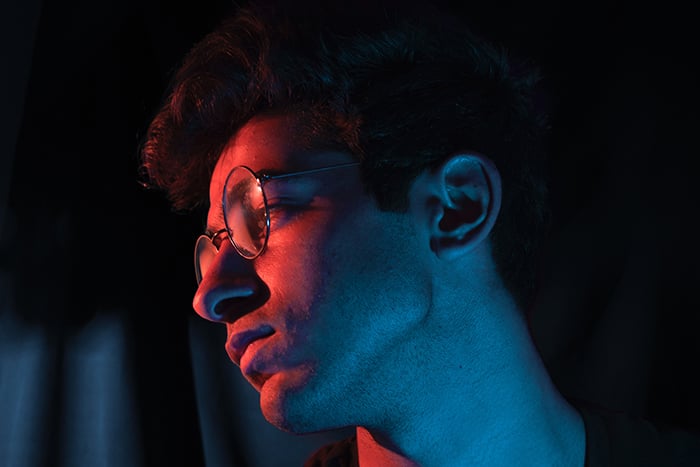
For this technique, you need at least two torches, cello paper, and an assistant. Cello paper costs as little as $3 and comes in a variety of neon colors.
The brighter your light sources, the more effective the results will be.
Cover each torch with a sheet of cello paper. One of the most flattering color combinations for this genre is blue and pink. You can see it in the image above.
Have at least two assistants hold the torches on opposite sides of your model. You can also place your torches on tripods or tables. Do this if you don’t have assistants or if you’re taking self-portraits.
The closer the torches are to your model, the stronger the colors and brightness will be. Leave at least some distance between the model and the light source to create a subtle neon light effect.
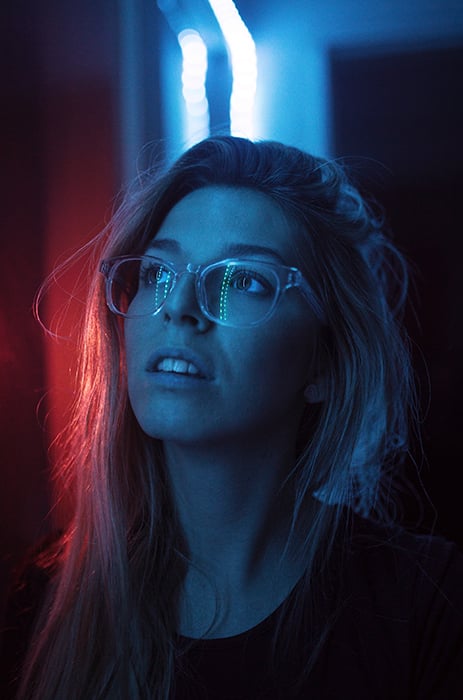
Experiment With Saturated Fairy Lights
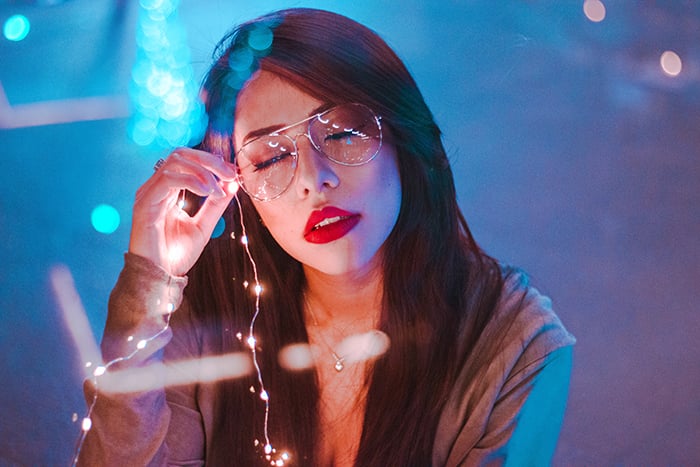
If you want to add even more lights to your photo, have your model wear glasses. They will reflect some of the fairy lights and make your subject’s eyes look like they’re sparkling!
Fairy lights are relatively affordable and can make all the difference during an indoor photoshoot.
You can use them to add depth to a background or foreground. Make sure you use a large aperture, such as f/1.8. This is to create as much blur as possible.
As exciting as neon lights are, their unnatural colors can make portraits look flat. This is where fairy lights come in.
If your model is missing that portrait spark, have them hold a string of white lights in front of their face. This will make them look better in the neon light.
If your portraits need a boost of color, use colored fairy lights instead.
Technical Tips for Neon Light Photography
Creativity isn’t the only ingredient in the recipe for amazing neon light portraits. Here’s how to handle your camera in low light.
Use a Fast Lens to Avoid Blurry Pictures
Fast lenses have large apertures, also known as small f-numbers. This helps their users take sharp, well-lit photos in the dark.
There are many affordable prime lenses, like the 50mm f/1.4. These work efficiently in the darkest conditions.
Lenses like these will allow you to focus on your subject without getting distracted by confusing technical settings.
Keep in mind that the smaller your f-number, the blurrier your background will be.
If you’re an absolute beginner, you might find it difficult to find the perfect focus with a large aperture. That’s because it won’t capture everything in detail.
Make sure you practise before your photoshoot if this is the case.
Embrace High ISO Numbers (They Won’t Hurt Your Photos)
RAW photos are easier to edit than JPEGS. Make sure you shoot in RAW to preserve as much image data as possible. You’ll find it easier to fix mistakes and remove grain during the editing process.
ISO is usually associated with a plethora of grain. This doesn’t have to stop you from experimenting with high ISO numbers.
As long as you don’t use the highest ISO available, you shouldn’t have trouble taking sharp photos of your subject.
If you don’t feel comfortable using high ISO, you can compensate for it by using a larger aperture. Or by placing your camera on a tripod to avoid unnecessary shaking.
You can also use editing programs like Lightroom to easily remove noise from your photos without ruining them.
Alternatively, you can keep it in your photos to give them a cinematic feel.
Use Manual Focus for Sharper Neon Photography Images
Autofocus can be a lifesaver or an obstacle. If you want to have full control over your images, avoid using it.
You’ll be shooting in a dark place. Your camera might have a hard time finding your subject. This could waste a lot of time and energy.
Even though it might take you a few days to master manual focus, it will be worth it. Once you learn how to handle your lens, you’ll be able to let your vision come to life within seconds and save a lot of time.
If you want to improve your manual focus skills quickly, take photos of details like flowers and patterns before your neon photography photoshoot.
This will make you more aware of details, motion blur, and sharpness.
Conclusion
You don’t have to spend a lot of money on equipment or go outside to improve your neon photography skills. Using these tips, you can practice whenever and wherever you like.
Once you strengthen your knowledge of this genre, you’ll be able to take incredible neon portraits wherever you go!


