What Are the Best Street Photography Camera Settings?

In street photography the aim is to be fast, and get those unique moments. The best street photography camera settings follow these two requirements.
In this article you’ll learn different camera settings for different street scenarios. From daytime to night photography.
Using techniques like pre-focusing a certain distance in front of you will help you take photos that pass in the blink of an eye.
Street Photography Camera Settings for Daytime
We can separate daytime camera settings into two categories. These are high aperture and low aperture settings.
Using a Wider Aperture for Street Photography
The most common lens used in street photography is the 50mm prime. This is a great piece of glass with largest apertures ranging from f1.8 down to f1.
Do you need such a large aperture for street photography? For the most part no, and an aperture for f2.8 will work very well.
But you might want to photograph at such a high aperture due to subject isolation. The wider aperture will allow you to blur out a distracting background. You’ll also be able to focus on the person or people you’re photographing.
The Drawbacks to Using a High Aperture
Using a high aperture in photography is always a winner, right? Well, no, not always.
Here are a few reasons why high aperture is not always the answer.
- Not a sharp enough focus – The fact that your background is blurry is the result of a shallow depth of field. In the dynamic world of street photography people move, and move out of focus. Getting sharp focus even with auto-focus is not always easy.
- Over exposure – Using a very large aperture on a bright sunny day can lead to problems with overexposure. Investing in a decent neutral density filter should provide a solution though.
- The loss of context – Getting a good photo is often about balancing a range of parameters. There will be times that blurring out the background is not the right option. Especially if that background lends story and context to your photo.
When the light is low, which it will be at night, you’ll need to use a lens with a large aperture.
Other Camera Settings for High Aperture Photos
The other settings you use will depend on the type of photo you wish to produce. But also on the available light you are photographing in.
If you want to produce silhouettes, or a low-key photo, you’ll need to underexpose your photo. Aperture priority is useful here. But be careful that the shutter speed does not drop too low.
Your ISO during the middle of the day should be set at 100 for the best image quality. When there is less light and at night, you can raise the ISO. You can raise the ISO to around 2000, or higher with a camera that deals with noise well.
A shutter speed of not lower than 1/100th is best.
When to Use High Apertures in Street Photography
So when is the best time to use a higher aperture for your photo? Let’s take a look at some scenarios where this would work.
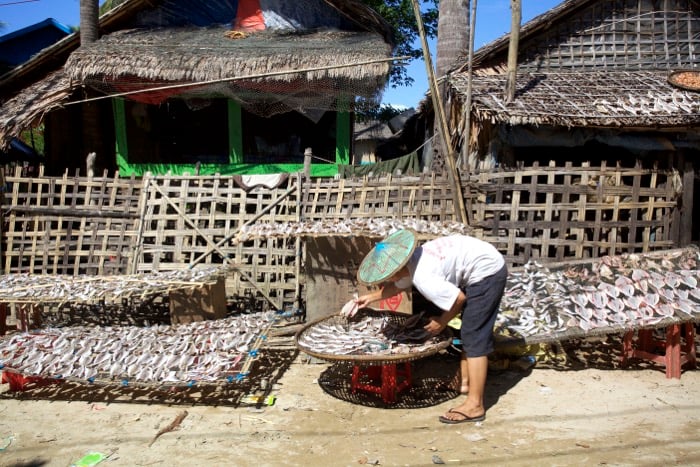
- Isolating the subject – A customer buying something from a street vendor? Use the shallow depth of field that large aperture provides to isolate the subject.
- Removing a busy background – You have a great street portrait, but an unattractive background? Use a large aperture and you’ll get rid of that background.
- Getting a nice bokeh – There are times when bokeh can look especially nice. Light shining off leaves in a park, or lights in the background of your subject. These often look better when blurred out as bokeh.
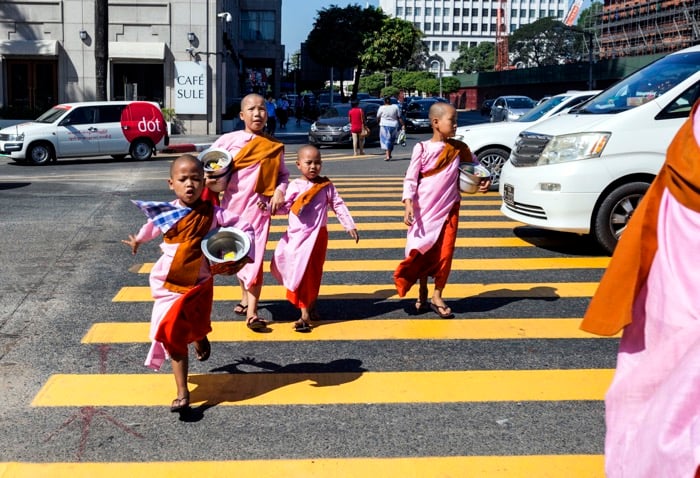
Looking for people going about their daily life is a good way to find nice street photos.
Using a Small Aperture for Street Photography
The alternative to a large aperture is to use a small aperture, giving you a much broader depth of field.
But why use a small aperture?
- Pre-focusing – Rather than using auto-focus, you can pre-focus on an area and wait for a person to walk into this area. Use the DOFmaster to work out the focus area that you can use at f16 or smaller. This is faster than auto-focus, but relies on people of interest walking into your focus area. You will of course be turning your focus to manual for this.
- Hip photography – Using a lens set to pre-focus as described above allows you to do hip photography. You’ll be using a small aperture, and a wide angle lens for this type of photography. Preset an area in front of you that will be in focus. With this type of photography you don’t hold the camera up to your eye. Instead, think of what will make a good photo, with the camera at your hip. You now take the photo, with people less likely to realise you took the photo.
- Show more of the scene – Many will argue the aim of street photography is to show a story. And that means showing more not less of the scene. Using a smaller aperture will mean you need to work with the background, and can’t blur it out. This will lead to you thinking how to position the element in the background to give you the best photo. It’s also true that for a lot of street photography a strong narrative means that a busy image is not an issue.
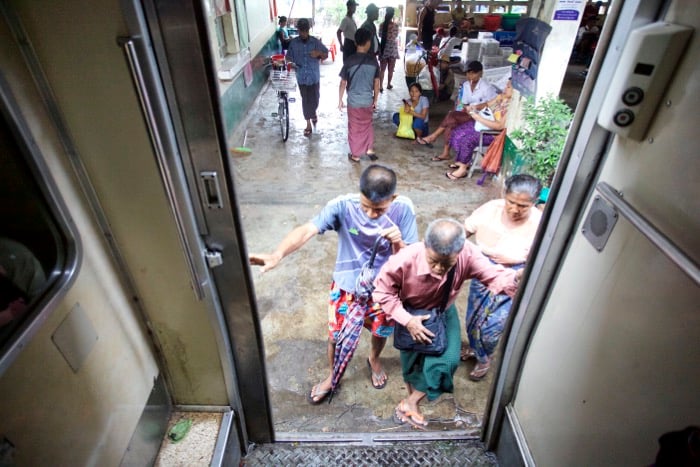
People coming through a train door is an ideal scenario for pre-focusing. The door provides a nice frame for the photo as well.
The Drawbacks of a Small Aperture
Using a small aperture can be great for daytime street photography. And adjusting your ISO between 100 and 2000 to keep your shutter speed at 1/100th is a good idea.
A lot of great street photography is in low light, and at night though. Will shooting at f16 work for that? The short answer is no.
Photographing at night at f16 will lead to blurry photos. Especially if you’re using shutter speeds bigger than one second. Even if you try cranking up the ISO.
Pre-focusing your camera, and hip photography are great ideas for daytime street photography. They’re not great for nighttime street photography or when the light level is low.
Creative Street Photography Camera Settings
You’ve now seen the best street photography camera settings to use. But a camera is a very creative device. You can push these settings to get even more unique and interesting results.
A shard of light like this one is the ideal time to try underexposing your photo.
Use a Slow Shutter Speed
There are two times you may want to experiment with a slower shutter speed in street photography. This shutter speed need not be too slow either.
Keep the shutter speed between 1/10th and 1/40th of a second. This will allow you to capture motion, but still keep a sharp image.
Set aperture and ISO according to the level of available light. This way you’ll make sure the exposure is correct.
- Panning – Panning allows you to show a sense of movement, while retaining a sharp image. You follow the motion of a moving object, and take the photo while moving in sync with it.
- Motion capture – This time you’ll keep the camera steady. Using a tripod is best for this type of photo. You’ll want a central point that isn’t moving such as a person. Then look for other people or cyclists that are moving around the stationary person.
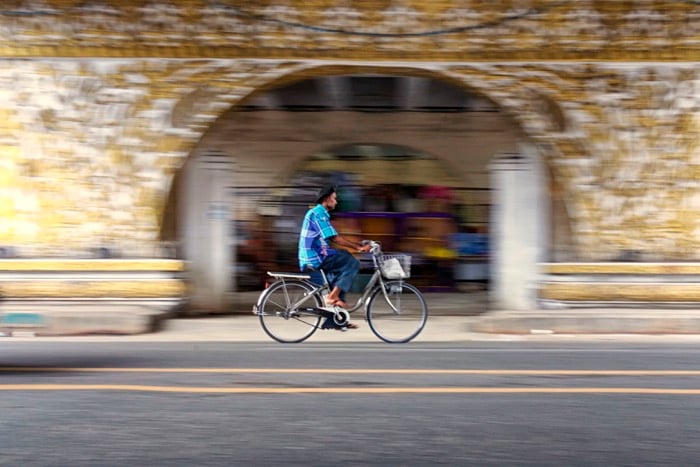
Techniques like panning can be applied to street photography, when you use the correct camera settings.
How to Use Strong Sunlight to Create Low Key Images
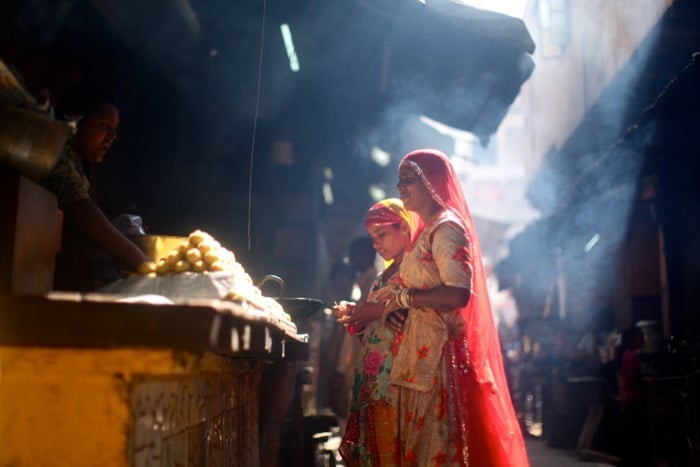
You can use sunlight to create low key street portraits with a black background. You’ll be using the sunlight to spotlight your chosen subject.
You can’t do this anywhere. You’ll need to find a location where a shard of sunlight is coming through a gap in the roofing. Or look for sunlight coming through a window.
- Pre-focus – When taking this type of photo it’s a great idea to pre-focus. The focus area where the sunlight is shining through. There’s a marked difference in light level before and after this area. Using a smaller aperture here is ideal, so you have a nice big area that’s in focus and sharp.
- Underexpose – The most important camera setting here is exposure value, and this needs to be -2 or -3. That means the photo will be underexposed, causing a large area of the photo to be dark. The only area where exposure should be correct is the person’s face, lit up by the sun. The easiest way to underexpose while using an aperture of f11 is to use aperture priority. Then adjust your exposure value. The camera will set the shutter speed for you.
- The correct location – You’re looking for a shard of light, with the rest of your scene not lit up in the background. An indoor market, with a gap in the roof is the ideal scenario here.
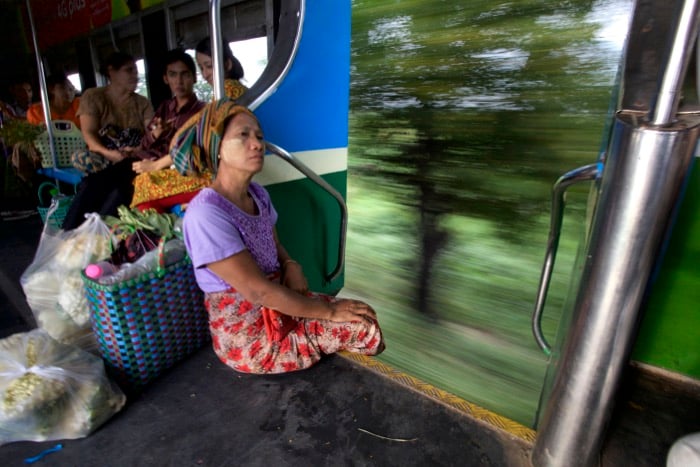
Capturing motion can add more interest to a scene. In this photo you can see the motion of the train, with the blurred tree’s outside.
Late Evening and Nighttime Street Photography
One of the most interesting times of day for street photography is nighttime. It’s also one of the most challenging both for technique and camera settings.
Pre-focusing on a wide area won’t be available because using a small aperture is not an option in lower light. You can still attempt to pre-focus. But the area that you can photograph with it will be much narrower, making it harder to get results this way.
Look for Artificial Light Sources
The light sources you’ll use for your photo will all be artificial. That may mean street lights or light coming through shop windows. Even the light from somebody’s hawker stand works.
As with any other light source you’ll want to make sure the light shines on people’s faces. The exception is if you want to photograph silhouettes.
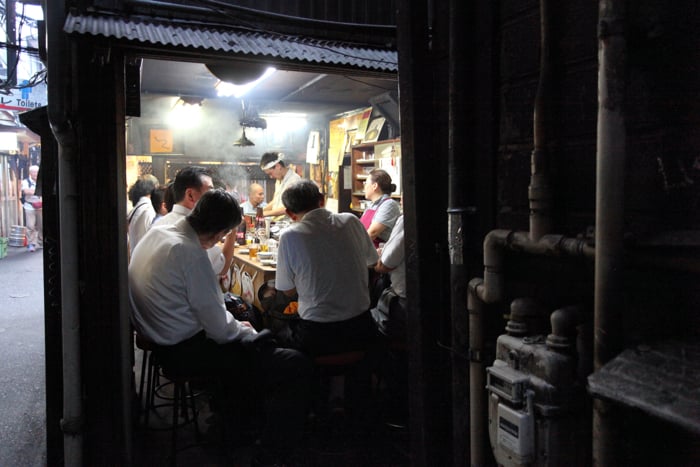
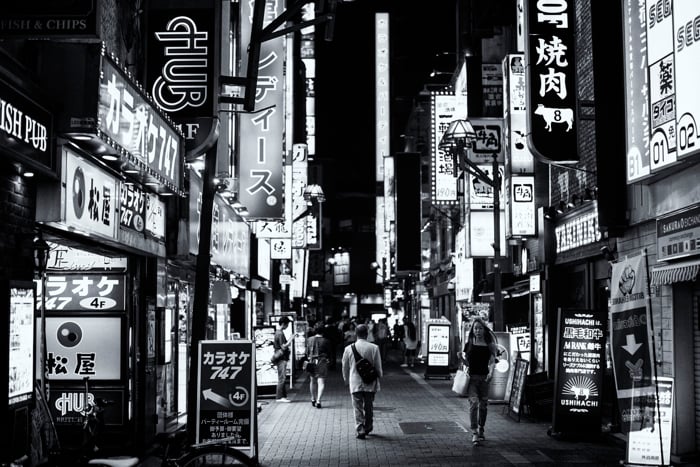
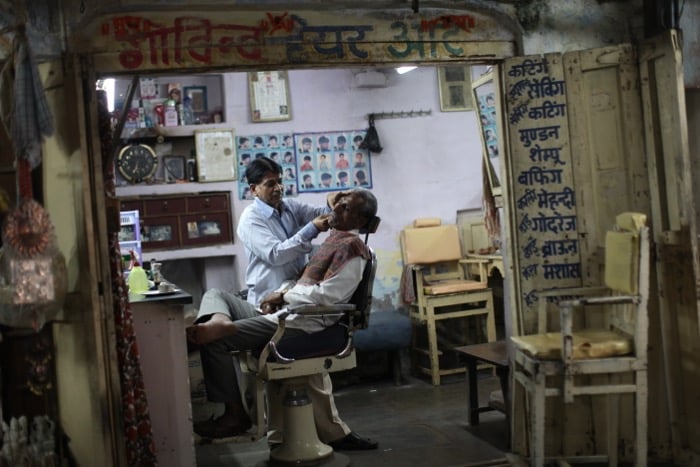
This back alley scene shows how available light can be used in street photography.
What Camera Settings Should You use
This is where your 50mm prime lens will come into its own. That’s because it will have a very large aperture of at least f1.8, which you’re going to need.
At night the important camera setting is the shutter speed, which needs to be high enough.
You may be able to underexpose when the light source is bright, and your subject is standing near to it. A slightly low key look to your photo can add mood. So keep your shutter speed at 1/50th or higher with a 50mm lens.
Adjust your aperture first, and if your shutter speed is still too slow then increase the ISO.
Where Should You Take Nighttime Street Photos
Anywhere that’s urban, and has a decent amount of life will be a good place for street photography. You’re also looking for available light, so bear this in mind.
An outdoor night market is often a good location for this type of photography. Look for moody scenes like people cooking food, and the smoke or steam lit up by any available light sources.
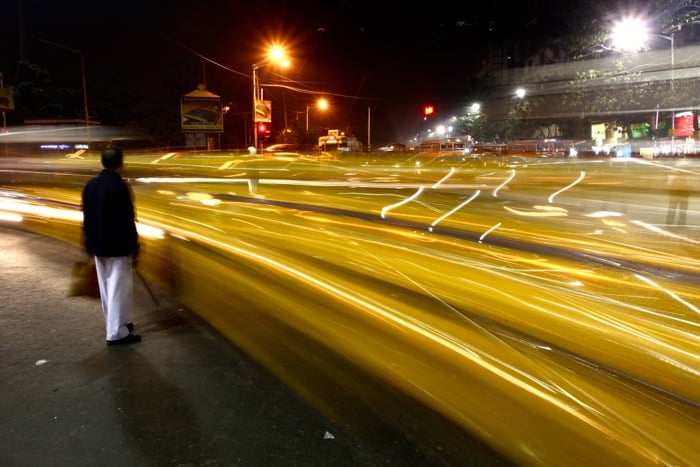
This is a four second exposure. The yellow light trail is produced by many yellow taxis passing to the right.
Conclusion
What’s your favourite street photography camera settings?
We’d love to get feedback from you. Share examples of your street photography in the comment section. And let us know the camera settings you used to get them.
Street photography is all about capturing a compelling story in your frame.