When it comes to camera settings for travel photography, there are a few things you need to keep in mind. First, you’ll want to make sure your camera is set to the correct aperture and shutter speed for the type of photograph you’re trying to take. You’ll also want to adjust your white balance and ISO as needed. And finally, always make sure to pack extra batteries and memory cards!
General Camera Settings for Travel Photography
Before getting into the best camera settings for specific scenarios, we’ll take a look at the basic settings you’ll need to know. It’ll give you a more clear understanding when we get into specifics. And it’ll help you develop command and independence over your camera settings for travel photography.
White Balance
White balance controls how white light is recorded in images. Our eyes automatically adjust so we don’t notice the different tones in natural light.
Unfortunately, cameras don’t do the same. For example, you notice that images taken in bright sunshine have a slight blue tint.
There are two ways to tackle this issue. You can set your white balance when taking the photo or adjust it in post-production. If you intend to do this in post-production, make sure you shoot in RAW format.
I always set my white balance setting to automatic on my camera. This usually works well, but I will change it in extreme situations. These could be when there’s snow, heavy cloud cover, or a lot of reflected light.
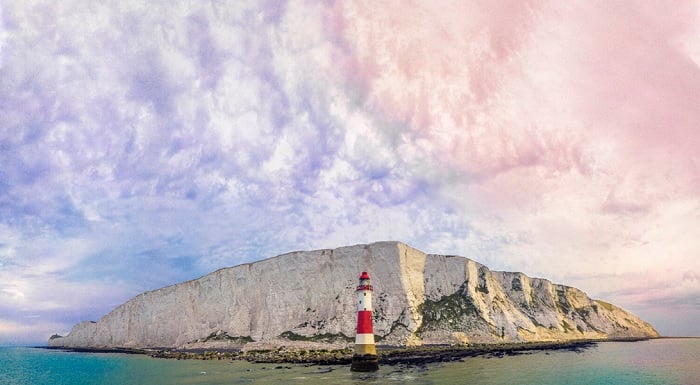
© Dave Williams
Focus
Unless you’re very quick and efficient with manual focus, I’d recommend setting your camera to autofocus. For most occasions, this will work fine and give you sharp photos. If you find the results aren’t quite right, switch to manual focus for more control.
If your camera has a multi-point autofocus system, you should test them to see if some are less responsive than others. The outer ones will sometimes not focus as sharply as the center ones.
An autofocus system with face or eye detection is handy for travel photography. It’ll help you capture portraits and environmental portraits. And an AF that tracks the subject is a godsend for wildlife and action photography.
I always use manual focus when I’m using a tripod to support my camera. The tripod keeps the camera in position, so you can select a focus distance without anything changing. I can zoom into specific sections, making sure the image is sharp and clear.
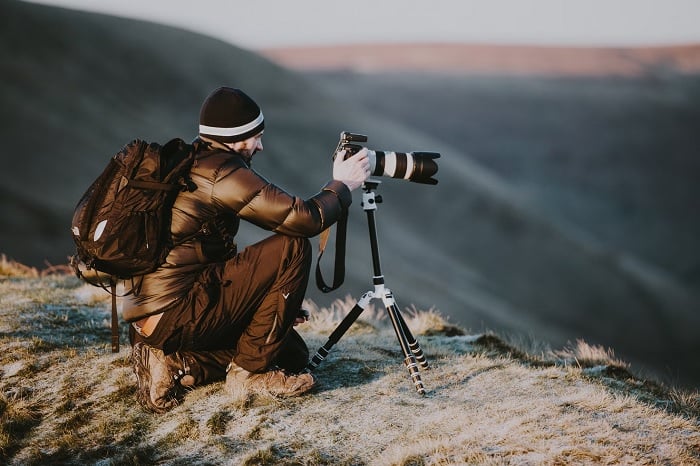
© Annie Spratt
ISO
You should always aim to keep your ISO as low as possible. The higher it is, the more noise will appear in your shots. Digital noise gives your photos a grainy effect and decreases quality. Your photos also lose sharpness with more noise.
Many photographers stick to the automatic ISO setting on their cameras. I don’t recommend this approach for travel photography. The camera will try to keep the ISO as low as possible. But it can still creep to a higher level than you might like.
Learn how to change your ISO setting manually. Most DSLRs and mirrorless cameras have a button, dial, or wheel as a manual ISO control. Practice using the ISO control while you’re shooting. It’ll take some time to get used to it, but you’ll see the benefits in the long run.
You’ll encounter many different lighting situations when you’re traveling. And the light conditions can change quickly. Practice your ISO control before you leave by shooting in areas with different lighting.
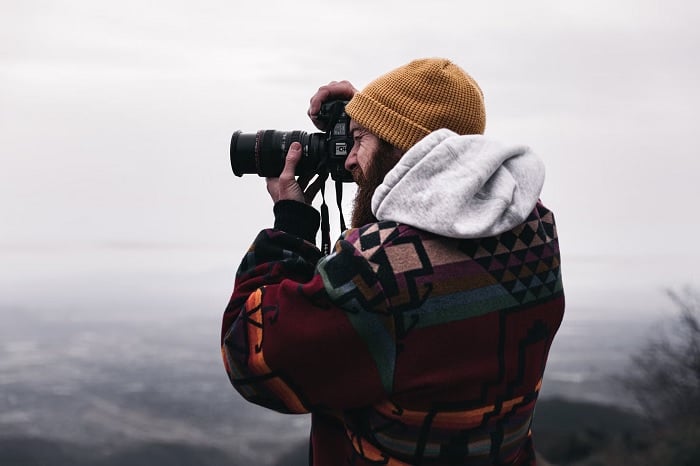
© Jakob Owens
The Best Settings for Different Scenarios
Now we’ll look at the best camera settings for different scenarios. These are common situations for a travel photographer. And you need to know which settings you’ll need when you’re in that situation.
The camera settings in this section serve as a guide for each type of travel photography. They are not strict rules. You can play with the settings, experimenting until you find the settings that suit your style of photography. Use these settings as a foundation and work from there.
1. Traditional Portraits
Portraits are an essential part of any travel photography portfolio. There are two types of portraiture that travel photographers should consider.
The first is the traditional head and shoulder portrait. These shots are fun and easy to capture if you have a willing model. You often need to give your model some direction. But don’t be pushy or force them to do something they don’t want to.
The first thing you need to consider is the background. Keep it simple. A neutral color ensures the focus is on the subject. The most important part of a head and shoulder portrait is the person’s eyes. You need to keep these sharp.
Keep your depth of field shallow to blur the background. This is also called a bokeh effect. And the shallow depth of field draws focus to your subject. As the person will be standing still, you can use a slower shutter speed.
Look for places with interesting lighting. It can be in the sun or the shade. But you want to place your subject somewhere that brings out their personality. It can be a certain color, or you could have dramatic light from a window or door.
Typical Settings for Travel Portraits
- Shutter speed: 1/100 s
- Aperture: f/4 to f/5.6 (You can use a wider aperture, but make sure you are focusing correctly.)
- Aperture priority mode
- ISO: 100 (Unless you need to raise it to ensure a fast shutter speed.)
© Kev Dadfar
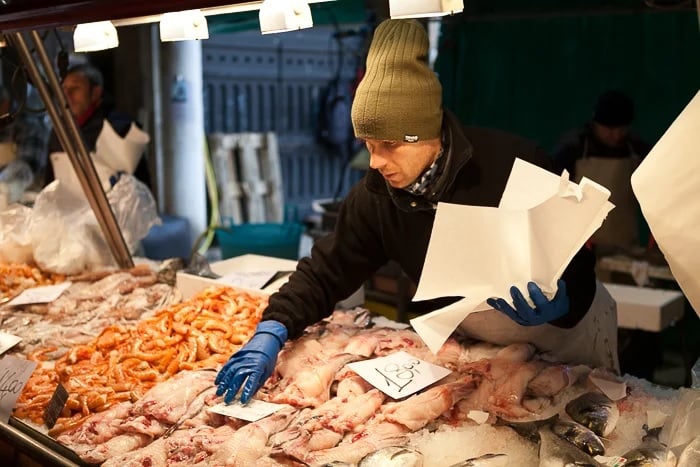
2. Environmental Portraits
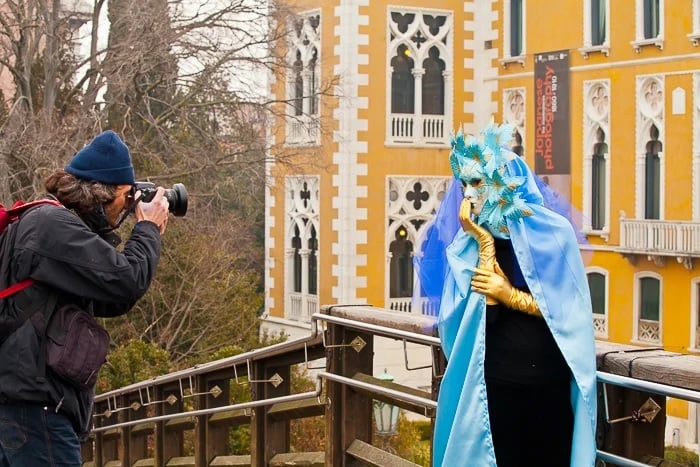
The other type of people photography is environmental portraits. This is when you capture a wider view to show what the person is doing. I could be a market vendor making a sale or a street chef cooking a local delicacy.
If the person is outdoors, the settings for standard portraits should be enough. But you may have to increase your shutter speed slightly if they are doing something fast.
Environmental portraits are often in low-light conditions, such as markets, shops, or restaurants. The lack of natural light makes things a little tricky. It means you have to be more careful about your shutter speed.
If the person is standing still, you can aim for around 1/100 s. But if they are moving around, you may need a faster speed such as 1/125 s, or even faster. And this means you might have to change your aperture or ISO to compensate.
Go for a medium depth of field to show the person and their environment. If you have a very shallow depth of field, the surrounding environment will be out of focus. You want to see the subject and what they’re doing.
Burst mode is an excellent option when shooting environmental portraits. You won’t miss any of the action if they’re doing something fast. And it gives you several photos to choose from. You can pick your favorite and publish it on your blog or social media.
Typical Settings
- Shutter speed: 1/125 s or faster
- Aperture: f/5.6
- Shutter priority mode (You want to make sure that your image will be sharp.)
- ISO: 400 (Possibly higher if working in very low-light conditions.)
- Burst mode
© Kav Dadfar
3. Landscape
There are different settings for landscape photography you can try. But one of the key settings for landscape photos is the depth of field. Most of the time, you’ll need to keep as much of the scene sharp as possible. That means you need a large depth of field.
You need a narrow aperture to achieve a deeper depth of field. Remember, the smaller the aperture, the larger the f-stop number. Start at around f/8 and work your way up to achieve the desired depth of field.
Avoid going too high, such as f/18 or higher. Using the maximum aperture can have a negative impact on the sharpness of your photo. You might experience aberration around the edges of your shot when using the narrowest aperture. But this can depend on the quality of your lens.
Shutter speed won’t be an issue if you’re using a tripod. And you can also keep your ISO as low as possible. The lowest ISO is usually 100. But go for ISO 50 if your camera has the ability.
Landscape photography is a bit more tricky when shooting handheld. You may need to bump up your ISO to allow you to take photos with a faster shutter speed. You don’t have the same freedom with your settings because there’s a greater risk of camera shake.
Generally, I will aim for a minimum speed of 1/100 s for handheld shots. Test how steady you can hold a camera, so you know the minimum setting you need in the future.
Typical Settings
- Aperture: f/8 to f/16
- Shutter speed: At least 1/100 s if shooting handheld
- ISO: As low as possible
© Kav Dadfar
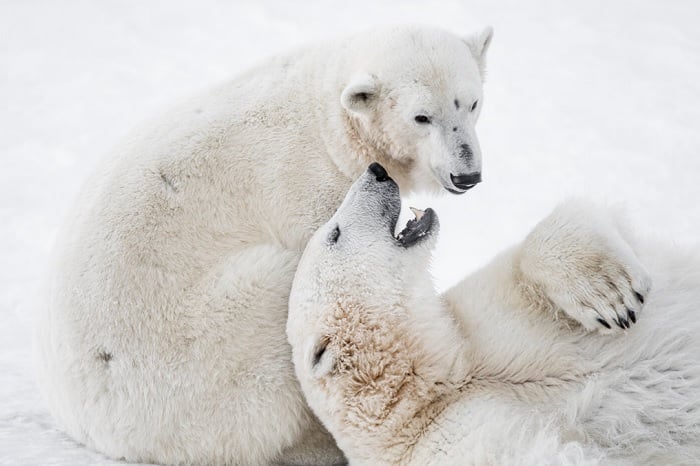
4. Wildlife
Capturing good wildlife photos takes a lot of practice and patience. And one of the main problems you’ll encounter with wildlife photography is movement. Wild animals don’t stay still for long. And some move incredibly quickly.
The critical setting for wildlife photos is your shutter speed. You need a minimum of 1/250 s for wild animal photography. And don’t be surprised if you need to go much faster when the animals are moving around.
Capturing a cheetah in a full sprint or an eagle mid-flight might need a shutter speed of something closer to 1/2000th of a second! A slower shutter speed will leave you with nothing but a blur.
Shutter priority mode is an excellent option for wildlife photography. This mode lets you select the shutter speed while the camera takes care of the aperture setting. You can select the shutter depending on the animal’s movement. And you don’t need to worry about aperture at the same time.
The other useful camera setting is the automatic focusing of moving subjects. (It’s called AI Servo in Canon cameras.) It’s a lifesaving setting for wildlife photographers. It tracks the subject and keeps it in focus as it moves across the frame.
Make sure you’re accurate with your focus. It’s easy to accidentally focus on the long grass the animal is sitting on rather than the animal itself. Cameras often have eye recognition autofocus. But always double-check that it’s focused on the correct subject.
Typical Settings
- Shutter speed: 1/250 s for still animals (Faster than 1/1000 s for moving animals.)
- Aperture: Auto
- ISO: Auto
- Focus: AI Servo for Canon (Use the equivalent mode in other brands.)
- Burst mode
© Dave Williams
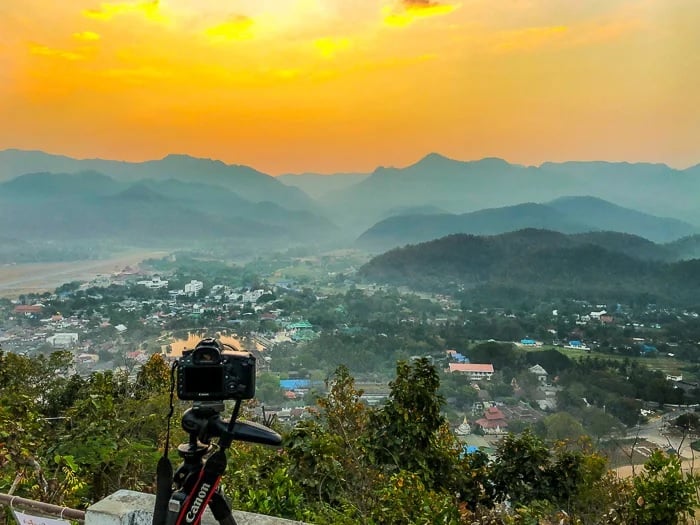
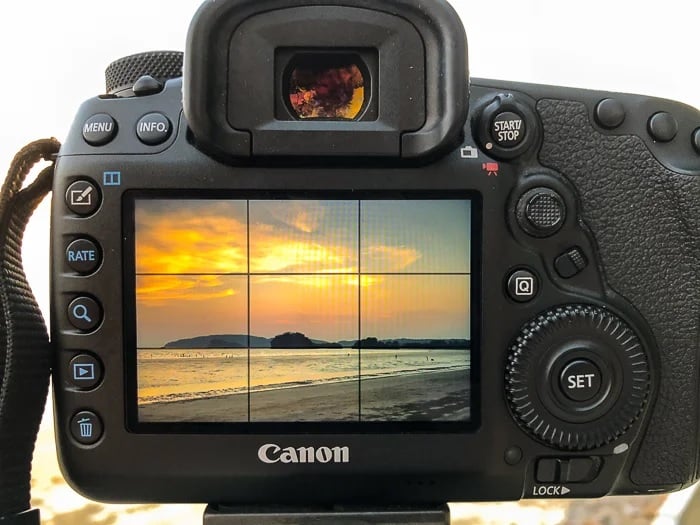
5. Sunrise and Sunset Photography
Sunrise and sunset photography can give you fantastic images. But they both come with a unique set of challenges. Using a tripod will make your life a lot easier. The tripod gives you a stable base and more freedom with your exposure settings.
If you want to show movement in people or cars, use a slow shutter speed. Using a tripod means you can keep your ISO setting low. And you can use a narrow aperture for a greater depth of field.
Shooting sunrises and sunsets from hand gives you more settings restrictions. You won’t be able to go slower than 1/60 s shooting handheld—you’ll experience too much camera shake. Find the slowest shutter speed you can use without blur, then adjust the aperture for a greater depth of field.
Keep the ISO as low as possible. You might need to increase it slightly if you’re shooting handheld. But you don’t want to lose image quality by increasing it too much.
When using a tripod, your camera settings for sunrise or sunset will depend on what you are photographing. So it will be a compromise between depth of field and shutter speed.
If the depth of field is more important, set your aperture first. Once you have done this, you can adjust the other settings accordingly.
Typical Settings for Freezing the Action
- Shutter speed: 1/200 s
- Aperture: f/5.6 to f/10
- ISO: Set according to the settings above
Typical Settings for Depth of Field
- Aperture: f/8 to f/16
- Shutter speed: 1/60 s or below when using a tripod
- ISO: As low as possible
© Kav Dadfar
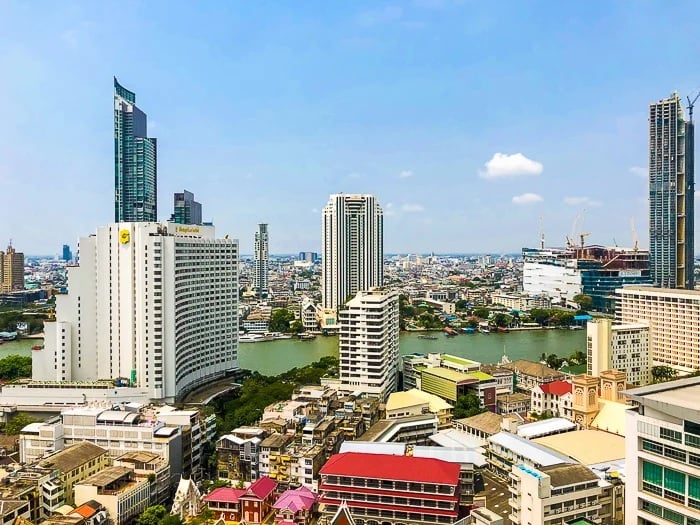
6. Exterior Architecture
You’ve probably noticed that buildings don’t move very much. And that’s a good thing for buildings and cityscape photography. You don’t need to worry about using a fast shutter speed. You can take your time and compose the shot you want.
The main issue when photographing buildings is converging lines. That’s the effect where buildings look like they are falling backward. If you have two tall buildings close together, it will look like they’re leaning into each other.
The best way to avoid this is to move back and photograph the building from further away. But that might mean needing to use a telephoto lens.
Relocating isn’t always possible because you might not have the space to move back. In this scenario, you will need to fix the issue in post-processing. You do this by distorting and tilting the image until the building looks straight.
This means cropping the photo, so try capturing the shot with space around the main building. Otherwise, you will end up cropping the main subject.
You can also use a tilt-shift lens. It’s a specialist piece of equipment that resolves this issue in-camera. But tilt-shift lenses aren’t cheap. Professional architecture photographers often use them. But some travel photographers might not have the budget for a tilt-shift lens.
Typical Settings
- Aperture: f/8 (If the building or multiple buildings are all in one line, you can use a wider aperture.)
- Shutter speed: 1/100 s for handheld
- ISO: as low as possible
- Make sure you leave room around the main subject in case you need to correct the converging lines in post-production.
© Kav Dadfar
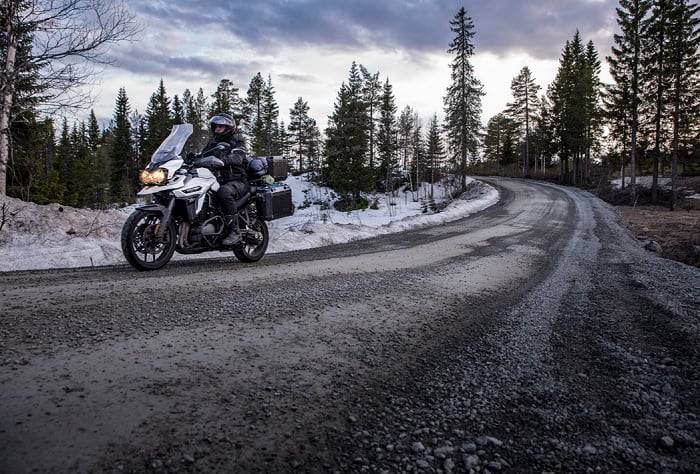
7. Action Photos
Photographing fast-moving subjects can be difficult. Capturing the perfect moment while focusing correctly and ensuring your image is sharp can be hit or miss.
Burst mode is an action photographer’s best friend. It captures many images in a very short time frame, so you won’t miss those blink-and-you-miss-it moments.
Make the most of your camera’s autofocus for action photography. There’s always lots of fast movement in sports and keeping your subject in focus can be difficult. And that’s especially true when you’re trying to get your exposure settings correct at the same time.
Like with wildlife photography, opt for the AI focusing if your camera has it. It will lock on your subject and track it as it moves across the frame. The autofocus and burst mode combine so you always capture the perfect action shot.
You can also opt for shutter priority mode. Set your shutter speed based on the speed of movement. Then use the auto ISO and aperture settings to allow the camera to set these for you.
Typical Settings
- Shutter speed: Minimum of 1/250 s
- Aperture: Auto
- ISO: Auto
- Focus: Auto AI
- Burst mode
© Dave Williams
8. Outdoor Food Photography
Photographing food outdoors is the ideal way to photograph food when traveling. Try to place the dish in the shade to avoid harsh shadows. Cloudy or overcast days are ideal for outdoor food photography.
You can use a shallow depth of field. But make sure you focus correctly on the part of the dish you want to highlight. Think about which element is the star of the plate. Which food item is the local specialty?
Keep your shutter speed at a minimum of 1/100th of a second to avoid camera shake. You’ll be using a wide aperture, so you can use a quicker shutter speed if you have enough light.
Typical Settings
- Aperture: f/4
- Shutter speed: 1/100 s (Use a minimum of 1/60 s.)
- ISO: 100 to 400 (You shouldn’t need to raise your ISO too high if photographing outdoors.)

© Kav Dadfar
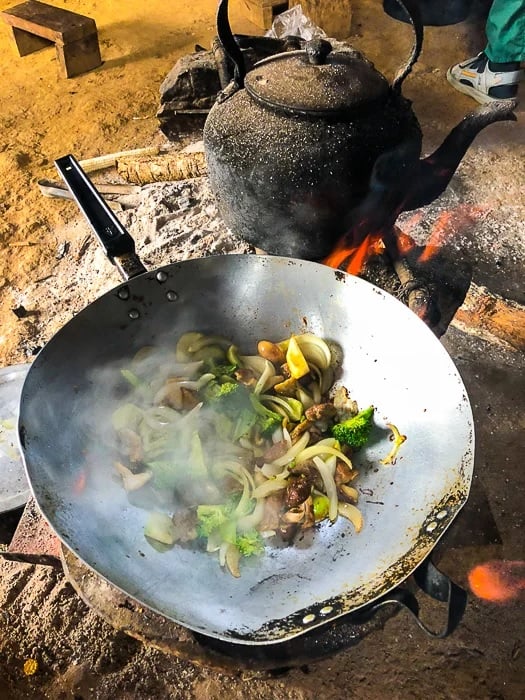
9. Indoor Food Photography
Photographing food outdoors is straightforward. But trying to capture good photos of food indoors can be tough. The main issue you’ll face is a lack of natural light.
Restaurants and indoor markets can be dark locations. And this can leave you with little option but to increase your ISO setting.
Different cameras will have different results when it comes to high ISO. Some cameras experience a lot of digital noise at high ISO levels. Typically, I wouldn't go above ISO 1200. Unless you have a professional-grade camera, you’ll encounter some noise at this ISO.
You’ll also need a wide aperture to get enough light for your exposure. It’ll give you a shallow depth of field. But you can use that for creative shots close to the food.
The shutter speed will depend on the type of food shot you want. If you’re photographing food being cooked, keep it fast so you don’t have motion blur. If it’s served and ready to eat, you can slow it down to allow more light to reach your sensor.
I don’t recommend using a flash for indoor food photography. A flash will wash away the colors and tones, leaving you with a flat image. The vibrant colors play a huge role in the appeal of food photography. And a bright flash reduces the mouth-watering effect of your food images.
Typical Settings
- ISO: 800 to 1200
- Shutter speed: 1/80 s
- Aperture: f/2.8
© Kav Dadfar
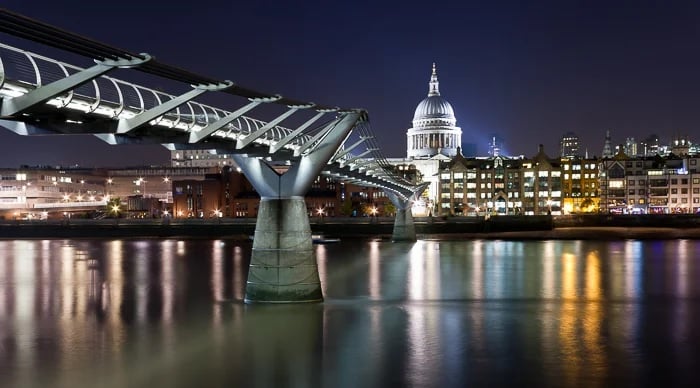
10. Night Photography
Night photography is straightforward if you are using a tripod. Shutter speed can be set to whatever you want. And you can keep your ISO setting as low as possible. And you can also use a narrow aperture for a deep depth of field.
If you want most of the image in focus, start your aperture at around f/8. But if you want a shallower depth of field with more bokeh, you can go lower. But remember to focus on the correct part of the image.
If you’re not using a tripod, you will find your image will have too much noise. Without a tripod, your exposure settings are more limited. The only option is to increase the ISO. And the higher the ISO, the more digital noise you’ll see in your image. A tripod is essential for night photography.
Typical Settings (With a Tripod)
- Aperture: f/8 or higher
- ISO: 100
- Shutter speed: Depends on the aperture
© Kav Dadfar
Conclusion
I use these camera settings for travel photography for consistent results when I’m out on an adventure. I don’t always stick to them. I’ll change and adapt to my situation and environment. But they serve as a guide when I’m on the road.
This is how you should look at these settings too. Nothing is set in stone. You don’t have to follow any of this advice if you don’t want to. But these camera settings for travel photography can be your baseline. You can modify them as much as you like. But you can always refer back to them if you need a hand in an unfamiliar situation.


