Using a rim light effect will help isolate your subject from the background. It will also help create a certain mood in the portrait.
Rim lighting a portrait is not always easy. You must have your light and subject positioned carefully for this technique to achieve the impact you want. Background is also important to consider when setting up a rim light portrait.
In this article we’ll show you how to use a rim light to make your portrait photography more impressive.
What Is Rim Lighting?
The goal is to create a rim of light around the subject. You do this by positioning them so there's a strong enough light that falls on them from behind.
The light source can be slightly to one side or it can be from more than one light. It is typically blocked from the view of the camera by the subject themselves. Otherwise, you can place it above your subject or to the side out of the way.
The technique is most pronounced when the background is dark and there is little or no light on the front of your subject.
Which Type of Light Can Be Used for Rim Lighting?
You can use any type of light to make a rim light portrait.
Studio strobes or off-camera flash produce great results. They can be challenging to work with because the effect is difficult to see prior to taking a photo.
Studio strobes with a modelling light will allow you to see some of the influence the light will have. But it's not always clear. This is because the output of the strobe when it's fired will create a greater contrast than the modelling lamp.
Continuous light, such as LED panels, is easier to use. LED panels will not provide as much light as a studio strobe or flash. But they are easier to work with because you can see the effect they will have as you set your portrait up.
Natural light is also great for rim light portraits. But you are restricted by location, time of day and the weather.
It will not work well on heavily overcast days. On sunny days and days when there's not much cloud cover rim lighting can be achieved.
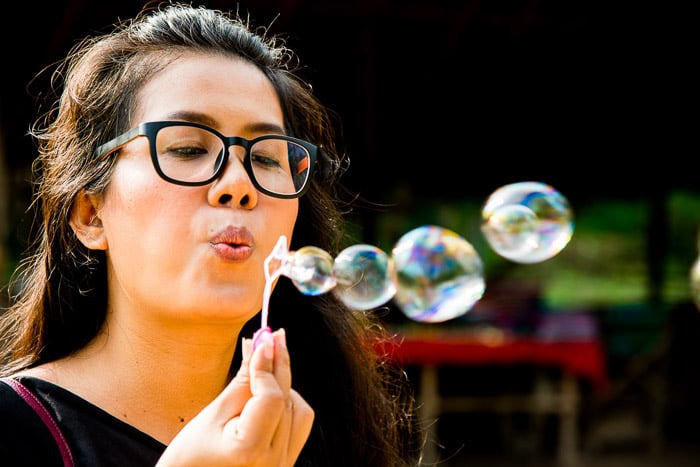
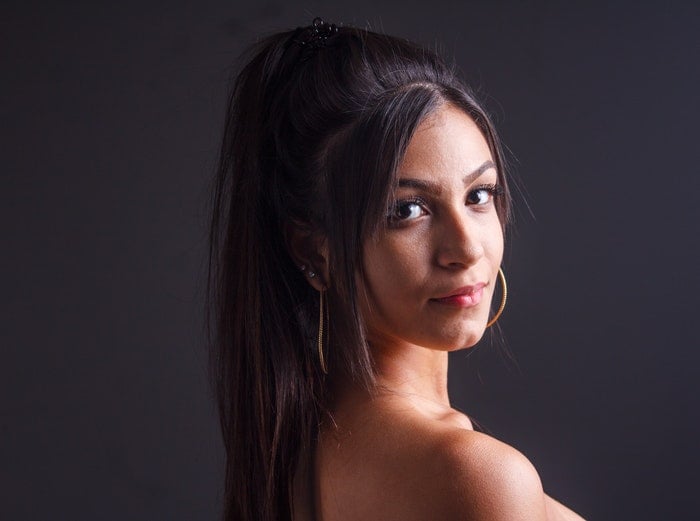
© Kevin Landwer-Johan
To set up this photo of my wife, I positioned her in front of a dark background. The light was above and behind her. Some thin cloud diffused the light from the sun.
The light falling on her black hair adds a rim around her. This hair light also helps separate her from the dark background and adds impact to the bubbles.
If the background were bright, there would be insufficient contrast and you would not see the rim light on her hair. This is an example of very simple rim lighting using natural light only.
Set Up Your Rim Light For Contrast
Contrast is an important factor in setting up your rim light portraits. If the contrast between the backlight and background is low, the effect will be minimised. I like to find a balance. Having the rim light slightly stronger than the key light on the front of your subject will often produce the most flattering results.
If your rim light is much stronger than your key light, your subject will be dark. In extreme contrast, detail in your subject is not visible and only the effect of the rim light around them is seen.
Making rim light portraits with strobes or flash gives you more control over the light output so you can balance it to achieve the result you prefer.
Rim Lighting a Portrait With Studio Strobes or Flash
Choose a dark background as this will provide more impact. Make sure you have a reasonable distance between your subject and the background.
If they are too close together you will risk spill from your light source affecting the background. This will lighten the background and reduce the effect.
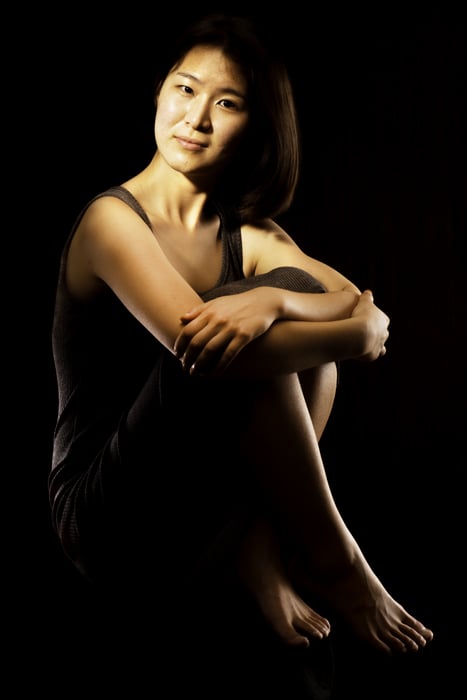
Decide how much or how little detail you want to see in your model and set your main light. For the portrait below my main light was in a small soft box above my left shoulder. The output was set to illuminate her face well.
I used two lights to create the rim effect. One was to my left and behind her a little way, diffused and set to a low output. This created the rim light on her back and right arm.
My third light was to my right, further back and diffused. It was more or less alongside her. This light provides the rim on her legs, left arm and hair.
A single light placed behind your subject will create a rim light. Position the light low behind them so it is not visible when you look through your viewfinder.
You can also place it above and behind them. To do this you will need to place the light on a boom arm or behind your backdrop so you can hide the stand. Light from this position will be stronger on the top of your subject's head.
You will need to be careful no spillover causes flare in your lens, unless you want this effect. Using a grid or snoot attachment on your light will help avoid this.
Multiple strobes or flash give you more flexibility on the outcome of your portrait.
Don't be confined to thinking the light must wrap all around your subject. If this is not what you want, just use one light off to the side and slightly behind your subject.
Adding a gel can also create an interesting look. I have just one light set to create the rim effect in this image and I used a blue gel.
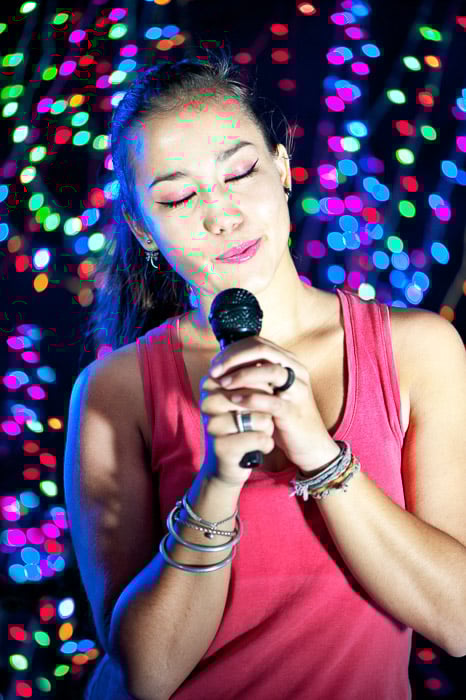
© Kevin Landwer-Johan
Finding the right positioning and balance of light output can be challenging. It will take time to set up so it's a good idea to have everything ready before your model arrives.
You don't want them getting bored waiting while you sort out your lighting set up.
Rim Lighting a Portrait With Available Light
When working only with available light you have fewer options and less control. You cannot re-position the sun if it's not in a convenient location.
I am always on the look out for situations where the light and background are right for a natural rim light portrait. Locations where you can place your subject in front of a dark background so the sun is behind them are optimal.
Morning and late afternoon are the best times of day for natural rim light portraits because the sun is lower in the sky. In the middle of the day, when the sun is overhead, it will be difficult to create a rim light effect.
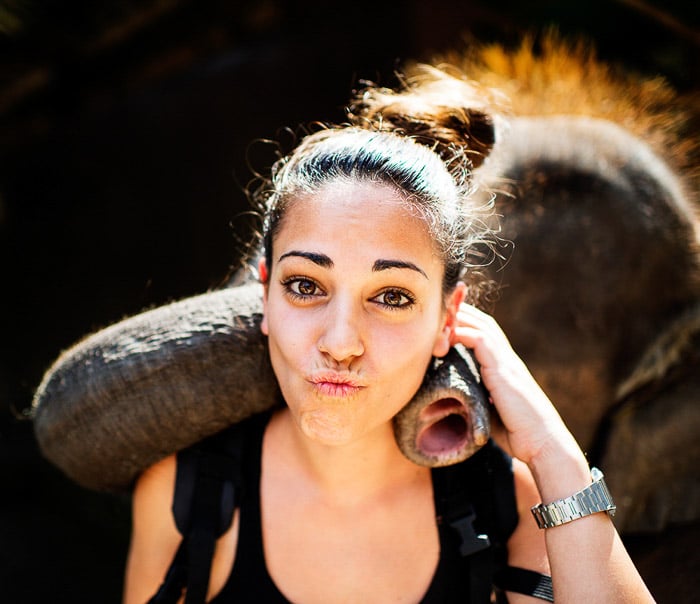
© Kevin Landwer-Johan
This photo was taken on a sunny day. Full sunshine is touching the back of the woman and the baby elephant creating the rim light. The dark background creates the contrast.
Her face is evenly lit with light bouncing up from the concrete path in front of her. This brings a pleasing balance to the light.
The elephant is much darker because the light from the ground is not having so much effect on it. Plus elephants have extremely light absorbing skin.
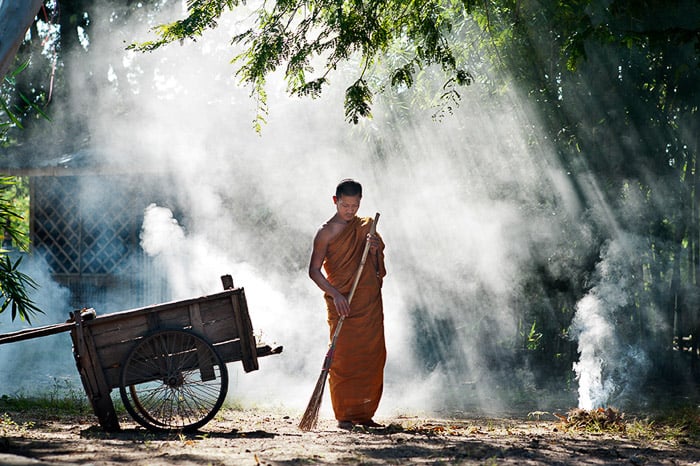
© Kevin Landwer-Johan
In my portrait of the monk sweeping his yard the effect of the rim light is minimised. The sunlight is strong but because the smoke in the background is also illuminated by the sun, there is not much contrast.
You can see the rim of light around him still, but it's not so obvious. If the smoke had not been there, the background of bamboo and the fence would have been dark and provided contrast with the rim light.
Rim Lighting a Portrait With Available Light and Flash
Making use of sunlight and adding a flash gives you more flexibility. A flash behind or in front of your model allows you to balance the light how you like.
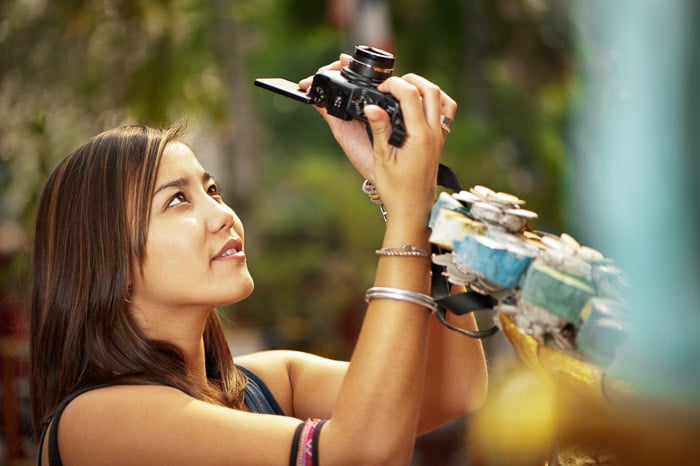
© Kevin Landwer-Johan
The day I made this photo the sun was slightly obscured by thin clouds. I had my flash on a stand to my left and the softbox diffused its light. Both my camera’s exposure and my flash output were controlled manually.
I set my camera to expose for the sunlight reflecting off her. Then I set my flash output to slightly less. I did not want a strong contrast in the image to create the mood I was aiming for.
Translucent Edges Enhance a Rim Light Portrait
Frizzy hair and clothing can amplify the effect of a rim light. Light passing through a translucent subject scatters a little and heightens the impact.
© Kevin Landwer-Johan
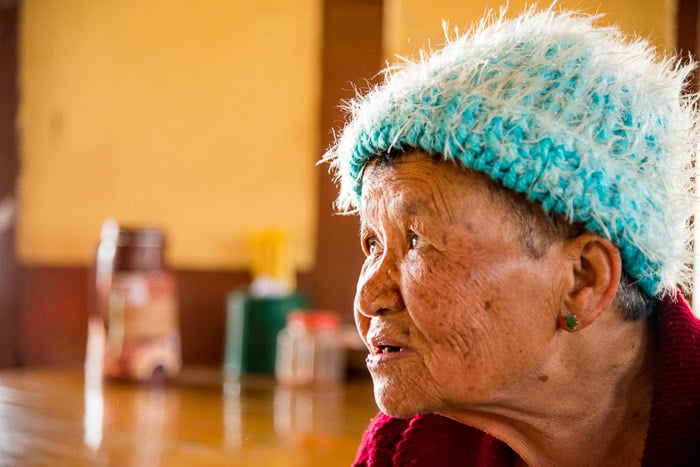
This dear lady we met at a roadside restaurant in Myanmar was happy for me to photograph her. I was attracted by her fluffy hat. The light coming through a window to my left and the open shop front on my right balanced beautifully.
The fuzziness of her hat caught the light and scattered it nicely.
Post Processing Rim Light Portraits
Refining your portrait during post processing can significantly alter a rim light affect. Darkening or lightening different parts of the image can change the mood.
This will be easier to do with a RAW file than a jpeg because you have more information saved in your RAW file.
© Kevin Landwer-Johan
© Kevin Landwer-Johan
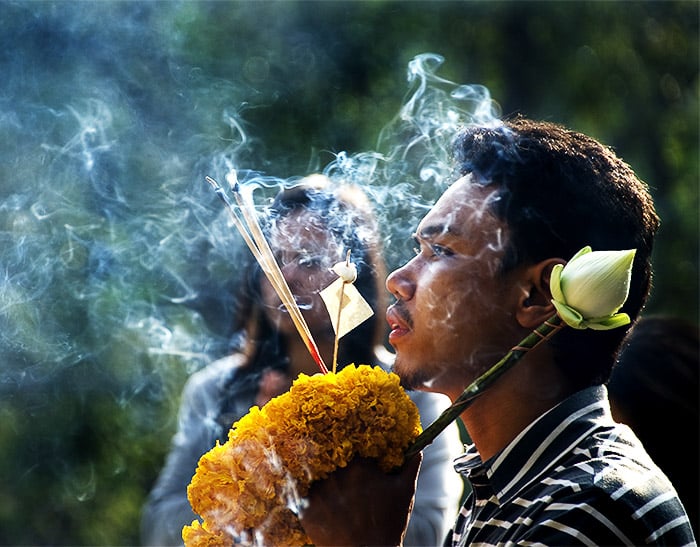
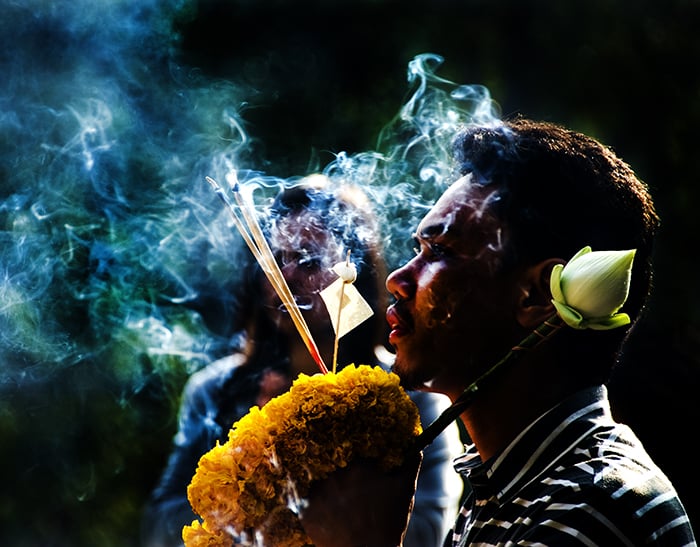
Light is reflecting off the ground into this man's face as he makes merit at a Buddhist shrine. The background and smoke is lighter than I would have wanted it.
But it would not have been appropriate in this situation to add flash behind him. So I post processed the image to add more contrast. This has enhanced the rim light effect.
Using the Burn Tool in Photoshop I have darkened his face and the background. I set the Range of the Burn Tool to Shadows. In this mode only the darker parts of the image are altered when you brush over them.
I also used the Dodge Tool to lighten some parts of his face affected by the light. When I am using these tools I have the Exposure setting at around 10% to give me more control.
Conclusion
As with all photographic techniques there are many ways to use them to obtain the look and mood you want. Experimentation is key, especially when you are trying something new.
Creating a rim light portrait will help you gain understanding of the balance of light you need to achieve.
Try setting up for the rim light effect using only available light. Once you are successful, introduce a flash to your mix.
© Kevin Landwer-Johan
Make some photos with the sun behind and flash in front of your subject. I suggest you diffuse your flash for a more pleasing result. Then try placing the flash behind your subject.
No diffusion is necessary when the flash is set up for backlighting. A snoot or grid may be helpful to direct the light and stop it spilling from behind.
If you have access to studio lighting you can try many more configurations of lights. It will be best to allow plenty of time and have a model who is willing and patient.