Clipping masks are an essential feature of Photoshop. You can use a clipping mask to selectively adjust an image layer while maintaining a non-destructive workflow.
In this guide, we will show you how to create a clipping mask in Photoshop.
How to Create a Clipping Mask in Photoshop
The clipping mask in Photoshop works in a similar way to layer masks. They are a pair of layers. One layer shows the content; the other controls its visibility. You can use them to edit parts of your layers selectively.
Photoshop clipping masks, unlike layer masks, are controlled by transparency. Where the control layer is transparent, the clipped layer will be invisible. Where it’s filled with content, the clipped layer will be visible.
This Photoshop method also works with partial transparency. If your control layer is 50% transparent, your clipped layer will be 50% visible.
How to Use Clipping Masks
You will need at least two layers to use a clipping mask in Photoshop.
Choose a layer that you want to mask in. I will use a patch of orange paint to color parts of our logo. This patch will be the clipped layer.

Then, choose your control layer. In this example, our logo will be the control layer.

At this stage, the paint is covering the logo partly. Once I turn on the masking in photoshop, the clipped layer will only be visible where the logo is.
To turn on the clipping mask in Photoshop, drag your control layer below the content layer. Then, click on the line between them in the layers panel while holding Alt or Option.
A small arrow icon will appear pointing downwards. Selecting the upper layer and pressing Alt+Ctrl+G will do the same.
Note that the control layer has to be partly transparent. The logo started as a PNG file with a transparent background. If the background is white, this technique won’t work.
Practical Uses for Clipping Masks
Clipping masks are perfect with adjustment layers.
Usually, adding an adjustment layer on top of other Photoshop layers affects all of them. With clipping masks, you can apply adjustment layers selectively to a single layer.
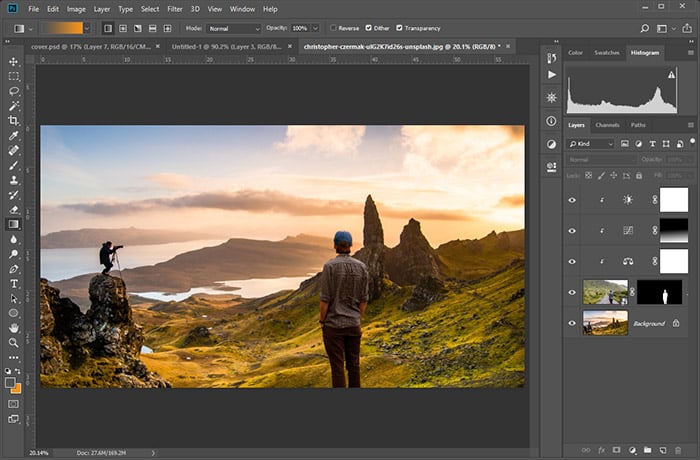
In this example, I will take a photo and place a new person in it. But to blend well, I’ll need to apply adjustments selectively to the person.

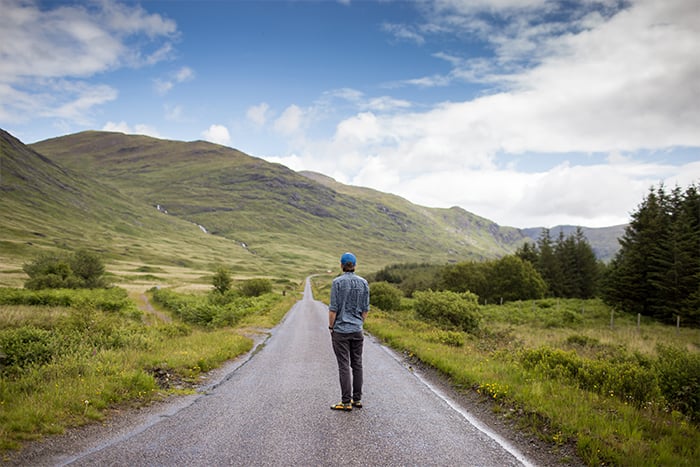
Starting with this photo by Christopher Czermak on Unsplash
Our source for the person. By Danka & Peter on Unsplash
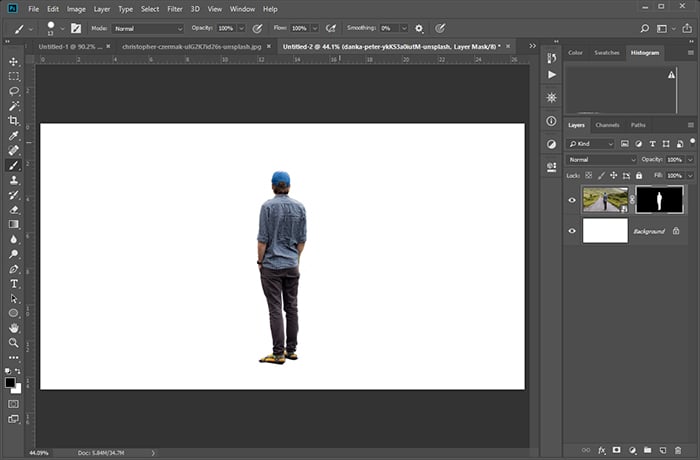
I first need to cut out the person from the second image. Here, I’m using a standard Photoshop layer mask to keep only the person visible.
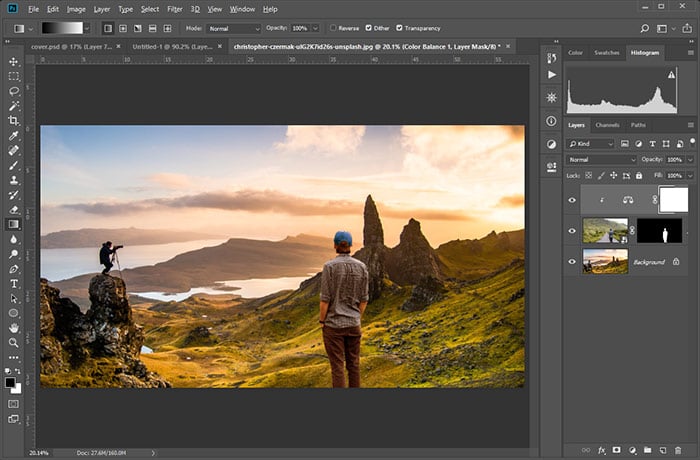
Now it’s time to place him onto the landscape image. I do this by grabbing the layer of the person and dragging it onto the other document.

The person is now in the new frame, but there is a problem. The tones of the landscape don’t match him at all. I need to adjust the colors and brightness. I do this by creating a color balance adjustment layer and setting the correct values.
Holding Alt and clicking on the line clips the adjustment layer to only the layer below it.
Colors matched
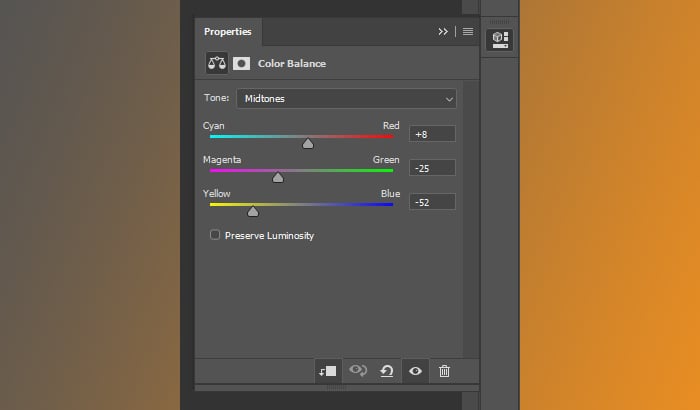
My settings for color balancing
Clipping masks can be stacked. So, to further blend the figure into the landscape photo image, I’m darkening it slightly. Lower parts of the body are still too bright, so I’m adding extra gradual darkening as well.
Stacked clipping masks
Conclusion
A Photoshop clipping mask is a versatile tool. Knowing how to use the clipping mask in Photoshop will enable you to improve and refine your image.