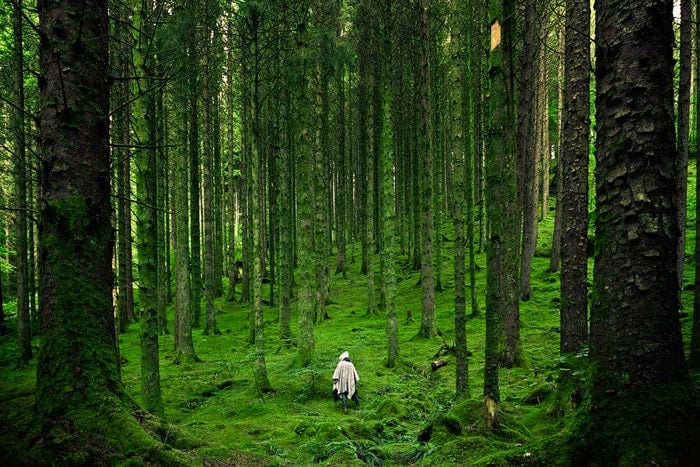
Capturing pictures of forests with a camera is a unique challenge.
I live in the core of the Boreal Forest in the interior of Alaska. These woods offer a landscape of spindly spruce trees, quaking aspens, and birches. There are endless opportunities for forest photography.
I spend a great deal of time wandering the woods, camera in hand, searching for the composition that captures the quiet beauty of the place.

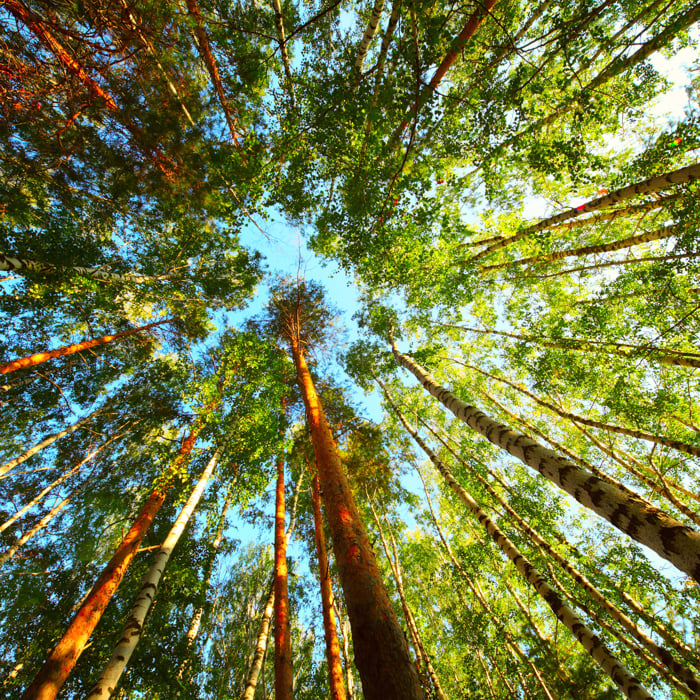
1. Forest Photography—Taking Low-Angle Shots Looking Up at the Treetops
Taking a shot of the trees from a low angle places the viewer into the forest. They will feel like they are looking up at the immense trees.
It emphasizes the enormity of these mighty plants, making the viewer feel humbled and small against their size.
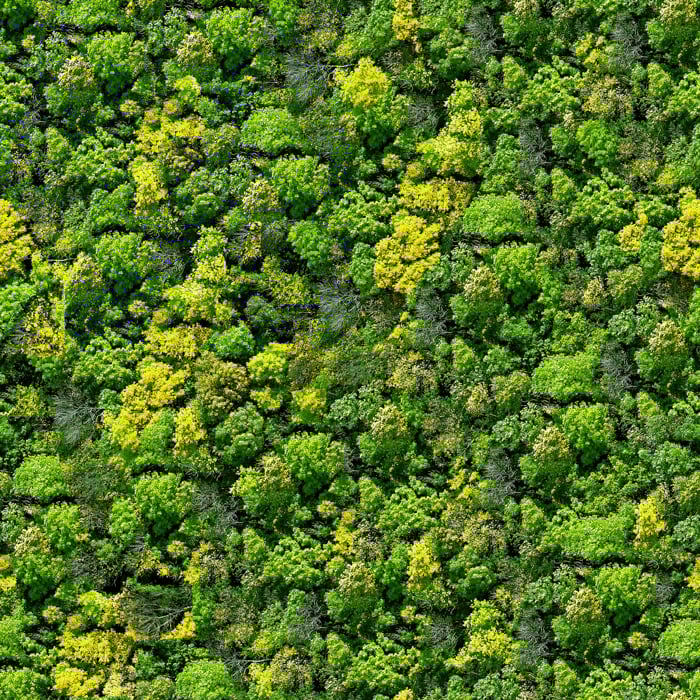
2. Use Aerial Photography to Capture the Vastness of the Forest
With modern advances, you can now take impressive aerial photography with a drone. This technique is amazing for photographing forests. From above, the trees seem even vaster and never-ending.
It is best to take aerial photography on a clear day to get a full view of the treetops. In misty weather, you can also create some great moody shots.
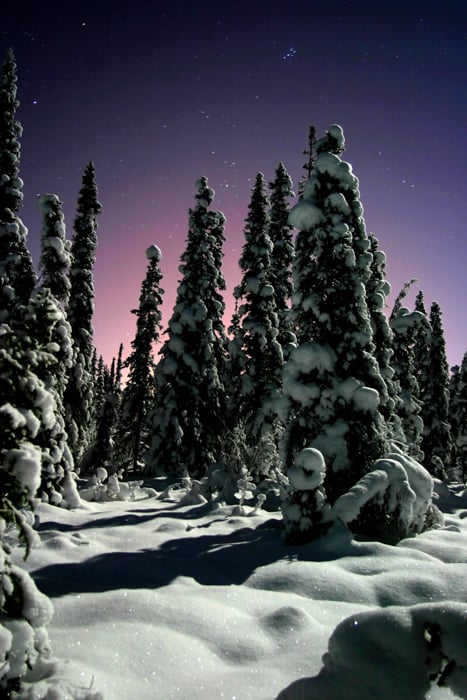
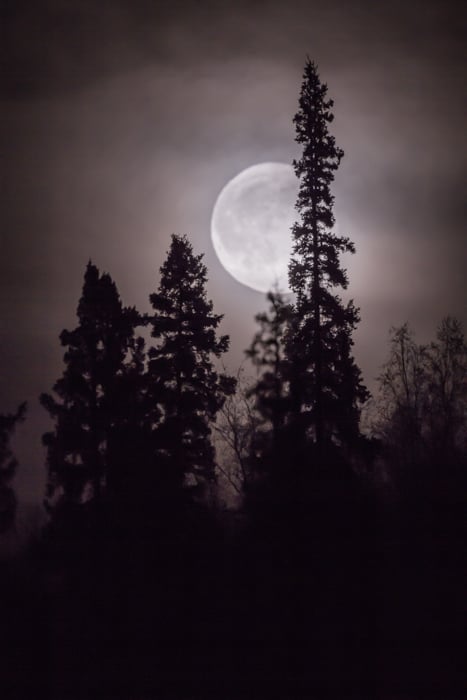
3. Use the Moonlight for Unique Forest Photography
Forests are dark places, especially at night and during the blue hour. At those times, pale starlight and the dim glow of the sky struggle to reach the ground.
In an open woodland, there is more potential. Moonlit forest photography is a chance to make unique images. The moon, when full, casts a surprising amount of light onto the landscape. It also provides a potential subject in itself.
Shooting dark woods is much like other night photography. The foregrounds of trees require extra attention. Consider how the limbs and trunks fall across the sky. Compose so that they complement rather than obstruct the background.
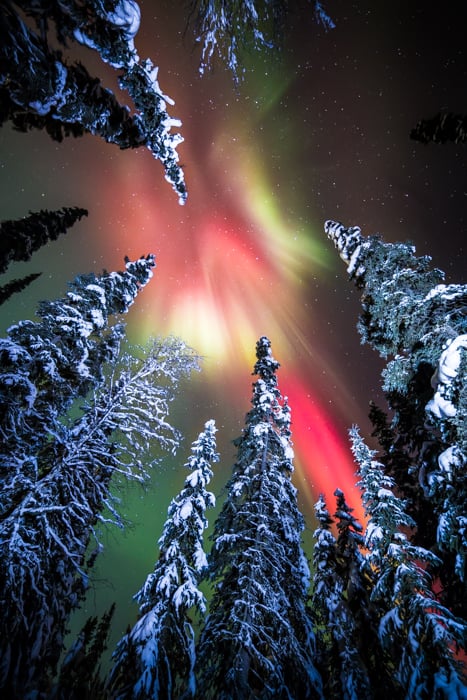
4. Capture the Stars and Night Sky Through the Trees
If you look up, the trees frame the night sky. You can take beautiful shots of the night sky surrounded by nature.
Where I live in Alaska, I often have the chance to photograph the Northern Lights through the trees. This can be a major challenge. As the lights move across the sky, I'm constantly shifting position to ensure that they are visible through the trees.
5. Capture the Silhouette of the Forest for Striking Images
The dim light before dawn or after dusk is a very hard time to shoot in the woods. Trees, already dark, become black silhouettes. Within the forest, things are even dimmer, making it difficult to take even basic photos.
The only hope for a successful shot during these hours is to find a tree silhouette against a backdrop of sky.
6. Use the Best Gear and Settings for Night Forest Photography
What Camera Gear to Use
A tripod-mounted camera is an absolute must for shooting in the woods in low light. The long exposure times make hand-holding an impossibility. A fast wide lens, like an f/2.8 or faster, will also be useful in dark conditions.
What Camera Settings to Use
Embrace long exposures and higher ISOs for night forest pictures. When the moon is not your subject and the night is dark, consider something like f/2.8 for 3 or 4 seconds at ISO 1600 as a starting point. From there, adjust your shutter speed or ISO up and down (but leave your aperture wide open) until you find the exposure you want.
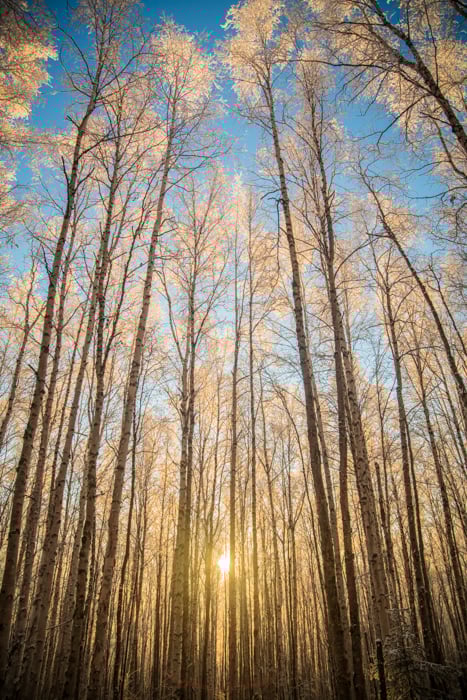
7. Make the Most of Golden Hour
The low-angle light of the golden hour is often muted on the forest floor. The trees block most of the incoming sunlight, leaving behind beams to track across the ground and through the branches.
That warm light will juxtapose the cool, shaded tones and the yellow sunlight. This can be a beautiful time of day. If you are fortunate to find a bit of fog rolling through the trees, these hours are matchless.
What Camera Settings
The right camera settings vary a lot during the warm light of the golden hour.
I tend to constantly shift my shutter speed and aperture depending on the final product I want to create. Since I often work handheld in the woods, I try to keep my shutter speed up around 1/60th second or faster, particularly when using a telephoto lens.
An aperture of around f/8 will usually yield sharp images while maintaining a pleasing depth of field. But again, there is no “correct” setting.
8. Shoot at Midday for Contrasting Lights
At midday, any sun reaching through the trees will result in a blasting contrast of hot sunlight and cool shade.
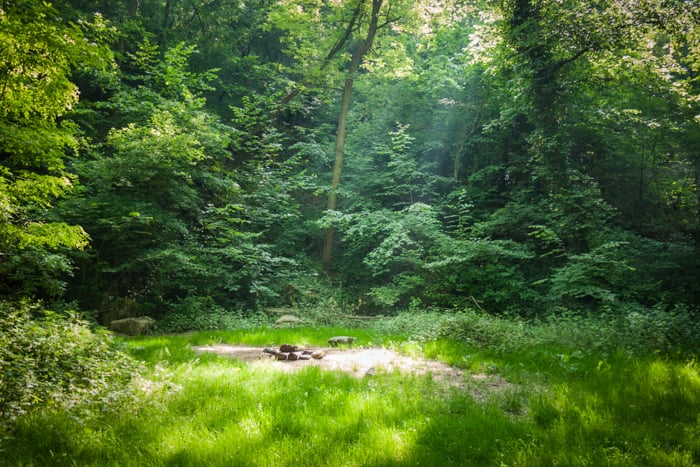
9. Embrace Overcast Weather for Forest Photography
Clouds are like a studio softbox for the sun. They soften harsh light, mute shadows, and provide illumination. This is a perfect formula for photographing forests.
The harsh contrast caused by sunlight disappears. The complex patterns of undergrowth, tree trunks, branches, and leaves emerge. While far from perfect for the grand landscapes, cloud cover is perfect for the woods. On those gray days, I head for the forest with my camera.
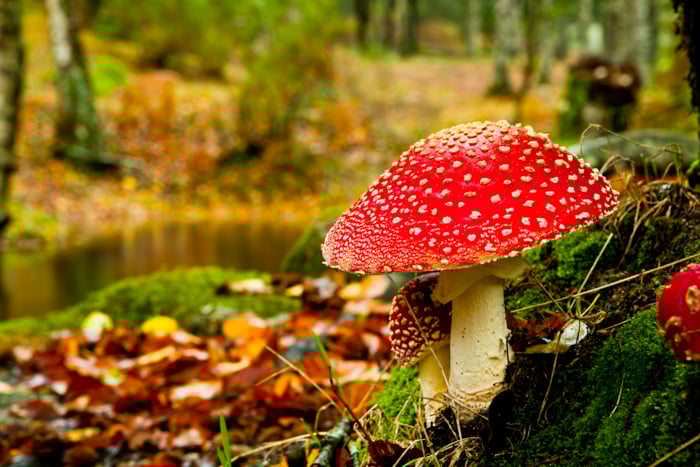
10. Capture the Forest Details
The easiest way to create successful forest photography is to remove all the clutter of the woods. Look past the chaotic branches, the crowds of tree trunks, and the mess of leaves on the forest floor. Focus on one specific part.
With the dappled light of morning, this can be done to great effect. Sections of the forest are illuminated. Look where the light is falling or where it will soon arrive. Then compose an image in those locations. It could be a detail of the forest floor, a flower, or a single backlit leaf.
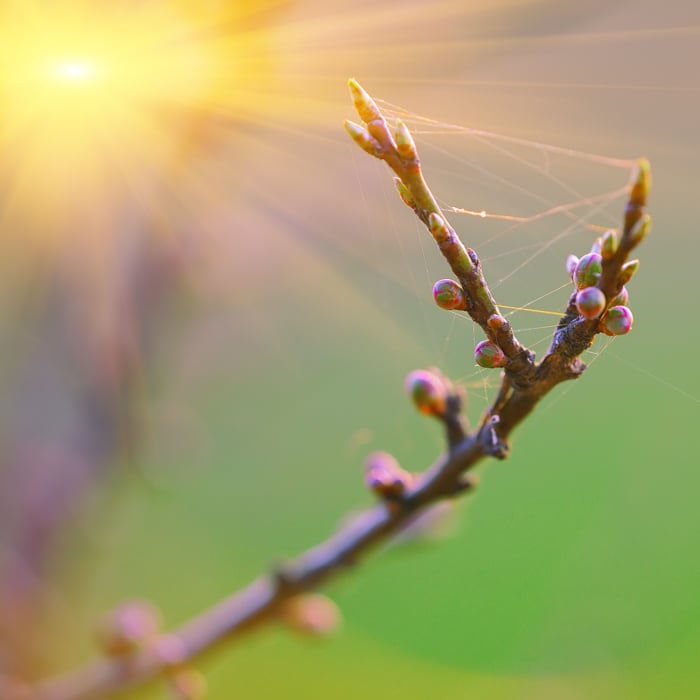
11. Use the Woodland to Tell a Story
Look for small parts of forests that tell a bigger story about the place. What is the season? Can you tell that with a single detailed image? An autumn leaf or a spring bud may be good for sharing a bigger story.
For this kind of image, a short telephoto lens or even a macro lens is a great choice. Images with a shallow depth of field that turns the background into a pleasing blur will be more effective. A deep depth of field can have a tangled background, which distracts from the scene you want to highlight.
12. Create Interesting Compositions with Different Elements of the Forest
Stepping back from the details to large sections of forests can be much more difficult photographically. The woods are full of chaos. There is often too much happening to effectively isolate a clean and interesting composition.
This is where perspective matters. In the previous section about details, I suggested looking for a single element to tell the viewer a bit about the place. Here, you’ll want to keep those details in mind when trying to go a bit bigger to show more of the forest landscape.
In the woods, find a detail—a branch, flower, or leaf—that you find compelling. Then, using a wide-angle lens, allow your focus to fall on your detail while also showing the surroundings.
This is standard practice in many types of landscape photography. In the woods, the method is more complicated. You have to find the right combination of detail and background that provides a wider perspective on the forest.
This is tricky, but it can be an enjoyable challenge in composition. Images that show off the forest in all its glory while retaining the fine details of the place are some of my favorite woodland images.
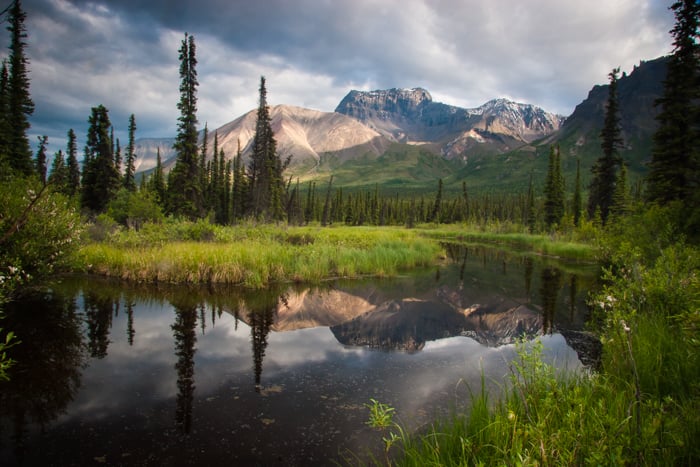
13. Experiment with Focal Lengths to Capture the View
When the forest opens up, we are offered a rare chance to see a broad landscape of trees. These images blur the line between open landscape and forest landscape. But the composition holds some challenges not usually encountered in the open country.
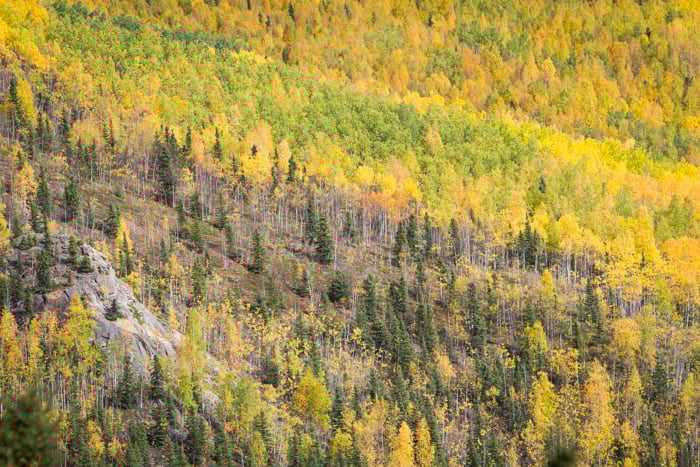 Tight and wide-angle compositions are both options in these scenarios. A wide scene might provide a sense of scale—the drama of a seemingly endless patch of forest.
The composition can become challenging. It is easy to end up showing too much of the nearby surroundings, reducing the impact of the scale.
A telephoto image, on the other hand, has the advantage of isolating the scene from the surrounding chaos and allowing a clean composition.
 There isn't a right or wrong way to make these forest images. What will work and what won't depends entirely on the scene at hand.
Experiment with multiple focal lengths and see what works, but keep in mind the story of the forest and where you are. Make an effort to tell that story by providing context in your images.
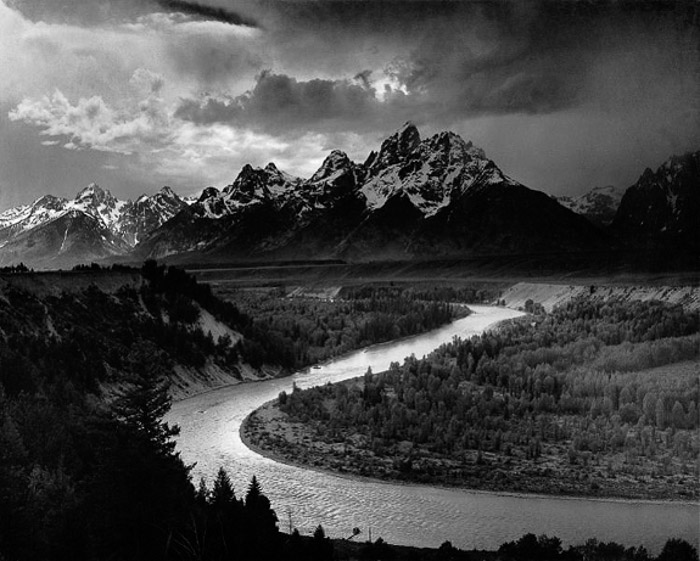
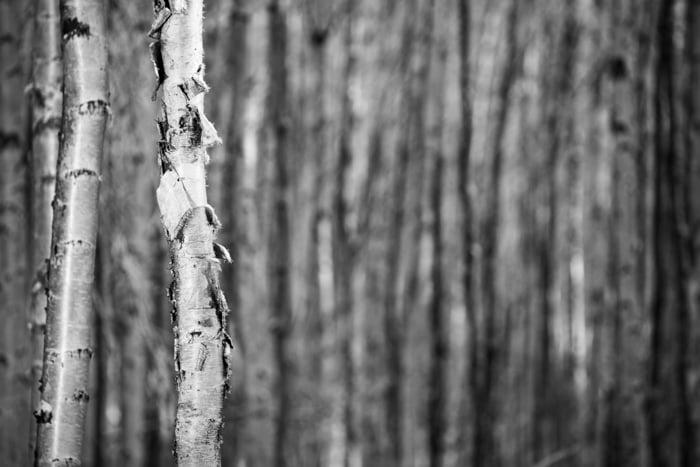
14. Try Black-and-White Forest Photography
Look up the classic images of the Redwoods in black and white by Ansel Adams. You'll understand that forests translate beautifully into black and white. The stark tree trunks against shaded, dark backgrounds result in compelling compositions.
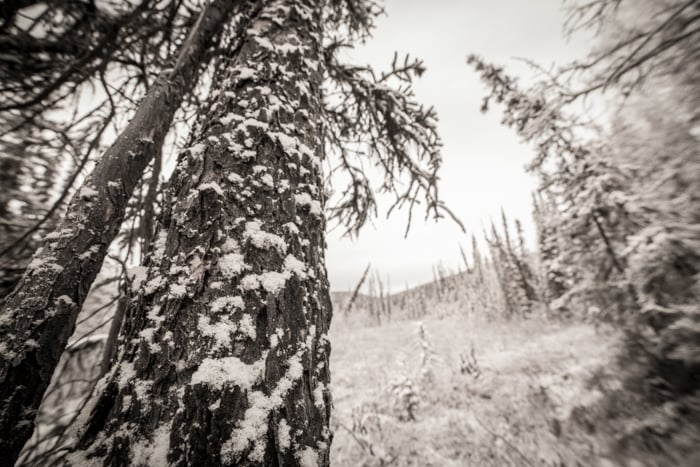 But black-and-white photography is tough. Learning to "see" in B&W takes time in the woods. We view the world in color, and determining how a color scene will appear in black and white is challenging and requires practice. Here are a few guidelines:
Look for contrast. Scenes with a mosaic of brights and darks tend to translate well into black and white.
Take advantage of backlight. Light coming from behind your subject can be difficult to use in color photography. But it’s great in the contrasty world of black and white.
Embrace the shadows. Exposing for the bright parts of your frame will often turn the dark shadows to near black. This can help you eliminate distracting elements in your frame.
There are few natural environments where leaving the color behind can be as effective as in the forest, so give it a shot.
Conclusion
Deep in the woods, the sounds of the outside world are hidden behind layers of trees, branches, and leaves.
Even in small patches of woodlands, you can find isolation. Forests are a place to turn off the daily grind and find yourself in the quiet with a camera. This is a big part of why I enjoy forest photography so much. Even a short walk from my backyard, I feel like I'm in the wild.
Many of us live within a short distance of a patch of woods. Find yours, and explore it. Take the time to find those photographic compositions and then share what you make.
To delve deeper into landscape photography, try our Simply Stunning Landscapes course today!