Using the right tone in photography can have a big impact.
Read on to learn how to use tones to tell stories through your photographs.
What Is Tone In Photography?
What does tone mean? Tone photography can have varying definitions. Tonal range is the difference between the lightest and darkest parts of a photograph.
Where and when you photograph affects these tones. Adjustments made in post-production such as contrast, burning and dodging also affect them.
Generally, we want to use a wide tonal range in photography that represent scenes in a realistic way. In abstract and high/low key photography there is room to push boundaries. You can use a more limited tonal range.
Sometimes tone refers to the interplay of the tonal range. This includes with luminosity, hue, and even the paper the photograph is printed on.
1. Basic Tone Adjustments In Post Production
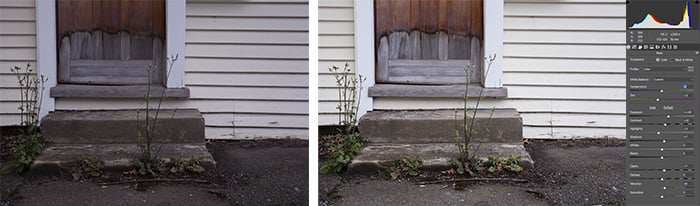
There are a few main post-production techniques I use for tonal range. These are adjustments to the exposure, temperature, dehaze, and contrast sliders. Sometimes I tweak other sliders such as highlights and shadows.
Try different tools until you find ones that work for you and your photographic style. If you’re working in Photoshop, burning, and dodging can be useful for specific areas of a photo.
If possible, work with a raw file format. Keep in mind that incorporating tonal range isn’t just about the contrast in photography.
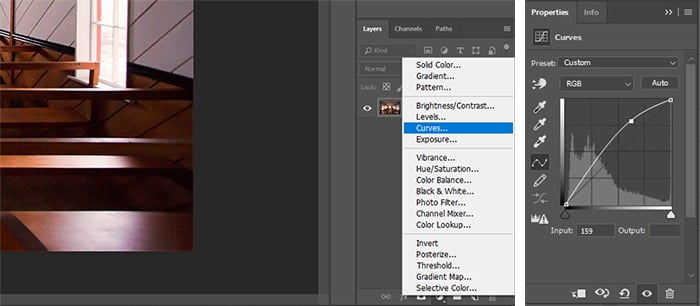
The tone curve tool is also a great feature to use in post production.
Try practicing the tone curve tool with texture photography. You’ll learn about balancing tones and emphasizing highlights, shadows, or both.
Understanding this tool means you can often skip past the individual sliders.
Below is a photo I made at an old, unused hospital in the South Island of New Zealand. The weather was overcast and my camera gave the image a pink hue.
The result was a flat and under-exposed photo. I corrected these issues to reflect the correct tones, luminosity, and hues I saw on location.
2. Using Tones In Your Black And White Photographs
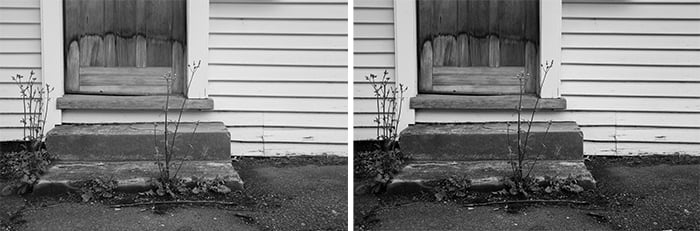
Black and white photography is a great way to practice the technical use of tonal range. Include true black and true white tones in your photograph. And work towards a variety of grey shades.
Referring to the histogram will help with this.
The tones of my old hospital photo worked well in color. But they didn’t convey the spookiness of what I felt when I clicked the shutter.
Converting it to black and white helped, but it needed improvement. I adjusted the contrast and temperature to enhance it further.
3. What Are Split Tones In Black And White Photography?
I’m a fan of using subtle split tones in my black and white photography. This tool adds different hues to the shadows and highlights of your photograph.
There are some classic combinations to use such as brown/orange (sepia) with blue. Or get arty and do something bold.
I applied a sepia tone to the highlights of my hospital photo to represent the age of the subject.
The dark blue tones of the shadows reflect the cold and desolate feeling at the site.

4. Tones In High Tone Photography
High tone (high key) photography is all about well lit photographs with minimal contrast. It’s more than an overexposed image though.
You need to brighten shadows and even out the highlights. And convey atmosphere and emotion. High key photography particularly suits ethereal or positive subject matter.
A good place to start with the tones in your high tone photography is when you have the camera in your hand. Use a well-lit environment. Include dark elements that show some contrast without overpowering the bright scene.
Balancing light and shadows in post production is also essential.

© Heather Milne
5. Set The Mood Using Tones
Figure out the mood you want your photography to convey. Do this before you make changes to the types of tones in your photograph.
What was the weather and light like when you squeezed the shutter? If you photographed a person, what’s their personality type? How does the subject matter make you feel?
Answering these questions through your photograph will make an impact on the viewer.
6. Cool Tones In Photography
Using cool tones in photographs means incorporating a slight blue or violet hue to the image. It conveys different emotions depending on the subject and composition.
You can do this with both color and monochrome photography. I tend to use cool tones to suggest isolation and sadness, or calm and tranquility.
- photograph during the blue hour
- set your white balance to white fluorescent or Tungsten light
- use specific camera and lighting gear such as blue or violet filters
- make adjustments to the temperature and color sliders in post-production
- apply a cooling adjustment layer in post-production
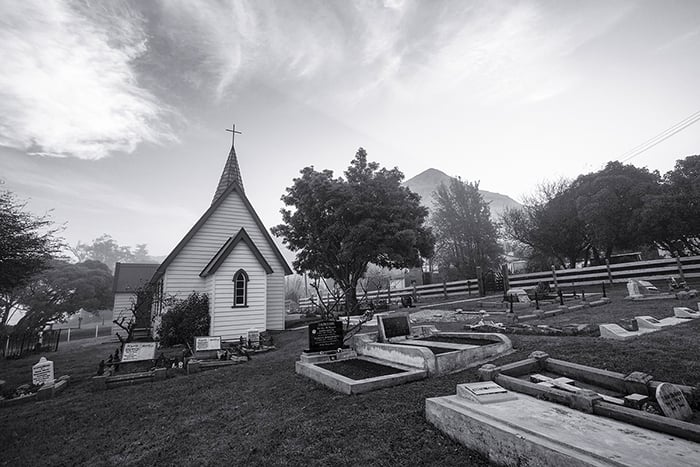
The photo below of a Whare Karakia in New Zealand was made on a cold afternoon in early winter.
The mist was clearing out of the valley but the sun was very weak. There was nobody else around.
I wanted to show the solitude and peace combined with the eerie atmosphere of the cemetery.
I applied cool tones across the full tonal range in post-production. This was what I needed to achieve the exact look I wanted.
© Heather Milne
7. Warming Up With Tones
Warm tones in photographs evoke feelings of warmth, happiness, and nostalgia. My favorite way to capture orange, brown, and yellow tones is by shooting during the golden hours.
When the weather doesn’t permit this, I rely on in-camera and post-production adjustments:
- photograph during the golden hour
- set your white balance to shade or cloudy light
- use specific camera and lighting gear such as orange and yellow filters
- make adjustments to the temperature and color sliders in post-production
- apply a warming adjustment layer in post-production
I made this photo of the Whare Karakia exterior with its cool tones.
I also went inside where the warmth of wooden fittings, artificial light and 150 years of history welcome me.
I wanted to respect these elements. This is why I applied warm tones to accurately represent what I felt.
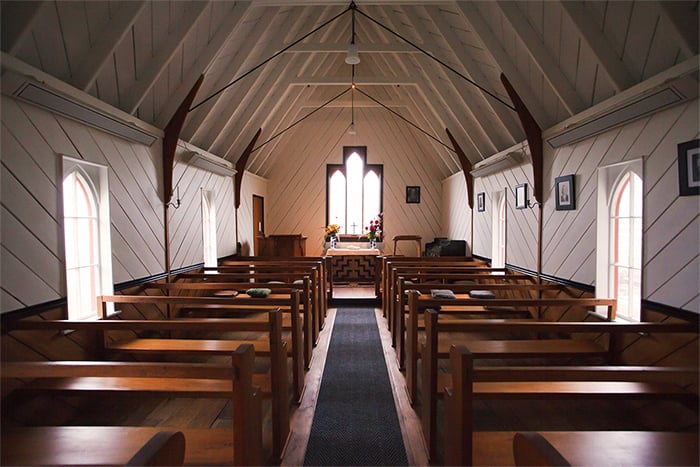
© Heather Milne
8. Less Is More With Tones In Post Production
Unless I’m creating abstract artwork, my number one rule when using tone in photography is to keep it real.
Maintain the integrity of your photograph. Use post production techniques to enhance a quality photograph, not to save a poor image.
I err on the side of caution by introducing tonal changes gradually. Then I review the photograph the next day.
Test print your images when possible. And consider how the paper stock affects the types of tones you’re using.
Conclusion
When you’re considering tone in your photographs, engage both sides of your brain. Learn and practice post production tools for tone.
Understand the storytelling and emotional components of your photography. This will help you evoke emotion through tone.
You’ll create photographs that are compelling in story and technique.


