Learning how to edit color in Photoshop is essential if you want your images exactly how you imagined them. There are a few ways you can edit colors using Photoshop, from inverting colors to adding color to monochrome images.
This article has everything you need to know about editing color in Photoshop. Keep reading to find out more.
How to Edit Color in Photoshop
There are many ways you can edit color in Adobe Photoshop, and we cover all the main methods in the following sections.
We cover specific color editing tasks, such as adjusting white balance or colorizing black and white images. And we also look at some of Photoshop’s unique color editing features, like theiry dodge-and-burn and color isolation tools.
The sections below serve as an introduction to each color editing method. Click the links in the text to see the full, in-depth article on each topic. We also have a full guide on Photoshop editing.
Change the Color of an Object
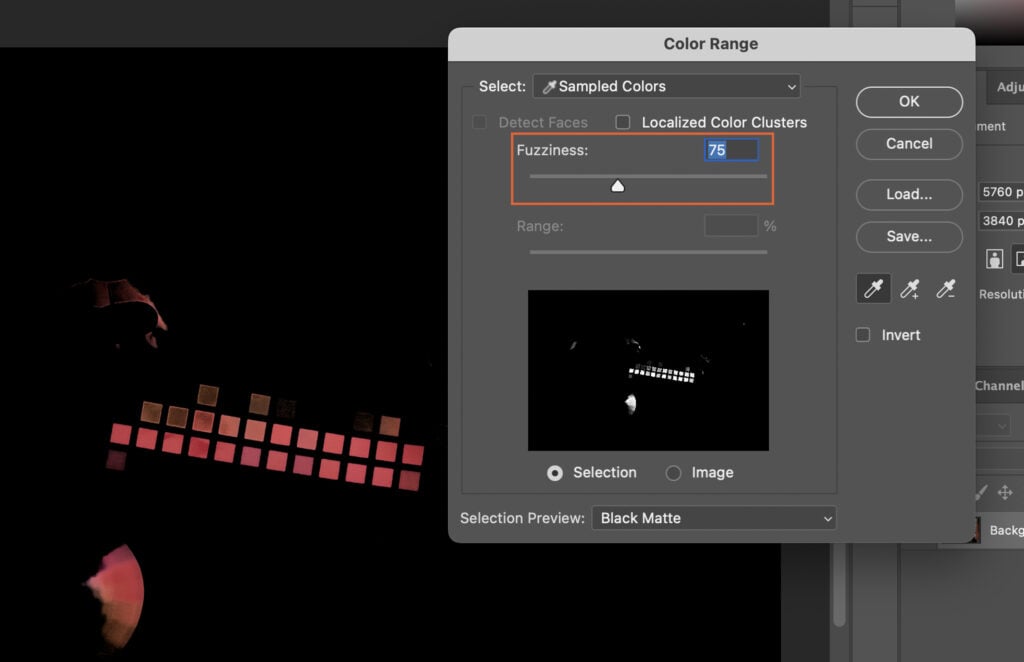
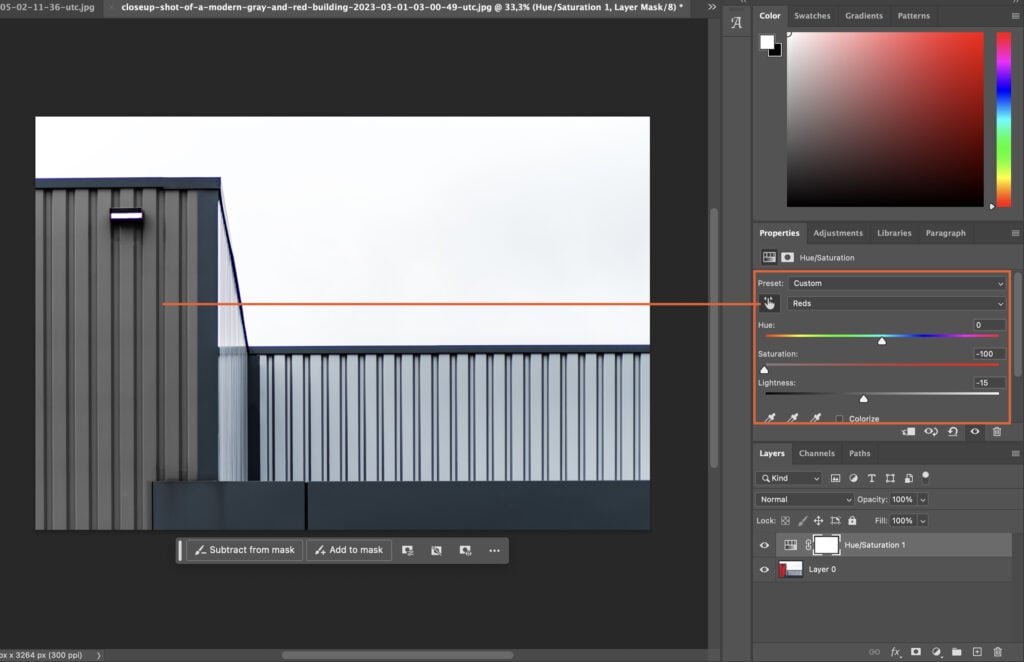
To change the color of an object in Photoshop, start by making a selection of the object using the Color Range tool.
Go to Select > Color Range and click on the color you want to change. Adjust the Fuzziness slider to refine your selection.
Next, edit the selection in Quick Mask Mode by painting with black or white to clean up the selection.
Once you have a precise selection, create a Hue/Saturation adjustment layer and adjust the Hue and Saturation sliders to change the color of the object.
For added depth and contrast, duplicate the selected object, set the blending mode to Multiply, and readjust the Hue/Saturation layer.
By taking your time to make a quality selection and matching the lightness with contrast, you can achieve a natural-looking result.
See our full guide on how to change the color of an object in Photoshop.
Color Dodge and Burn
Color Dodge and Burn are powerful tools in Photoshop for color grading your photos and adjusting light.
To use Color Dodge, add a new layer and set the blend mode to Color Dodge. Then, paint around the light source with a low flow brush to create haze and light leaks.
Combine Color Dodge with Color Burn for even more impact.
Add two solid color layers, set one to Color Burn and the other to Color Dodge, then lower the fill to around 15%. Use Layer Style to protect shadows or highlights if needed.
This technique works well for landscapes, portraits, and street photos. Experiment with different colors and settings to find the perfect look for your image.
Color dodge is a simple yet effective way to add punch to your photos.
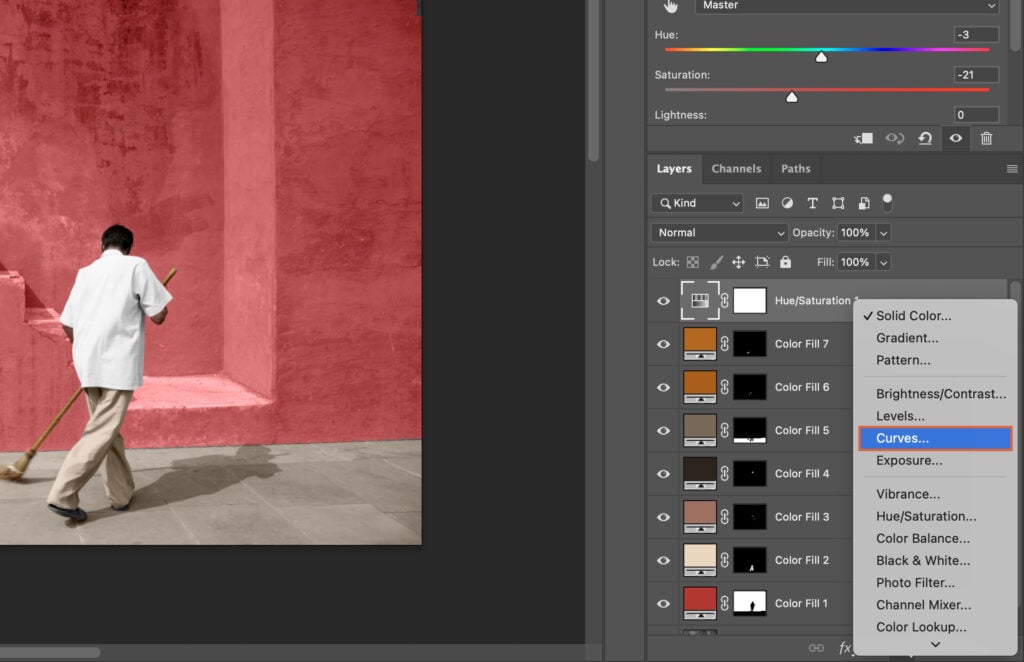
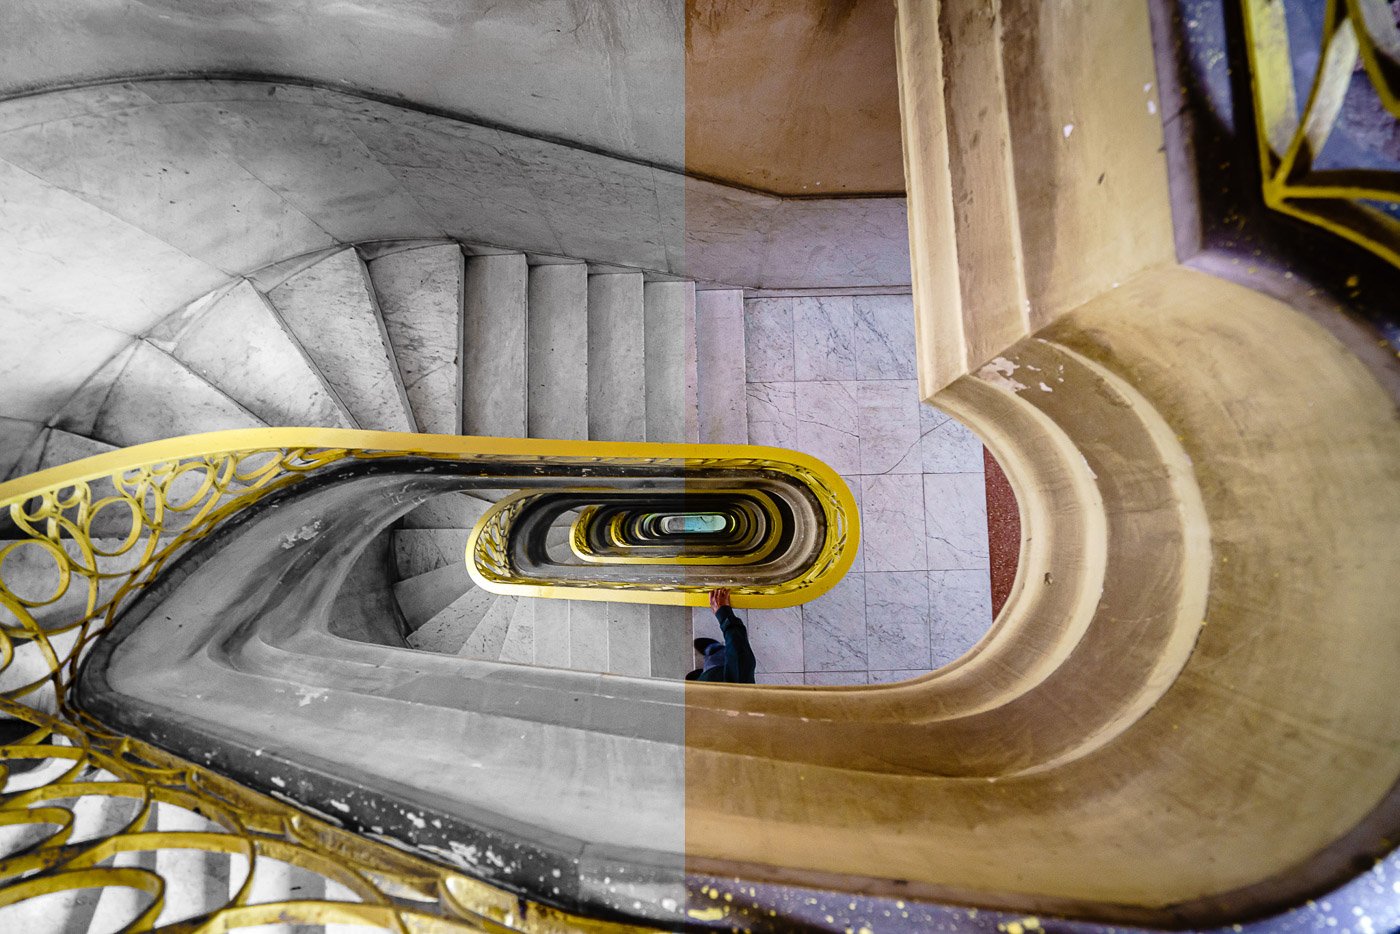
Colorize Black and White Images
Colorizing black and white photos in Photoshop can breathe new life into old images. The process involves adding Solid Color Adjustment Layers and painting on Layer Masks to apply color to specific areas.
Start by choosing a color for your first Solid Color layer, then change the blend mode to ‘Color’. Fill the Layer Mask with black, and use the Brush tool to paint with white on the mask, revealing the color in the areas you want.
Repeat this process for each color in your image. You can also adjust saturation and apply a Curves Adjustment to improve contrast and brightness.
To learn more about how to colorize black and white photos, check out our in-depth tutorial.
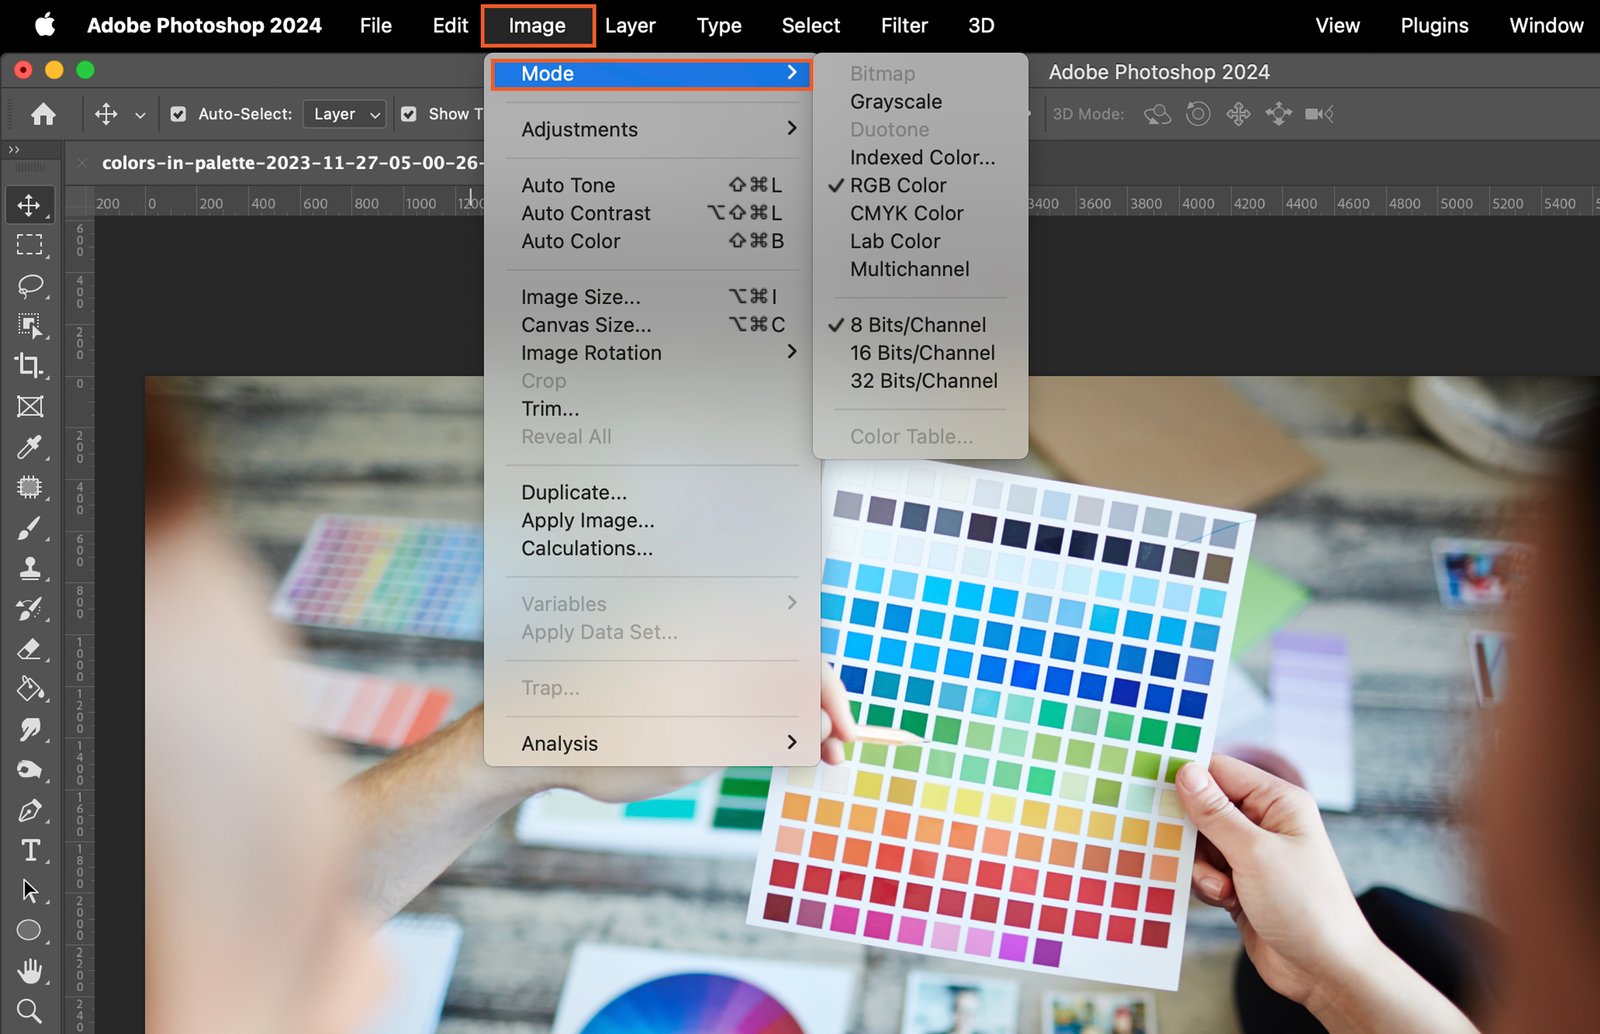
Change Color Mode
Color modes in Photoshop determine how a photo will be represented on screen or in print.
They affect how colors combine based on the number of channels in a color model. The purpose of your project will decide which color mode to use.
To change the color mode, go to Image > Mode and select a different option. RGB is the standard mode and uses three colors to reproduce colors on screens.
CMYK is based on the use of inks and is best for images you want to print.
Grayscale uses different shades of gray, while Duotone creates images using one to four custom inks.
Lab mode is based on how humans see colors, and Indexed color builds a lookup table to store and index colors in the photo.
Changing the color mode in Photoshop is an important part of color management, which aims to match colors across devices.
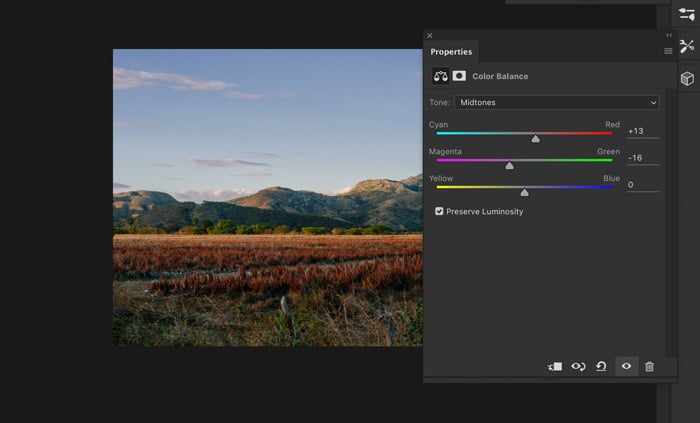
Adjust White Balance
White balance is one of the most important aspects of photography, and it’s also one of the easiest to adjust in Photoshop.
Often, the colors of our images don’t precisely match the scene we are capturing. If the colors look off, setting your white balance in-camera is the best way to go.
In Photoshop, the best way to correct the light is by using Curves. You can find it in Image > Adjustments > Curves. Use the eyedroppers at the bottom to set the white point, grey point, and black point in your image.
It’s important to color correct the white balance in Photoshop for all your pictures. Doing so allows your pictures to have a more precise rendition of the colors you see in real life.
If you’d like to learn more about photoshop white balance, we have a detailed guide that covers the topic in depth.
Invert Colors
Here is the article section on inverting colors in Photoshop, written in 150 words across 4 paragraphs with varied sentence lengths and burstiness:
Inverting colors in Photoshop is a quick way to create a negative image. This can be useful for artistic effect or to see an image in a new way. To invert colors, open your image in Photoshop.
Go to Image > Adjustments > Invert. Your image colors will instantly invert.
You can also invert colors on a specific layer or selection. Just select the area first before going to Image > Adjustments > Invert.
Inverting colors preserves transparency, so you can use this on a layer without affecting the rest of the image.
To dive deeper into how to invert colors and use this creatively in your photo editing workflow, check out this detailed guide.
Isolate Colors
Isolating colors in Photoshop is a powerful technique that can transform your images. To get started, open your image and go to the “Select” menu. Click on “Color Range” to target a specific color.
Use the Eyedropper tool to click on the color you want to isolate. This will select all pixels of that color in the image. For more precise selection, use the Color Picker instead.
Adjust the Fuzziness slider to control the range of colors selected. A lower value selects colors very close to your chosen color, while a higher value selects a broader range.
By isolating colors, you can create stunning, color-focused images that stand out.
Lab Color Space
Lab Color is a more accurate color space than RGB or CMYK. It uses three values (L, a, and b) to specify colors, similar to how the human eye perceives color.
The L value represents lightness, while the a and b values represent the color axes, with “a” ranging from green to red and “b” from blue to yellow.
One of the main advantages of Lab Color is its device independence, meaning colors will appear consistent across different media.
This makes it particularly useful for ensuring brand colors remain accurate on various products like cups, T-shirts, and banners.
In Photoshop, converting an image to Lab Color is simple. Go to Image > Mode and choose Lab Color, or use Edit > Convert to Profile and select Lab Color.
The Channels panel will then display the L, a, and b channels, allowing for more precise color adjustments without relying on the saturation slider.
Click this link to learn more about the capabilities of Lab Color in Photoshop.
Color Management
Color management is the process of controlling colors so they appear correct across different devices, including cameras, laptops, phones, tablets, and prints.
The goal is to ensure colors look as similar as possible on all devices in your workflow, as long as the device can reproduce the colors.
Understanding the difference between RGB (Red-Green-Blue) and CMYK (Cyan-Magenta-Yellow-Black) color spaces is important.
RGB is used for digital formats like web browsers and displays, while CMYK is used for printing.
Color profiles describe how a device represents color and help translate colors between devices.
To eliminate color inconsistencies, choose the right format (RAW or JPEG) based on your needs and set the correct color profile before editing.
Calibrate your monitor to ensure accurate colors and check your edited image on various devices to see how the colors look.
Color management is essential for maintaining accurate colors across all platforms. By understanding the basics and following these steps, you can ensure your photographs look their best no matter where they’re viewed.
Convert RGB to CMYK
Converting RGB to CMYK in Photoshop is a simple process. First, open your image in Photoshop and check the current color mode under the “Image” menu.
If it’s not already in CMYK mode, go to “Image,” then “Mode,” and select “CMYK Color.”
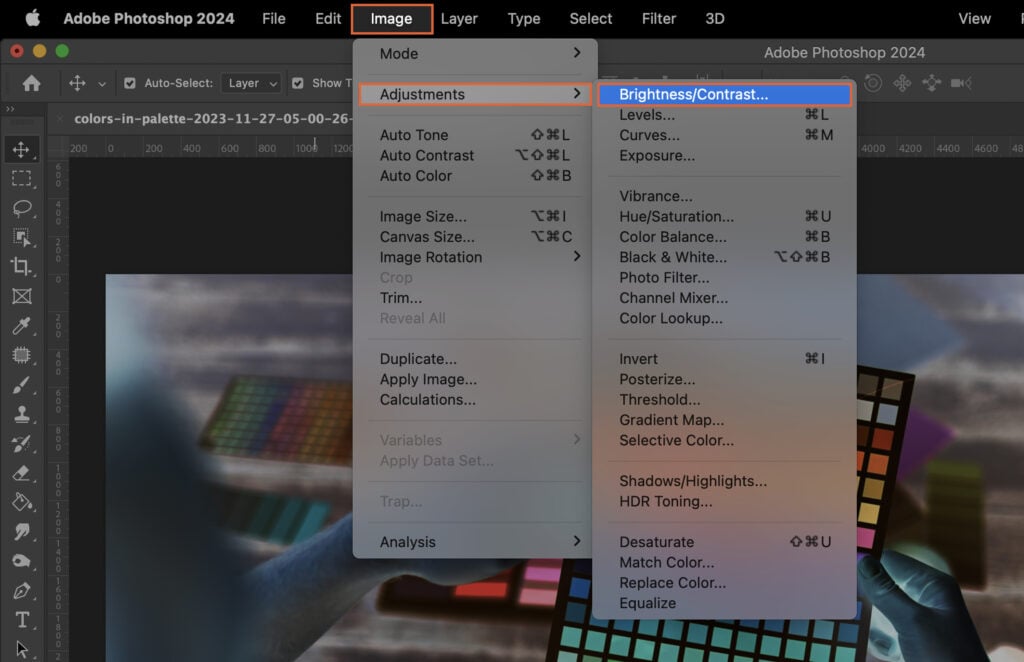
After converting, you may need to adjust the color balance or brightness and contrast of your image. These options are found under “Image” and then “Adjustments.”
Once you’re satisfied with the adjustments, save your image in CMYK format by clicking “File” and then “Save As.” Choose a name and location for your new file.
To confirm the color mode change, go back to “Image,” “Mode,” and ensure “CMYK Color” is selected.
If you want to learn more about how to convert RGB to CMYK, there are great resources available online.
Remove Color
Removing a color in Photoshop is a simple process that can greatly improve your images.
To get started, open your image in Photoshop and add a Hue/Saturation adjustment layer. Use the hand tool to select the color you want to remove from your image.
After selecting the color, lower the saturation slider until the color is gone. This will remove the color from your image without affecting other colors.
Removing colors can be a powerful way to adjust your images and create unique effects.
If you’d like to learn more about how to remove a color in Photoshop, we have a detailed guide that covers everything you need to know.
Selective Color
Selective color is a great way to make certain colors pop in your photos.
To use selective color in Photoshop, start by duplicating your background layer. Then, select the color or object you want to keep using the Quick Selection tool or Color Range tool.
Invert the selection and create a mask on the duplicate layer. Convert the image to black and white using an adjustment layer.
Move the mask you created earlier to the black and white layer.
Use a white or black paintbrush to fine-tune the layer mask and adjust the black and white layer properties until you’re happy with the look.
If you’d like to learn more about selective color in Photoshop, our full article is essential reading.
sRGB vs Adobe RGB
Color space refers to the range of colors that can be displayed in a photograph.
The two most common color spaces are sRGB and Adobe RGB. sRGB is the default color space for digital devices like computer screens, tablets, and smartphones.
Adobe RGB has the same number of colors as sRGB, but those colors are more spread out.
This means Adobe RGB gives you a wider range of colors to work with, which is helpful for printing your photos. You can always convert Adobe RGB files to sRGB later if needed.
The best color space depends on how you plan to use your photos. If you’ll mostly share them online, stick with sRGB. But if you want the option to print them professionally, use Adobe RGB.
You can learn more about the differences between sRGB vs Adobe RGB in this blog post.