Fisheye lens photography is a genre that depends completely on one thing: the extreme panoramic perspective created by the fisheye lens.
These lenses are wild beasts in the world of camera lenses, due to their huge field of view and strong visual distortions.
Some people love them, some hate them. Some consider them to be toy lenses, with no real use other than creating funny and weird-looking portraits. And others see them as a way to make a statement through a distorted but eye-catching image.
What Is A Fisheye Lens?
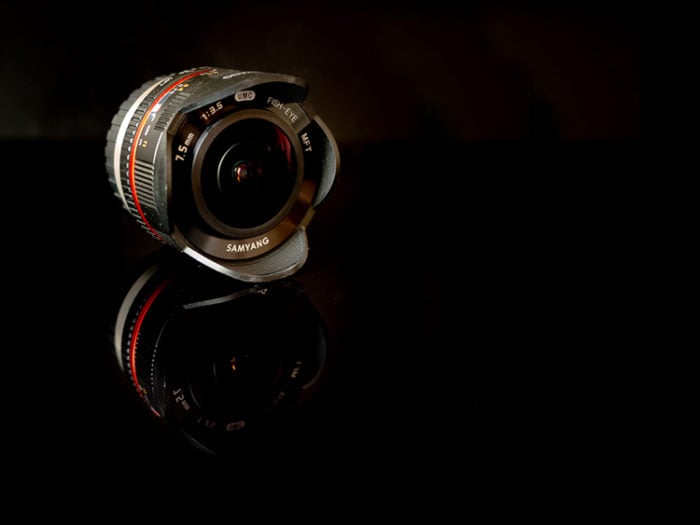
The Samyang 7.5mm f/3.5 UMC MFT Fisheye lens.
A fisheye lens is a type of lens that produces an extreme wide-angle image with distortions that make straight lines appear curved.
As its name indicates, it is based on how a fish would see things beneath the surface of the water, with an ultra-wide hemispherical view of everything in front of it. By ‘ultra-wide hemispherical view’, I mean precisely that the lens has a 180° field of view (which is half of the 360° of a sphere, hence the term hemispherical).
The term ‘fisheye’ was first used to describe these kinds of photographic lenses in 1906 by Robert W. Wood, an American physicist and inventor.
While fisheye lenses will always project a circular image on the camera sensor, they can be grouped into two families: circular and full frame fisheye.
A circular fisheye lens will project the whole hemispherical image onto the camera sensor. A full frame fisheye lens, however, will project an image larger than the camera sensor. This leads to a non-circular photo with a field of view smaller than 180°. The photo below shows a comparison between images produced by the two kinds of lenses.
Check out the best fisheye lenses in this article.
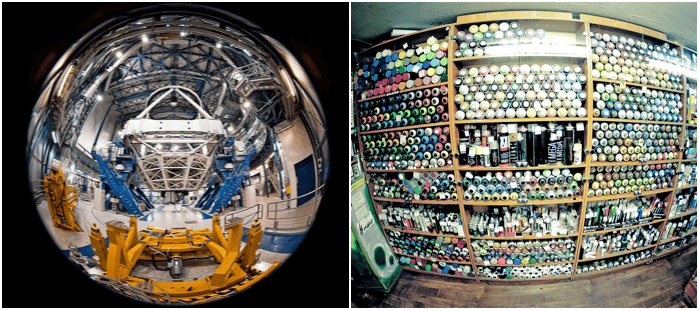
Comparison between circular (left) and full frame (right) fisheye lenses. (Image credit: Wikipedia.)
Some Fisheye Lens Recommendations
Due to their huge field of view, fisheye lenses are usually found in action cams (e.g. GoPro cameras). Relatively cheap fisheye lenses are also available for iPhone and other camera phones (e.g. the Olloclip 4-in-1 set). And all the major camera lens manufacturers, such as Canon, Nikon, Olympus, Sigma, Sony, Samyang, etc., have a fisheye lens available in their catalog.
Finally, fisheye lenses come in all sorts of prices. From the $950, pro-grade Olympus M.Zuiko Digital ED 8mm f/1.8 Fisheye PRO lens all the way down to the much cheaper, but fully manual, Samyang / Rokinon / Bower fisheye lenses.
I own the fully manual Samyang 7.5mm f/3.5 UMC Fisheye lens for my Olympus micro 4/3 camera and it is a joy to use. If you are tempted to get a fisheye but don’t want to spend too much on it, do not be afraid to go fully manual. Thanks to the very large depth of field, manual focusing is actually quite a pain-free process.
Fisheye Lenses and Optical Distortions
Fisheye lenses, together with rectilinear wide-angle lenses, have a focal length less or equal to 24mm (equivalent to full frame sensor size). This means they fall into the ultra wide-angle lens category.
Rectilinear wide-angle lenses are built in such a way that straight lines in the scene will be rendered straight (uncurved) in most parts of the image, with increasing amounts of distortion towards the edges of the frame.
In general, the shorter the focal length, the more difficult it is to rectify the lens. Fisheye lenses always manifest a strong curvilinear barrel distortion, as shown in the image below.
This image illustrates well the curvilinear barrel distortion typical of fisheye lenses.
Many people do not like the fisheye effect because they do not like the resulting distortion in the images. In some cases, you can use post-process methods, such as defishing techniques using Lightroom or more specific software (e.g. IMADIO Fisheye-Hemi), to lessen the amount of distortion, or remove it altogether.
In general, though, careful composition and choice of subject can greatly reduce the visual impact of the fisheye distortion without the need for extra editing, particularly with full frame fisheye.
So, how does a fisheye lens work in practice? All you need to remember to start doing serious fisheye photography is:
- The central part of the frame is less affected by the distortions
- The more you close in on your subject, the larger the distortion in the resulting image will be
- If you want a flat horizon, place it in the middle of your frame, and crop the photo later on to satisfy composition rules, such as the rule of thirds
- Tilt the lens upward to achieve a concave horizon
- Tilt the lens downward for a convex horizon
What Are Fisheye Lenses Good For?
In general, fisheye lenses are great traveling lenses for your camera. Because they are generally fast and you can easily use them indoors, they are great for taking photographs in museums, churches, and monuments.
They are equally good lenses for walking around the city. Fisheye lenses allow you to emphasise the height of buildings and monuments, as well as capture wide birds-eye views looking down at the city from high vantage points.
If you like the natural landscape, fisheye lenses are perfect for capturing wide panoramic views and also to photograph nocturnal landscapes and the Milky Way in all its glory.
One thing’s for sure—because they are quite different from any other kind of lens, if you are stuck in a photographic rut, fisheye photography is a great way to get your creative spark back.
Let’s take a look at a few subjects you can photograph with a fisheye lens, and how to get some strong effects.
Fun and Weird Images
The most straightforward way you can use a fisheye lens is to create funny and weird-looking images. Try to use the fisheye distortions when photographing a pet’s nose from up close, as with the dog in the image below. Big nose and begging eyes, teeny tiny body, great fun.
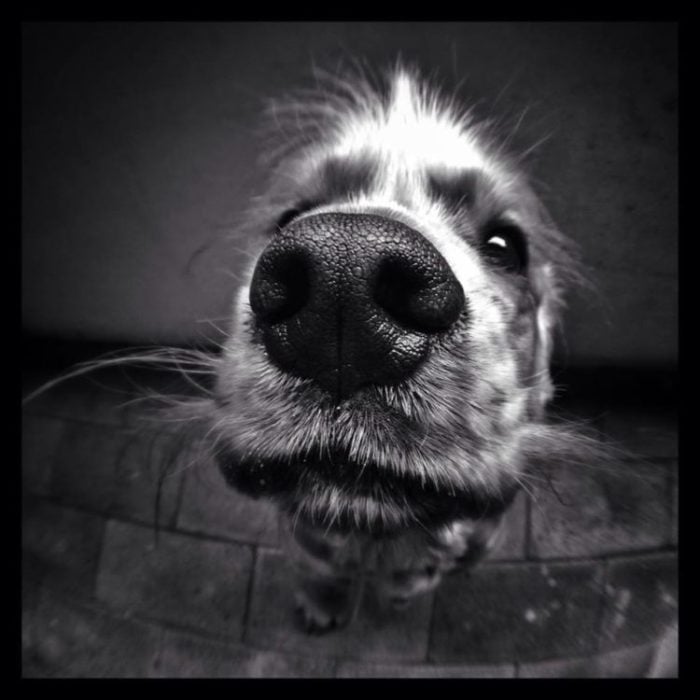
Having your dog look at you is a great chance to use the fisheye distortions to make his nose appear huge and his body look tiny. This photo of my dog has been taken with the Olloclip 3-in-1 set on iPhone 5.
You can also tilt the camera upward or downward and rotate it to create funny landscapes from your otherwise unremarkable city park.
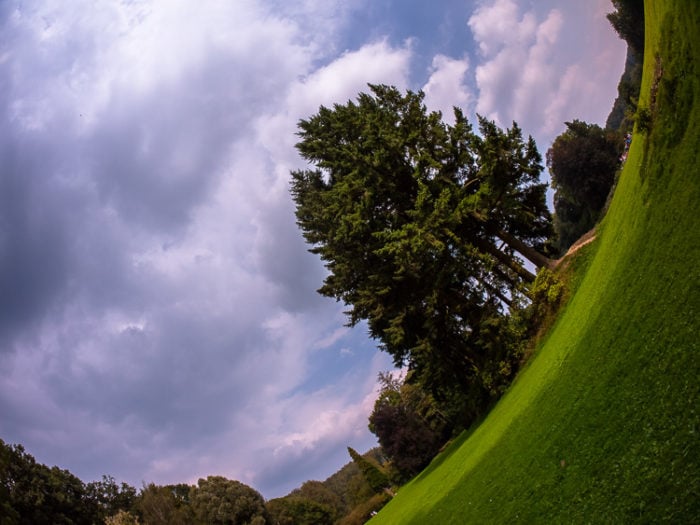
A weird-looking landscape.
Finally, you can take advantage of the huge field of view and place your camera in small, secluded spots.
What about a selfie from deep inside your washing machine?
Just make sure the place is dry and remove your camera before washing your clothes. Note how, in the photo below, I managed to place myself towards the center of the frame, thus avoiding strong distortions on my face.
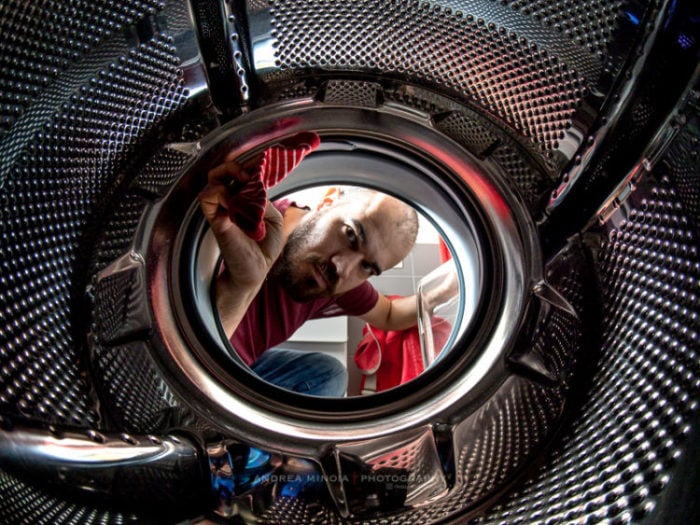
A selfie from deep inside your washing machine is something you cannot easily do without a fisheye lens.
Portraits
Usually people will not be flattered by having you taking their portrait with a fisheye lens—the nose will be too big, while the ears and body will be too small. In short, you will mess up the typical proportions of the face, particularly if you go for a headshot or for close-ups.
But, in toddlers and very young children, face proportions are still quite different from those of the average adult. Kids of this age have small noses and huge, beautiful eyes in contrast to the rest of their faces.
With a fisheye lens you can enhance these youthful proportions by making the toddlers’ eyes even larger, particularly if shot in close quarters, like from just beneath a car seat canopy.
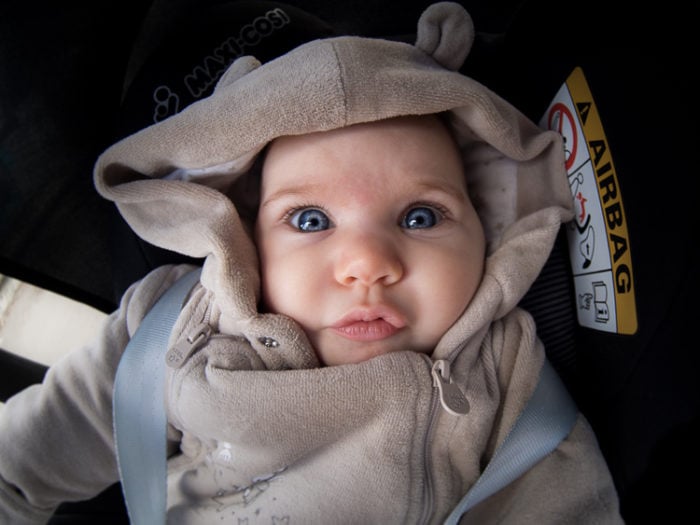
Fisheye portrait of my 4-month-old daughter. She was really amazed (or scared) by the camera, so it was easy to get her eyes wide open.
Natural Landscapes
Of all subjects, perhaps the one that suits a fisheye lens best is a natural landscape. This is generally because landscapes have no straight lines in them. And if you place the horizon in the middle of the frame, it can go unnoticed that you have used a fisheye lens.
This is a great way to avoid buying a wide-angle lens, particularly if you rarely shoot wide.
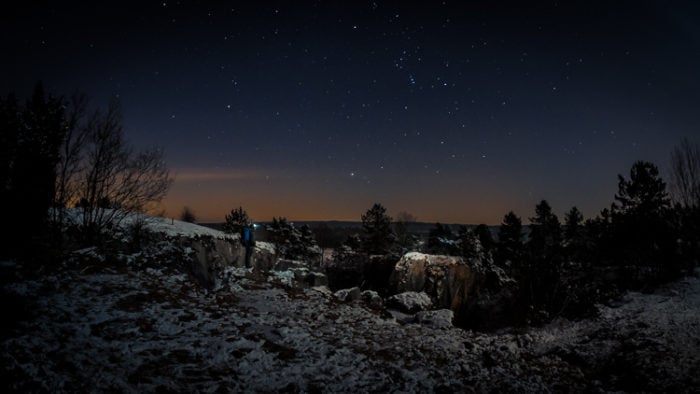
Natural landscapes with their lack of straight lines can be photographed nicely with a fisheye lens.
Fisheye lenses typically have a fast aperture, useful if you want to capture a large portion of the Milky Way while having a strong foreground with a large and interesting subject, like this small tree lost in tall grass shown in the photo below.
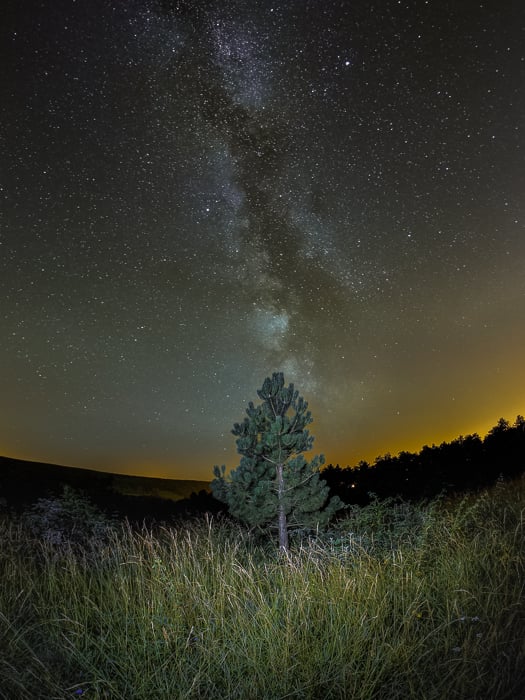
If you have a fisheye lens, it’s worth spending few hours out under the starry sky with it to capture images of the the Milky Way.
Sometimes, it is nice to have a curved horizon in a landscape, in order to create stronger lines that will lead the viewer toward the subject, as in this morning shot taken at the castle of Bornem, in Belgium.
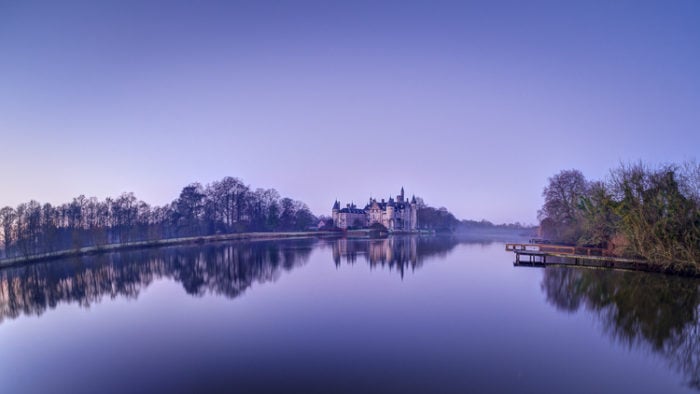
By curving straight lines such the horizon, the left bank of the channel, and the dock on the right, the fisheye naturally draws the viewer’s attention towards the subject: the castle.
Fisheye and the City
As I said before, if you are a fan of urban environments, you should get a fisheye lens to capture monuments and tall buildings. For instance, the Atomium is a world-famous monument in Brussels. It also happens to be 102m tall.
To capture it entirely at 24mm (equivalent to full frame), you have to move back about 80m from it. With my fisheye I was able to get it all into the frame from 15-20m away. The distortions helped create an original image of this famous location.
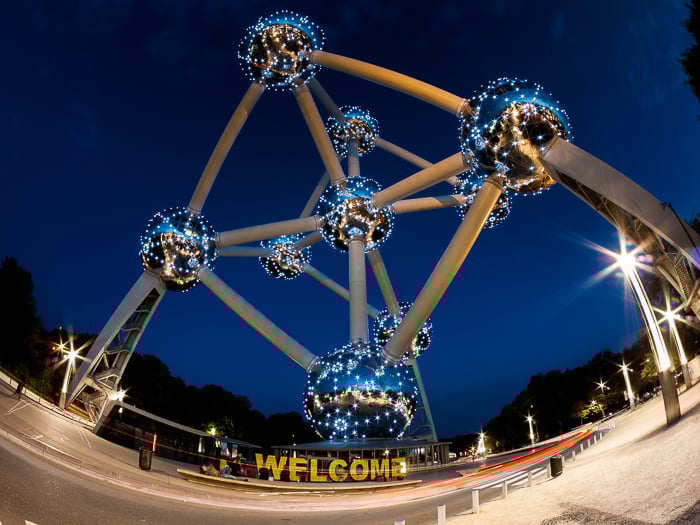
The Atomium. The fisheye helped to capture this 102 metre tall monument entirely from just 15 metres away and the distortions worked to create an original view of this world-famous landmark.
Another nice way to play with tall buildings is to use the distortions to make them bend around the image as if they were huge waves about to break.
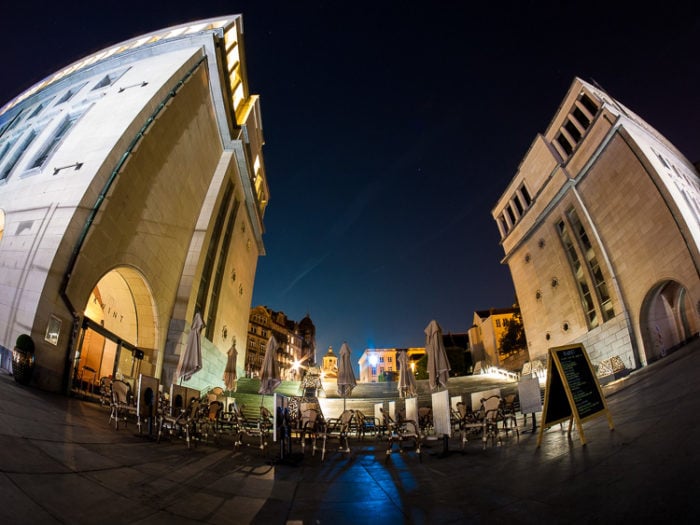
Tall buildings warped, looking as though they’re huge waves about to break.
You should also take advantage of curved lines and amplify them to create strong leading lines, like this circular platform roof in front of Brussels Central Station.
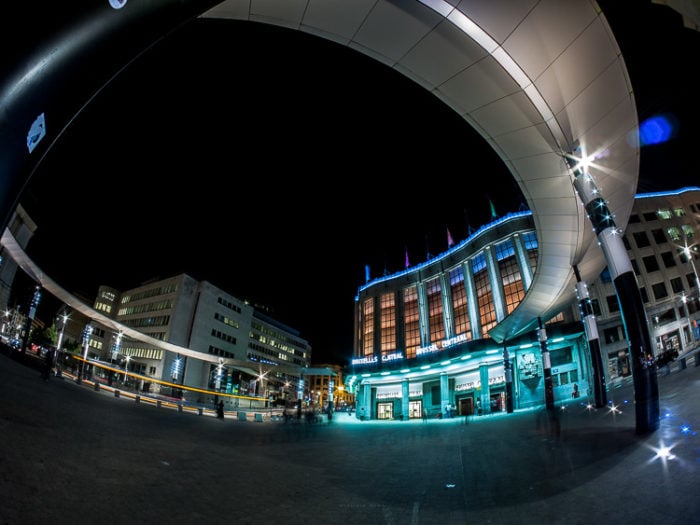
Taking advantage of curved lines to create strong leading lines.
Finally, everybody shooting in the city has tried the classic photo with night traffic light trails. Usually those trails are straight or snaking into the distance following the road.
With a fisheye you can get a full roundabout into the frame and have some space left to get circular trails. This creates a nice 'traffic light carousel'.
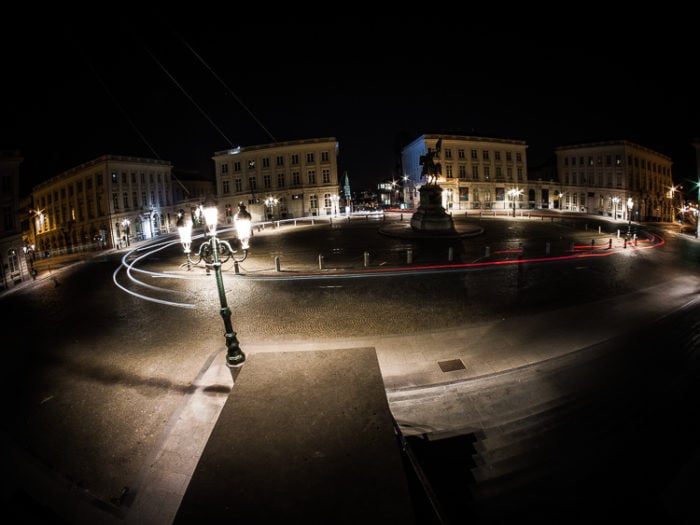
Turning a roundabout into a light carousel.
Before moving on to another subject, I would like to point out that I didn’t find lens flares to be an issue, as these nocturnal cityscapes (with their many street lights and other artificial light sources) show.
Interiors
You can do indoor photography with a fisheye and easily get everything into a single image. I took this picture of a gallery in Brussels, which has some nice interior architecture.
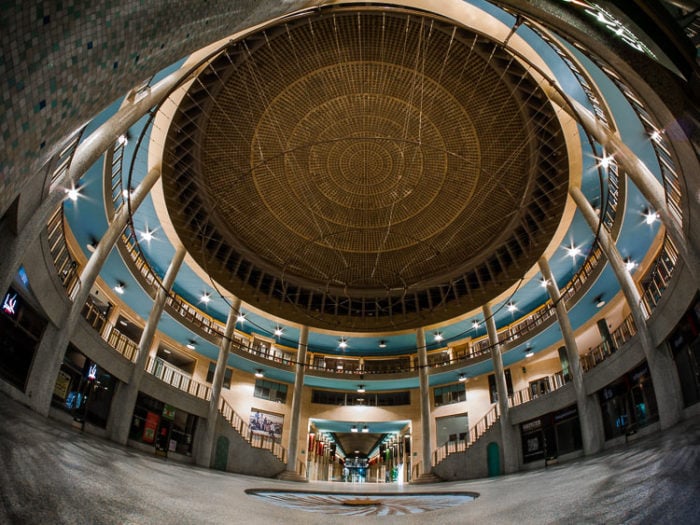
Interior of the Ravenstein gallery, near Brussels Central Station.
Bird’s-Eye Perspectives
It sounds funny to say, but you can get some great bird’s-eye views with a fisheye lens. If you have access to a high vantage point, you can have a nice panoramic view over the city.
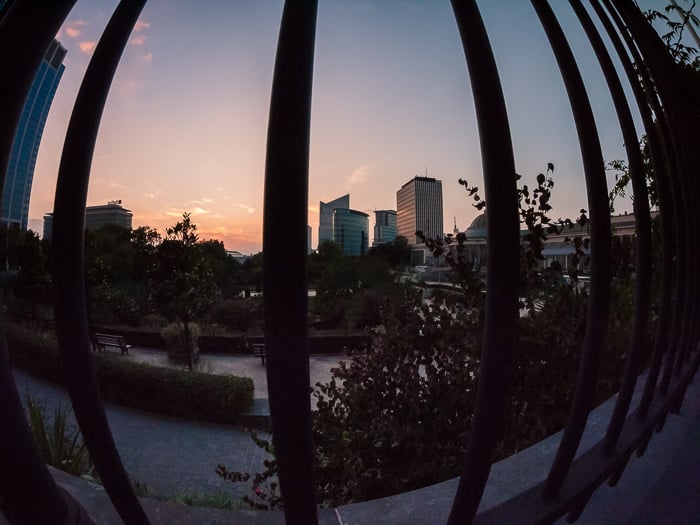
I’m lucky to live in a tall building on top of a hill in Brussels. As such, I found myself climbing to the building roof quite often with my fisheye to take photos.
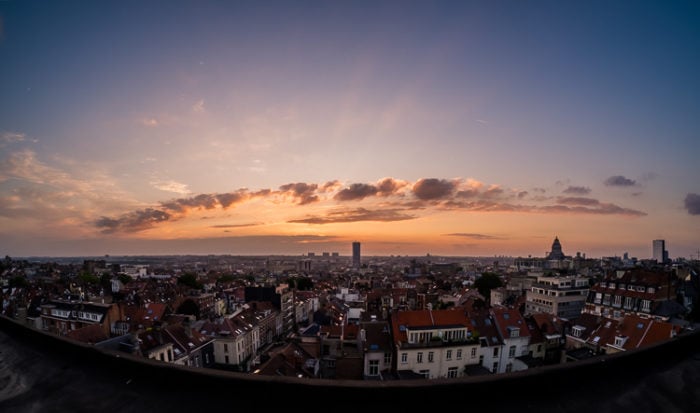
Sunset over Brussels.
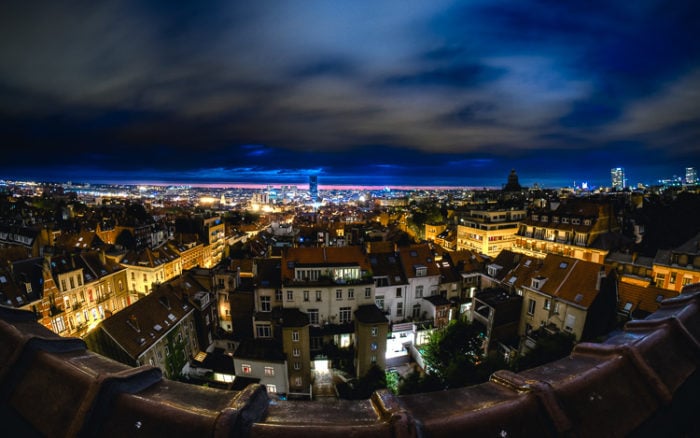
Brussels by night.
Need More Ideas?
Sports cars and motorbikes, as well as airplanes are great subjects for fisheye photography, provided that you can shoot from up close. People doing sports, like skaters in a skate park, also make for interesting subjects.
The real limit in using a fisheye lens, though, is your creativity and willingness to explore different possibilities.
Are you into street photography? With a bit of luck you can do it even with a fisheye lens. I managed to get a lucky shot of a praying man in the hall of the Justice Palace in Brussels at night.
The great merit of the fisheye lens in this photo lies in the way it highlights how huge the Justice Palace hall really is, compared with the praying man in front of the large door. The lens’s distortion make it seem as though his surroundings are stretching to dominate the space above him.
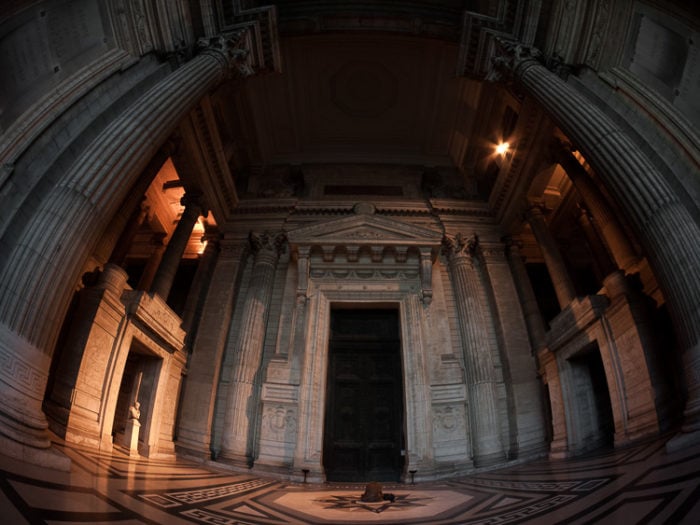
The praying man, dwarfed by his surroundings.
The Major Drawback in Fisheye Lens Photography: No Filters
Working with fisheye lenses is not great if you are addicted to photographic filters. As far as I know, no fisheye lenses can mount standard filters. This is due to the bulging front element of the lens. But you may find some custom made or DIY solutions.
Below, you can see an example of why you may need to use a filter with a fisheye lens.
I took this photo from the top of the Bayon waterfall in Belgium.
The use of a fisheye lens provides a nice, dynamic view of the area. I could combine many interesting elements, such as the water rushing down the waterfall, the colorful foliage, and the streaky clouds in the sky beyond.
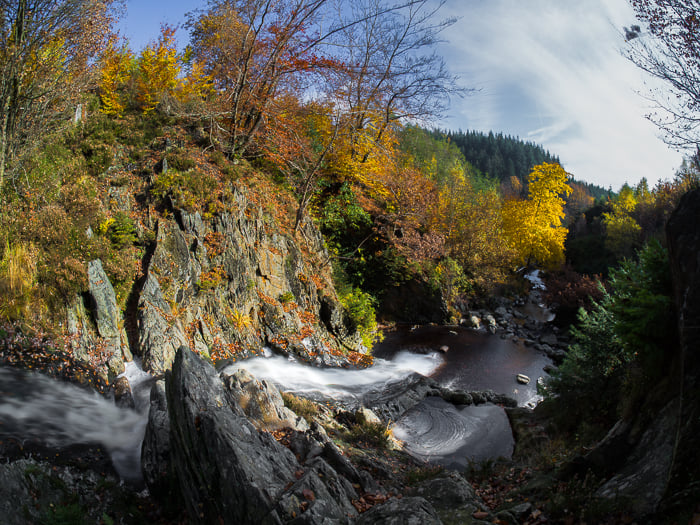
The Bayon waterfall (Belgium). Olympus OM-D EM-10 with Samyang 7.5 f/3.5 MFT fisheye lens.
I wanted to have a scene that was dynamic, colourful, and large enough to capture the grandeur of the place. From where I was standing, I had to use my Samyang 7.5mm fisheye lens to do this.
I also wanted to incorporate the nice, silky look of motion-blurred water over rocks, which meant I had to take a long exposure.
How to Deal with the Problem: Two Workarounds
Placing a handheld filter in front of the lens may work with GND filters but for long exposures this is a ‘no go’. Light leakage will be unavoidable.
As mentioned earlier, because these wide-angle lenses have the front element bulging out, some, such as the Canon EF 11-24 f/4L USM, have a rear slot for gelatin filters. Some people have taken to taping small pieces from ND gelatin filters to the rear element of a fisheye lens.
The following video shows this DIY solution:
While this method is clever and cheap (gelatin filters are not expensive), you can only use ND (I think max 3 stops) and color filters. Plus, due to their flimsy nature, they tear apart and get ruined easily.
Use the Image Averaging Technique
Another solution is to use the image averaging technique. This consists of taking a large number of photos of the same scene and then averaging them in Photoshop.
The resulting image will (i) benefit from having very low digital noise (see my introduction on the multi-frame noise reduction technique in this article) and (ii) have the moving subject blurred as if you took a long exposure.
The best results are achieved by combining the use of the image averaging with the use of gelatin ND filters. As I had no gelatin filters at that time, I ended up averaging eight single exposures, each 1/200s long.
When you do image averaging, your final exposure time will be the sum of the shutter speeds used for the single photos. In my case, the resulting total time is (1/200) * 8 = 1/25. This does not really qualify as long exposure. The shutter speed is barely slow enough to blur the waterfall. It is, however, long enough to illustrate the concept.
Moreover, without gelatin filters to cut down the light, to get a total time of only 5 seconds, I should have taken something like 1000 photos. That was not really feasible.
The last step in blurring the flowing water involves using Photoshop. After editing the photo in Lightroom, I re-imported it in Photoshop, duplicated the level and used a moderate motion blur filter (distance=45) in the main direction of the waterfall.
I then applied a mask to this layer to reveal everywhere, except for the waterfall, in the original image in the layer below it. The image below shows a 100% comparison of the water before and after the use of the motion filter.
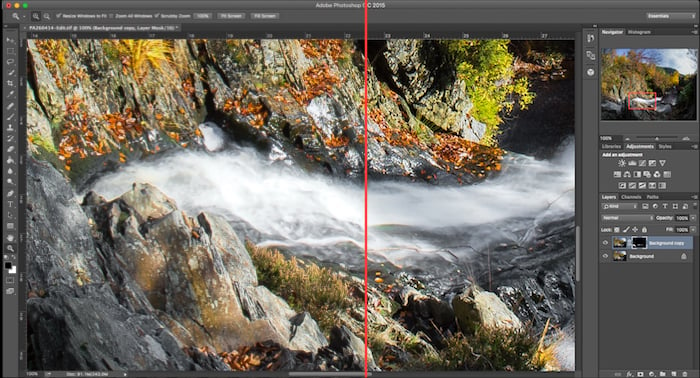
Before (left) and after (right) the use of the motion filter in Adobe Photoshop CC to further smooth and blur the water.
Conclusion
Now you are aware of how fisheye lenses work and when you can use them. You should be better equipped to get the effects you want from this lens, whether you’re shooting a few fun novelty shots or doing more serious photographic projects.