To fix an overexposed photo, lower Exposure if the whole image is too bright, reduce Highlights to reveal detail in bright areas, then adjust Whites to control clipping. If only the sky or a face is too bright, use a mask so you do not darken the rest of the photo.
Start with the original RAW file if you have one. A bright preview can hide recoverable detail, but no exposure slider can restore texture that was never recorded. The steps below use Lightroom Classic and explain how to tell the difference.
How to Fix Overexposed Photos in Lightroom Classic
Open your photo in the Develop module. The Basic panel contains the main tone controls. Work on the original file rather than a screenshot or a small image downloaded from social media.
1. Check the Bright Areas Before You Edit
Look closely at the part of the picture you want to save. Can you still see texture in the clouds, skin, or white clothing? Click the upper-right clipping indicator in the histogram to show the highlight warning over the image.
The warning shows clipping in the current rendering. It does not, by itself, prove that the original RAW file has lost all detail. Try the adjustments below and check whether real texture appears.
2. Lower Exposure if the Whole Photo Is Too Bright
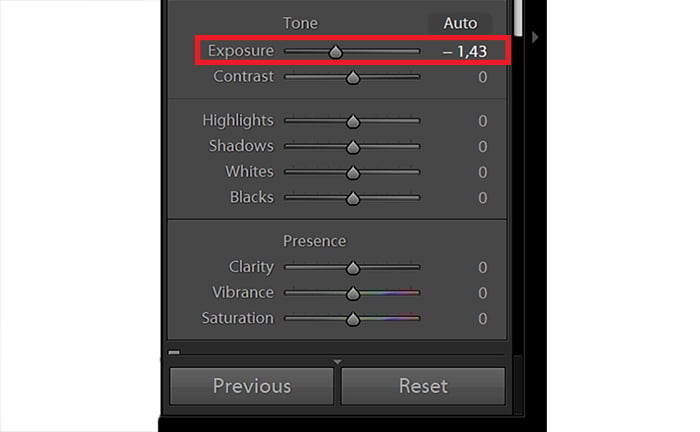
Move Exposure left until the main subject looks closer to the brightness you want. Watch the subject, not just the brightest patch. If the foreground already looks right, leave global Exposure close to its starting point and concentrate on Highlights or a mask.
Exposure values represent stops: a negative value darkens the image. There is no fixed setting that rescues every photo. A large change can make the rest of the scene too dark before it solves the bright area.
3. Reduce Highlights, Then Set Whites
Move Highlights left while watching for texture in bright areas. Stop when you have a useful result; you do not need to push the slider to its limit on every image.
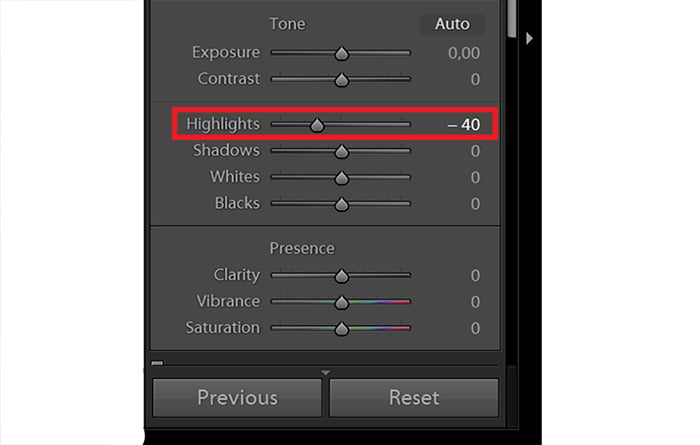
Next, adjust Whites. This control sets white clipping; it is not a midtone brightness control. Hold Alt on Windows or Option on Mac while you drag it to inspect clipping. Reduce it only as far as needed for important detail.
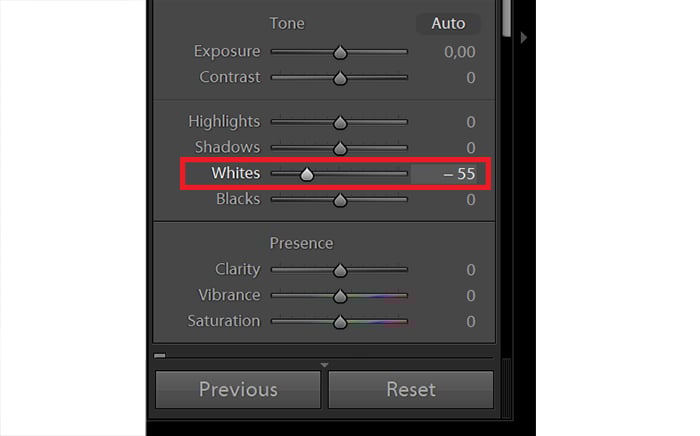
Do not make white clothing or clouds look muddy just to remove every warning. Small reflections and light sources can remain bright. The aim is a useful photograph, not a histogram with no pixels at either end.
Adobe's tone-control guidance explains how Exposure, Highlights, and Whites work together. Recheck the overall brightness after these changes.
4. Use a Mask for a Bright Sky or Face
In current Lightroom Classic, open Masking in the Develop module. Choose Select Sky for a sky, Brush for a small area, or Linear Gradient for an adjustment that fades across the frame.
The original screenshots below show the older Graduated Filter tool. Use Linear Gradient in the current Masking panel for this type of gradual adjustment; the old icon position no longer applies.
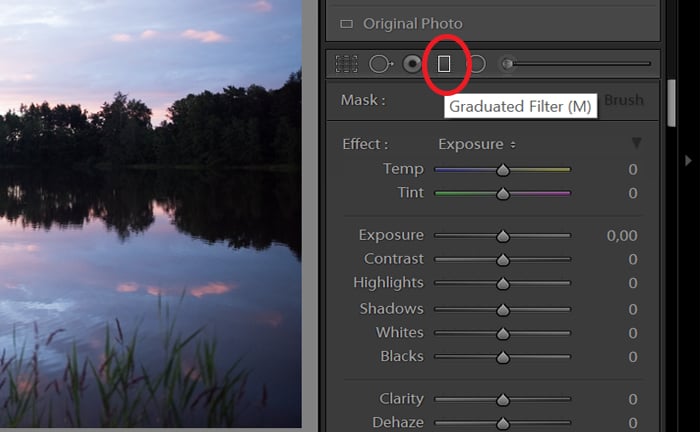
For a simple sky, drag the gradient over the area you want to change. Reduce Exposure or Highlights inside that mask and adjust the transition until it blends with the foreground.
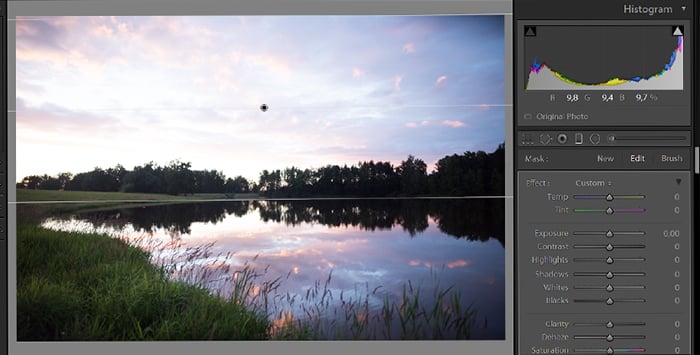
Inspect the mask around buildings, trees, and the horizon. Use its Add or Subtract controls if the adjustment spills into areas that should stay unchanged. A Brush mask works for a bright patch on a face, but it still cannot recover missing skin texture.
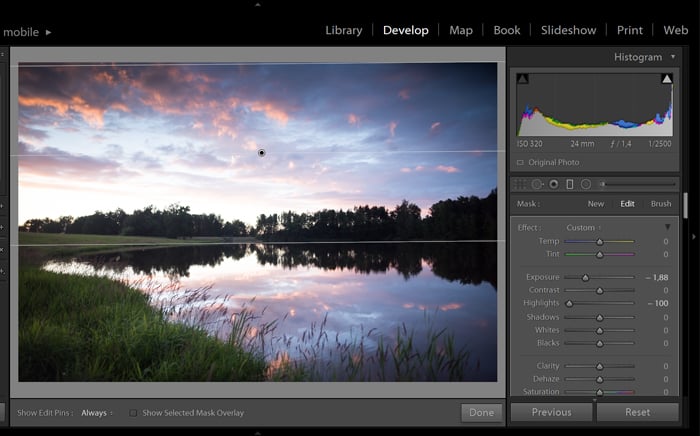
Adobe's Lightroom Classic masking guide shows the current controls. A software gradient changes recorded tones; a physical graduated filter reduces light before capture. Neither is a way to recover detail absent from an existing file.
5. Compare the Result and Refine It
The original editing sequence below illustrates a useful workflow: make broad corrections, then refine individual areas.
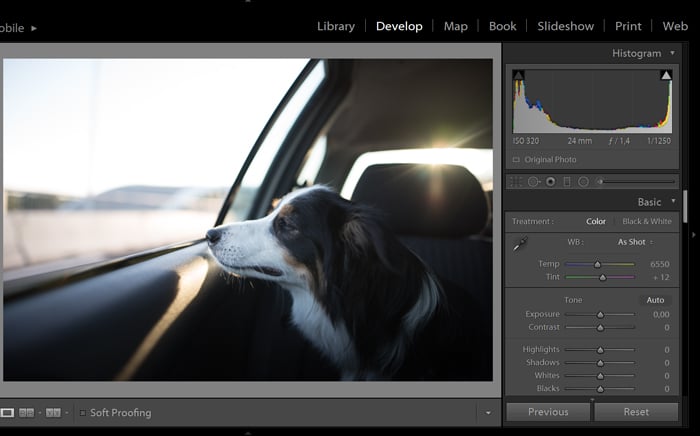
Compare the edited photo with the original. Look for useful highlight detail without making the subject dull or the colors unnatural. If the shadows became too dark, make a modest Shadows adjustment or use a separate mask.
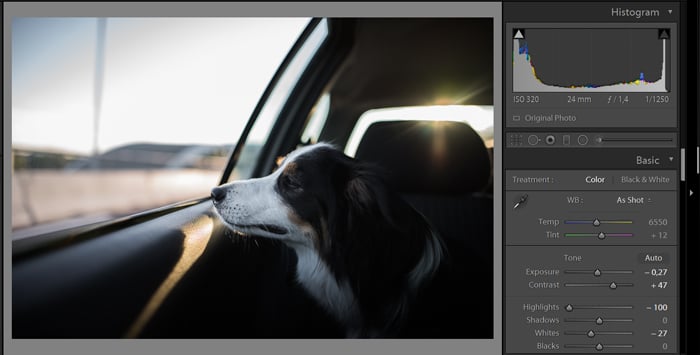
The Adjustment Brush in these older screenshots is now accessed as Brush in the Masking panel. Use it where you need a local change. The choice between global and local edits depends on the subject and lighting, not a fixed percentage of the frame.
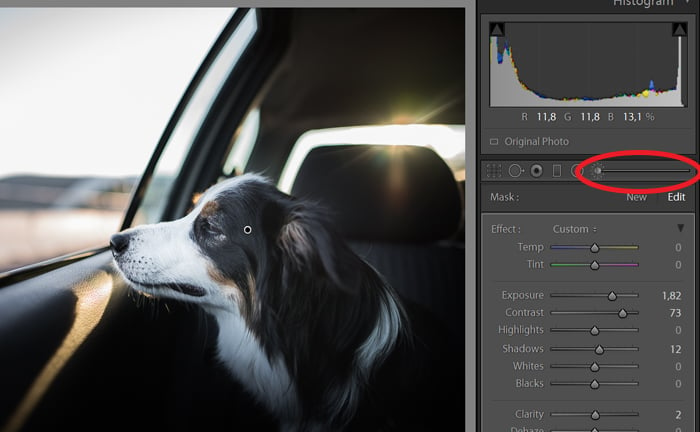
Finally, check white balance and color. Judge the photograph at normal viewing size as well as close up before you export it. For a Photoshop workflow, see our guide to correcting exposure in Photoshop.
Can You Recover Completely Blown Highlights?
If lowering Exposure and Highlights reveals texture, the file still contains useful information. If the patch only becomes a flat gray area, darkening it has not recovered detail. When all color channels in the original capture are saturated, the missing texture cannot be restored with ordinary tonal adjustments.
Try another frame from the sequence or a darker bracketed exposure if you have one. You may also be able to crop out a distracting bright area. Replacing a sky or generating new texture creates replacement content; it does not recover the original scene.
RAW Gives You More Editing Flexibility
Shooting in RAW preserves more editing flexibility than a processed JPEG. Use the original RAW file when it is available. Do not assume that RAW guarantees a particular number of stops of recovery, or that a large exposure correction is free of quality loss.
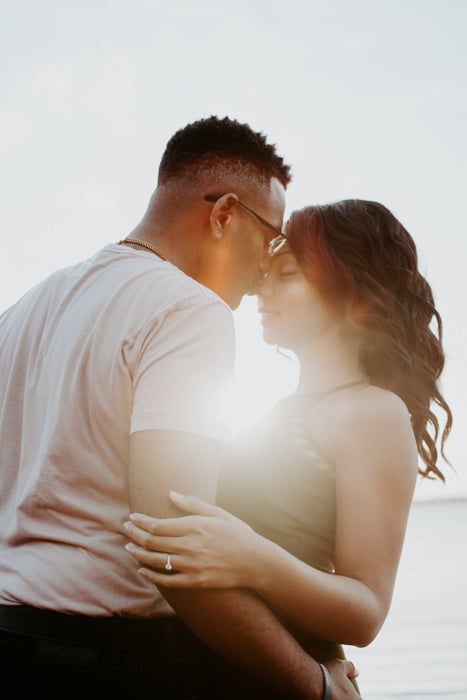
RAW does not mean “uncompressed.” For example, Canon documents lossless compression for its conventional RAW files. Formats and options vary between Canon, Nikon, and Sony cameras.
Use an editor that supports your camera's files. Options include Lightroom, Camera Raw with Photoshop, and Capture One. Check camera support rather than assuming that every software version opens every RAW file.
For more editing guidance, see our Lightroom tutorials and Lightroom versus Photoshop comparison.
If you only have a JPEG, try the same basic corrections. You can improve excess brightness and contrast when detail remains, but there is less room to recover clipped areas. Export a separate copy so you keep the original.
Why Do Photos Become Overexposed?
An overexposed photo is too bright for the result you want, often with lost detail in important highlights. Exposure settings can be wrong for the light, or the scene can contain a wider brightness range than one capture can hold.
Think of a shaded building beneath a bright sky. Exposing for the building can leave the clouds washed out. Darkening the whole photo may save the sky but make the building too dark. This is why checking both areas matters.
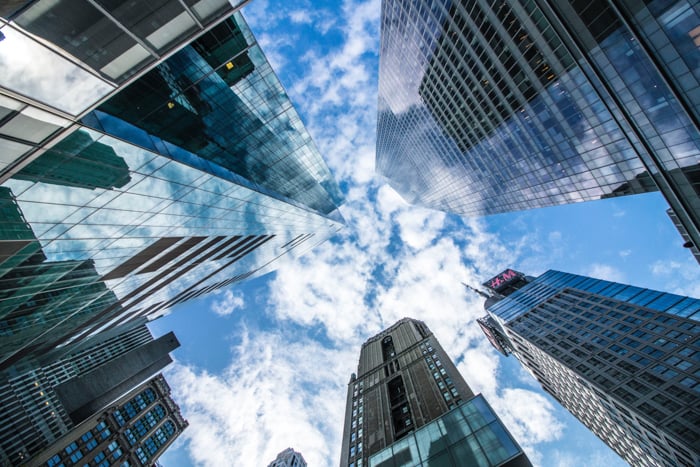
Read the Histogram in Context
A histogram shows the distribution of tones from dark on the left to bright on the right. Taller parts of the graph mean more pixels at those brightness levels.
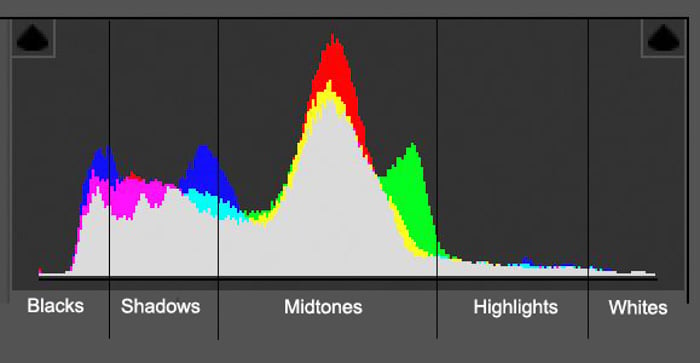
There is no single ideal shape. A scene with a lot of white can sit mainly to the right; a dark scene can sit mainly to the left. Check the image and important highlights rather than trying to make every graph centered and even. High-key and low-key photographs deliberately use different tonal distributions.
Use the histogram and highlight warning together when you review a shot. The brightness of the camera screen alone is not a reliable guide to exposure.
How to Avoid Overexposure Next Time
Adjust the Settings for the Scene
The exposure triangle describes the relationship between shutter speed, aperture, and ISO.
In manual mode with fixed ISO, a faster shutter speed or a smaller aperture lets less light reach the sensor. A smaller aperture has a higher f-number. Lowering ISO can also make the recorded image darker. Choose the change that fits your needs for motion and depth of field.
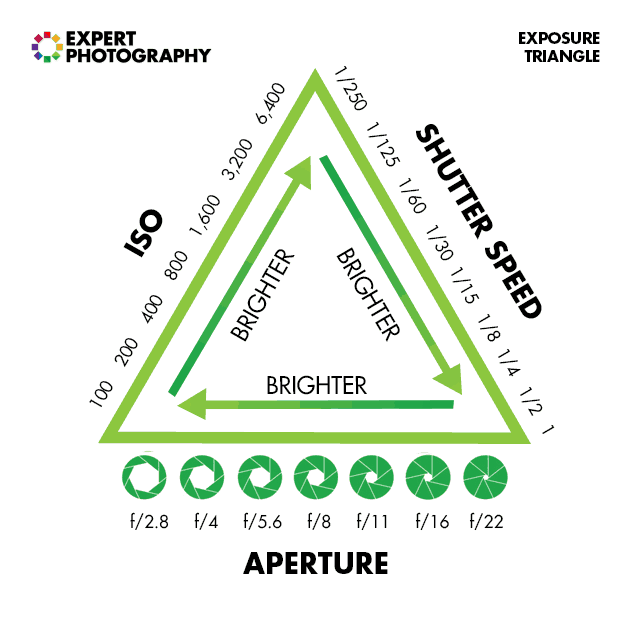
If the camera controls exposure automatically, negative exposure compensation can make the next frame darker. Its behavior depends on the shooting mode and Auto ISO settings, so check your camera manual.
Protect important highlights without making every image deliberately underexposed. Deep shadows can also lose detail, and brightening them can reveal noise.
Check What the Meter Is Measuring
Your camera's light meter guides exposure decisions. Common metering modes include evaluative or matrix, center-weighted, and spot metering. Available modes and the size of the measured area vary by camera.
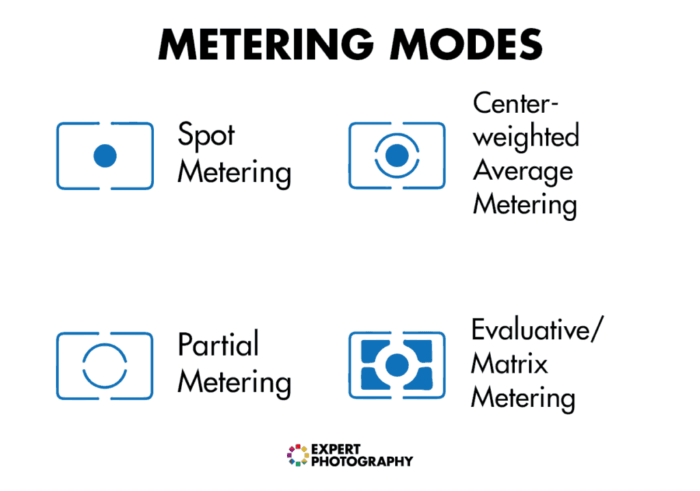
A reading that favors a shaded portrait subject can leave a bright background overexposed. Spot metering narrows the measured area; it does not guarantee that everything else will be correctly exposed.
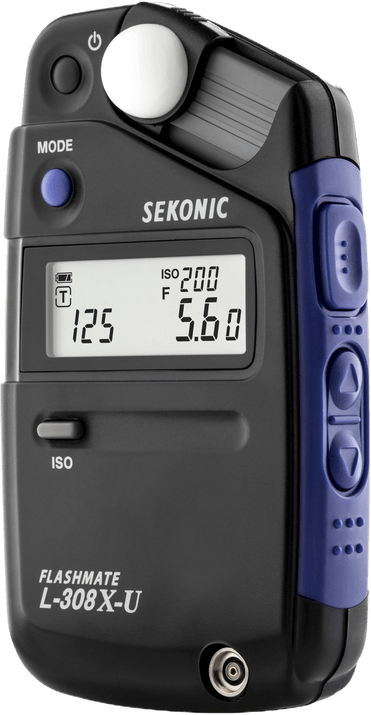
Check another frame when the light changes. A handheld meter helps you set exposure before capture. It does not repair an overexposed image already on your memory card.
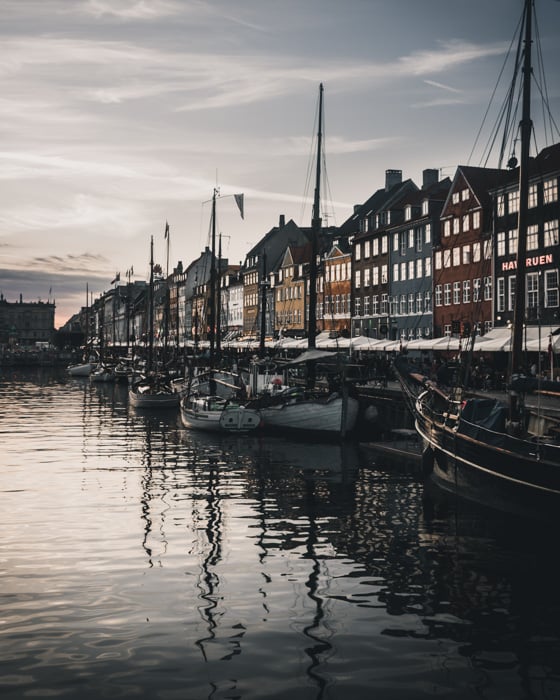
Bracket Difficult Scenes
Bracketing records several exposures so you can choose the best one or combine them later. Use your camera's automatic bracketing feature, if available, or change settings manually.
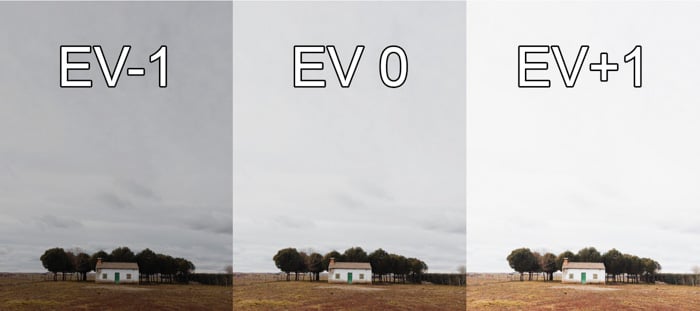
For example, with ISO and aperture fixed, 1/1000 s, 1/500 s, and 1/2000 s give a starting exposure, one exposure stop brighter, and one stop darker. These are examples, not required settings. Choose the spacing from the scene's brightness range and check that the darkest frame holds the highlights you need.
Changing shutter speed affects moving subjects; changing aperture affects depth of field. Keep those tradeoffs in mind.
For an interior with bright windows, suitable bracketed frames can be merged into an HDR image. Our interior editing guide covers this type of scene. There is no requirement to use exactly three stops between frames. Adobe's HDR merge guide explains how to combine exposure-bracketed photos in Lightroom Classic.
Conclusion
Start with the original file and check whether important highlight detail remains. Use Exposure for overall brightness, Highlights for bright areas, and Whites to set clipping. Use a mask when only part of the frame needs attention.
If a bright patch stays featureless after adjustment, stop trying to recover detail that the file does not contain. For the next shot, check the highlights before you leave the scene.
Check out our Effortless Editing with Lightroom course to master your post-processing!