In the world of photo editing and graphic design, Adobe Photoshop is a powerful tool that offers a wide range of effects to enhance and transform images. One such effect is the blur effect, which can be used to create a sense of depth, movement, or focus. However, applying a blur effect can be a tricky task, especially for those new to Photoshop. This article aims to provide a simple and easy-to-follow guide on how to add a blur effect to your images in Photoshop. Whether you want to blur a background, create a motion effect, or selectively blur parts of an image, these step-by-step instructions will help you achieve your desired outcome.
Step 1: Select the Area You Want to Blur
First things first, decide which part of your image needs the blur effect. You can select the specific area using different tools in Photoshop. Adjust the Feather for smoother transition between the blurred and original image.
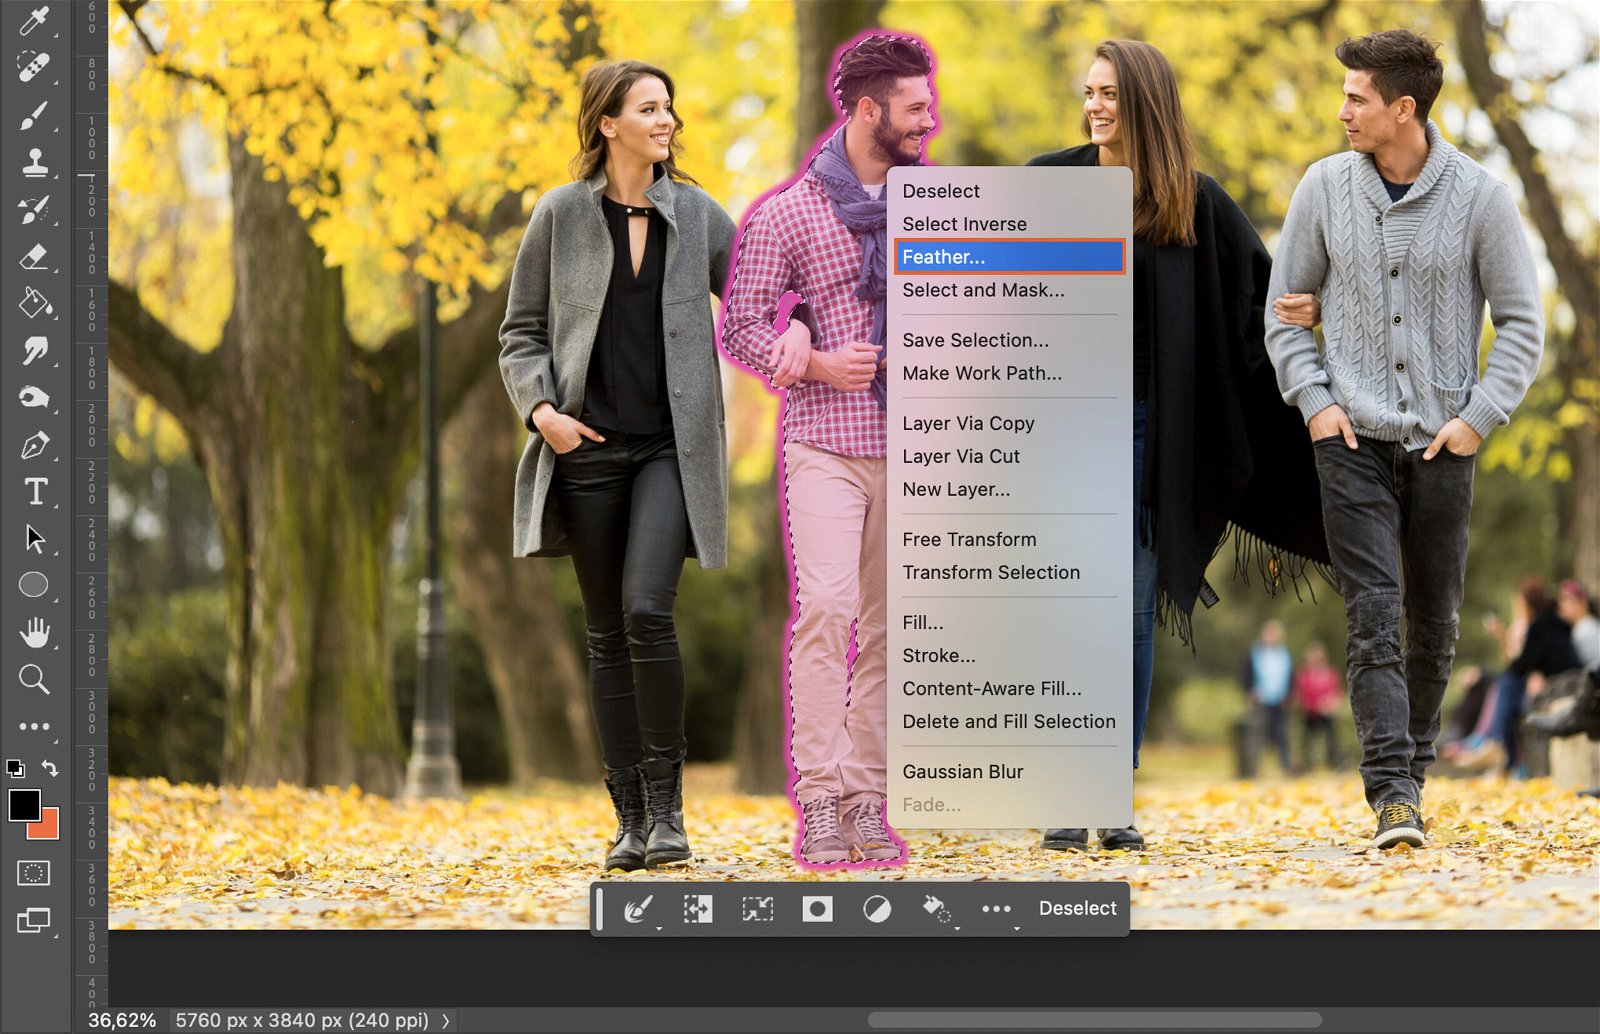
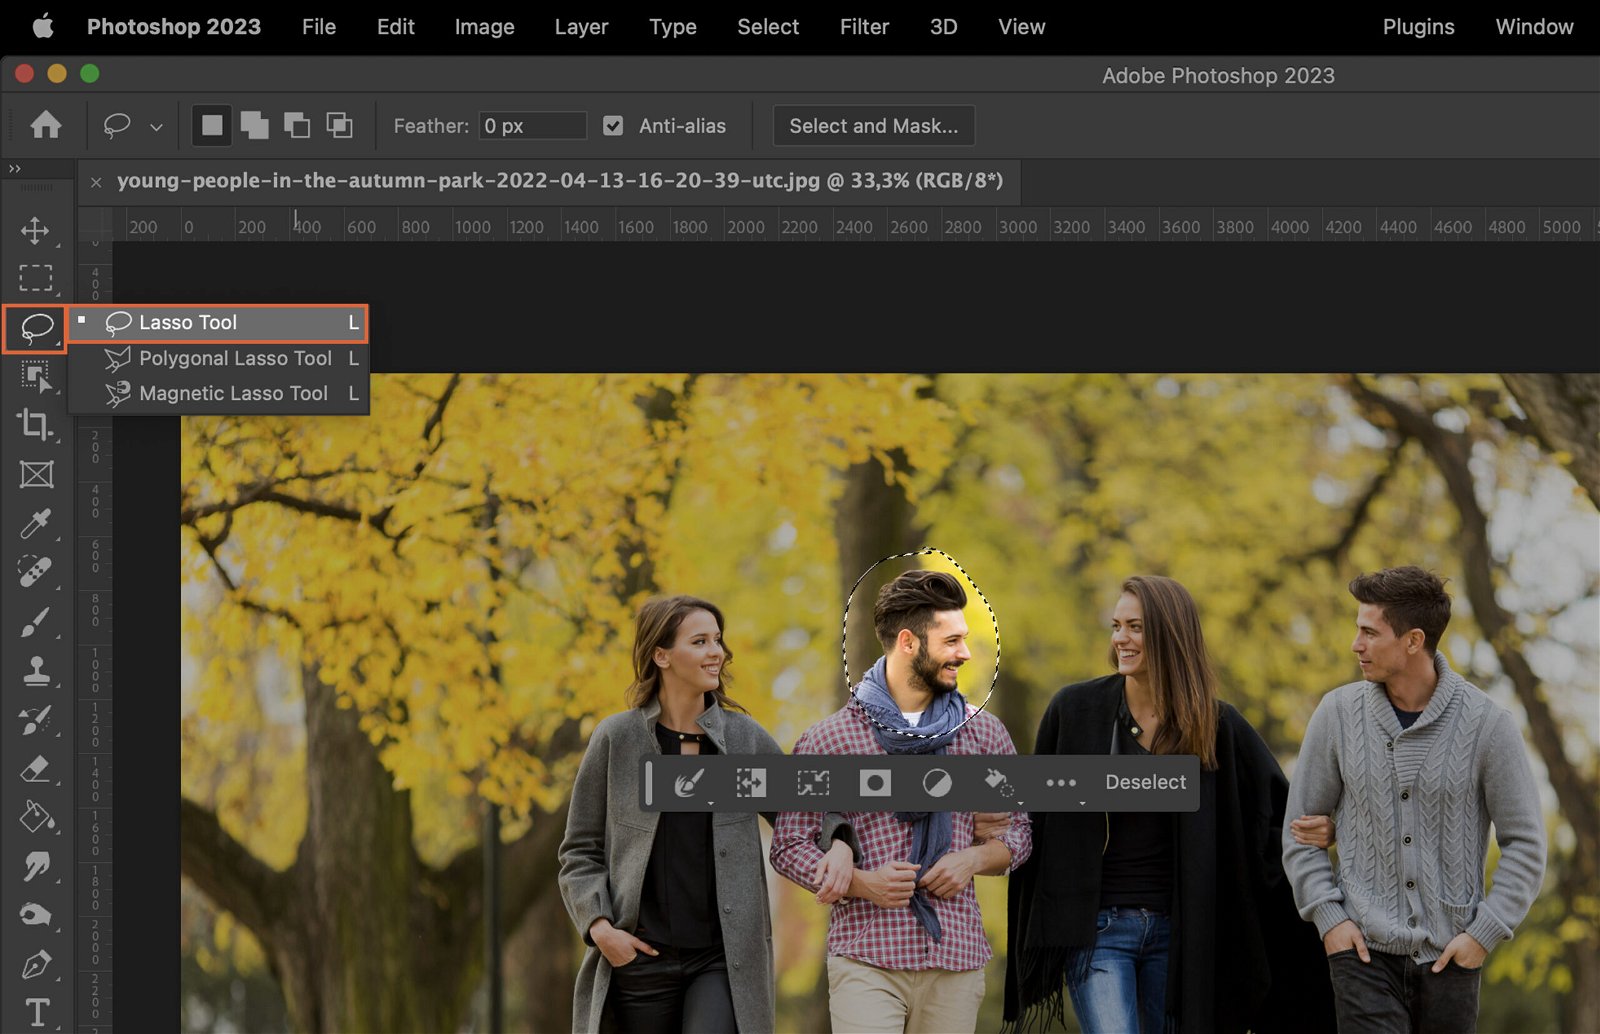
Step 1.1: Use the Lasso Tool
The Lasso tool is like a digital piece of string. You can draw around the area you want to blur. It’s perfect for irregular shapes. Click and hold the mouse button to draw your selection, and release when you’re done.
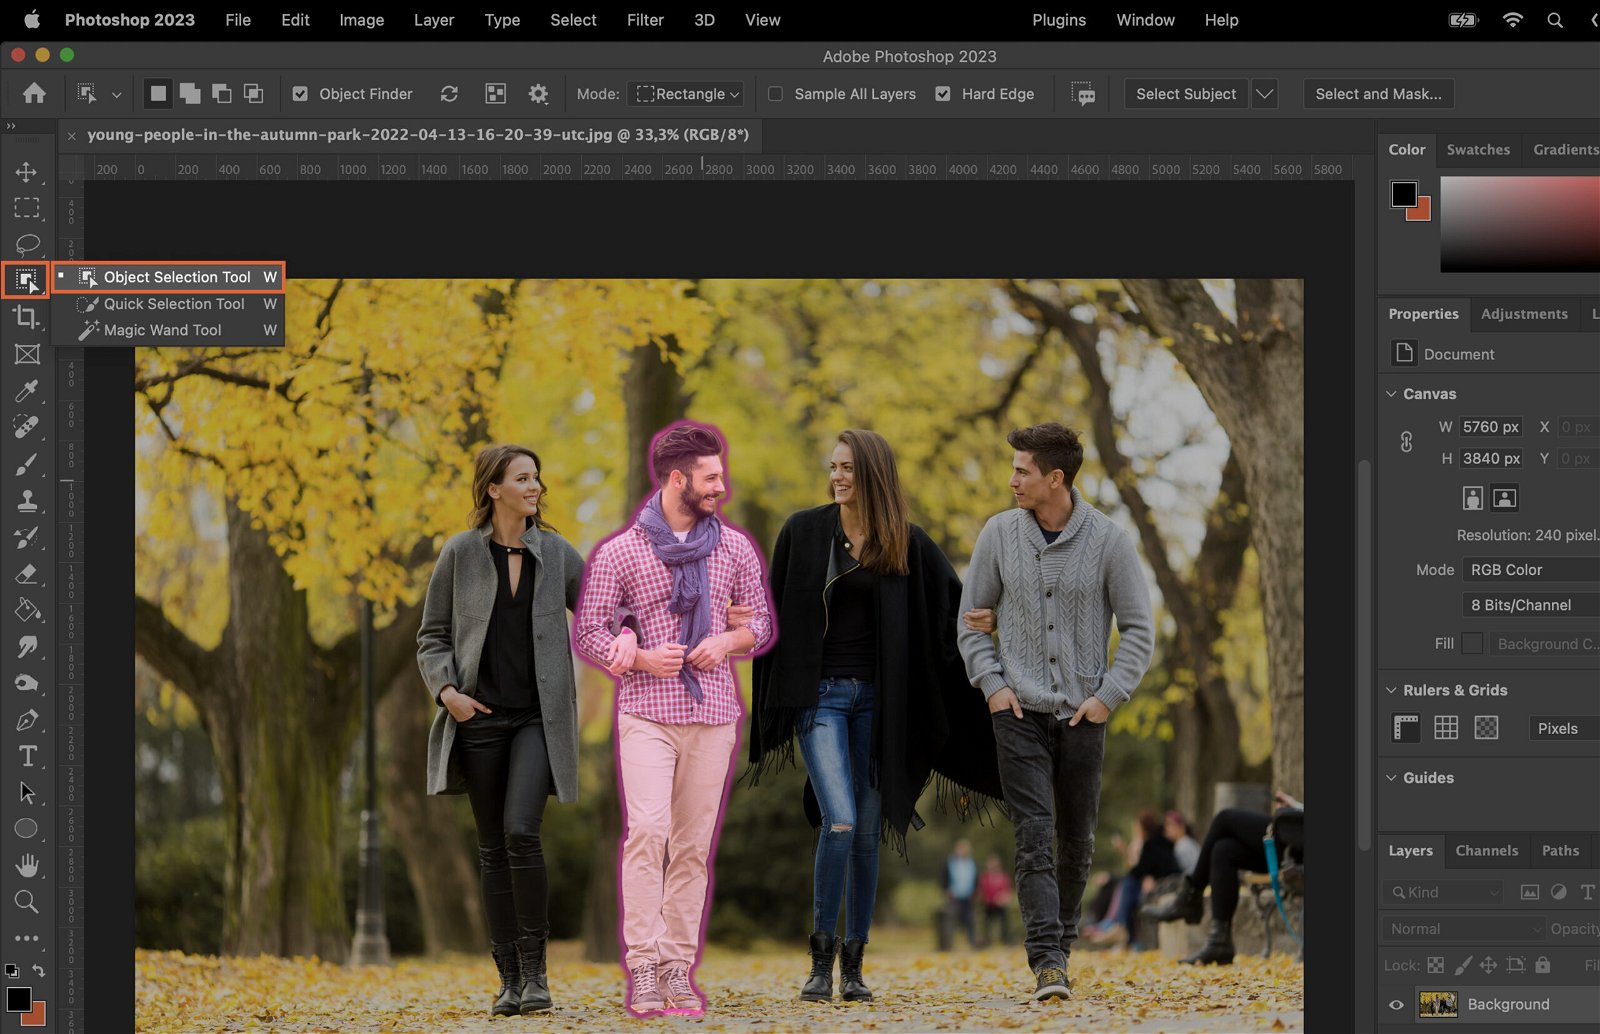
Step 1.2: Use the Object Selection Tool
The Object Selection Tool in Photoshop is a powerful selection tool that uses artificial intelligence to automatically select objects or subjects within an image with just a few clicks.
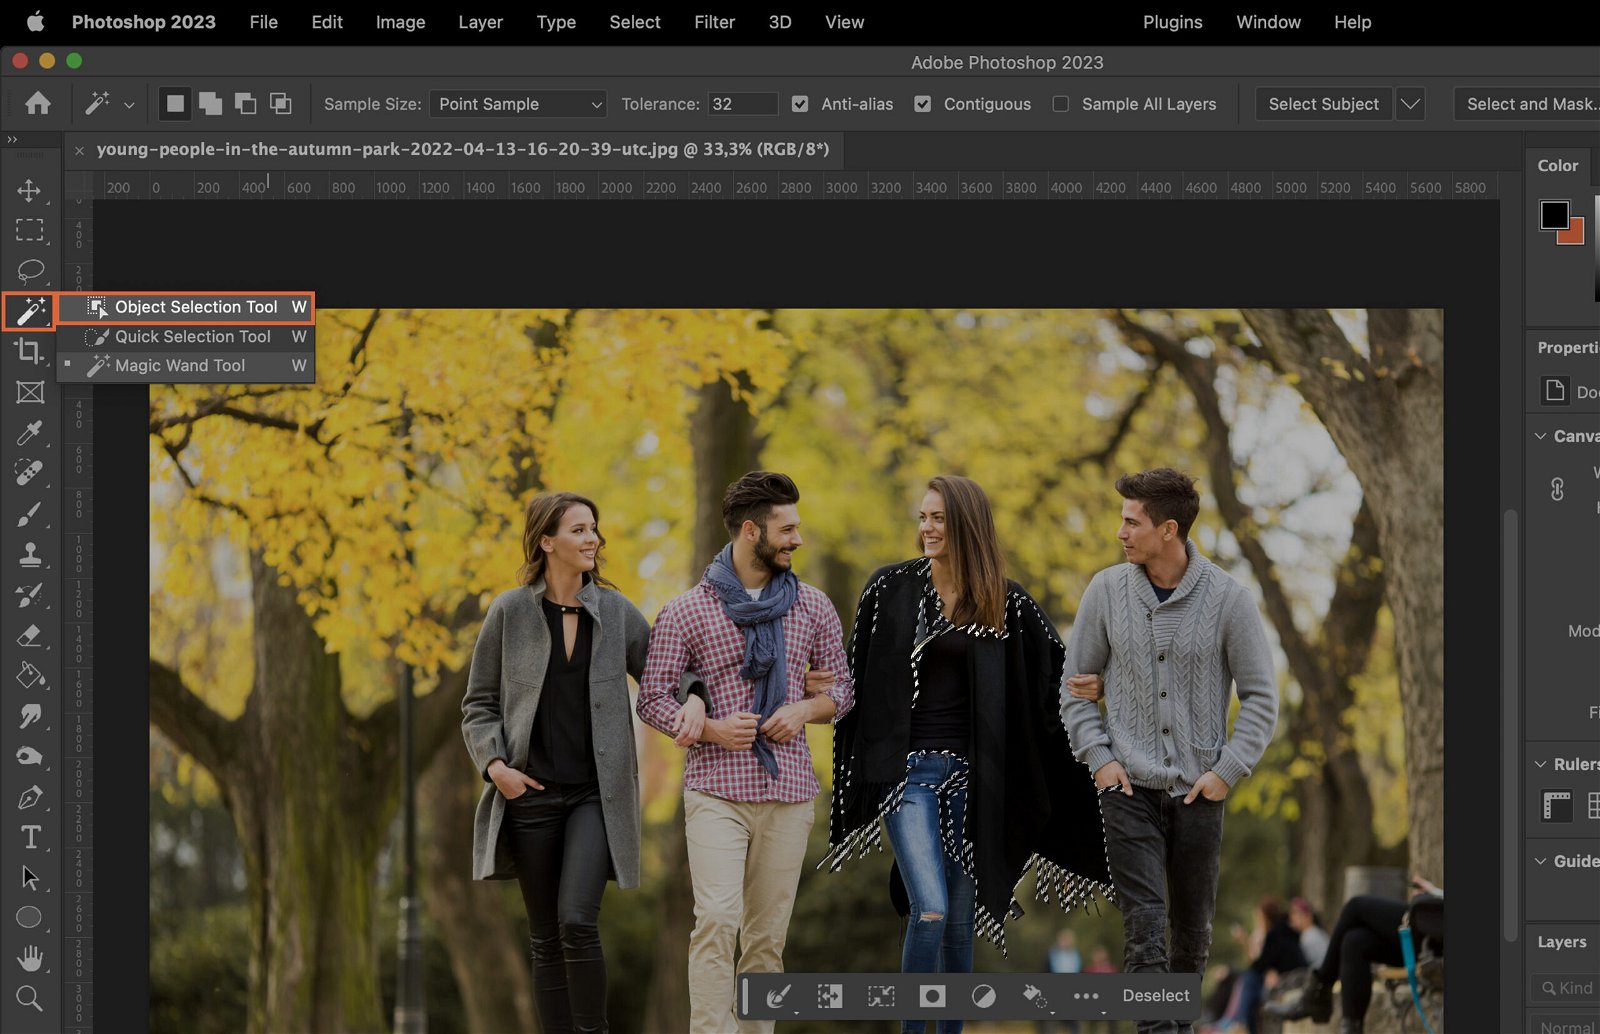
Step 1.3: Use the Magic Wand Tool
This tool is a real time-saver. It’s perfect when your area has a single color. Click on the color you want to select, and the Magic Wand will do the rest.
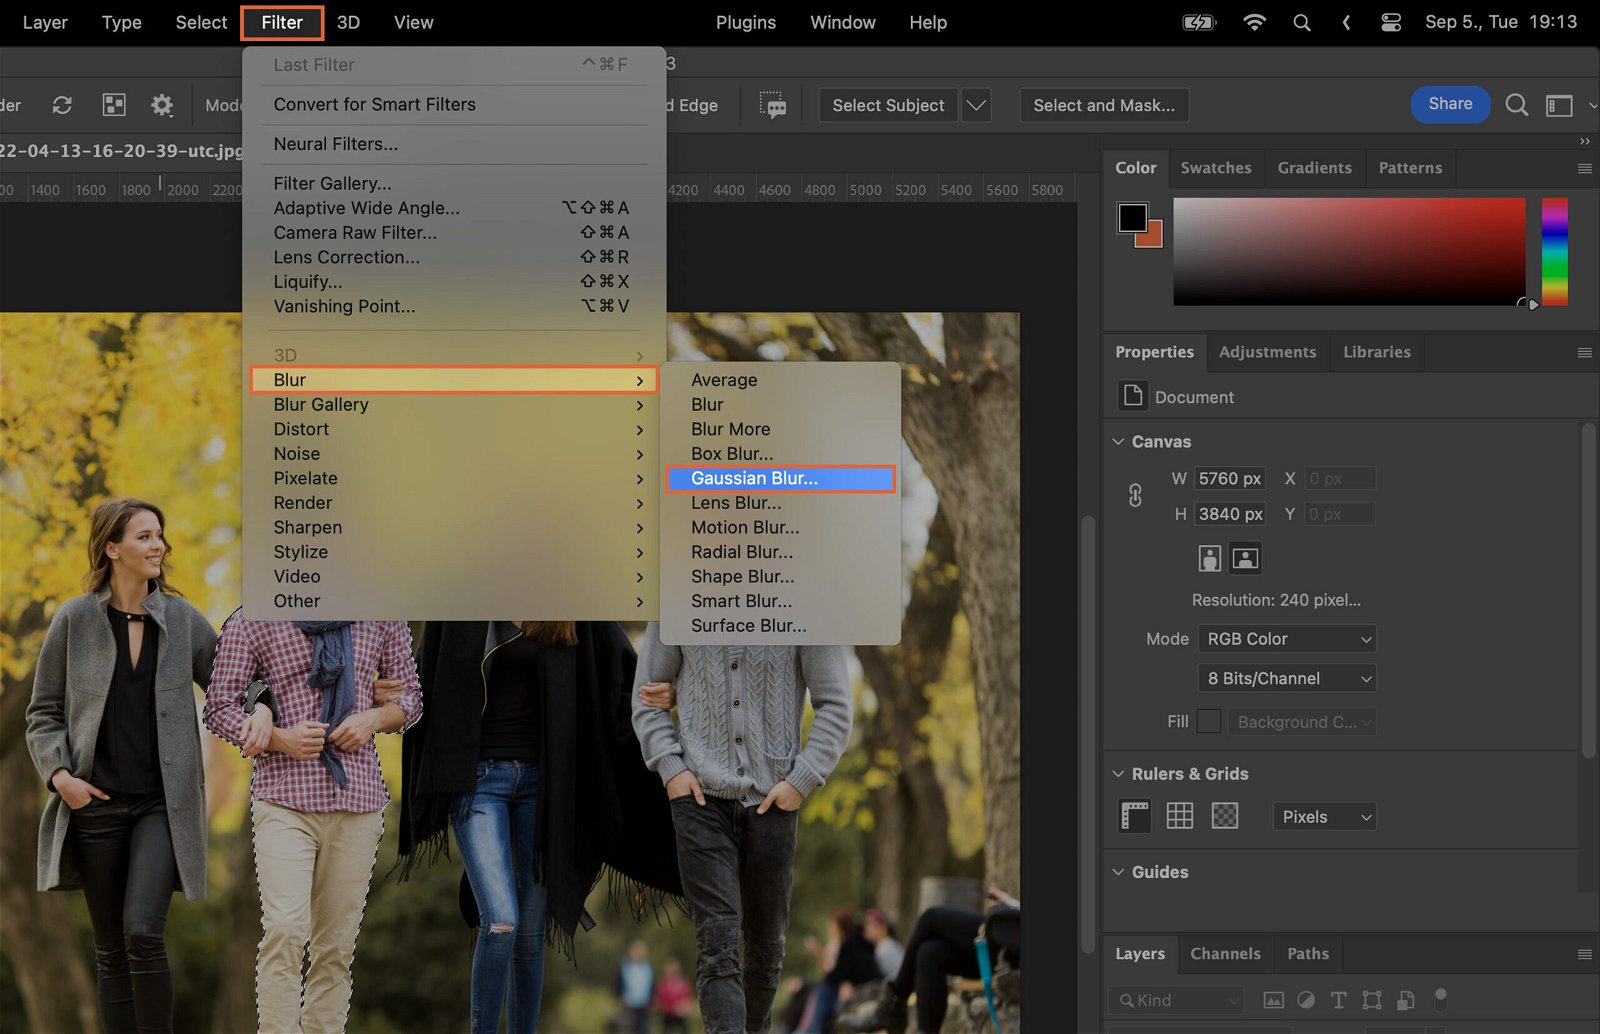
Step 2: Apply the Blur Effect
Now for the fun part. There are several blur effects you can use in Photoshop.
Step 2.1: Use Gaussian Blur
Gaussian Blur is a classic. It gives a general blur effect that’s great for backgrounds. Find it under ‘Filter’, then ‘Blur’.
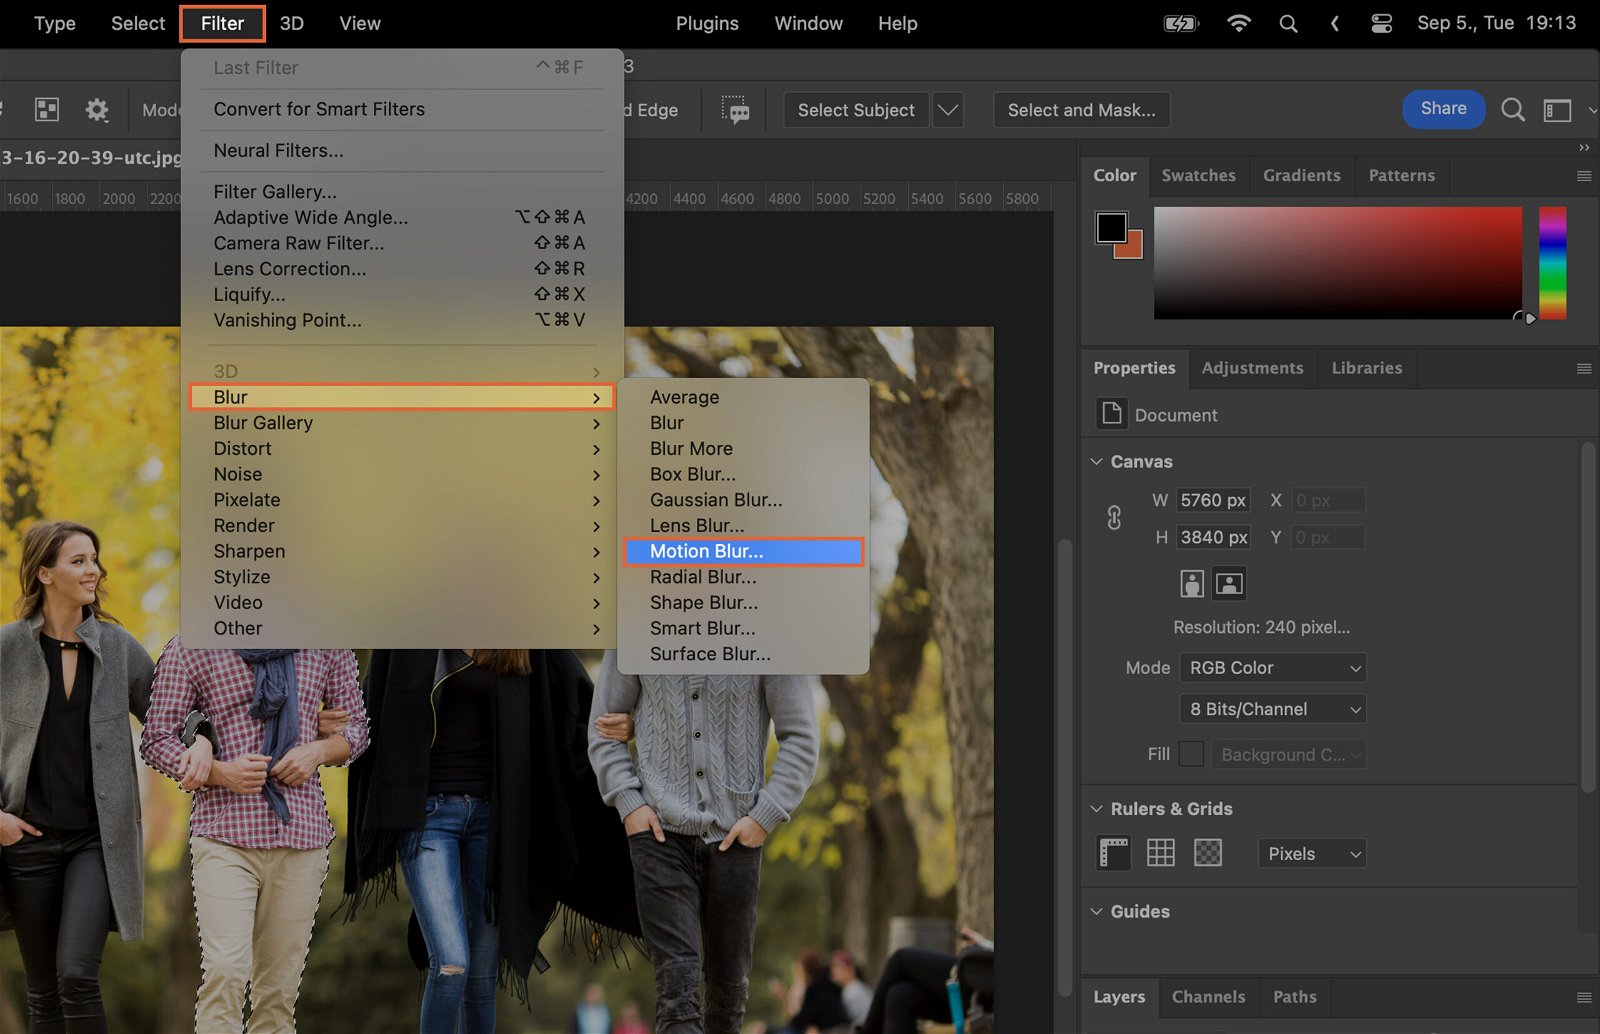
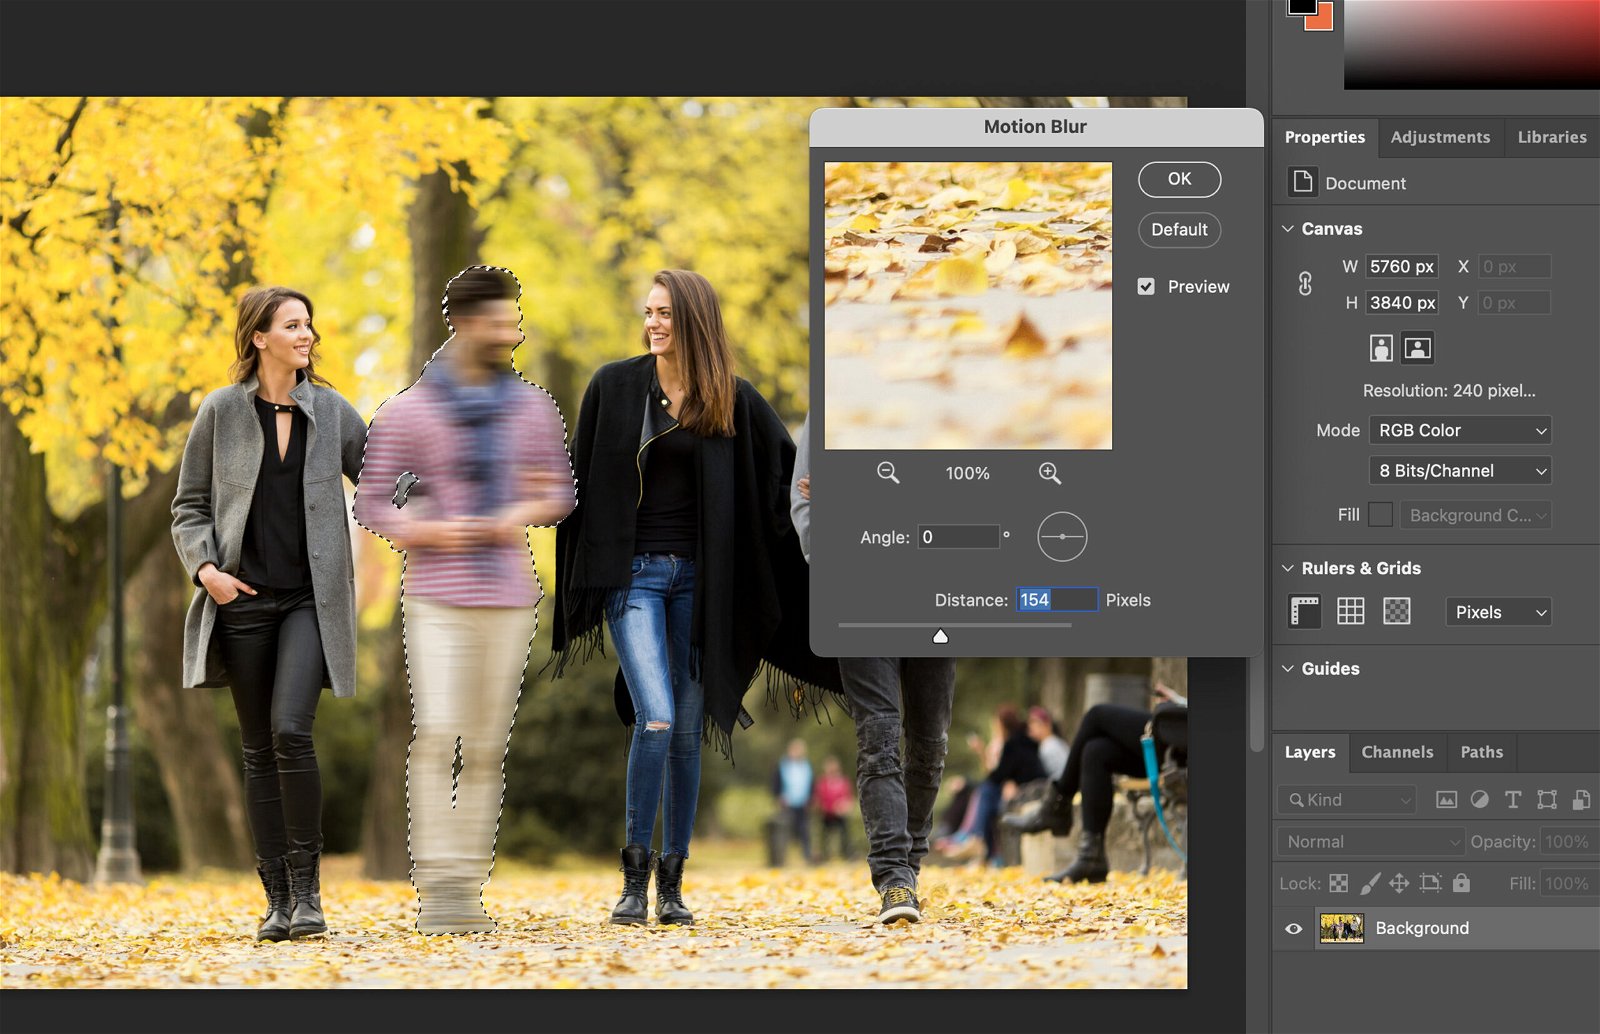
Step 2.2: Use Motion Blur
Motion Blur is dynamic. It gives the effect of movement in a still image. Find it in the same menu as Gaussian Blur.
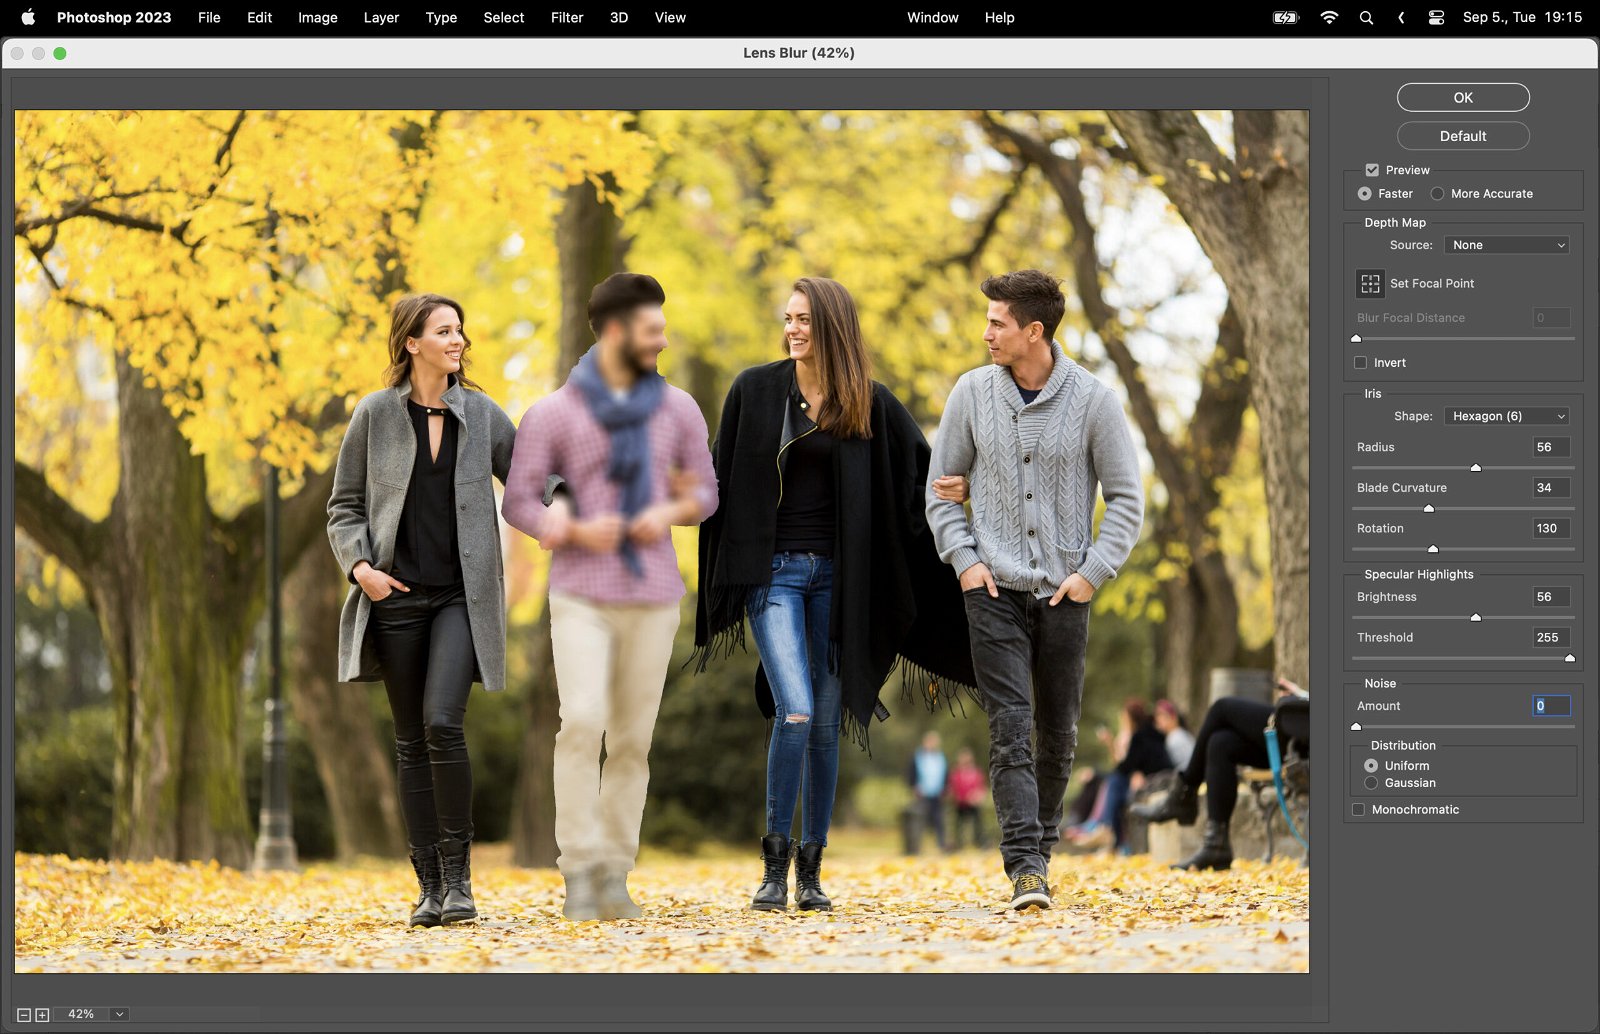
Step 2.3: Use Lens Blur
Lens Blur is a bit more advanced. It simulates the blur effect of a camera lens. It’s great for adding depth to an image.

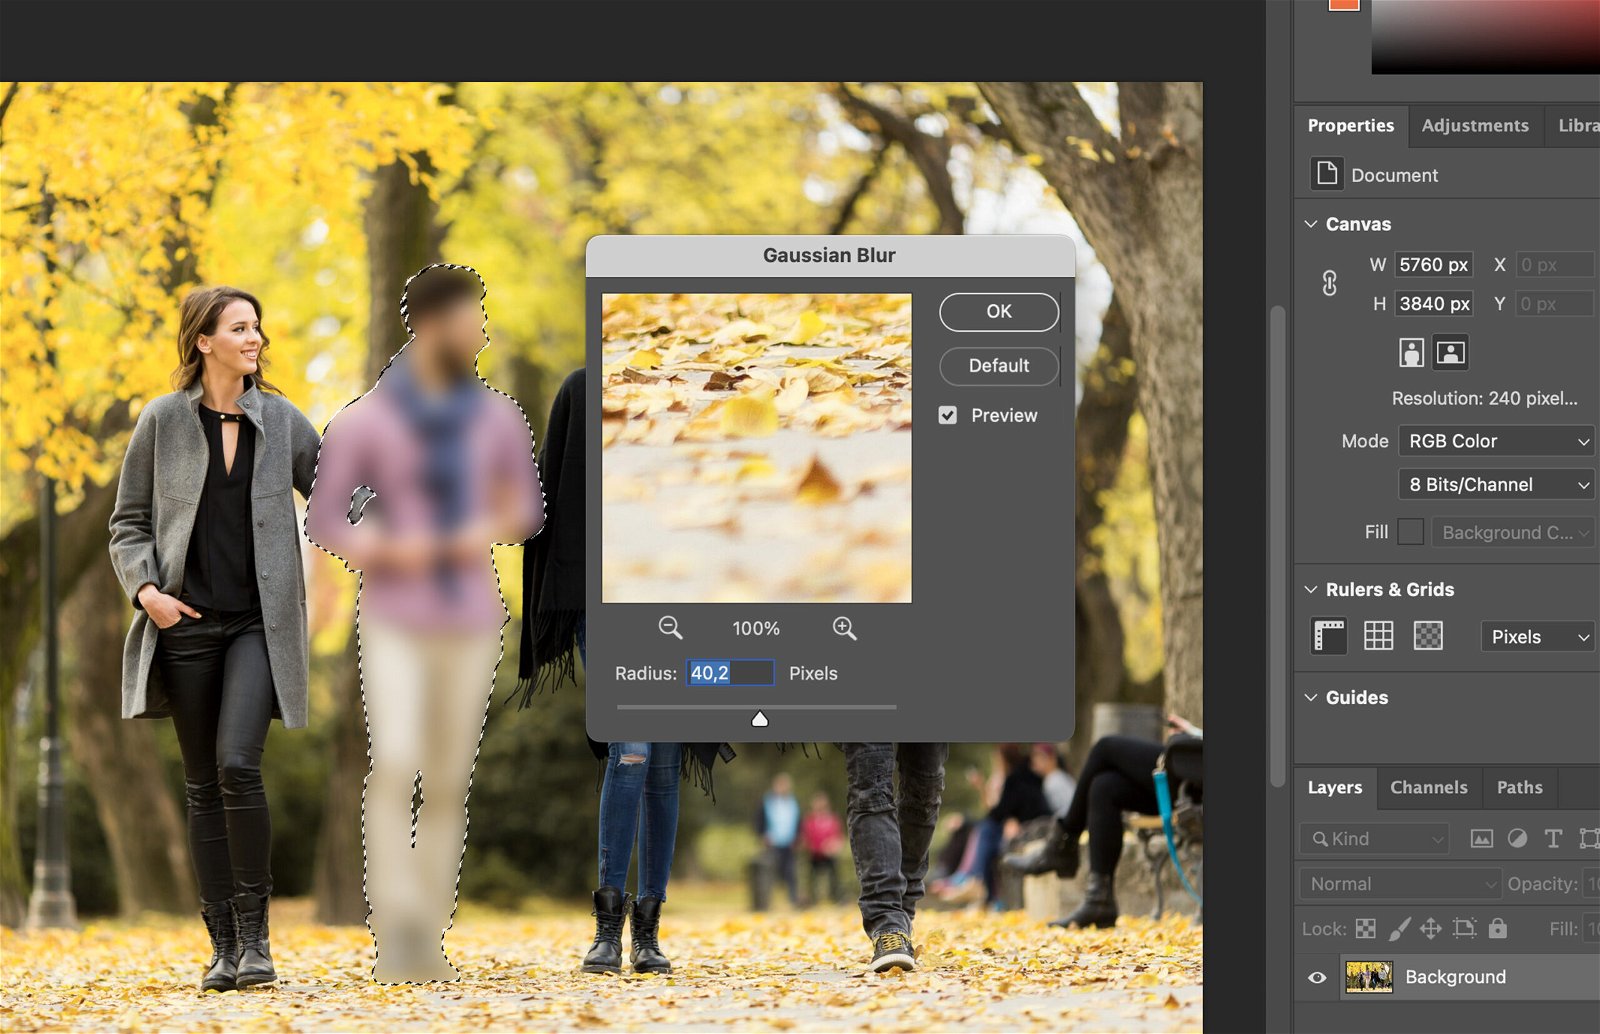
Step 3: Adjust the Intensity of the Blur Effect
Don’t go overboard with the blur. Use the ‘Radius’ slider to adjust the intensity. A smaller radius means less blur, and a larger radius means more.