How to Smooth Skin in Lightroom Tool (Step By Step)
One of the most crucial aspects of portrait editing is also one of the most difficult. This is smoothing your model’s skin. Smoothing the skin is particularly important for female portraits. It can also be beneficial for some styles of male portraiture.
In this article, we will see how to smooth skin in Lightroom. The latest texture adjustment slider is especially useful here.
How To Achieve Smooth Skin In Lightroom For Your Portraits
Not everybody behind the camera is a fashion photographer. And not everyone in front of the camera is a fashion model. Then why is smooth skin important?
If you work in the fashion industry, then the answer is pretty obvious. Models must have perfect, smooth skin.
If you are not in the fashion industry, whether to smooth the skin or not is up to you. Generally, your editing should include some smoothing. A lot of people will appreciate it if you remove obvious pimples and other marks.
Skin smoothing is important also if you are into documentary photography. In this case, the smoothing will target only specific areas and imperfections. You won’t remove freckles, age marks, and other features that add to the portrait character and message.
As a general rule of thumb, blemishes, skin marks, and other skin imperfections should be removed, or tuned down. This is not only for aesthetic purposes but also because they will steal the viewer’s attention.
Smoothing your model’s skin does not have to turn him/her into a plastic-looking person. The problem, like with HDR in portraiture, is that these techniques have been abused and applied in a tasteless manner.
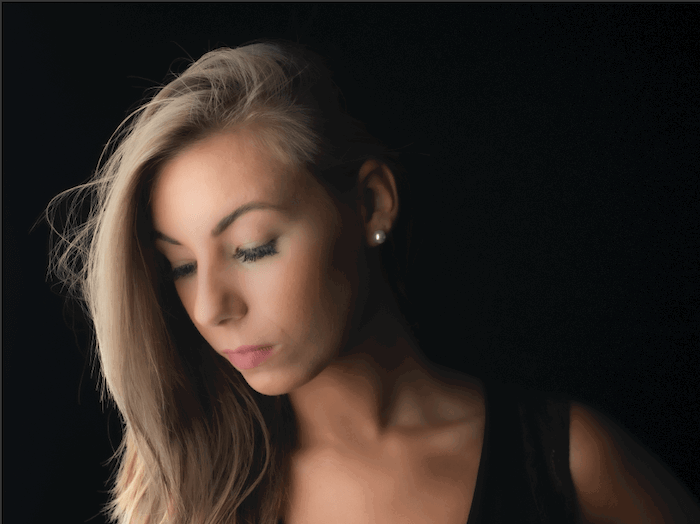
Smoothing the skin too heavily will result in a plastic look.
The internet is full of over-saturated landscapes with halos around trees and plastic-looking models. Both techniques have gained a bad reputation as a result. The trick for successful editing is not overdoing things.
Shoot With Smooth Skin In-Camera for Faster Editing
Your model might have bad skin because of acne or scars. Take this into consideration when taking their portrait.
Ask the model to pose. Photograph them in such a way that the unwanted spots are hidden or their impact on the photo minimized. Of course, if your model is comfortable showing their marks, you should respect this.
For example, if your model has a scarred cheek, you can photograph them at an angle.
Light also has a prominent role. You can use slit light to keep one side of your model’s face in the shadows.
A more frontal lighting scheme might be best though. It smoothes the skin texture more.

Angled light, instead, highlights skin texture.
How to Smooth Skin in Lightroom
For targeting specific areas, you should use the local adjustments tools available in Lightroom. Don’t use global adjustments.
Local adjustment tools are the:
- Brush,
- Clone Tool,
- Graduated Filter,
- Radial Filter.
For portraits, you will rely on the Brush and Clone tools to retouch your model’s skin.
The Clone Tool allows you to clone (or heal) a targeted area with data coming from a different place. This tool is useful to remove blemishes, small scratches, and pimples.
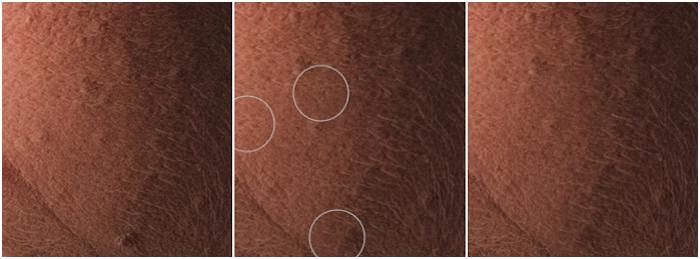
With the Clone tool, it is fast and easy to remove unwanted skin imperfections, such as pimples, skin marks, and blemishes.
The Brush Tool is used to soften skin texture. One should pay attention not to smooth out all the texture. Don’t remove pores, wrinkles, and freckles.
To smooth the skin with the brush tool you can count on a set of useful adjustment sliders, namely:
All these sliders can be given a value between -100 and +100. This means you can use them to apply a negative or positive effect.
Positive and Negative Clarity
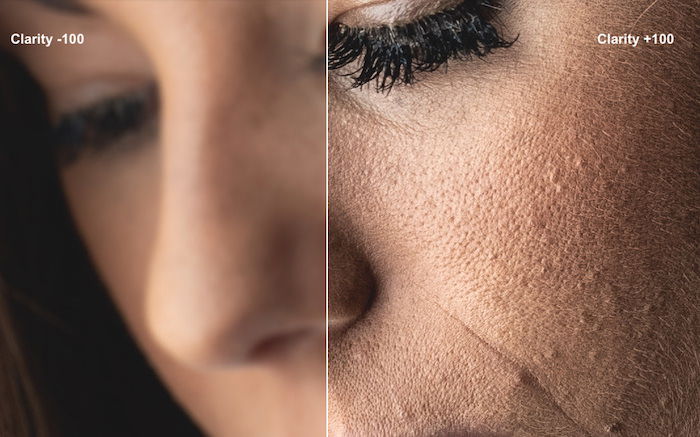
The clarity slider targets larger and middle details. It also affects luminance and saturation. By reducing clarity, you can give your model a plastic look.
Positive and Negative Texture
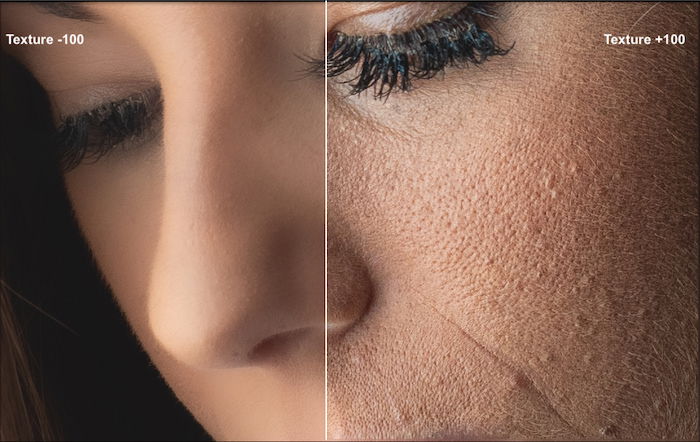
The Texture slider is the latest addition to the set of adjustment sliders in Lightroom. It was introduced specifically to edit skin.
Texture will smooth out or enhance finer details than those affected by the Clarity slider. It also affects the luminance and saturation of the skin less.
If you compare the effect of applying full negative Clarity vs Texture, you can see that Texture leaves more details. In the same way, full positive Texture gives a more natural look than full positive Clarity.
Positive and Negative Sharpening and Noise
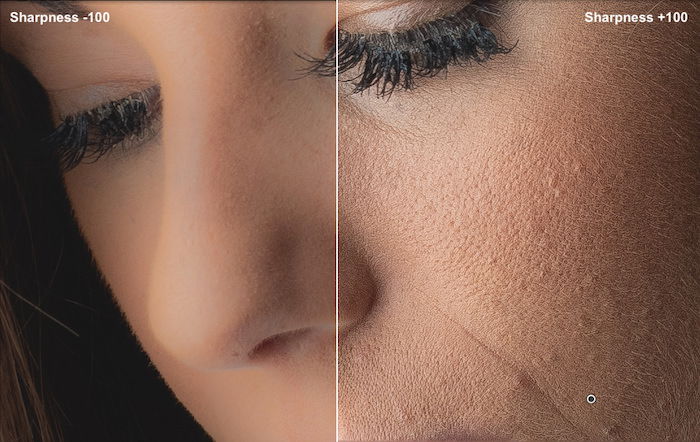
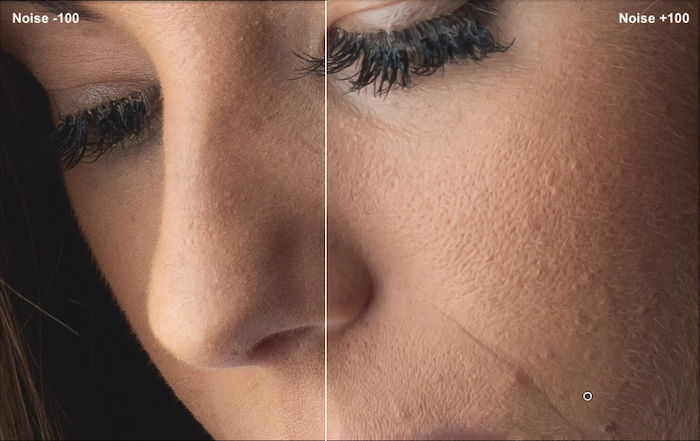
The Sharpness and Noise sliders alone don’t do a great job of smoothing the skin. These are more useful to fine-tune the results obtained by using Clarity and Texture sliders.
Combine the Adjustment Sliders and Tools for Better Results
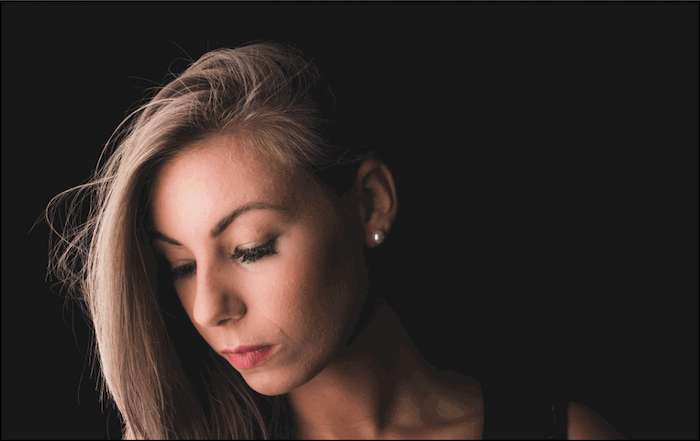
As shown in the images above, a single adjustment slider will not produce the most natural-looking skin. To achieve a more natural look, it is best to combine different adjustments and tools.
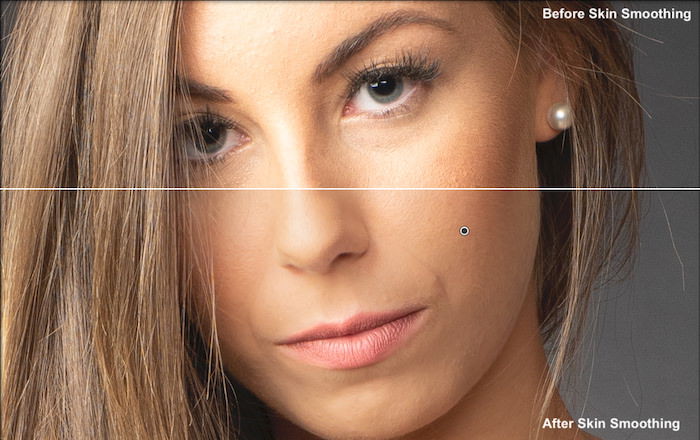
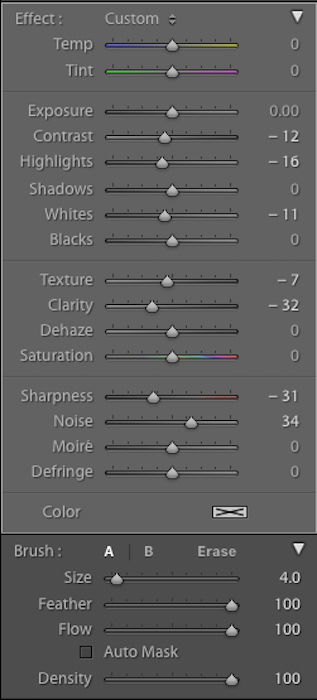
For the portrait above I used a brush tool to smooth the skin. Then I used the clone tool to remove small imperfections. For the brush, I used the following settings:
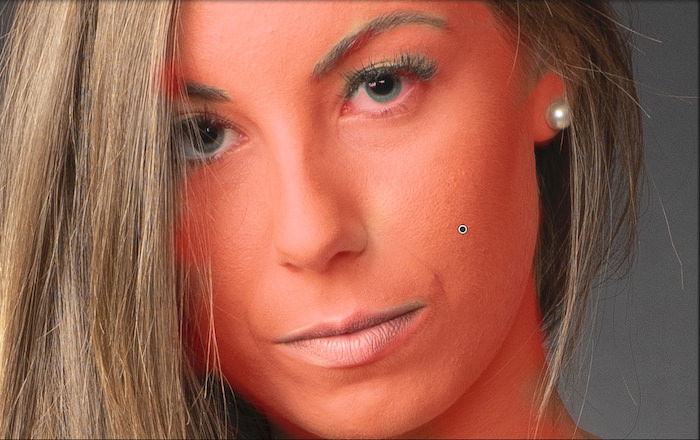
When you smooth the skin on the face, you should avoid smoothing the eyes, eyelashes, eyebrows, and lips. Those areas should be as sharp as possible. These will capture the viewer’s attention, particularly the lips.
Use the mask overlay function (cmd+o in Mac OS or alt+o in Windows). This will display the areas of the photo affected by your brush in red.
If your model has a bad form of acne or very prominent scars, you should turn to Photoshop. While good, Lightroom is more limiting in the editing techniques you can use.
Tips For a Gentler Edit
Feather, Density, and Flow are options used to control how the brush’s effect is applied.
- Feather affects how soft the brush is. The harder it is, the less smooth the effect around the brush edges will be.
- Density puts a cap on the effect of the brush.
- Flow: At +100 the brush’s effect is applied in full. With lower flow values, the effect is more subtle. You can build it up gradually by painting more times over the same area.
Not all the areas showing skin should have the same smoothness. These settings are very useful for this. When you modify them, the changes are not applied to areas you have already painted.
Alternatively, you can use multiple brushes with different strengths.
Conclusion
Smoothing and softening the skin is a big part of retouching a photo. Next time you edit a portrait in Lightroom, experiment with the brush tool and the different sliders to improve your model’s skin.


